Git, developed by Linus Torvalds, is the most popular distributed system for version control. Git is a very efficient platform for open-source projects. Using Git, you can collaborate with the other developers, upload the new changes, keep track of the changes, and many more.
Installing Git on Linux Mint
The Git is included in Linux Mint 20 standard repositories can be installed easily using the apt command.
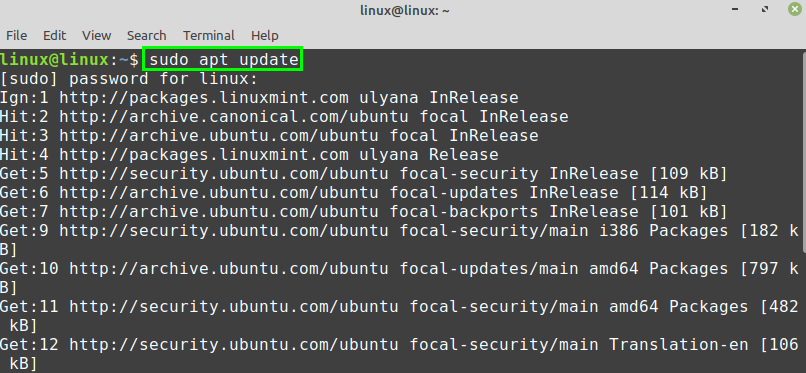
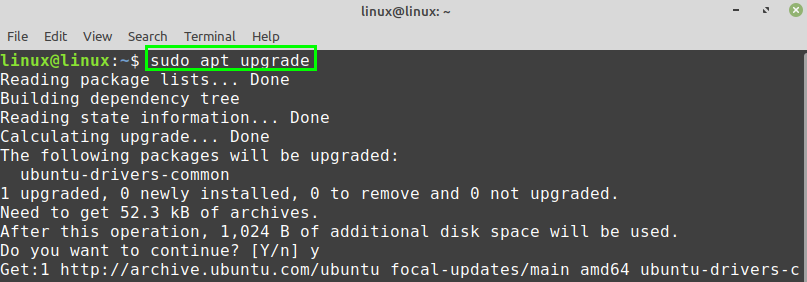
As always, update and upgrade your Linux Mint 20 system before installing the Git package.
Type the below-given command to update the apt package listing:

Next, upgrade the system with the command:

After successfully updating and upgrading the Linux Mint 20 system, install Git with the command:

Press ‘y’ to continue installing Git.

When the Git is successfully installed, verify the installation:

Git 2.25.1 is successfully installed on my Linux Mint 20.
Configuring the Git on Linux Mint 20
Next, we have to configure Git. The Git can be configured from the command line. Configuring Git refers to setting a name and email address. The name and email are used while committing changes on the Git repository.
Fire up the terminal and use the below-given command syntax to set a global commit name:

Type the below-given command to set the global commit email:

Finally, when the global commit name and email are set, run the below-given command to check and verify the changes:

The output shows that the global commit name and email are sent successfully.
If the changes are not made correctly, or you want to change the global commit name and email any time, then you can edit the configuration settings any time by using the command:

The Git configuration file is opened in the nano editor. You can make any changes in the Git configuration file if you wish to.

Conclusion
Installing Git on Linux Mint 20 is very straightforward. Git is part of the Linux Mint 20 base repositories and can be downloaded and installed with apt command.
from Linux Hint https://ift.tt/3knz2kU


0 Comments