First, you will be staying within the catchy Windows 10 environment with which you feel extremely comfortable.
Second, while staying within the Windows 10 environment, all the advantages of the strong Bash shell can still be enjoyed.
Therefore, today we will be exploring with you the method of enabling Bash in Windows 10.
Method of Enabling Bash in Windows 10
To enable Bash in Windows 10, you will have to perform all the steps described below.
Step 1: Ensuring that the Developer Mode is enabled
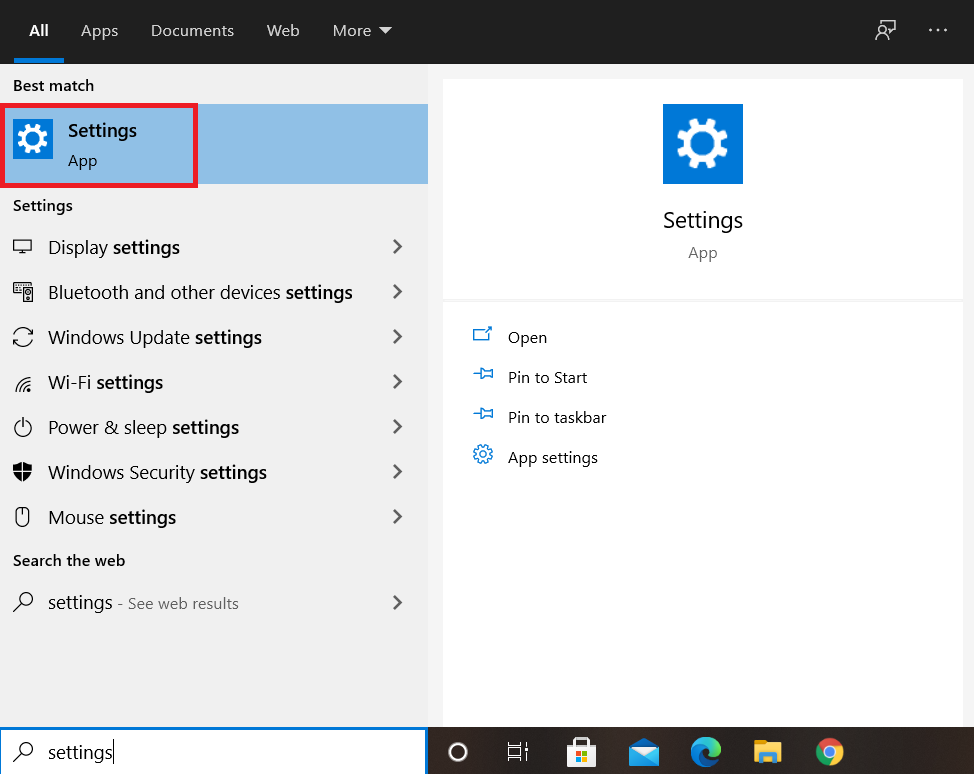
Firstly, you have to verify that the Windows 10 developer mode is on. For that, you have to visit the Windows 10 Settings window. This can be done by typing Settings in the Cortana search bar and clicking on the Settings result, as highlighted in the following image:
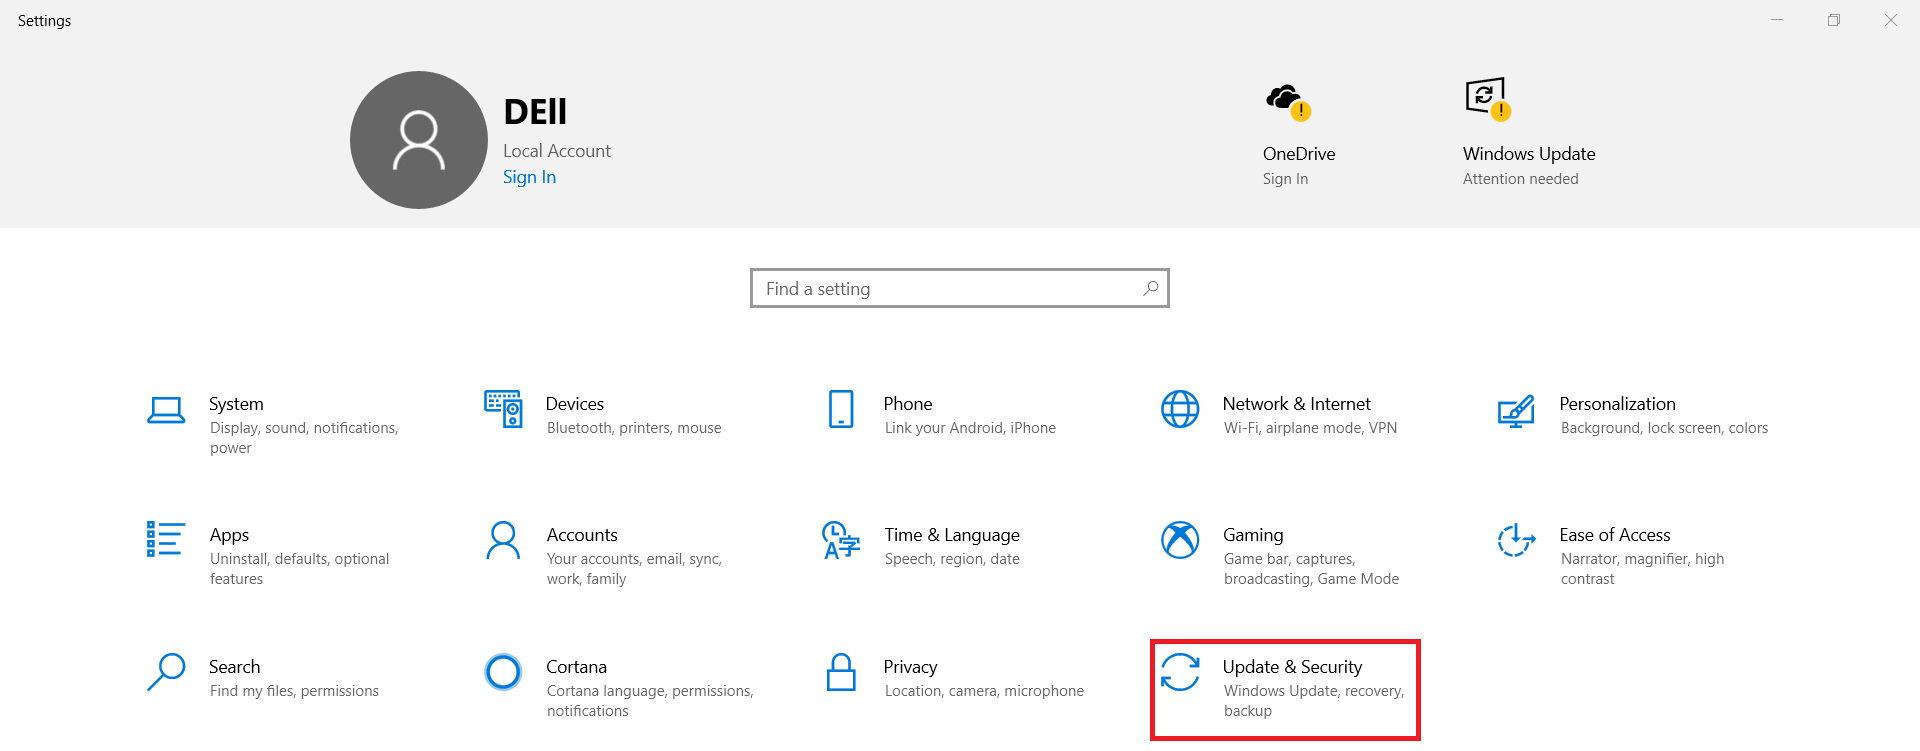
Doing this will take you straight to the Settings window of Windows 10. In the Settings window, you will find several different tabs from which you are supposed to locate and click on the “Update and Security” tab.
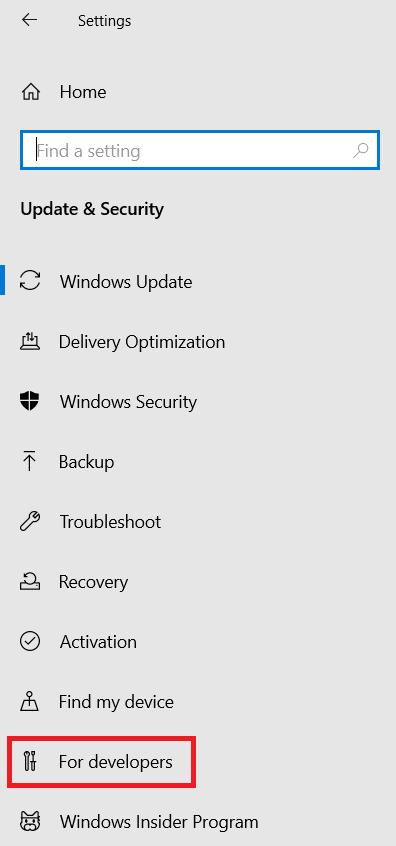
You need to click on the “For developers” tab located at the left pane of the window present In the Update and Security settings window.
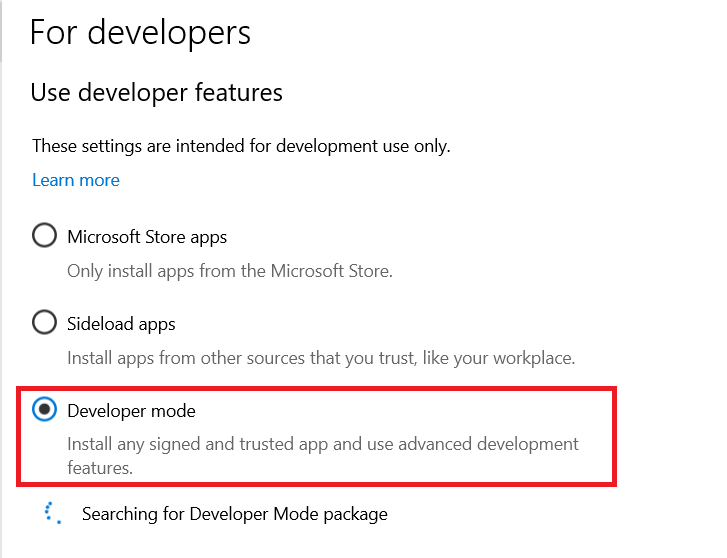
Clicking on this tab will display the Developers settings of Windows 10. From here, you need to verify if the Developer mode is enabled or not. If it is not enabled by default, then you can simply click on the Developer mode radio button. In our case, the Developer mode was enabled by default as highlighted in the following image:
Step 2: Accessing the Windows 10 Control Panel
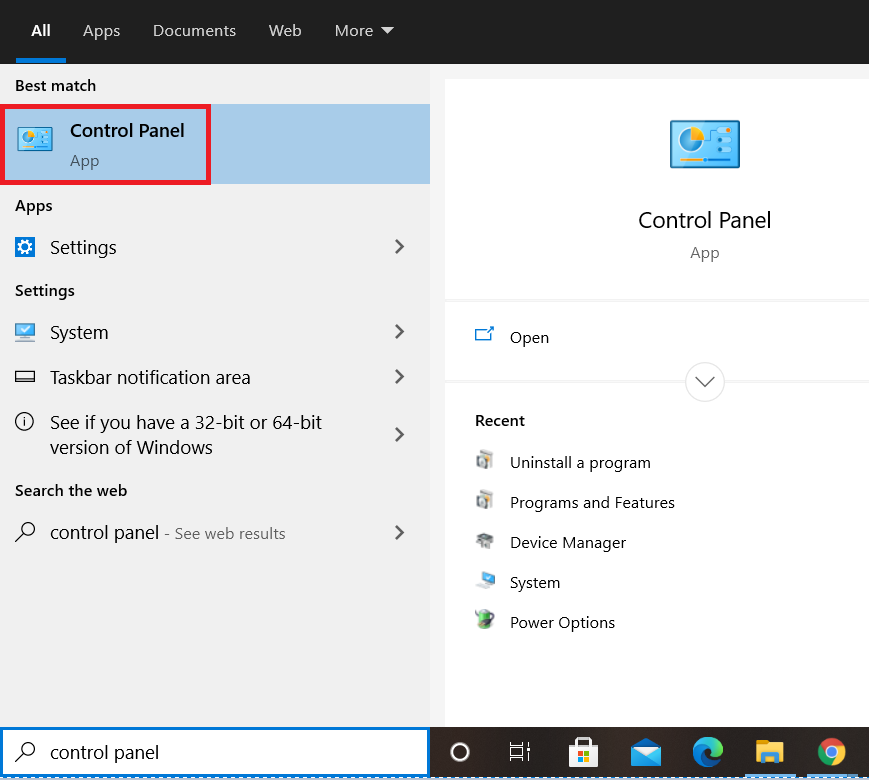
After ensuring that the Developer mode is on, the next step is to navigate to the Windows 10 Control Panel. You have to use the Cortana search bar for this purpose. Just type in Control Panel in the Cortana search bar and then click on the Control Panel result, as highlighted in the image shown below to access the Windows 10 Control Panel:
Step 3: Enabling the Windows Subsystem for Linux by using the Windows 10 Control Panel
Once you have gained access to the Windows 10 Control Panel, you need to click on the “Programs and Features” tab located in the second column of the window.
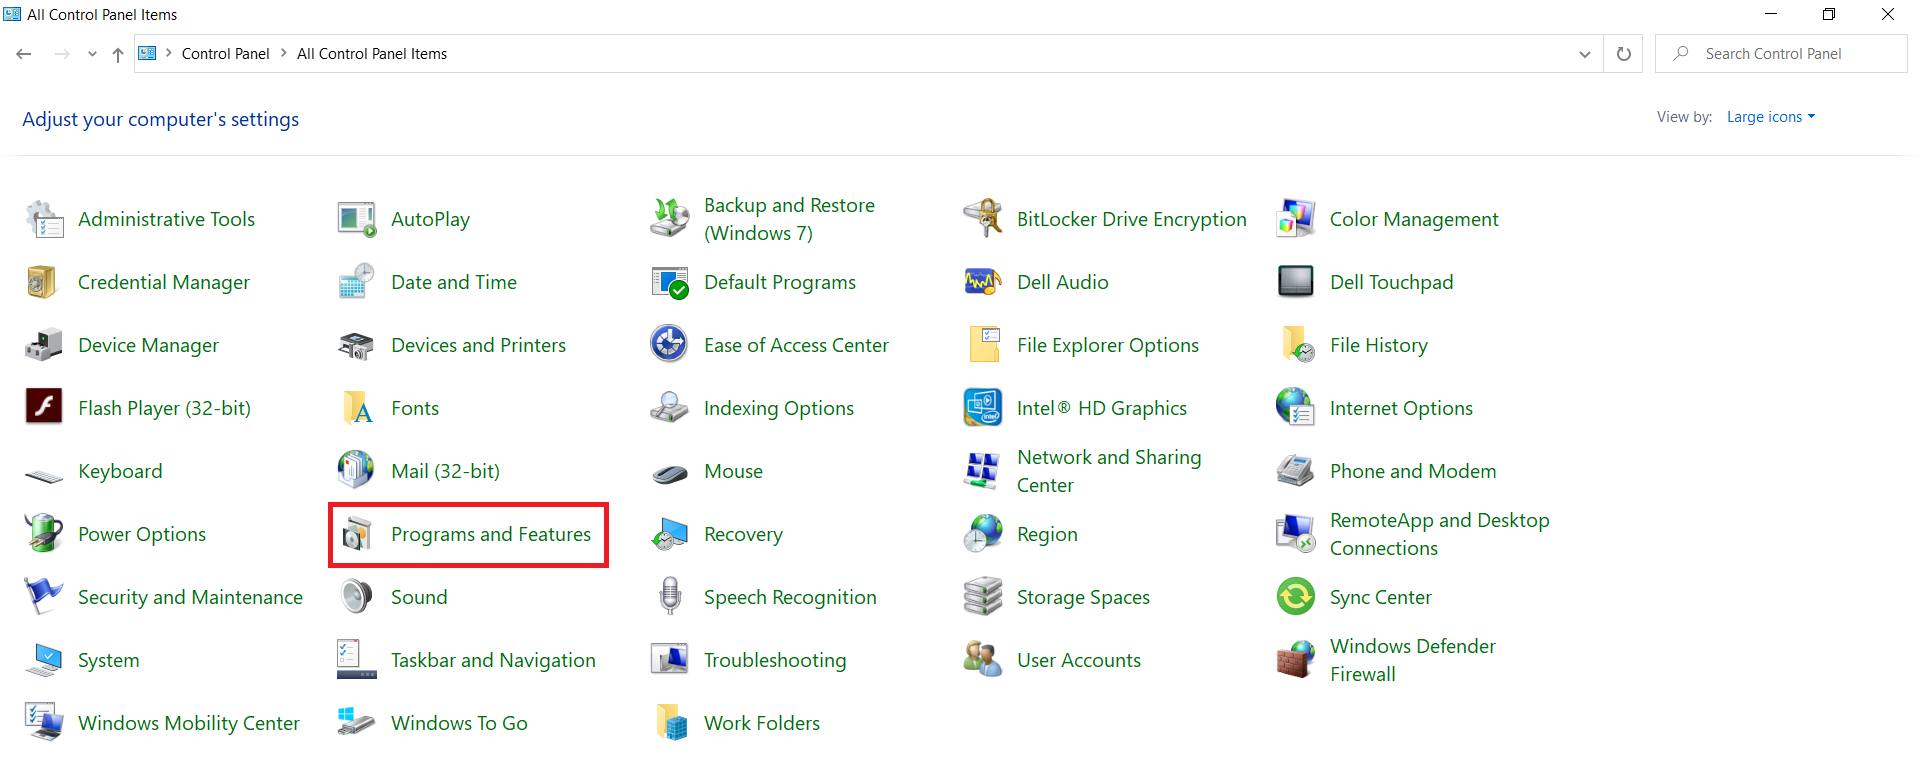
Clicking on this tab will lead you to the Programs and Features window of the Windows 10 Control Panel. From here, you need to click on the “Turn Windows features on or off” link, as you can see from the image shown below:
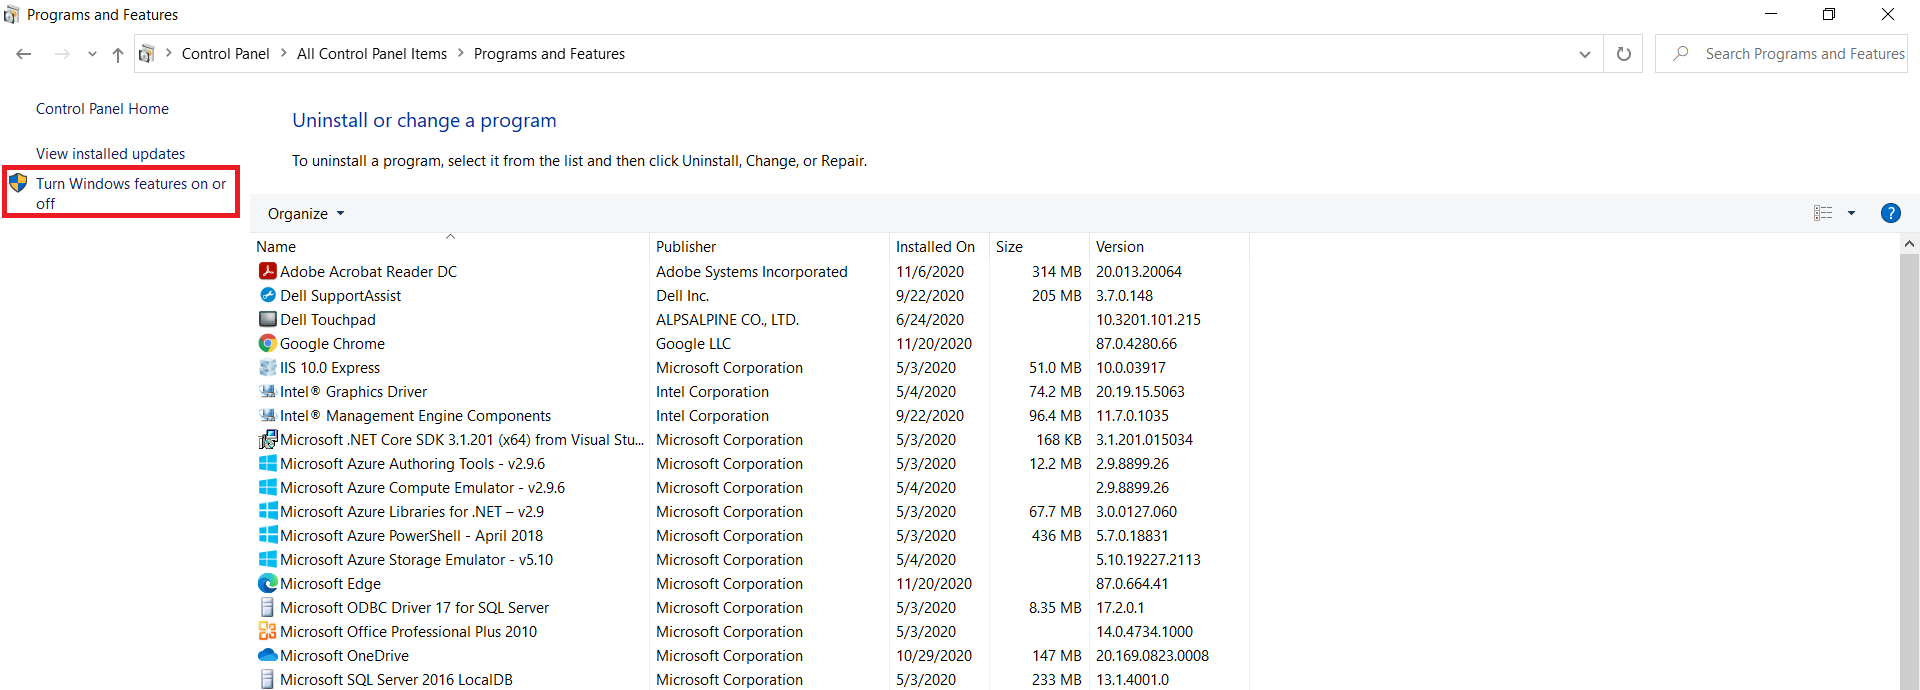
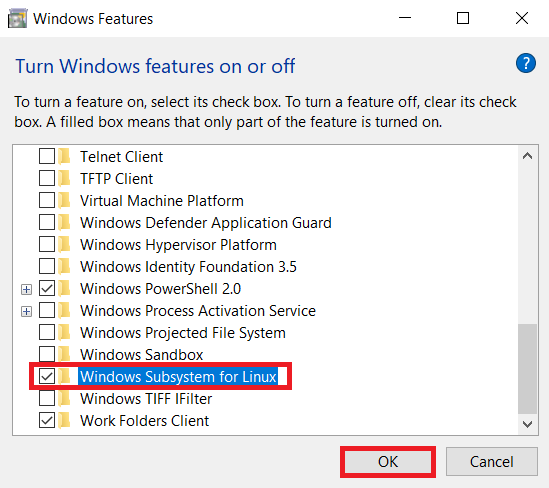
As soon as you click on the link, the “Windows Features” mini window will be displayed on your screen. It will take a few seconds for it to load all the Windows 10 features, i.e., both the enabled ones and the disabled ones. From these features, you have to locate the “Windows Subsystem for Linux” feature as highlighted in the following image:
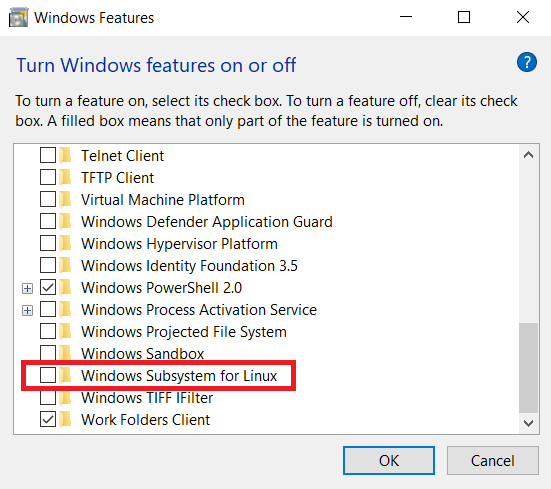
After locating this feature, you need to click on the checkbox located before this feature to enable it and then click on the OK button as highlighted in the image shown below:
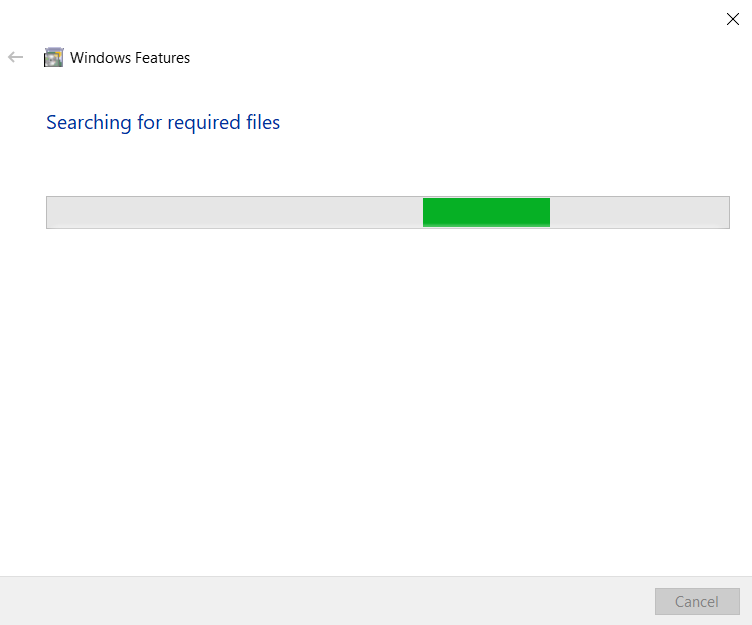
As soon as you do this, Windows 10 will start searching for all the required files as shown in the following image:
Step 4: Restarting your Windows 10 System
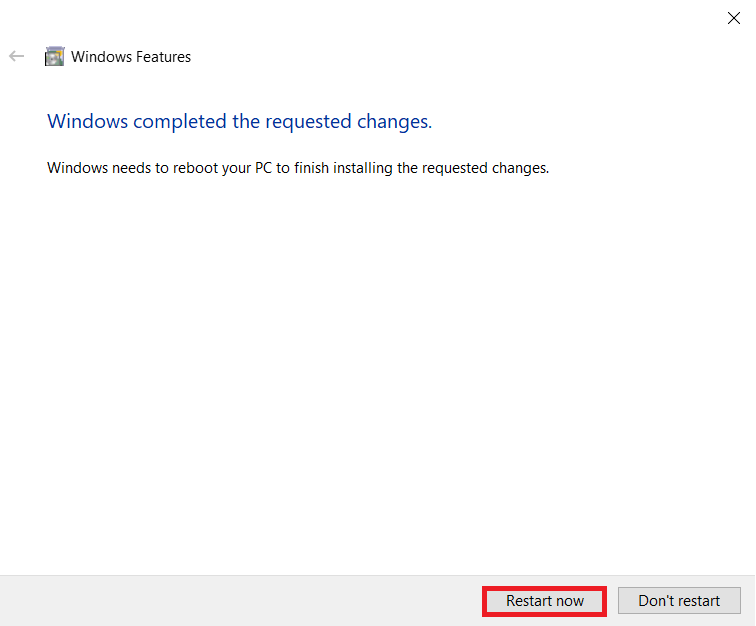
It will take around one to two minutes for Windows 10 to search for all the required files, after which you will be presented with the option of restarting your system. Doing this is necessary for all the changes to take effect immediately. Therefore, you are supposed to choose the “Restart now” option.
You just need to wait a couple of seconds now for your Windows 10 system to restart.
Step 5: Verifying that Bash is enabled on Windows 10
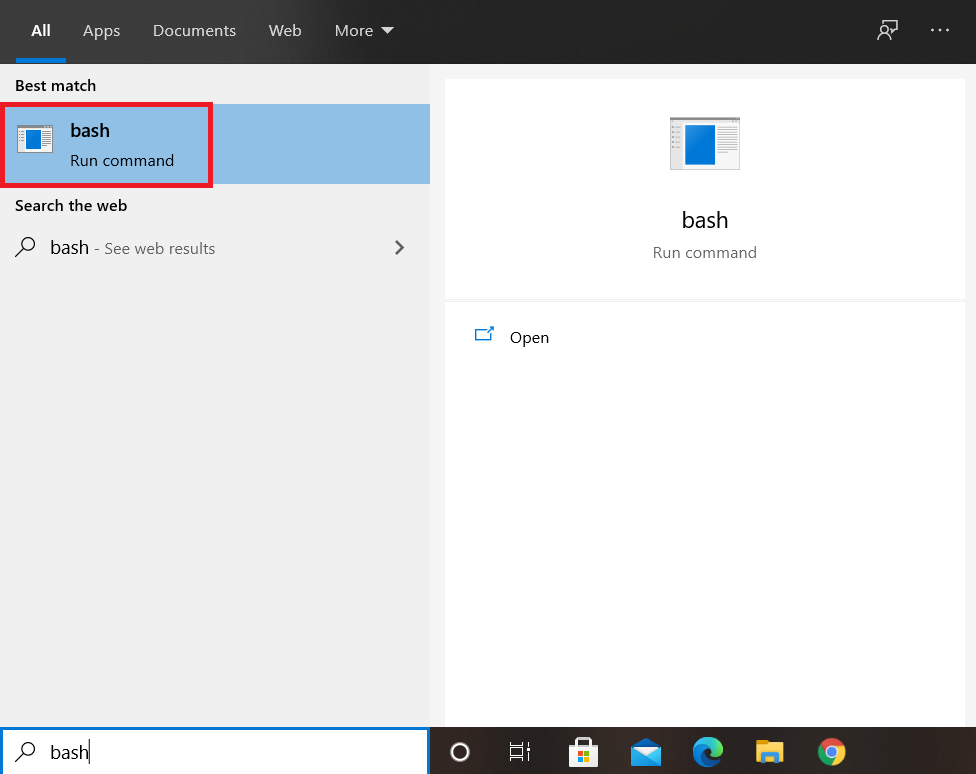
By now, Bash should have been successfully enabled on Windows 10. However, we can still verify if we have succeeded in achieving our goal or not. This can be done by typing bash in the Cortana search bar, and you will be able to see Bash in the search result, as highlighted in the following image. This will serve as an indication that Bash has been successfully enabled on Windows 10. If you wish to access Bash on Windows 10 now, you can simply search for it in the Cortana search bar and click on the Bash search result. In this way, you will be able to use Bash on Windows 10 in the same manner as you would have used it on any distribution of Linux.
Conclusion
By following all the five steps described in this article correctly, you will be able to enable Bash in Windows 10 within a few minutes. After performing this whole procedure, you will be able to use and enjoy Bash in Windows 10 just as if you are using it on any distribution of Linux. For instance, you will be allowed to perform all those operations on Windows 10 that you could possibly do with Bash on any flavor of the Linux operating system.
However, at any instance, if you feel like you do not need Bash anymore on Windows 10, then you can conveniently disable it. For disabling Bash on Windows 10, you will have to navigate to the “Windows Subsystem for Linux” feature again as described in Step #3, and you just need to uncheck the respective checkbox. After doing this, you will be asked to restart your Windows 10 system, after which Bash will no longer be there on your Windows 10 system. You can verify it by looking for it in the Cortana search bar.
from Linux Hint https://ift.tt/2Lb5V6H


0 Comments