
Step 1: Update APT
As always, first, update your APT.

Step 2: Upgrade APT
Now, upgrade your APT.

Step 3: Add Webmin Repository
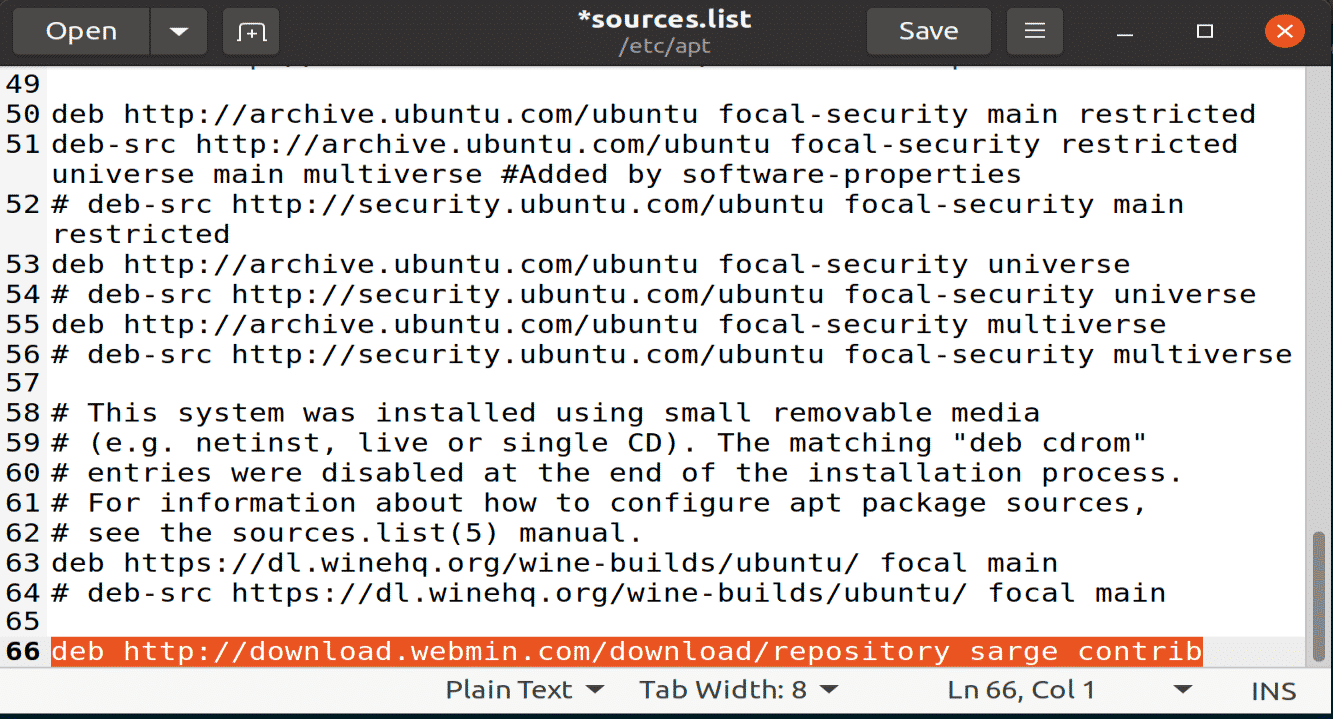
First, add the Webmin repository in the sources.list file so that you can install it via the APT package manager. Using your favorite editor, open the sources.list file using the following terminal command.

Step 4: Add Download Line in File
Add the following line in this file, save it, and then close it.
Step 5: Add Webmin PGP Key
Next, add a Webmin PGP key so that your APT package manager can validate the new repository. We will be using the wget command to get the Webmin key via the following terminal command.

Step 6: Update APT Again
Now, update your APT again using the update APT terminal command.

Step 7: Download and Install Webmin
You are now ready to download and install webmin package. To do so, enter the following command.
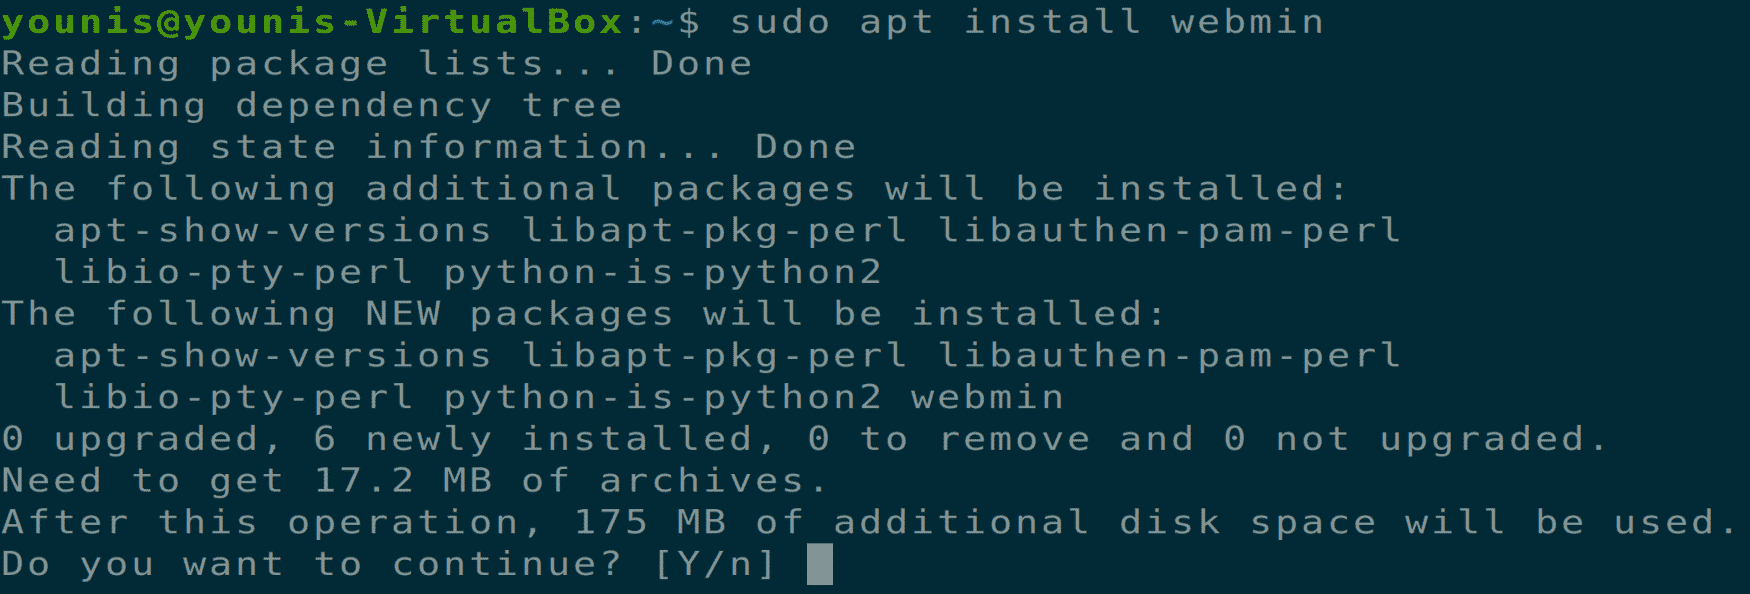
When Webmin is installed, you will be provided the following details at the end of the installation. Record and use this information to log into your Webmin dashboard.

Step 8: Update ufw Firewall
Update the ufw firewall rules to allow traffic from port 10000, the default port Webmin uses.

Step 9: Open Webmin Dashboard
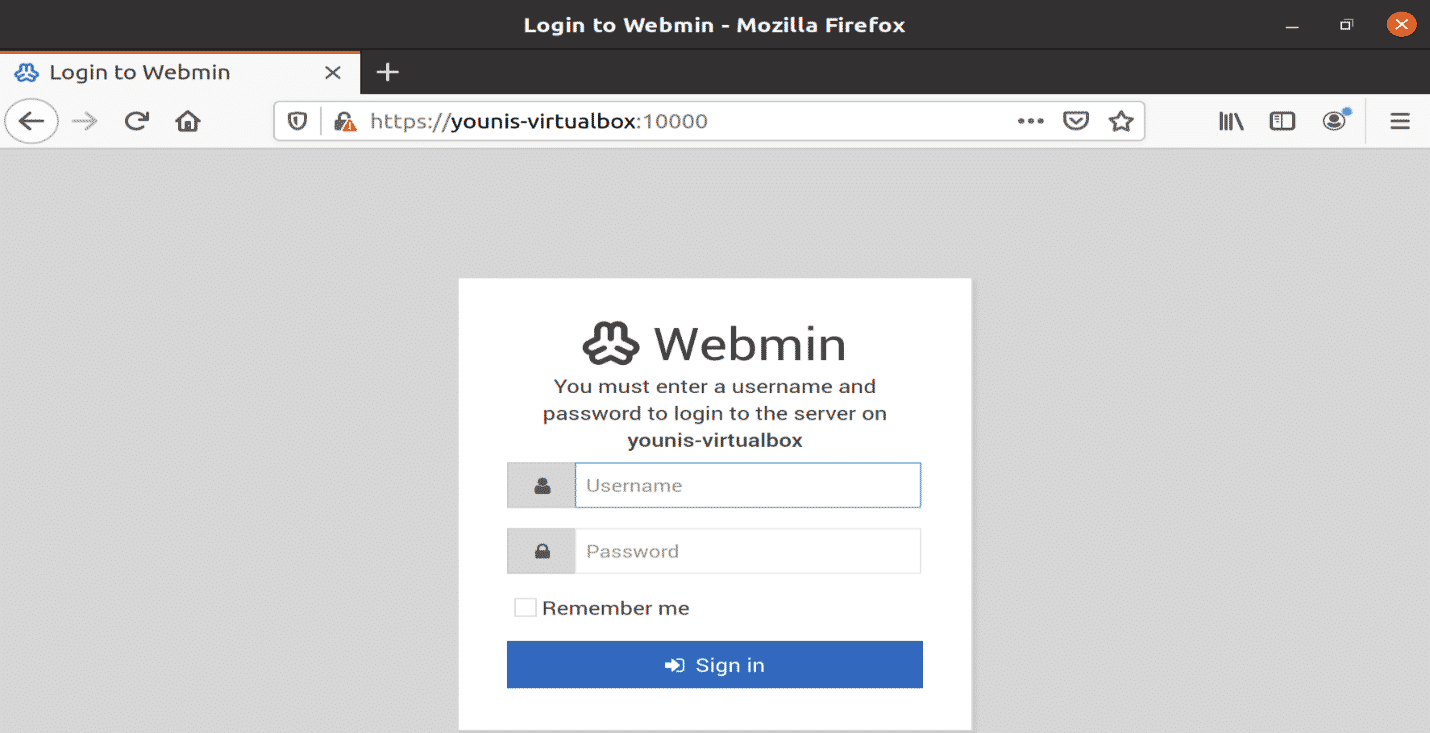
If Everything is done as stated above, you should be able to open the Webmin dashboard in your web browser tab. Enter the following URL in the URL bar, and you will be prompted with a login panel, as shown in the following window.
Step 10: Launch Webmin Dashboard
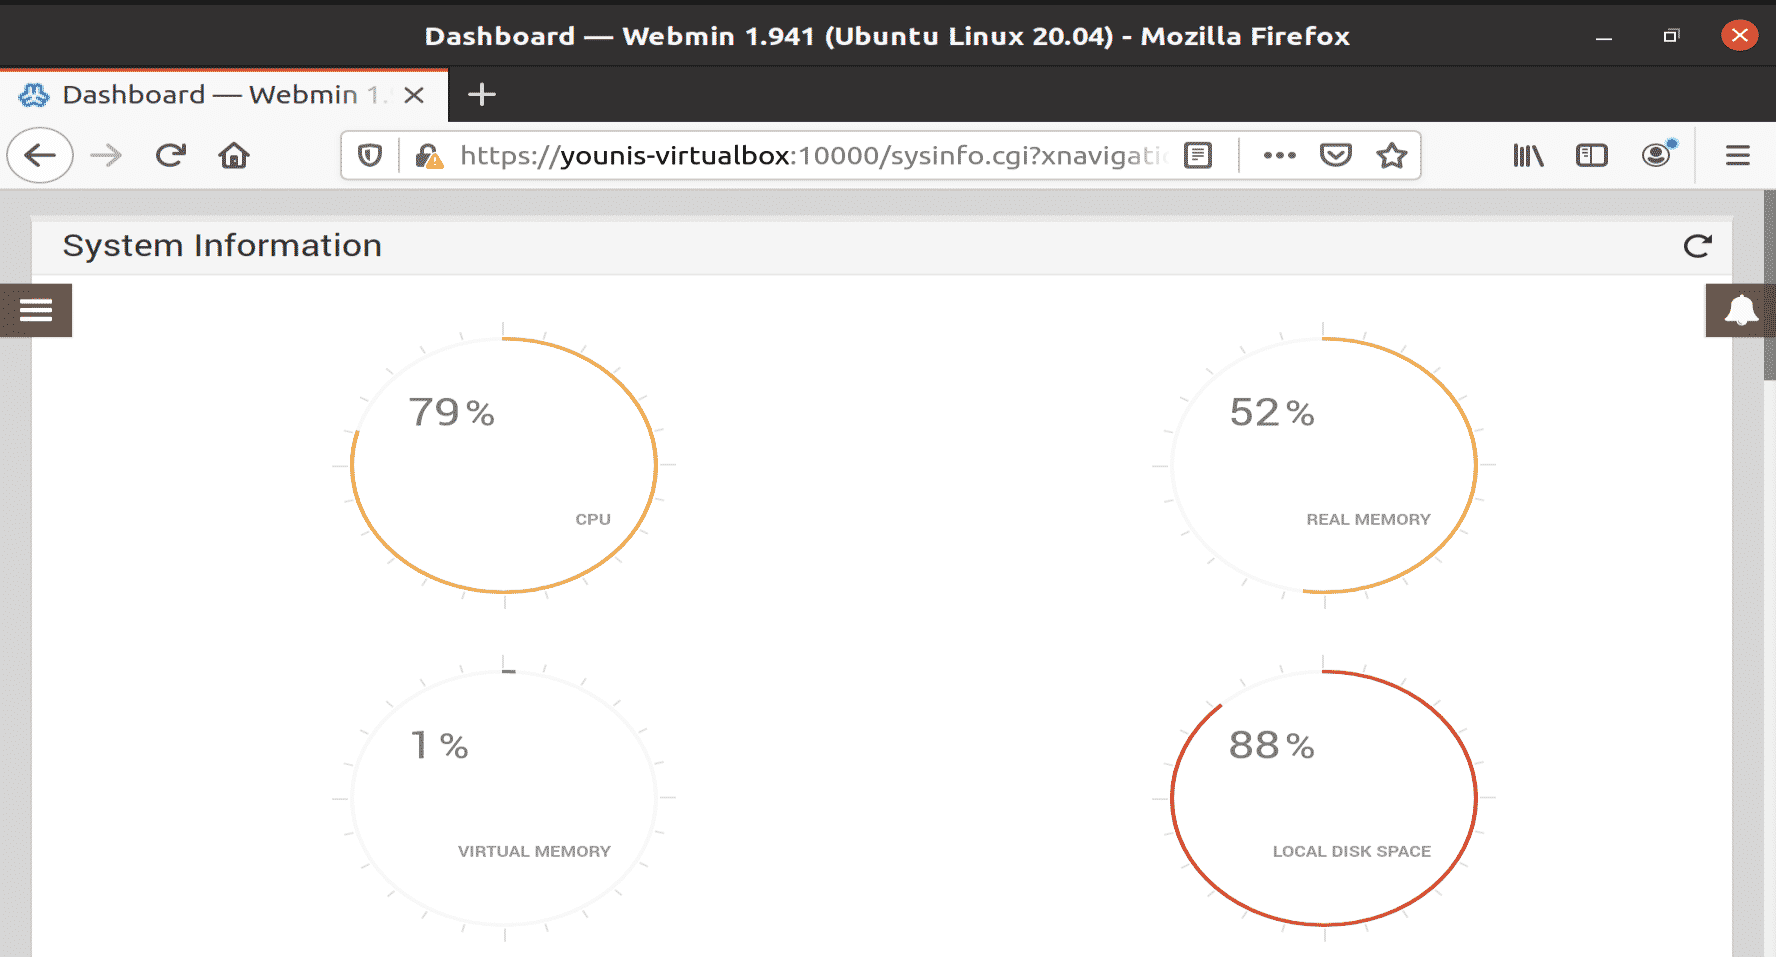
Enter the details and the Webmin dashboard will launch, as shown in the following window.
Step 11: Create User to Host Web Applications
Go to the MENU icon and in the search bar, type ‘Users and Groups’, and click on this option.
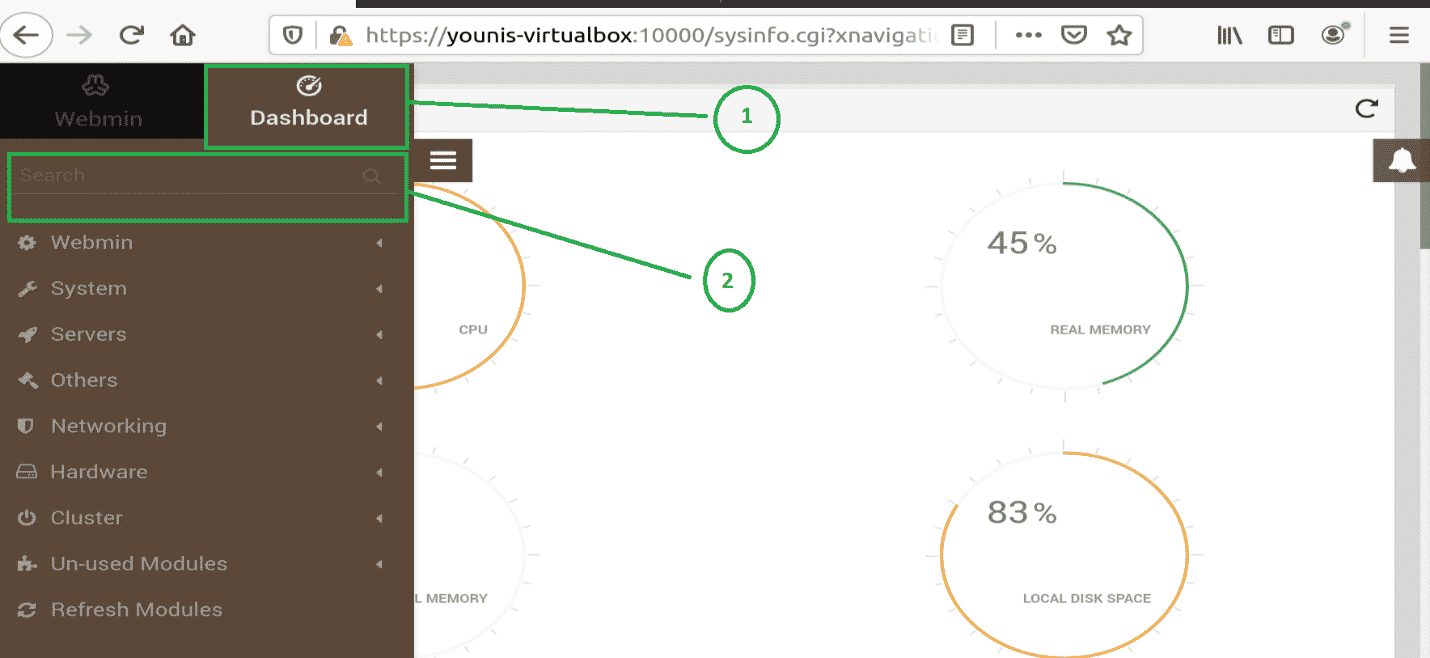
Create a user with a deploy name to be used for hosting web applications. There are also many other options in this tab, such as password expiry option, home directory authorization, and more. We will be using the basic options required for a new user account in the following steps.
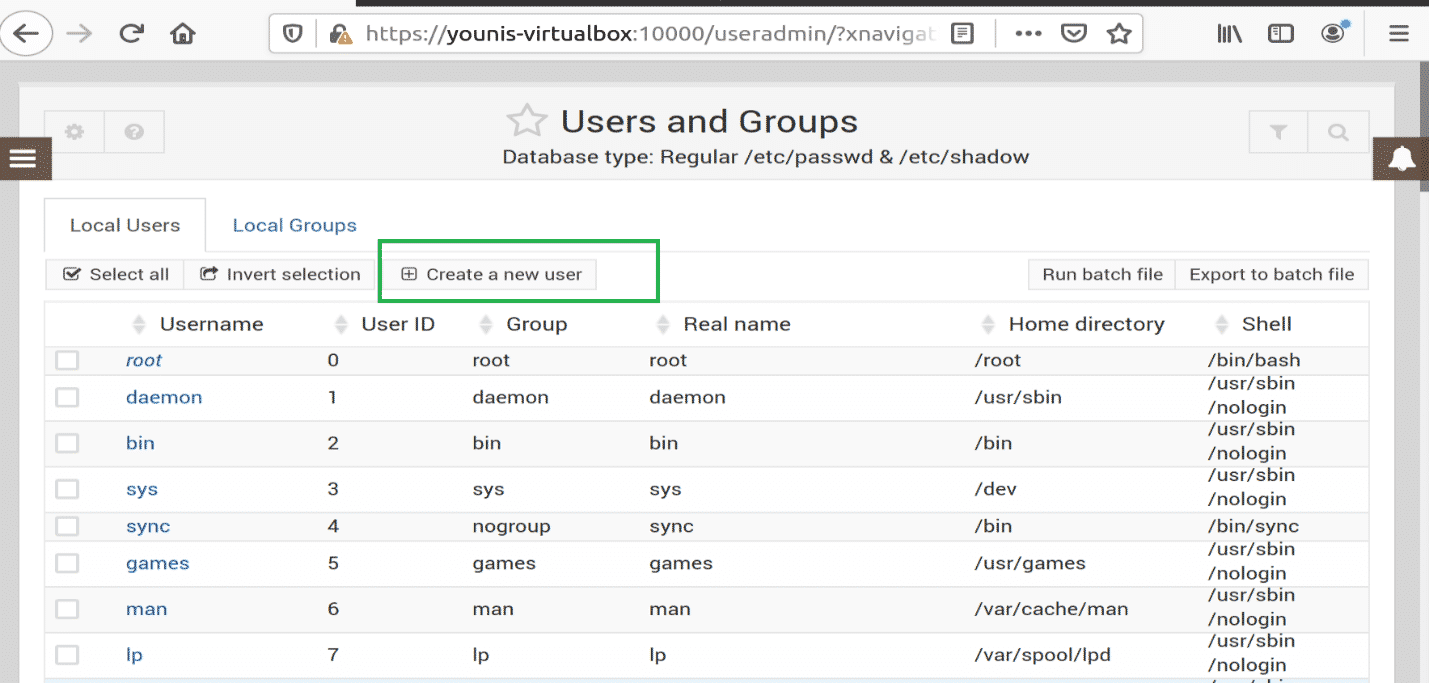
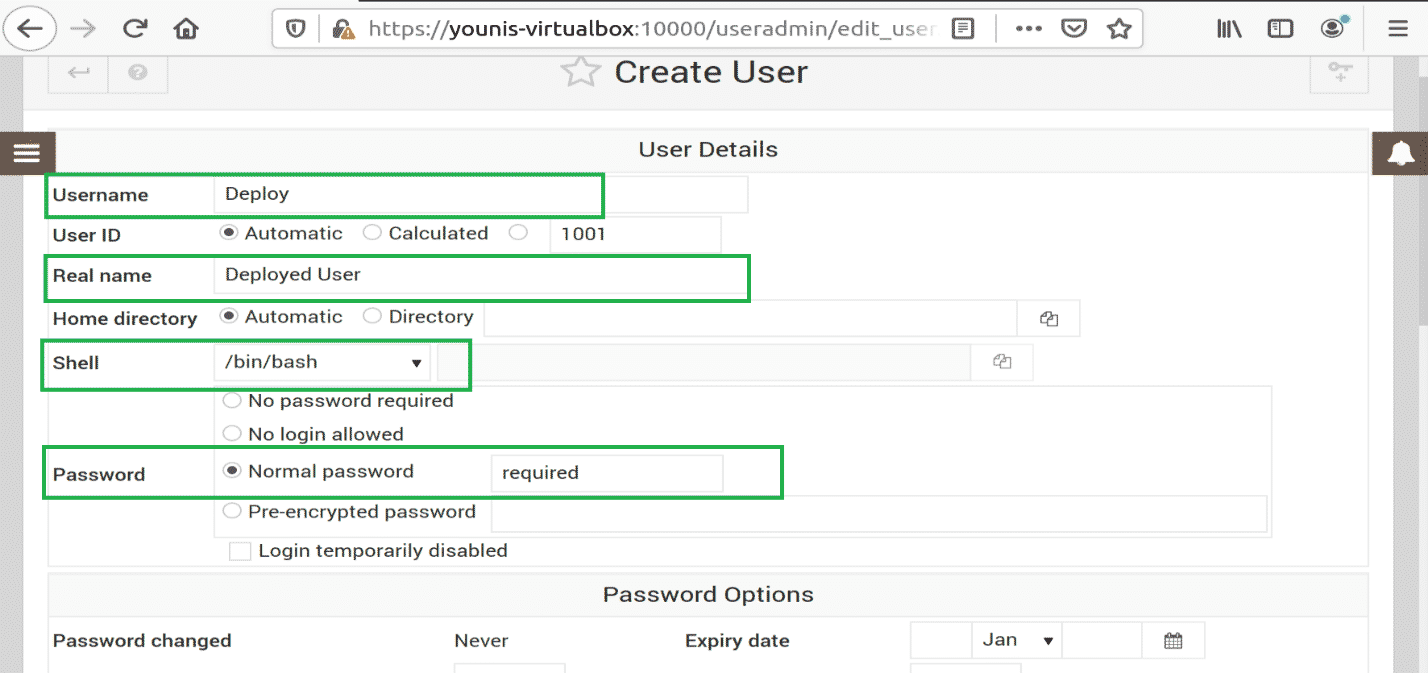
Create a Username called ‘deploy.’
Click on the Automatic option for the User ID.
The Real Name text box should have a small description of the name.
For Shell options, select ‘/bin/bash’ in the list.
Select a normal password and type a password.
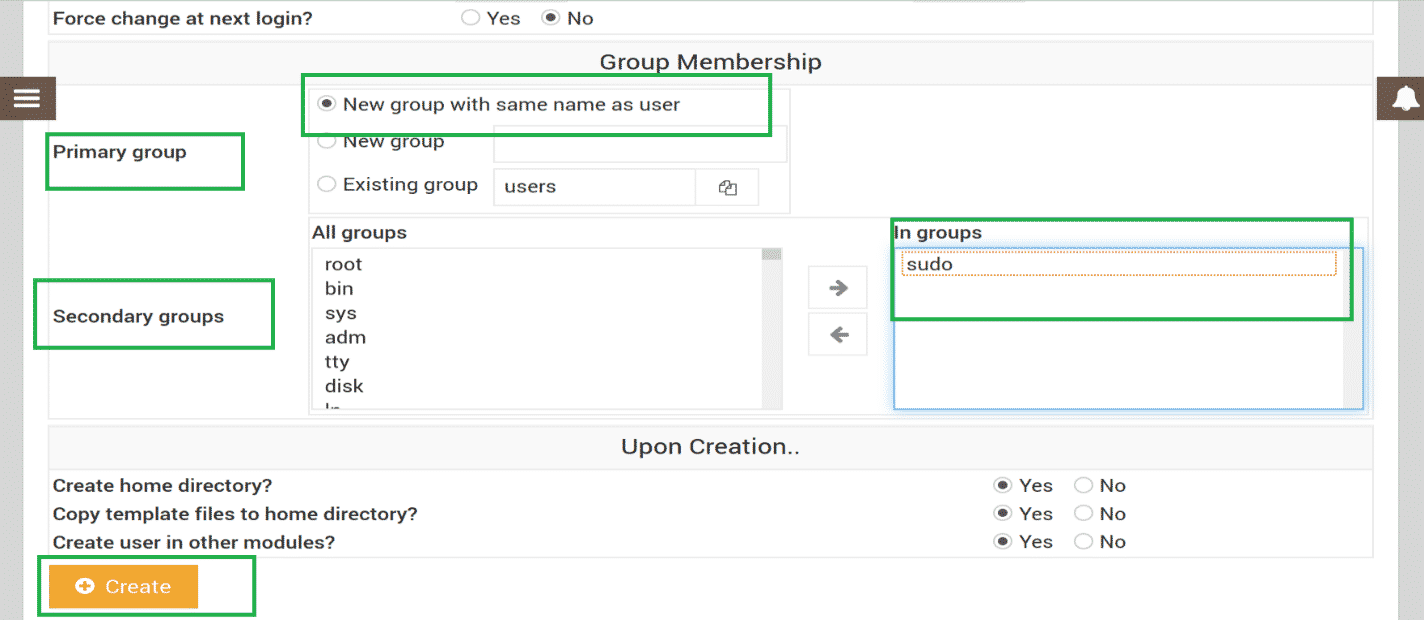
Primary group settings to be changed to ‘New Group With Same Name As User.
Secondary group settings should have sudo selected from all group options.
Press the ‘Create’ button, then create a user with the name ‘deploy,’ having all of the above options.
Step 12: Update Packages
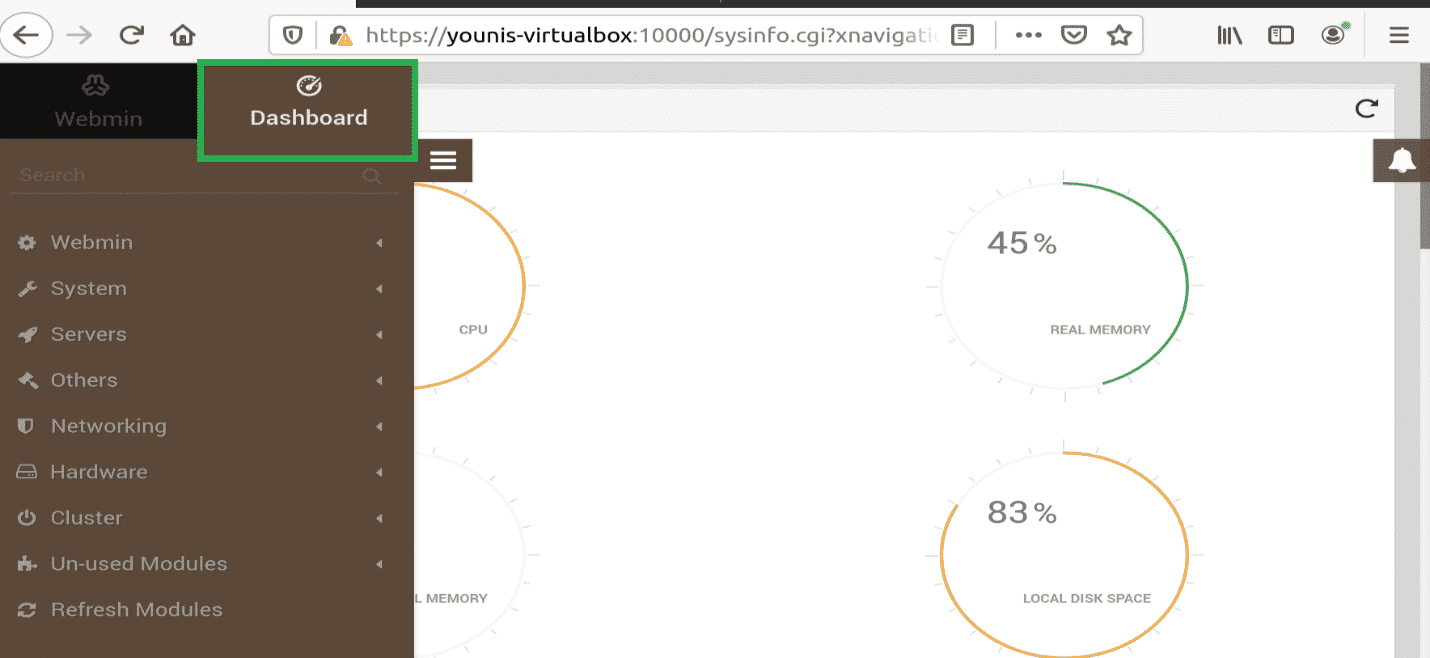
To update the packages, you must return to the dashboard. Click on the MENU icon and select the dashboard, as shown in the window below.
Step 13: Select Package Updates
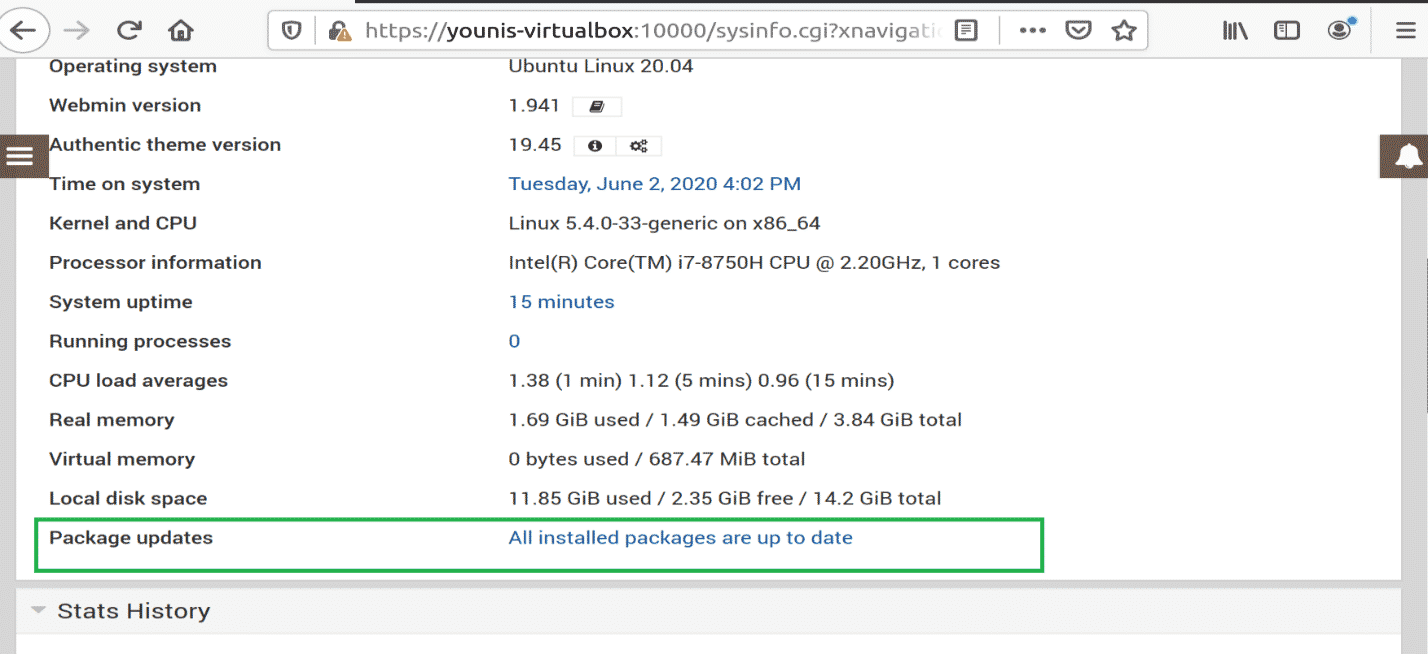
Scroll down until you see the field with the ‘Package updates’ text, as shown in the following window, and click on it.
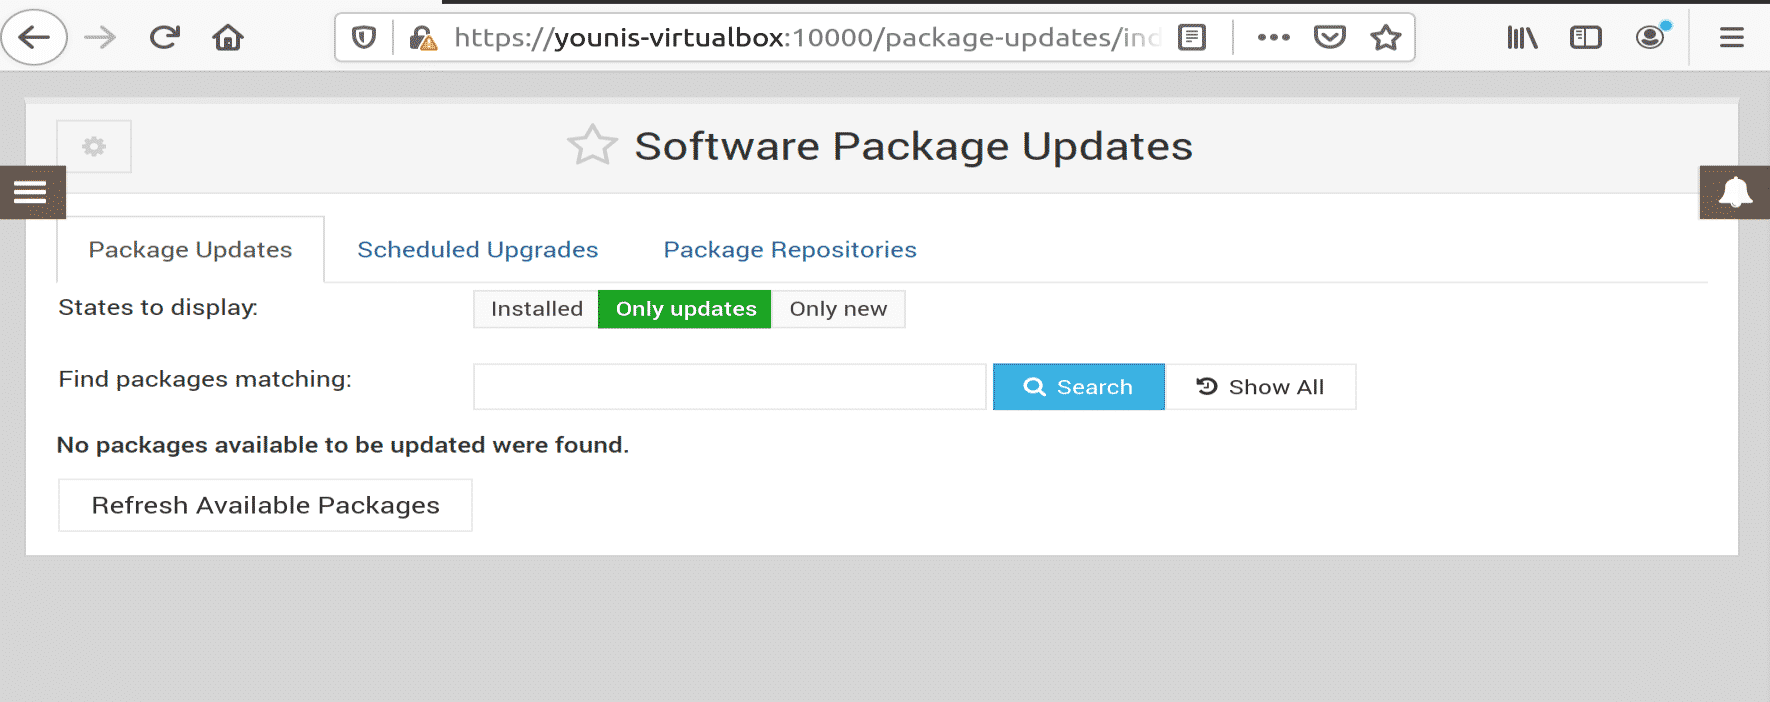
Step 14: Update Packages Remotely
You can update your packages remotely through the Webmin dashboard on-the-go.
Conclusion
This article showed you how to install Webmin, how to create a new user and group in Webmin, and how to update packages using the Webmin dashboard.
from Linux Hint https://ift.tt/3bczjCk


0 Comments