Using lsblk Command:
You can list all the attached disks on your computer from Ubuntu using the lsblk command as follows:
The ones with the TYPE disk are the physically attached disks on your computer.
The ones with the TYPE part are the partitions of the disks.
The lsblk command without any filter shows a lot of loop devices that are used by the Ubuntu snap apps. It is annoying I know. Luckily, you can easily get rid of them from the list.
You can use the -e7 option with lsblk to hide the loop devices.
Now that the loop devices are gone, the list looks much clearer now.
You can also do the same thing with grep.
You can also hide the CD/DVD rom device from the list. Just add the -e11 option along with -e7 option.
You can also list the attached disks on your computer, and their vendor and model information using lsblk as follows:
As you can see, all the attached disks on my computer are listed. Their vendor and model information are also listed.
Using fdisk Command:
You can also list all the attached disks on your computer from Ubuntu using the fdisk command as follows:
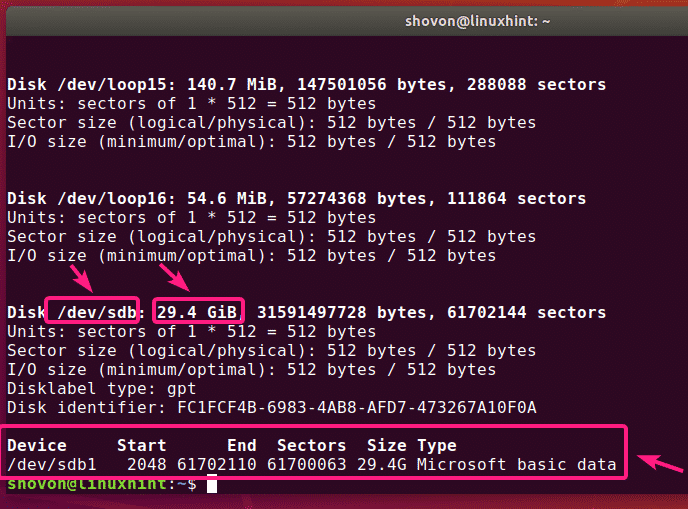
fdisk shows all the disks, their total size, their partitions, size of each partitions etc. But sadly, the list is too long and there is no easy way to hide the loop devices.
But if you know the device name (i.e. sda, sdb) of your disk, you can find more information about it very easily with fdisk.
You can also find information about more than one disk at the same time with fdisk. Just put the disks paths as fdisk arguments one after the other.
Using parted Command:
You can use parted to do the same thing. parted may not be installed by default on Ubuntu. But you can easily install it with the following command:
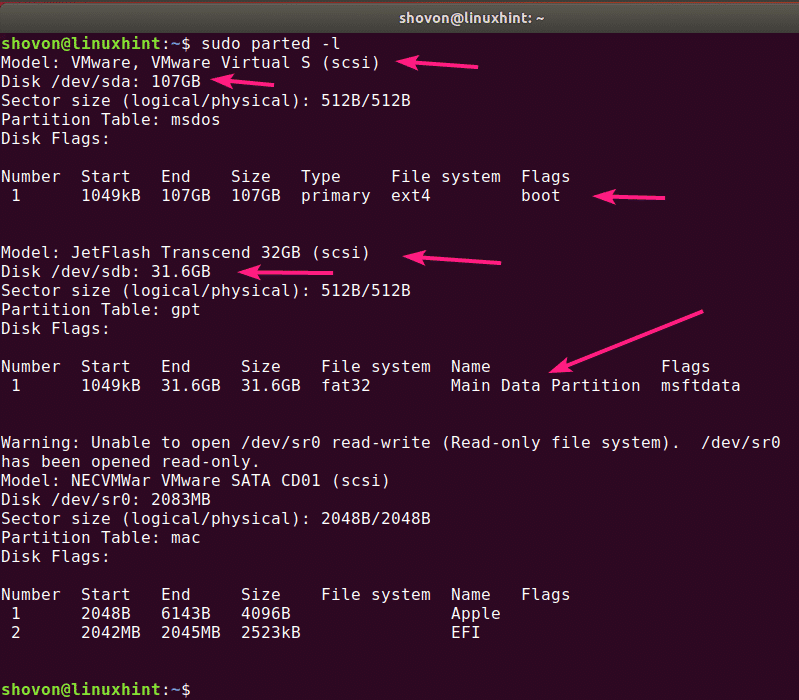
You can get a fdisk like output for all the storage disks attached on your computer with parted as follows:
As you can see, the output format is the same as in fdisk, but parted does not list the annoying loop devices. That’s a good thing.
Using GNOME Disks App:
If you don’t like to use the command line, then there are many graphical programs you can use to list disks on Ubuntu.
GNOME Disks is the default partitioning app on GNOME desktop environment. You can use it to list the disks attached on your computer.
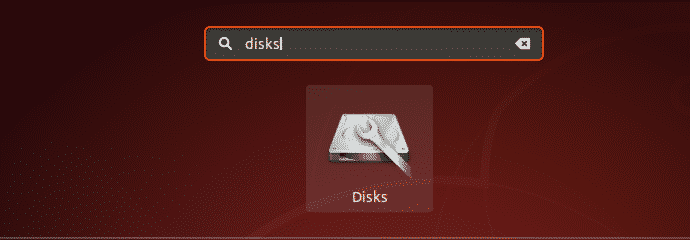
First, open GNOME Disks from the Application Menu.
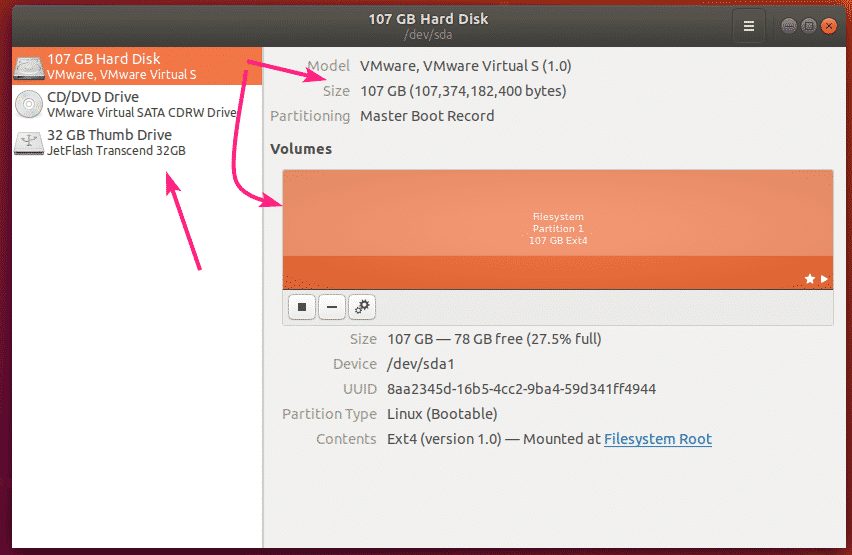
GNOME Disks should be opened. On the left side, you will see all the attached storage devices/disks on your computer. To find more information about the disk, click to select the disk. The disk size, partitions and other information about the disk should be listed on the right side.
Using GParted App:
If you don’t like the command line, then you can also use the GParted Partition Editor app to list all the attached disks on your computer.
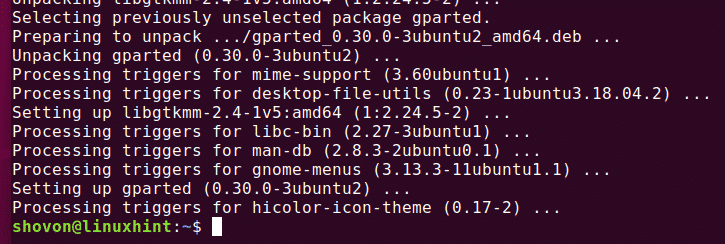
GParted is not installed by default on Ubuntu. But you can easily install GParted with the following command:
GParted should be installed.
Now, you can start GParted from the Application Menu.
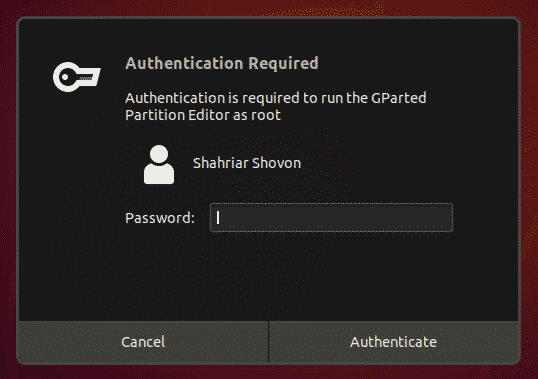
In order to use GParted, you will need superuser privileges. Type in your login password and click on Authenticate.
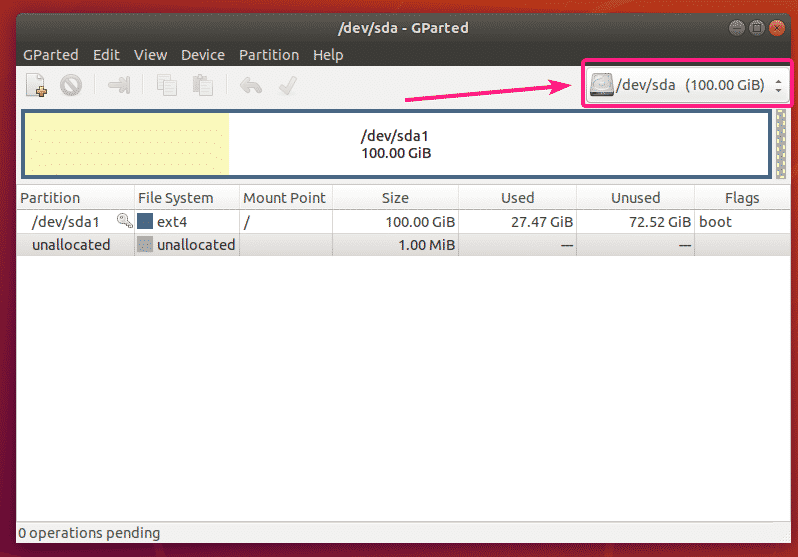
GParted should start. You can select a disk from the dropdown menu at the top right corner of GParted.
As you can see, all the disks attached on my computer is listed in the dropdown menu. Just select a disk from the list.
The partitions of your selected disk should be displayed.
So, that’s how you list all the disks attached on your computer from Ubuntu.
I’ve shown some of the common methods in this article. If you know of listing disks any other way on Ubuntu, be sure to let me know.
Thanks for reading this article.
from Linux Hint https://ift.tt/385l0wD








0 Comments