In this article, we will mount a NFS share on a Debian client machine manually, as well as automatically, upon system boot.
We will use Debian 10 Buster system to run the commands and procedures discussed in this article.
Pre-Requisites
Before proceeding, be sure that:
- NFS server is installed and running on the remote machine
- NFS shared directory on the remote server is exported
- Firewall is allowing access to NFS clients
For the purpose of this article, we have set up two Debian10 machines with the following hostnames and IP addresses:
NFS Server
- Hostname: nfs-serevr
- IP address: 192.168.72.144
- Shared directory: mnt/sharedfolder
NFS Client
- Hostname: nfs-client
- IP address: 192.168.72.145
- Mount point: mnt/client_sharedfolder
Install NFS Client Package on Debian 10 Client Machine
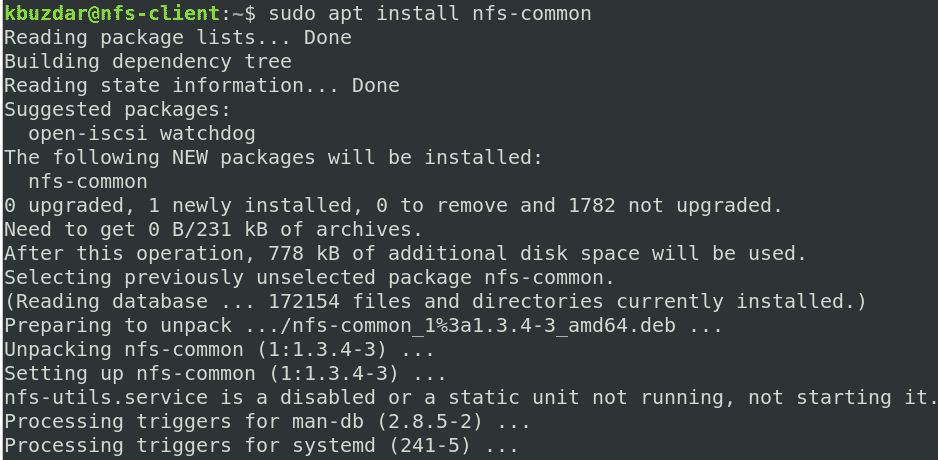
To mount share directories on the client machine, you must first install the NFS client package on it. On the client machine, run the following commands in the Terminal to install the NFS client package:
$ sudo apt install nfs-common
Step 1: Create a Mount Point for the NFS Server’s Shared Directory
To make the NFS server’s shared directory available to the client, you will need to mount the NFS server’s directory on an empty directory on the client machine.
First, create an empty mount point directory on the client machine. This empty directory will serve as the mount point for the remote shared directories.
We have created the new mount directory “client_sharedfolder” under the /mnt directory using the following command:
Step 2: Mount the NFS Server Shared Directory on the Client
Mount the NFS shared directory to the mount point directory on the client using the following syntax:
Where:
- NFS_IP is the NFS server’s IP address
- NFS_export is the shared directory on the NFS server
- Local_mountpoint is the mount point directory on the client’s system
Based on our setup, we ran the following command:
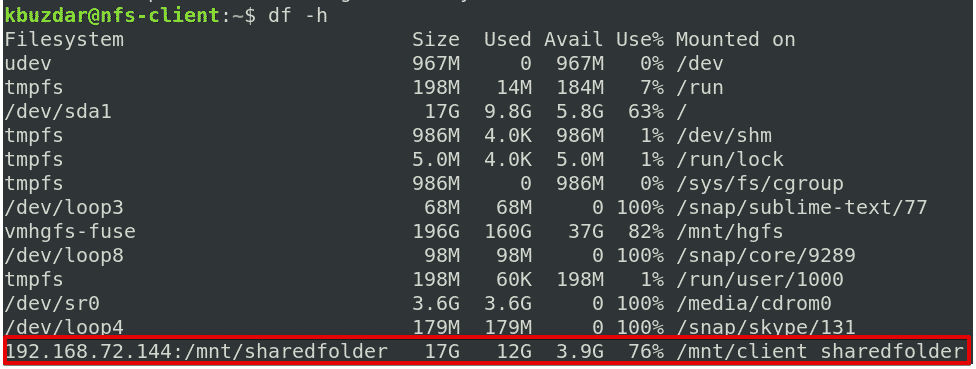
After mounting the NFS shared directory, you can confirm it using the following command in the Terminal:
Step 3: Test NFS share
Next, test the NFS share on the client machine. To perform a test create some files or directories under the NFS shared directory on the server machine and then access them from the client machine. Follow the procedure below to do this yourself:
1. On the NFS server machine, open the Terminal and use the cd command to navigate to the NFS shared directory:
Next, create some test files:
2. On the NFS client machine, verify whether the same files exist in the local mount point directory.
Note that the mount command does not permanently mount the NFS file system on the mount point. You will have to mount it manually every time you reboot the system. In the next step, we will look at how to automatically mount the NFS file system at boot time.
Mounting an NFS File System Automatically
Automatically mounting an NFS file system saves you the trouble of having to manually mount the file system each time you boot your system. Below is the procedure to do so:
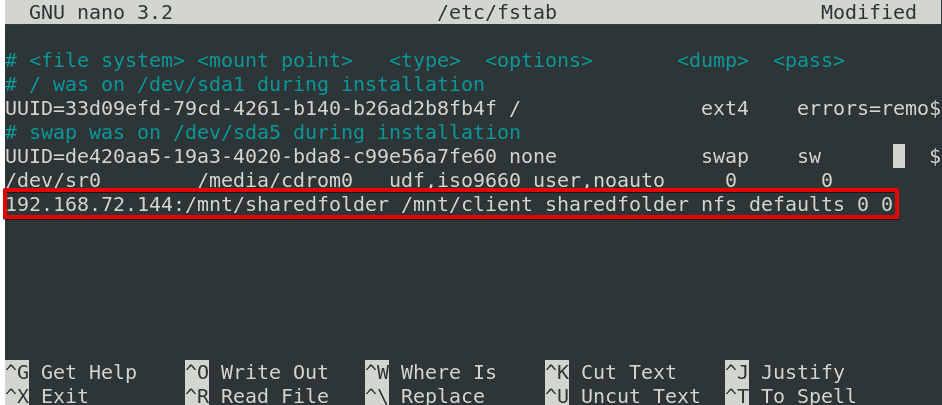
Edit the /etc/fstab file:
Next, add an entry in the /etc/fstab file, as follows:
NFS server:directory mountpoint nfs defaults 0 0
Where:
- NFS server is the IP address of the NFS server
- directory is the shared directory on the NFS server
- mountpoint is the mount point on the NFS client’s machine
- nfs defines the file system type
Based on our setup, we have added the following entry:
After adding the above entry in the /etc/fstab file, save and exit the file by Ctrl + o and Ctrl + x, respectively.
The NFS share will be mounted automatically at the specified mount point the next time you boot your system.
Unmounting an NFS File System
You can easily unmount the NFS shared directory from your system if you no longer need it. To do so, type umount, followed by the name of the mount point, as follows:
Based on our setup, it would be:
Note: The command is “umount,” not unmount (there is no “n” present in the command).
Keep in mind that if you have added the entry in the /etc/fstab file for mounting the NFS, it will be automatically mounted again the next time you boot your system. If you want to prevent it from automatically mounting on the next boot, remove the entry from the /etc/fstab file.
Remember that if the NFS file system is busy, you cannot unmount it, such as if any files are opened on it or you are working on some directory.
There you have it! A simple procedure to mount and unmount the NFS share on the Debian 10 Buster system, both manually and automatically. I hope you liked the article!
from Linux Hint https://ift.tt/2CFi7ZH


0 Comments