In this article, you will learn how to install Apache Maven on a Raspberry Pi so let’s begin:
How to Install Apache Maven on Raspberry Pi
There are two methods to install Apache Maven on Raspberry Pi, which are as follows:
- Installing Apache Maven Through Raspberry Pi Source List
- Installing Apache Maven Through tar.gz File
1. Installing Apache Maven Through Raspberry Pi Source List
The installation of Apache Maven on your Raspberry Pi can be done directly from the Raspberry Pi source list because its repository is already included in the list. However, through this process, you won’t be able to install the latest version of Apache Maven on your device.
To perform the Apache Maven installation through the official Raspberry Pi source list, you must update packages using the following command:

In case your packages are not updated, you can replace “update” with “upgrade” in the above command to install packages update on your Raspberry Pi.
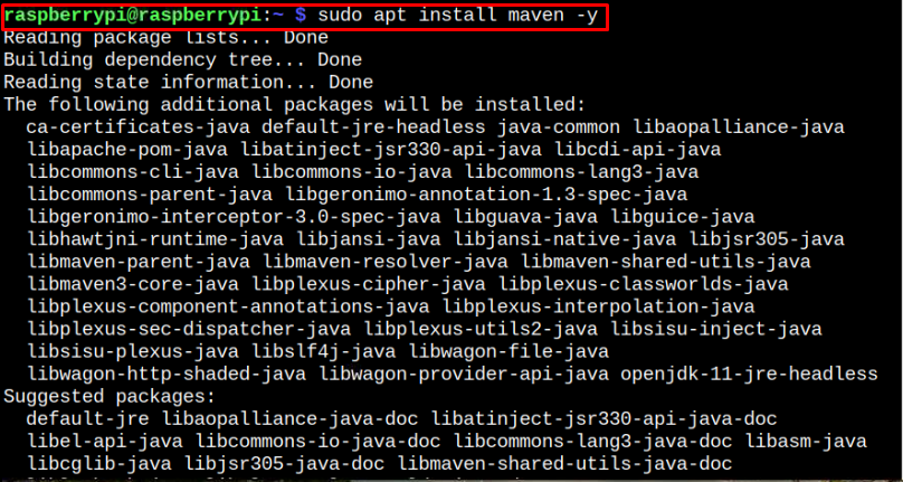
After the update, you can install Apache Maven on your Raspberry Pi device using the following command:

To check the Apache Maven version, you can apply the following command:

Remove Apache Maven From Raspberry Pi
To remove Apache Maven from your Raspberry Pi, you can issue the following command:

2. Installing Apache Maven Through tar.gz File
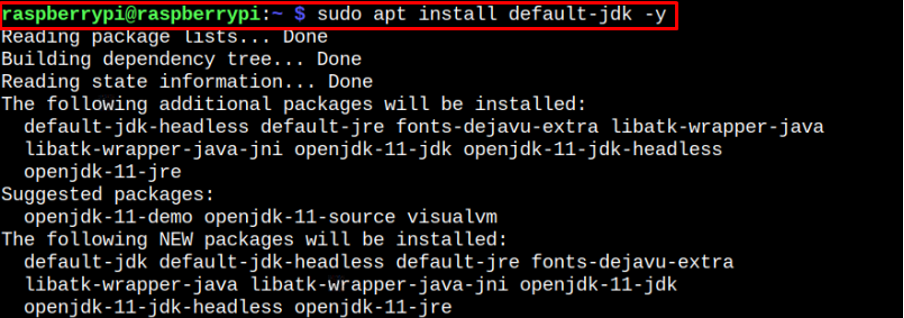
You can also install Apache Maven’s latest version on your Raspberry Pi by downloading the tar.gz file. However, before that, you first need to install the default Java JDK on your device through the following command:

After successfully downloading the Java package, follow the below-mentioned steps to install the latest version of Apache Maven on your Raspberry Pi device.
Step 1: Download Apache Maven tar.gz File on Raspberry Pi
To download the latest version of Apache Maven tar.gz file in the /tmp directory of your Raspberry Pi, use the following command:

Step 2: Extract Apache Maven tar.gz File
Next, you will need to extract the Apache Maven tar.gz file into the “/opt” directory by executing following command:
Step 3: Set Up Environment Variables for Apache Maven
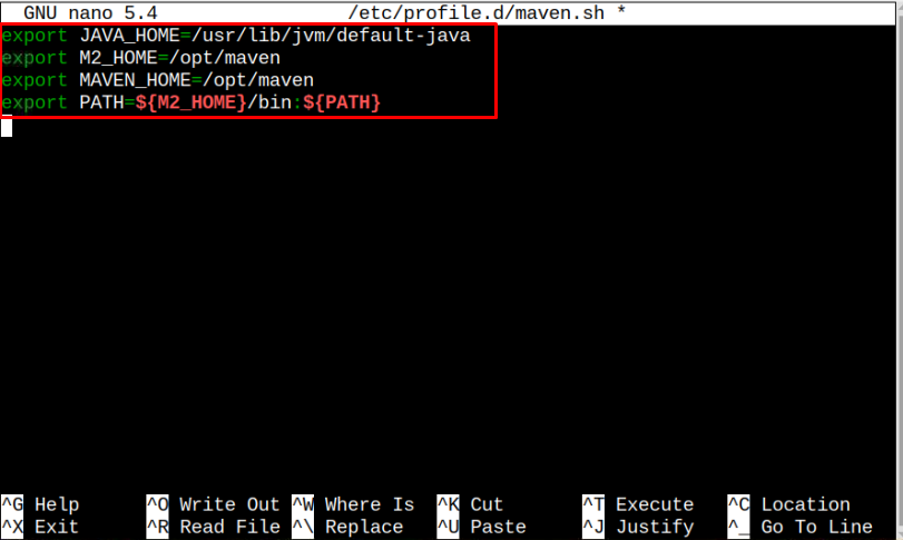
Now, we need to setup the environment variables by creating a script file with the name “maven.sh” and to do so, we have to run the following command:
Inside the “maven.sh” file, you will need to add the following text and then save the file using “CTRL+X”.
export M2_HOME=/opt/maven
export MAVEN_HOME=/opt/maven
export PATH=${M2_HOME}/bin:${PATH}

Step 4: Make the “maven.sh” File Executable
You will also need to make the “maven.sh” file executable via applying the below-mentioned command:
![]()
Step 5: Load Environment Variables
After successfully making the “maven.sh” file executable, you have to load the environment variables inside the file using the following command:

Once the variables are loaded, you can execute the following command to confirm the installation of the latest version of Apache Maven on your Raspberry Pi device:

At this step, you have successfully installed the latest version of Apache Maven on your Raspberry Pi device. Although Method 1 seems to be the easiest method, if you want to use the latest version of Apache Maven, then you have to follow Method 2.
Conclusion
Apache Maven is a perfect application to develop Java projects with ease and there are two simplest methods to install this application on your device. You can use the Raspberry Pi source list to install the application on your device directly or follow the second method to download and extract the “tar.gz” file from the Apache Maven official website. To follow the second method, you need to create a file “maven.sh” and the load environment variables inside this file to complete the installation of the latest version of Apache Maven on Raspberry Pi.
from https://ift.tt/FqYu0Vc


0 Comments