


Discord Bots perform a number of useful tasks that are automatic using AI(artificial intelligence). For example, welcoming a new user, moderating content, and blocking or banning someone that breaks the rules of your discord server. Discord bots are very useful as they can help you with almost everything from automating menial activities to starting to play music across your server and in this post, we will show you how to make a Discord Bot with JavaScript.
Bot Registration
The first step is to register or make an account on the Discord server by going to the below-mentioned URL:
https://discord.com/register?redirect_to=%2Fdevelopers%2Fapplications
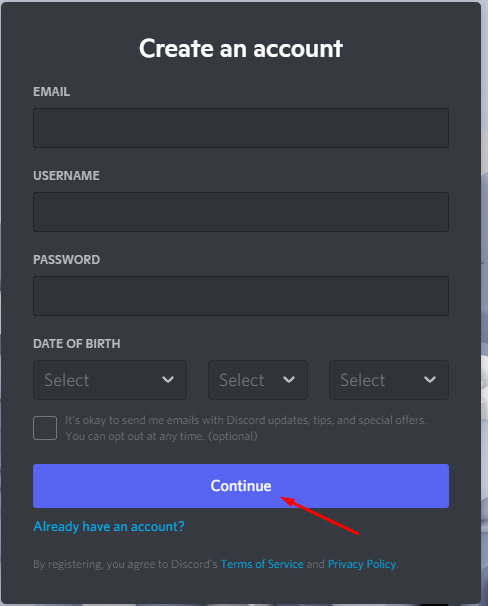
You will see the following screen where you have to register by filling the text fields accordingly and once done click on the continue button:
If you already have an account then simply log in to your account. Once you are logged into your Discord account, go to the below URL:
https://discord.com/developers/applications
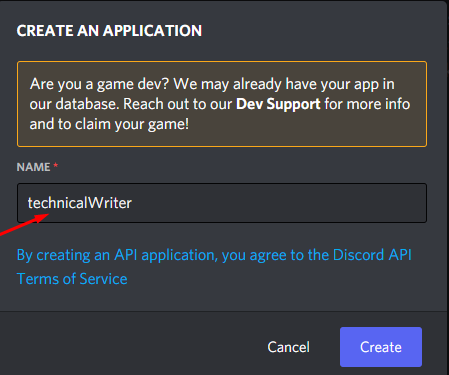
Click on the New Application which is located in the top right corner of the viewscreen:

You will be asked to name your application. In my case, I have named it as technicalWriter:
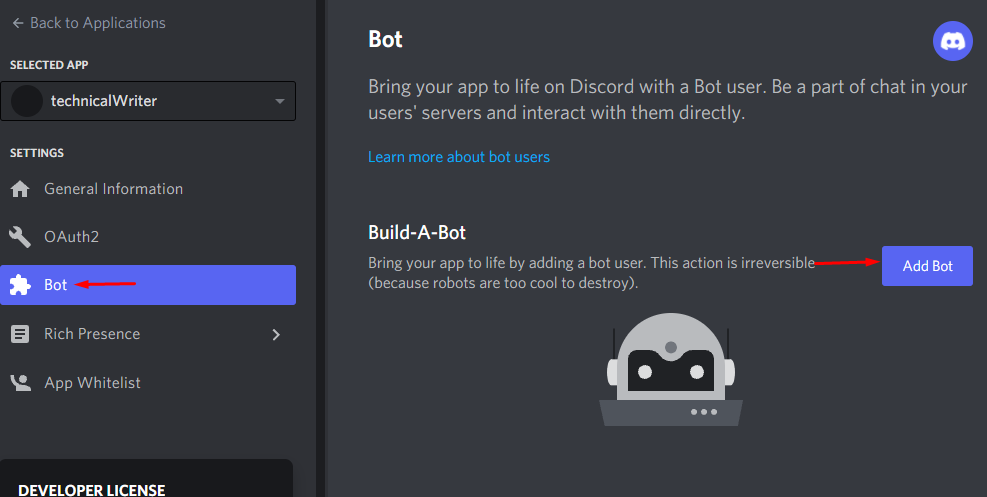
Click on Create and you will be redirected to your created application dashboard. On your app dashboard click on the Bot and then click on Add Bot button to enable your app as a bot:
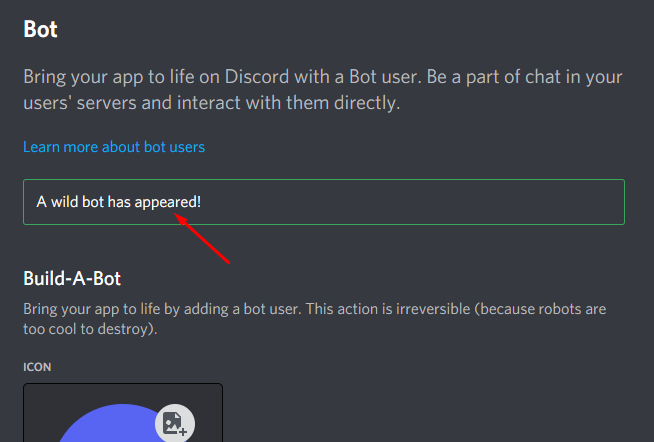
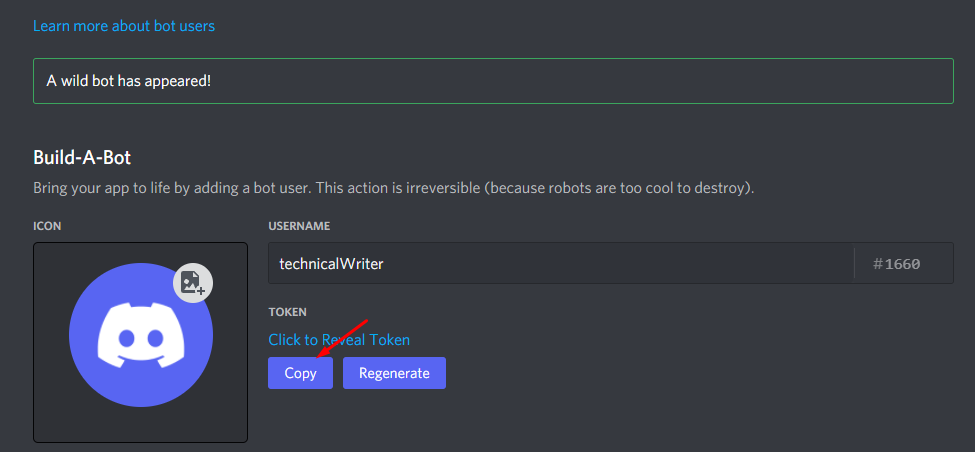
You will see that your bot has been created:
The next step is to copy the token and paste it somewhere where you have access to it, as we will use this token later in our VScode editor(or any other editor of your choice) to connect to the JavaScript bot:
Addition of the bot to the server
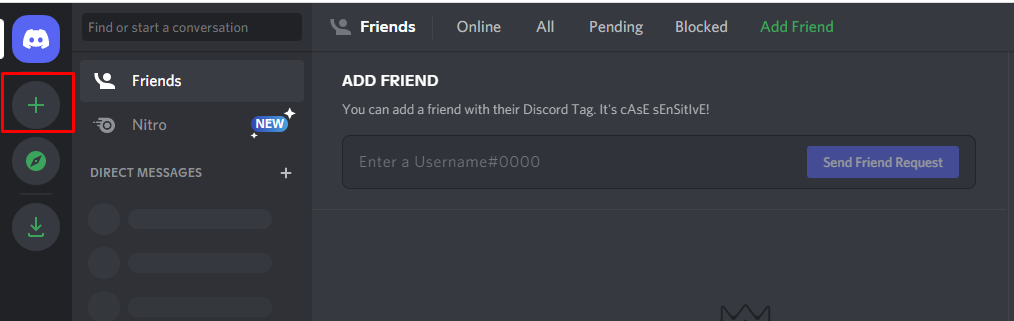
Now that we are done with the bot registration, let us take the next step which is to add the bot to the server. For this purpose, we have to create a new Discord server so that we can install the bot there.
To create a new Discord go to the following URL which is the homepage of the Discord server:
https://discord.com/channels/@me
Next, click on the Plus icon present on the left as shown below:
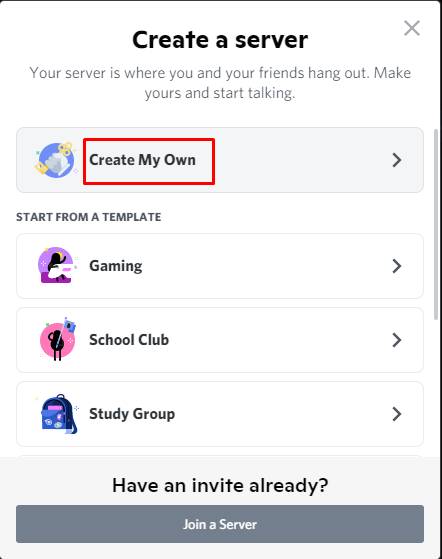
You will see Create a Server window on your screen where you have to click on the Create my own option as shown below:
Next, you will be asked to give a name to your server. In our case we have chosen the name technicalWriter:
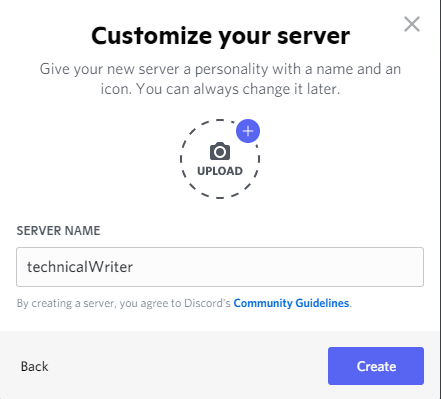
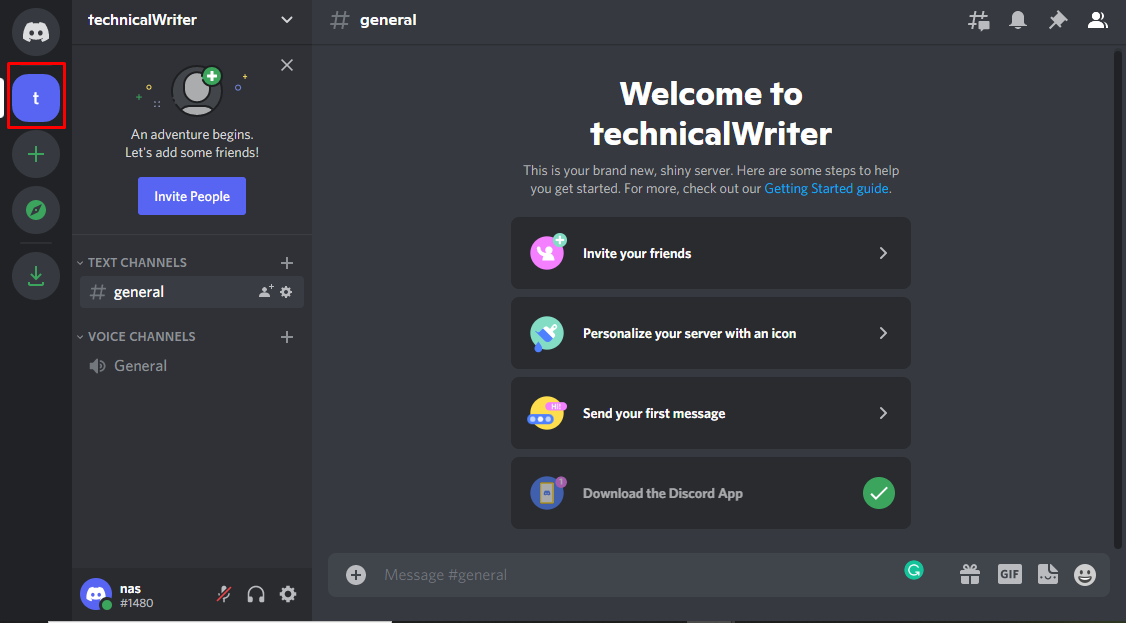
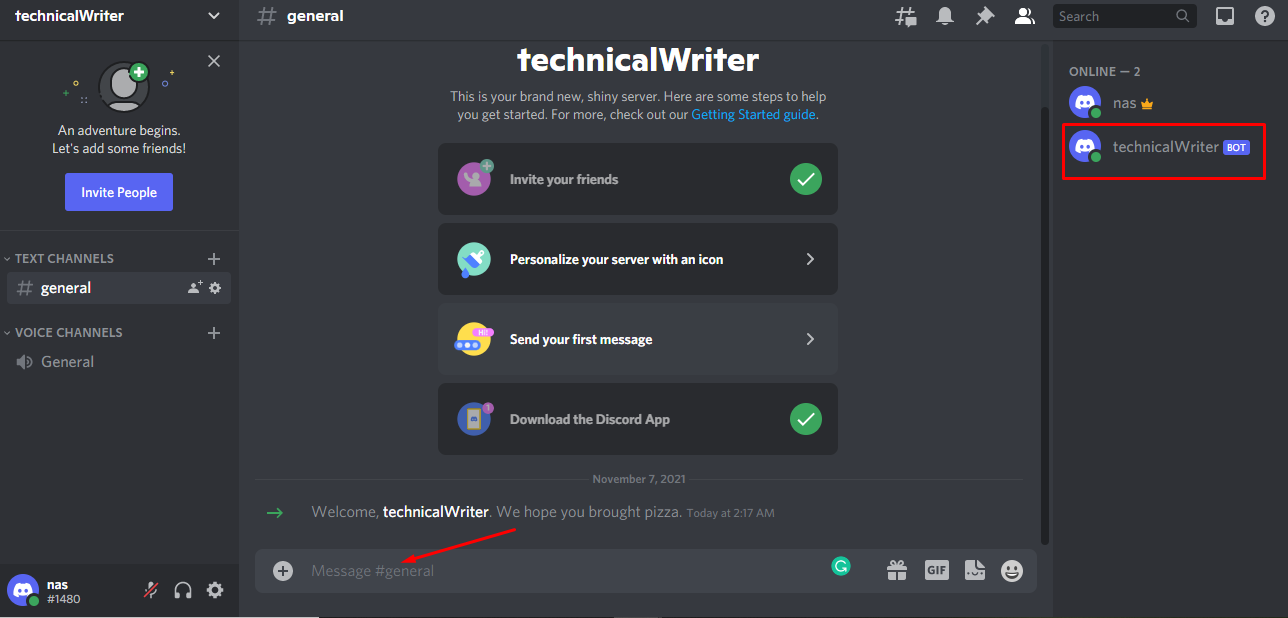
Once done you will see your server on the left side of the screen:
Once done, go back to the Discord Developer Portal:
https://discord.com/developers/applications
In the app dashboard, click on OAuth2 and then select the bot which is located under the Scopes section:

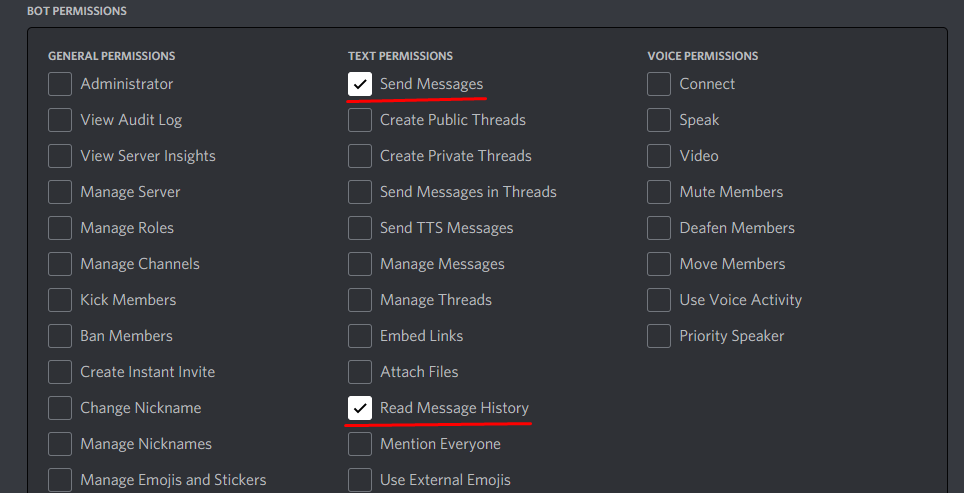
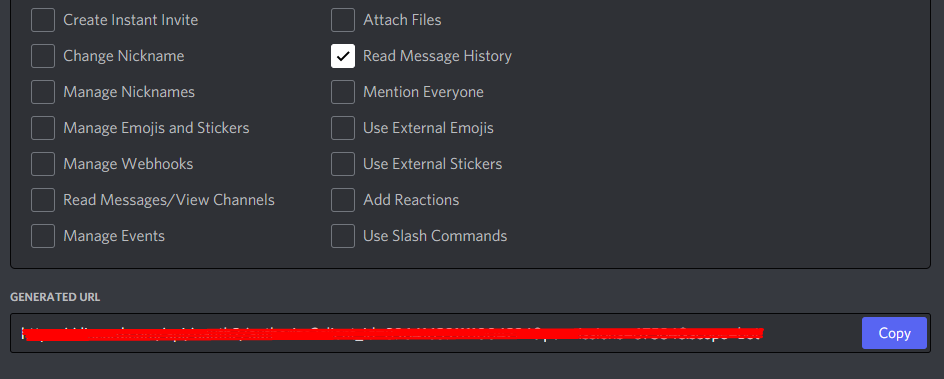
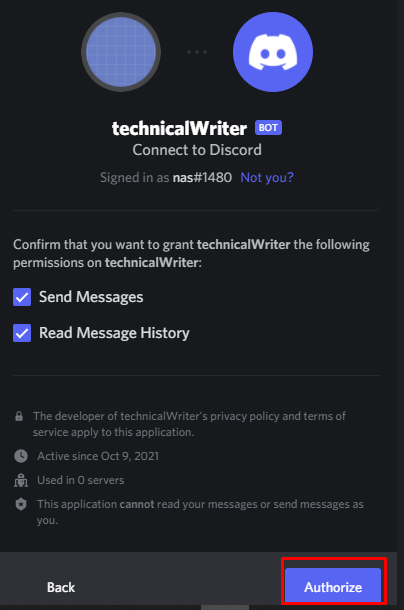
When you select bot you will see the bot permissions where you have to select all the permissions that you want for your bot. We chose the send messages and read message history as shown below:
A URL has been generated in the below text field. Copy this URL by clicking on the copy button and then paste the copied URL on a new tab:
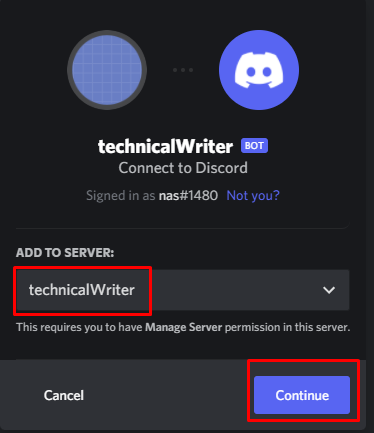
Once done, you will be redirected to the following page where you will install the bot to your preferred Discord Serve by choosing the server you created before. I created technicalWriter so I will select that and then will click on the Authorize button:
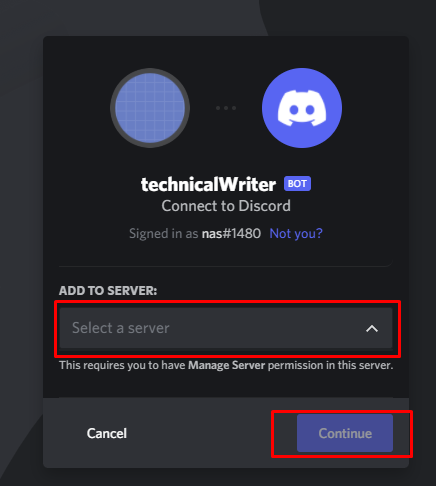
When you click on the continue button you will see the confirmation screen where you have to click on the authorize button:
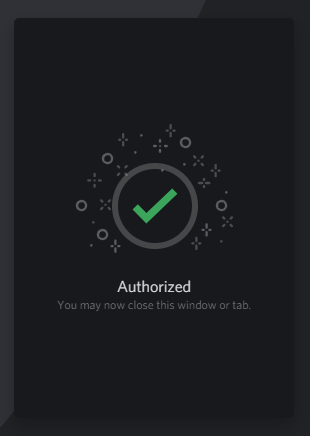
After clicking on the Authorize button you will see the following screen:
Close the tab and let us now move towards the installation of discord in our IDE.
Installation of DiscordJS library in IDE
Now that we are done with registering our bot let us install it in our IDE which is visual studio code. Create a new folder with the name of “test” and go to the terminal of Visual studio code and execute the below command to change the directory to the directory we just created:
The test is the folder we created:

Now run the above command which will initialize NPM and create a package.json file in the test directory:

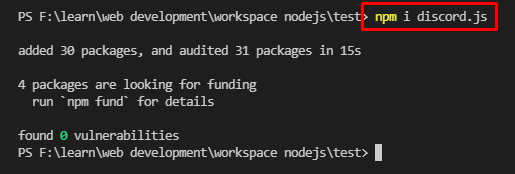
Let’s install Discord.js with the below-given command:
The next step is to install a nodemon that is used for automatic restarting of our server:
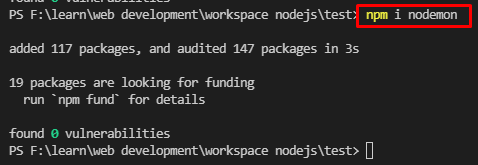
We have successfully installed all the dependencies that are required to create a discord bot.
Bot start Command
Now that we are done with registering our bot and installing all the dependencies let us create an index.js file in our test directory. Index.js file will act as our starting page or homepage of our application.
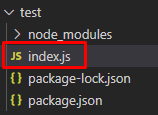
Open the package.json file seen in the above screenshot and add the below script so that we are able to run our file:
"start": "node index.js",
"dev": "nodemon index.js",
"test": "echo "Error: no test specified" && exit 1"
},
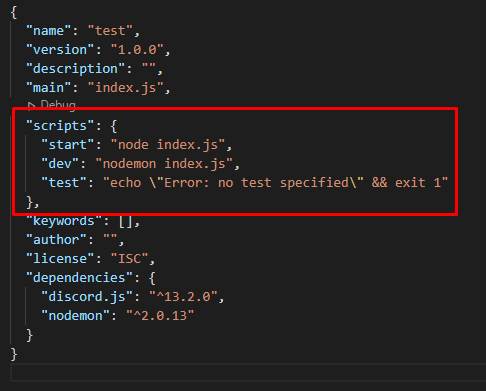
Now we will be able to run our application with the command of npm run start and can start the development server with npm run dev command.
Writing test Bot
Now that our development environment is ready let us start writing the discord test bot. We will implement a very simple test bot so that we can confirm it works. Open index.js created earlier and paste the below-given code:
const { Client, Intents } = require('discord.js');
// Instantiate a new client
const client = new Client(
{ intents: [Intents.FLAGS.GUILDS, Intents.FLAGS.GUILD_MESSAGES] }
);
// listening for event to notify progress
client.on('ready', () => {
console.log("Connected as " + client.user.tag);
})
// paste your bot secret token here
bot_secret_token = "XXXXXXXXXXX";
client.login(bot_secret_token);
We are importing the discord js library first and then creating an instance of the client so that we can connect to Discord. After that, we used the event .on() where the ready event is called whenever the bot is ready to be used. When the ready event is called, the callback function within .on() will start executing. In the end, we have provided our bot secret token.
It should be noted that you have to replace the bot_secret_token with the bot token of your account and you will have to keep it as a secret because it is like the password of your bot. To find the secret token of your bot click on the below URL:
https://discord.com/developers/applications/
After going to the above URL, go to the Bot section present on the left and then click on reveal token.
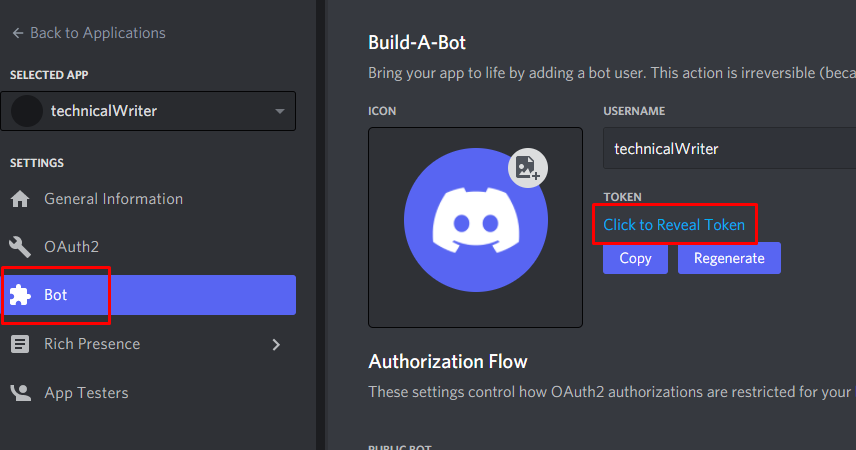
Copy the revealed token and replace it with the bot_secret_token in the above code.
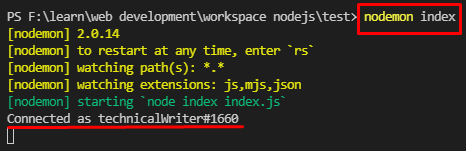
Once done, run your application by going to the terminal and executing the below command:
The output should say Connected as if you were successful in creating your first test bot:
Discord Bot
We are now ready to create our discord bot that will give a reply to our message. We have done all the hard work and now we just needed to add a few more lines to the already existing code of JavaScript. Copy or type the below code to your JavaScript code:
// reply if the message received is Hello discordbot!
client.on('message',
function(mesg){
if(mesg.content === "Hello discordbot!"){
mesg.reply("Hello yourself!")
}
}
)
The complete code is given below:
const { Client, Intents } = require('discord.js');
// Instantiate a new client with some necessary parameters.
const client = new Client(
{ intents: [Intents.FLAGS.GUILDS,Intents.FLAGS.GUILD_MESSAGES] }
);
// listening for event to notify progress
client.on('ready', () => {
console.log("Connected as " + client.user.tag);
})
// listen to server chat
// reply if the message received is Hello discordbot!
client.on('message',
function(mesg){
if(mesg.content === "Hello discordbot!"){
mesg.reply("Hello yourself!")
}
}
)
// paste your bot secret token here
bot_secret_token = "XXXXXXXXXXX";
client.login(bot_secret_token);
The above code will ensure that the bot will continuously listen for any received messages. If the received message has Hello discordbot! then the bot will send a message in the channel as a reply and the reply message will be Hello yourself!. To check the functionality go to your discord account and select the server you have created (in our case it was technicalWriter).
Now send a message Hello discordbot! in the general text channel and you will see the following output:
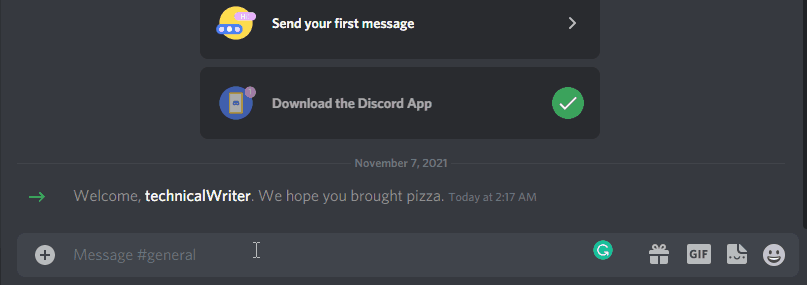
Congratulations! We have successfully created a discord bot that reads a message and then replies to that message automatically.
Conclusion
Discord bots are very useful as they can perform numerous automatic tasks for example welcoming a new user on your discord server or replying to a user using artificial intelligence and much more. In this post, we discussed how to make a discord bot using JavaScript by first registering our bot and then installing our bot to the server. After that, we performed the installation of the bot server in our IDE that was visual studio code and then went on to code a simple test bot that showed who logged in. After that, we created a discord bot that replies with a message whenever the server gets Hello discordbot! Message.
from https://ift.tt/3omMnNL


0 Comments