


WordPress is undoubtedly the most used and trusted content management system across the world. It’s famous due to its easy integration and user-friendly interface. Using a content management system for your website allows you to edit and publish the content with zero coding knowledge. You don’t need to enter those heading tags for formatting the content, just click on the button, and you are done. You also get access to several free plugins that can help you in formatting your content more efficiently.

WordPress is entirely free and open-source and based on PHP and SQL. According to WordPress, it powers around 40% of top websites across the world. Starting with WordPress is as easy as surfing through the web.
In this article today, we will be discussing how to start with the WordPress content management system.
Steps For Getting Started With WordPress CMS
Here is a step by steps guide that will help you with hands-on WordPress.
Select WordPress(WordPress.Com) Plan
Go to WordPress.com, create an account there, and Get a plan accordingly with a domain name and hosting. Here domain name is the name of your business, and hosting services are like a store where all the files are stored as rental services. You can choose any hosting services from any provider depending upon your requirements.
The criteria for Webhosting for a WordPress website is:
- PHP version 7.4 or more
- My SQL version 5.6 or more
- And HTTPS Support
Installing WordPress Application
If you are using hosting from WordPress itself, then you need not perform this step.
But if you are using a third-party application, log in to your hosting provider account and navigate to the Apps section. Click on the WordPress app to start the installation. Once you are done with the installation, you will be asked about the domain name you want to host, the directory name, and setting up admin credentials for the website.
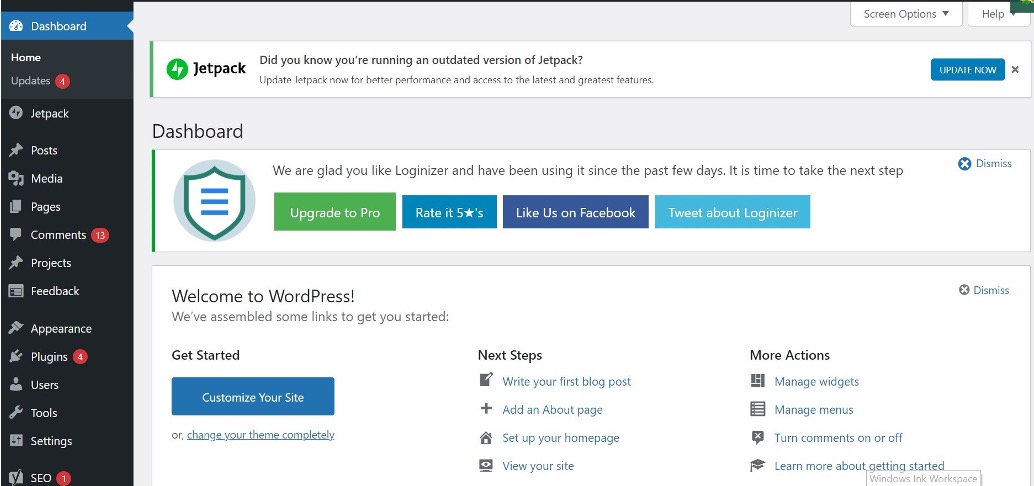
Once done, you will be taken to the WordPress dashboard that looks like one in the picture given below:
Choosing Theme For WordPress Website
Themes are just prebuilt templates that you can set up on your website without any coding knowledge, and you can make customizations accordingly. By default, WordPress activates a simple and plain theme template on your website. You can change this anytime.
To change the theme, Navigate to the appearance tab and click on the themes option given there. You can select any free themes from the library and install them. If you don’t like the theme collection, then you can try purchasing a better quality theme from an online marketplace such as Envato.

All the themes come with the default content from the developer. You can customize the theme according to your website by exploring the appearance section and clicking on customize option.
You can also upload site logos, favicons and create widgets for your website.
Installing Plugins
After you have installed your theme, you should now work on installing plugins. Some basic plugins that you should install are Classic editor, Yoast Seo, and Jetpack. Classic editor is the best plugin for writing content without any issues. Yoast SEO takes care of your on-page SEO and similar aspects, and jetpack is for your website’s safety, backup, and analytics.

To install plugins, you need to click on the plugins button on the left sidebar and move to add new. You can search the plugin by name or upload it by downloading from the internet on the next page.
Writing Posts and Pages For Your Website
Every new and old website should have some website pages that define your website and policies. You can start by creating an “About Us and Contact page” so that your visitors get to know about you and your website.
For writing pages, you have to click on the pages section on the left sidebar and then click on add new button.
You will be shown an ms-word alike window for writing content. You can write relevant content using the toolbar given on top and then click on the blue button given on RHS to publish it.
Similarly, you have to click on the posts>Add new and then start writing for writing posts.
Creating Menu
Having a proper menu on your website ensures that your visitors don’t get confused while searching for relevant content. You can create a menu for your website, including pages’ links, tags, and categories, and set it in different locations. You can also add the search icon in the header.
Exploring Settings Option
You can fix up a lot of technical things regarding your website. You can find the settings option in the last corner of the left sidebar. The setting menu comprises Writing, reading, discussion, media, and permalinks setting. You can change the default category, mail server, and default post format in the writing settings. In reading settings, you can choose your homepage as a static or dynamic homepage, no. of posts to be displayed on the homepage, customizing excerpts, etc.
Creating Users For Your Website
Since a website demands multiple skills for scaling and you cannot excel in all of them. You can hire a person with a specific skillset and then ask him to get the jobs done. And it’s quite risky to share Admin credentials with someone. WordPress dashboard has a simple solution to this problem.
Go to the left sidebar of your dashboard and click on the users. Select the author or editor you want to hire and then set user credentials with their user names. You can later share the credential with the people, and they will have access to only a relevant part of the website.
The Default link for logging in to the website is: https://www.sitename.com/wp-admin
Conclusion
This was a major part of starting with the WordPress content management system. Starting with WordPress is a quite simple task but is not limited to this only as exploring WordPress dashboards is a lengthy subject. WordPress has surely given the freedom to users from HTML-based annoying editing and content management.
from https://ift.tt/3mY7UvC


0 Comments