


Working with Photoshop is not a fast process as it takes a lot of time involving complex tasks. The same goes for removing background from designs in Photoshop. Be it a static image or your design, you need to remove backgrounds as the demand of the project. Most of the time, clients ask for logos with transparent backgrounds as it is considered a plus point in branding. Some clients prefer using plug-ins, while some like manual methods to serve the purpose.
In this article today, I will be guiding you in removing backgrounds in Photoshop. We will be going through multiple methods, and you can choose the suitable one for your design. Let’s start:
Different Methods to Remove Backgrounds in Photoshop
Here are 4 different methods within Photoshop that can help you in removing backgrounds from your Photoshop designs:
Photoshop Remove Background Tool
The first and most simple way to remove a background in Photoshop is using the Photoshop Remove Background tool. Start by opening the image in your Photoshop. Navigate to the Layer section on the right-hand side of the platform. Now, you have to duplicate the layer by pressing Ctrl+J (Windows) or Command+J (Mac).

Now, press Ctrl+J in your Photoshop canvas to duplicate the layer. Move to Quick Actions and select the option saying “Remove Background”.
After clicking, you have to go to the Properties and set the output path as a new document. This will result in removing the background from the document as a complete document.
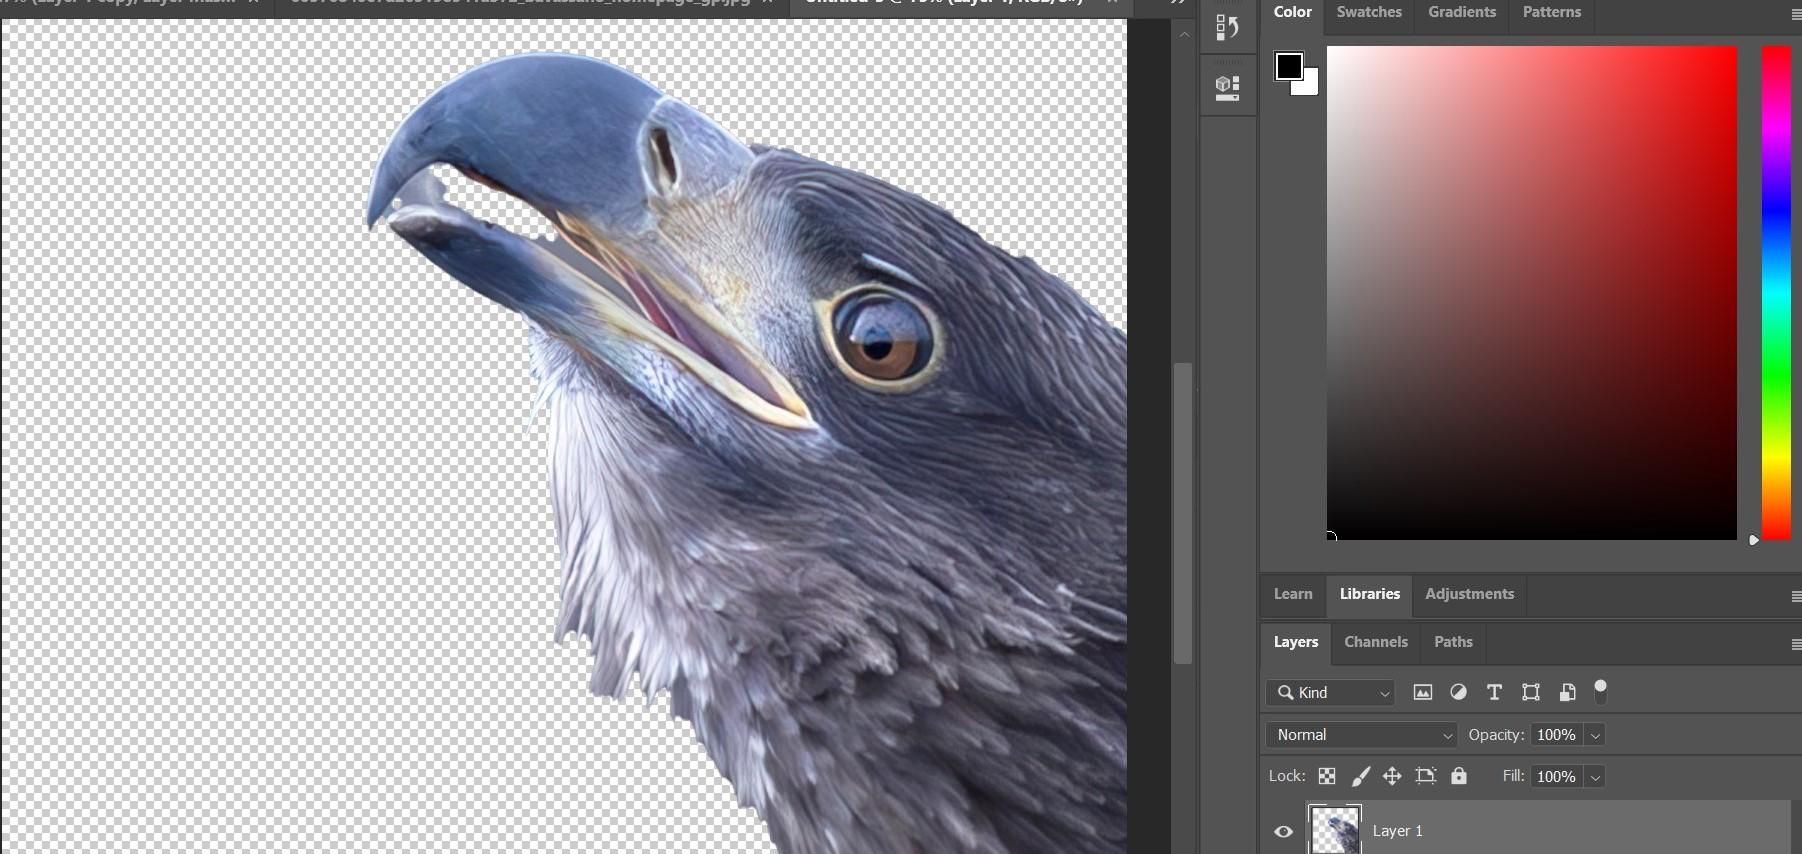
As you see in the picture above, the background removed is still not satisfactory at some points. This is where you will require to use another method.
Removing Background in Photoshop Using the Pen Tool
As previously mentioned, the Remover tool might not produce the desired results. This is where the Pen tool comes to impress you. This method is used by most professionals and delivers the best results.
Open the image in your Photoshop, duplicate the background layer by pressing Ctrl+J. Now, turn off that layer by clicking on the eye (preview) icon provided along with the layer on the right-hand panel.
Navigate to the toolbox on the left side and select the Pen tool. Now, you have to outline the main subject of the image using the Pen tool. You can start from a suitable initial point by zooming into the subject.

If you are a beginner, then it might be difficult for you to use the Pen tool. You can refer to this guide on using the Pen tool. While making curved lines, you have to click and drag to adjust the curves. And for adjusting the anchor points, you can use the Direct Selection tool. To undo any task on the Pen tool, you can use the shortcut Ctrl+z.
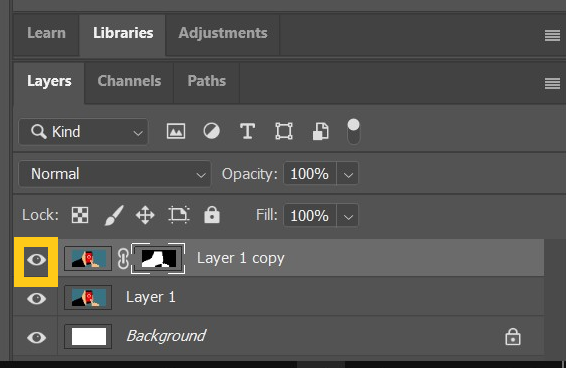
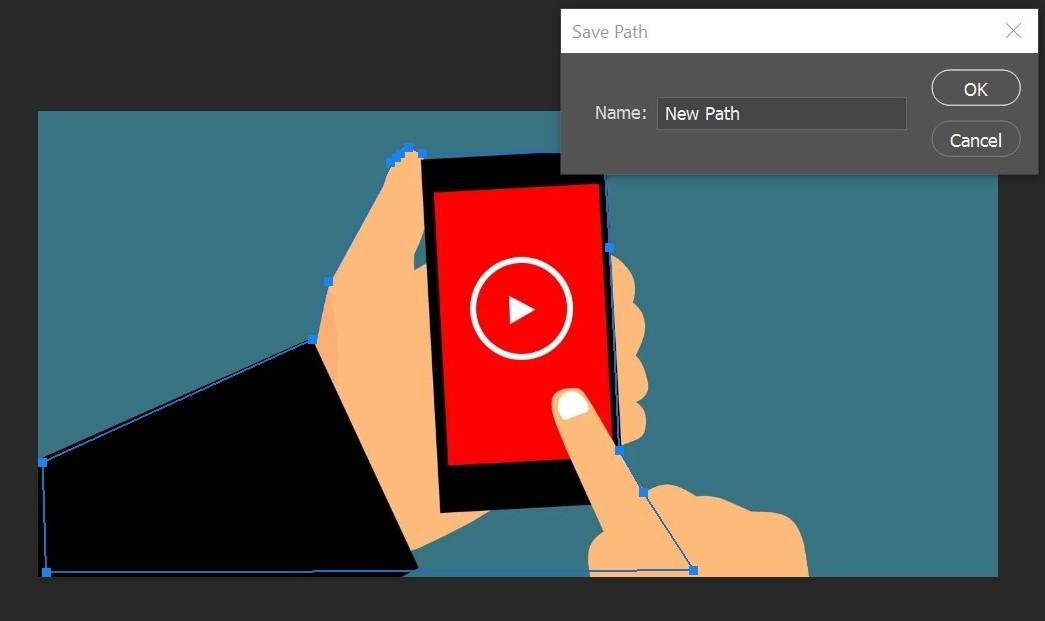
Once you are done with path selection, complete it by clicking on the initial point. Now, you have to navigate to Windows and go to Paths to Preview the Path section. Now, explore the menu on the right-hand side and save the outline as a new path.
Right-click on the newly saved path and click on Make Selection and press OK. This will create a moving outline around the selection made by you.

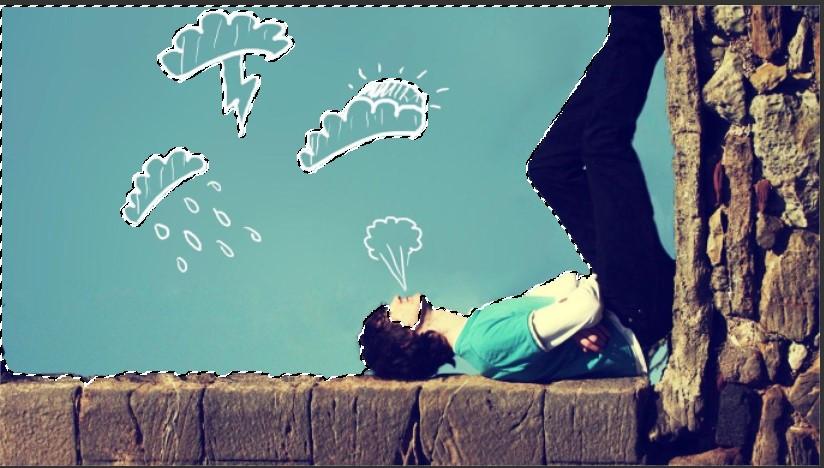
To remove the background, navigate to Select and choose “Inverse”. This will reverse the highlighted outline around the image. Now, press the Delete button. This will remove the background of the image with only the selected object remaining in the image.

Removing Background in Photoshop Using Quick Selection Tool
Using a Remove Background tool from Photoshop is not as effective as it should be, and the Pen tool method is quite time-consuming. This is where the Quick Selection tool comes into play for removing background in Photoshop.
Open the image in Photoshop and duplicate the layer by pressing Ctrl+J. Now, turn off that layer by clicking on the eye (preview) icon provided along with the layer on the right-hand panel.
Navigate to the toolbox and select the Quick Selection tool. Now, you have to start painting the image with the Quick Selection tool. You will see the motion in the outline of the objects as you start painting.
You have to paint following the subject. In case you have painted in error, you can see the tool indication turning + to – by holding and pressing the Alt key. You can change the size of the tool by [ ] keys.
After you have selected the desired elements from the image, you have to save the selection by proceeding to Select and then Save. For deleting the background, go to Select and click on the Inverse button. This will inverse the outline selected by you as we have to remove the background. Click on the Delete button, and you are good to go.
Removing Background in Photoshop Using a Plug-in
Plug-ins in Photoshop hold great significance as they ease your task and save you a lot of time. Many professionals trust Plug-ins for creativity and productivity. Remove.bg plug-in is a free plug-in that you can integrate with your Photoshop and remove the background of the images within seconds.
Download the plug-in for free. Once downloaded, find the plug-in drop-down menu. Log in to your Remove.bg account and click on the remove background button to remove the background of the opened image.
This plug-in removes the background with similar effectiveness as manual methods do. If you don’t want to waste your time in selections using a pen, then this is the perfect method for you.
Conclusion
Removing a background in Photoshop is not an easy task as the level keeps changing concerning image outlines. Multiple methods can be used to serve the purpose. Most designers prefer the Pen tool for removing background as it performs tasks with more precision. While using the Pen tool, you can perform the task in two batches. This consumes a lot of time, however. If you are looking for some faster methods, then using a plug-in will work for you. I hope the article served your purpose, and check out LinuxHint for more informative articles.
from https://ift.tt/3qZDefH


0 Comments