


Main Features of KDiskMark
KDiskMark can generate a report of test results and you can export it to an external file. This makes it easy to share test results and compare benchmark scores with other hardware. It can perform both sequential and random read and write speed tests to give you a better idea about a drive’s capability and performance. Other main features of KDiskMark include support for different measurement units, ability to change multithreading and queuing parameters for tests, and ability to change block size for benchmarks.
Installing KDiskMark in Linux
You can download a universal AppImage file for KDiskMark that works on all major Linux distributions from here. On Ubuntu, you can also install it from a PPA repository provided by the developers of this app. To do so, follow installation instructions available here. More repositories, a snap package, and downloadable native packages for other Linux distributions can be found here.
Using KDiskMark to Run Benchmarks on Storage Drives
To benchmark storage drives connected to your Linux system, launch KDiskMark from the main application menu of your desktop environment. You should get a new window similar to this:
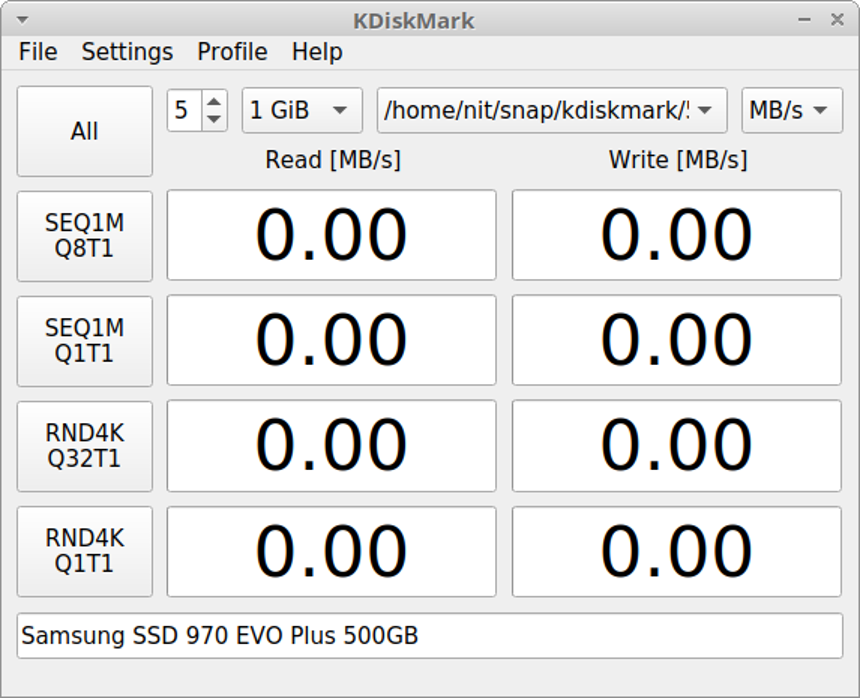
On the left hand side, there is an “All” button that can be used to run read and write tests one by one. Below it are various individual buttons that you can use to run specific tests only. If you hover the mouse cursor on these buttons, you will get more information about them in tooltips.
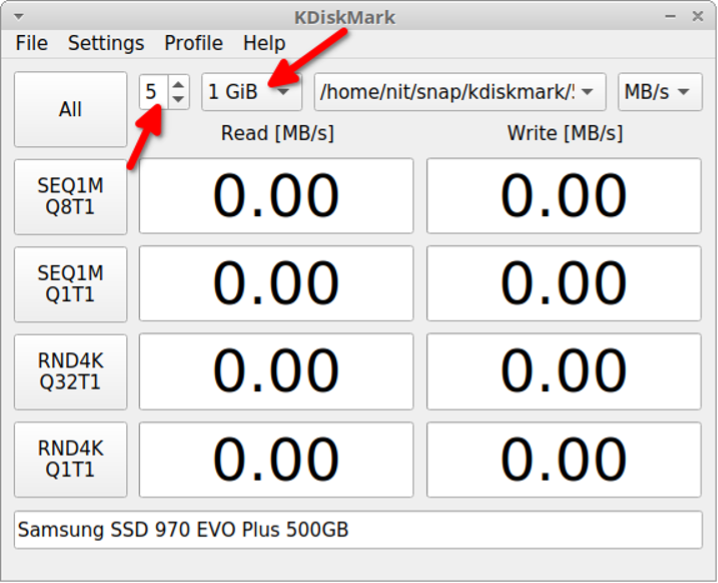
Next to the “All” button, you will find a number counter that can be used to specify the number of passes for read or write cycles. Just adjacent to this field, you can choose block size for each read and write test cycle. So with a block size of 1GB, the read and write tests will be performed 5 times, with a default time interval of 5 seconds between each test.
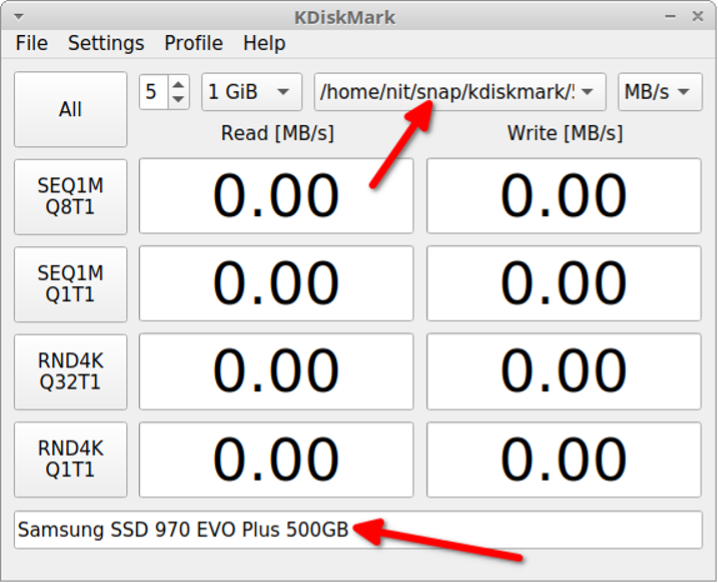
Next to the block size drop down menu, you will be able to pick a directory where you want to perform read and write tests.
Beware that these benchmarks will completely erase contents of the selected directory, so choose a folder where you have no data stored.
If you have multiple drives connected, choose the appropriate empty directory in each storage device. The bottom row will show the currently selected storage drive.
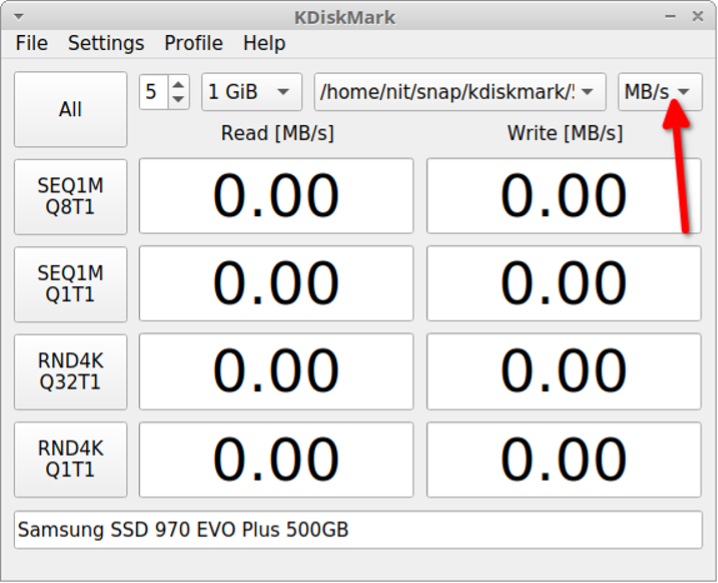
The button next to the directory picker shows the unit in which the test report will be generated. You can change it to larger memory units and IOPS (Input/output Operations Per Second) as well.
The “Settings” button on the top menu bar can be used to configure the number of threads, queued operations, and time interval between read and write tests.
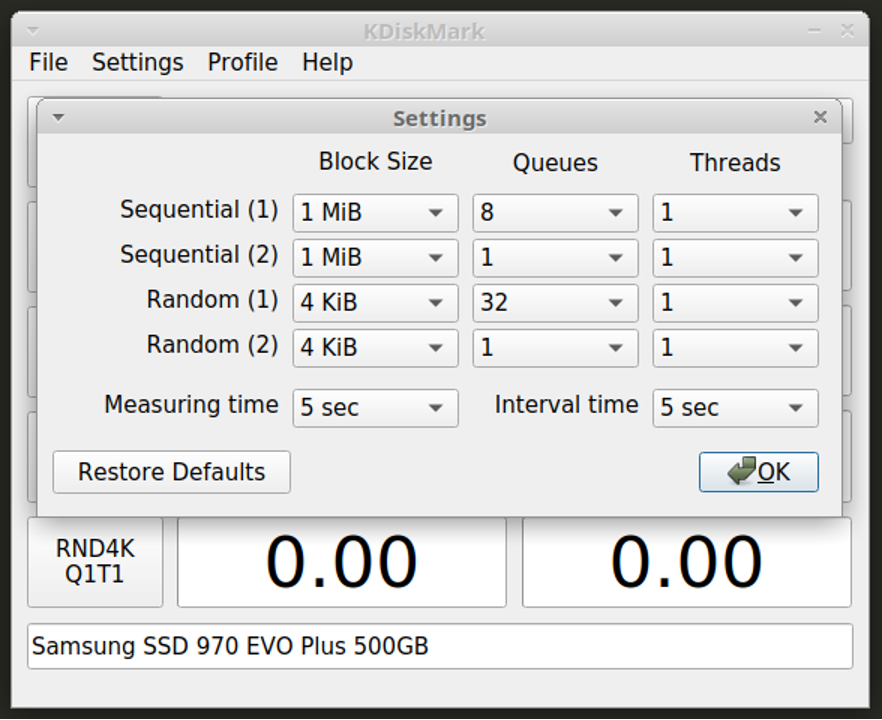
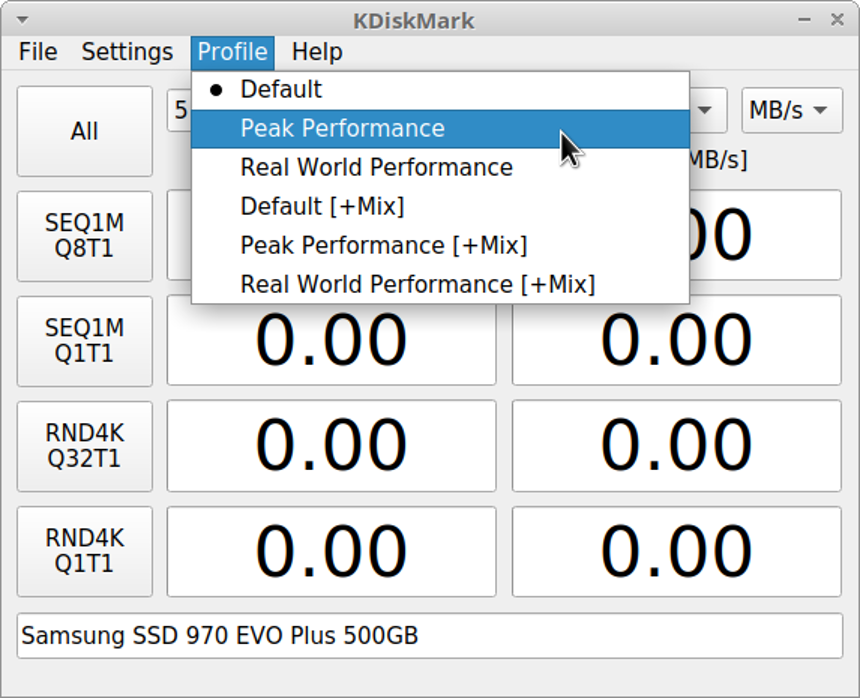
The “Profile” button on the top menu bar allows you to pick up certain predetermined profiles that automatically set test parameters for you. You can use them to quickly get an assessment of hard drive capabilities on your Linux system.
Once you have chosen an appropriate profile or manually changed test parameters, click on any of the five buttons on the left to begin the benchmarking process.

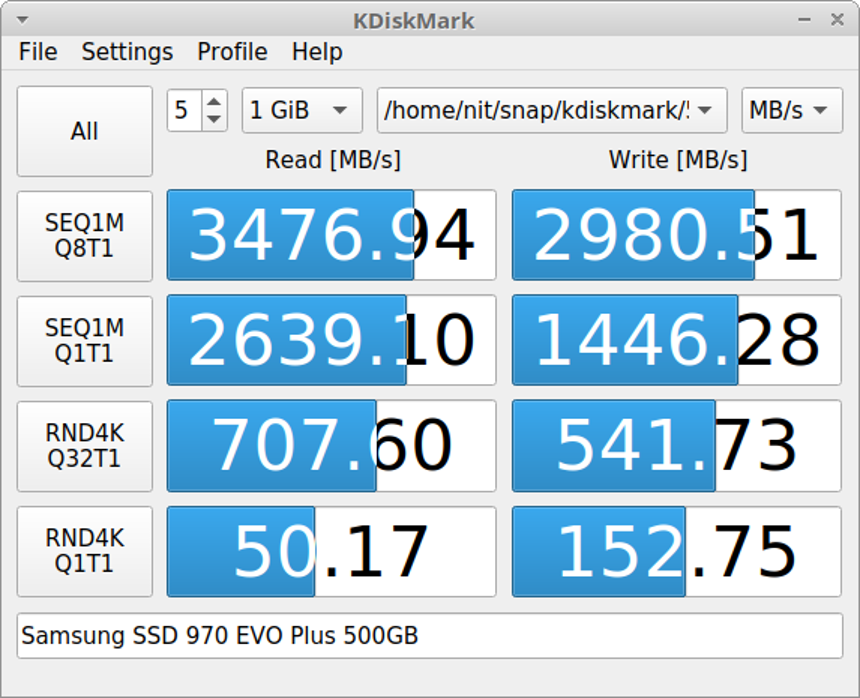
After completing the benchmarking process, you may see test results similar to this depending on storage hardware present in your Linux system.
Note that your Linux distribution may be handling power management of storage drives present in your PC. It may be possible that the read and write speeds of the storage drive are throttled based on the connected power source. If your Linux device is on battery power, you may get less read and write speeds. On the other hand, when your Linux device is plugged into a wall socket, you may get maximum speed. This is entirely based on the default configuration shipped by your Linux distribution. So you may want to run benchmarks with and without AC power connection to make better assessment of read and write speeds. It is possible to change these power management settings so that you always get maximum speed, but it is a different topic altogether and out of scope of this article.
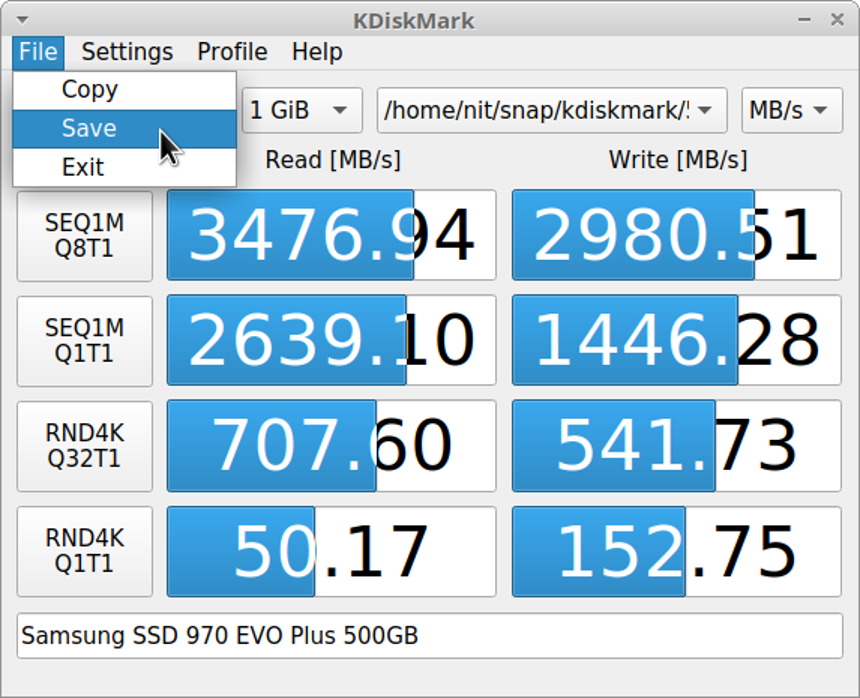
You can save a text report of benchmark results by clicking on the File > Save button located on the top menu bar.
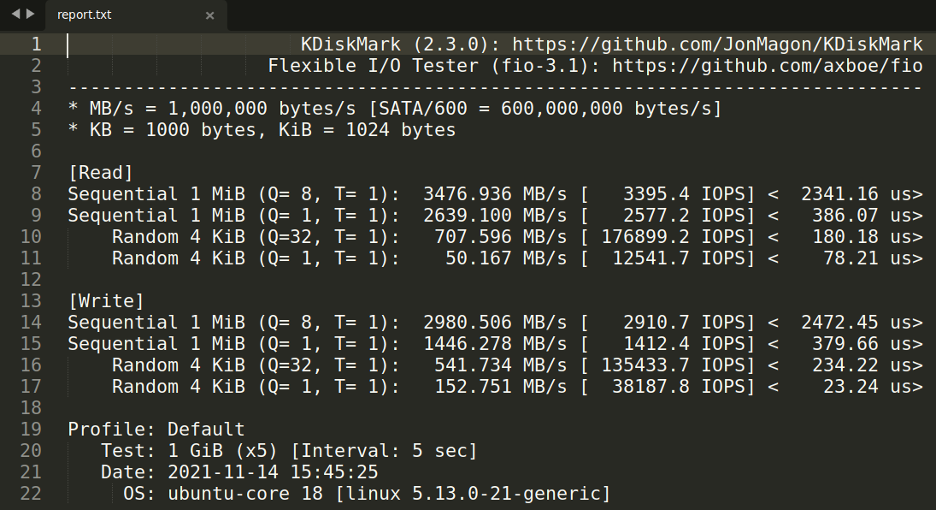
Below is a sample test report generated by KDiskMark:
Conclusion
KDiskMark is an excellent benchmarking utility to gauge performance of storage drives present in your Linux system. While Windows has many such graphical utilities, Linux doesn’t have that many dedicated graphical benchmarking utilities for storage drives and KDiskMark aims to fill that void.
from https://ift.tt/2Za6ULE


0 Comments