In this prescribed tutorial, we are going to learn the way to get pod details in kubectl. Let us begin it by following the appended below steps:
Pre-requisites
So, to get pod details using kubectl, you must have the following appended requirements completed:
- Installation of Ubuntu 20.04 Linux system
- A user with Sudo privileges
- Installation of the latest version of minikube cluster to run Kubernetes services on it
- Installation of kubectl command-line tool
- A strong internet connection
Once all of these requirements are fulfilled, you can jump to the next step described in this tutorial.
Method get pod details in kubectl
To get pod details in kubectl, you have to log in to Ubuntu 20.04 Linux system by utilizing your root user credentials. After that, to implement this tutorial, you have to get hands-on to the command-line terminal. So open it by following the shortcut key as ‘Ctrl+Alt+T’ or searching it in the applications of the Ubuntu 20.04 system. Once you get access to the terminal, start the minikube cluster by executing the displayed command.

It might take a few minutes to get started with the minikube cluster. The output displays the version of the installed minikube cluster on your system as well. As soon as it gets started, you have to create a pod in your system. So, create a file by using.YAML extension. The created file will be a configuration file. You can make it by using the terminal.
![]()
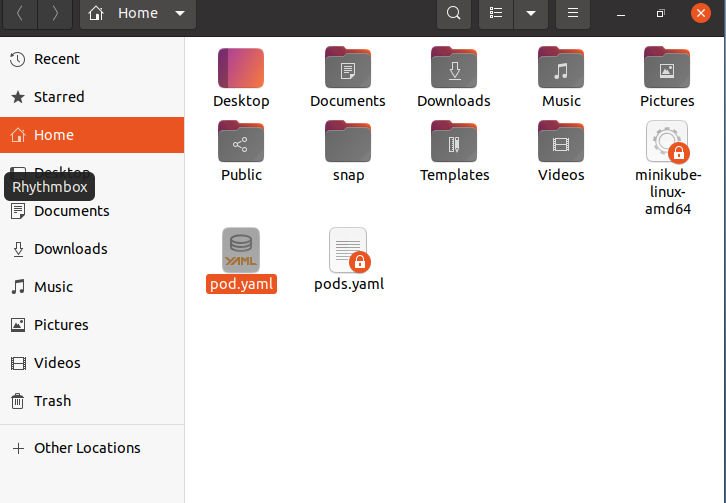
You can rename the created file as per your desire. But you have only to use it.YAML extension in it. The file will be created in the home directory of your system. We have highlighted it, as shown in the below-attached screenshot.

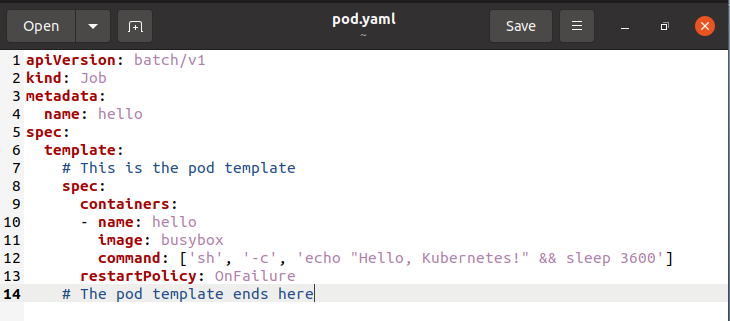
Once created, open the file in any of your desired text editors. You have to write down the same script as shown in the displayed image below.

Once writing all the content, save this file and create it by a terminal using the kubectl command.
![]()
The output clearly shows that the pod has been created in your system. To get the pod details, you have to run the command cited below in the terminal shell.

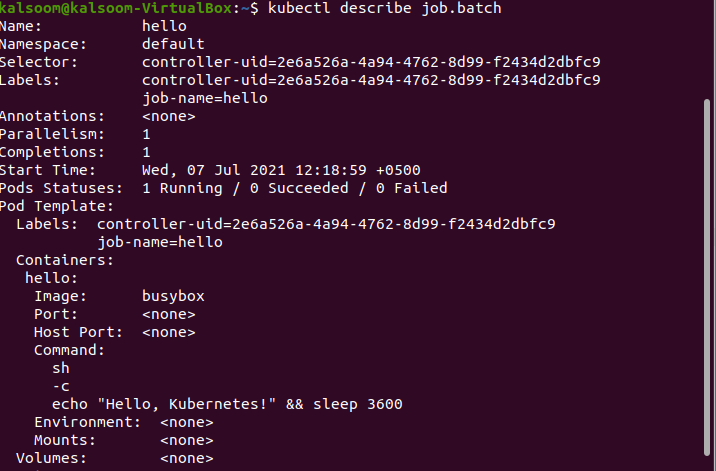
The relevant information will be displayed in the output. The sample output is also attached in the above-attached image. To get detailed information regarding any pods, you can utilize the following listed command with the kubectl keyword.

The output shall display the complete detailed report of the specific batch. The port creation and start date are also displayed.
Conclusion
A Kubernetes user needs to know the detailed information of the pods running in the system. The status of the pods is essential to check out the performance of the system. So we have tried our best to clarify the pod creation and monitoring method in detail. Now I can believe that you will have no difficulty creating a pod or checking its relevant information.
from Linux Hint https://ift.tt/3eZuyiU


0 Comments