Features
Wireshark contains several useful features, the foremost of which are listed below:
- Inspecting thousands of protocols
- New protocols being added with every update
- Live-capturing of protocols with offline analysis
- Three-way handshake
- Maximum portability: runs on Solaris, Linux, Windows, MAC OS X, FreeBSD, and more
- Analyzing VoIP protocols
- Reads data from many platforms, i.e., Wi-Fi, Ethernet, HDLC, ATM, USB, Bluetooth, Frame Relay, Token Ring, and more
- Results can be saved in CSV, XML, PostScript, and plain text documents
- Reads and write a wide variety of captured file formats
Installing Wireshark on Ubuntu 20.04
The Wireshark utility is available on all major desktop platforms, i.e., Linux, Microsoft Windows, FreeBSD, MacOS, Solaris, and many more. Follow the steps below to install Wireshark on Ubuntu 20.04.
Step 1: Update APT
First, as always, update and upgrade your APT through the following command.
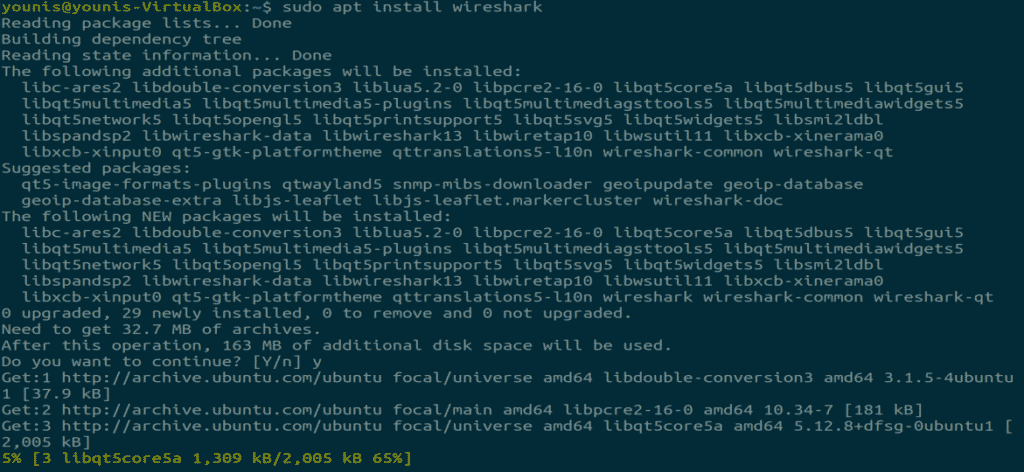
Step 2: Download and Install Wireshark
Now that Wireshark’s latest version has been added to the APT, you can download and install it with the following command.
Step 3: Enable Root Privileges
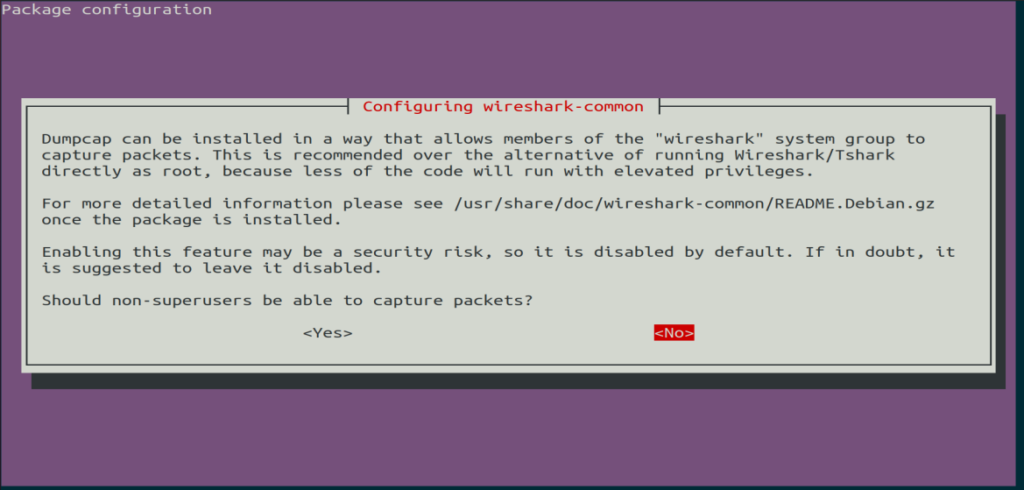
When Wireshark installs on your system, you will be prompted by the following window. As Wireshark requires superuser/root privileges to operate, this option asks to enable or disable permissions for all every user on the system. Press the “Yes” button to allow other users, or press the “No” button to restrict other users from using Wireshark.
Step 4: (Optional) Reconfigure Permission Settings
If you have selected “No” in the above scenario, then you can change this selection again by executing the following command, which will reconfigure the Wireshark permission settings.
Select the “Yes” button to change the configuration settings to allow other users access to Wireshark.
You must add a username to the Wireshark group so that this user can use Wireshark. To do this, execute the following command, adding your required username after “wireshark” in the command.
Step 5: Launch Wireshark
In the terminal window, type the following command to start the Wireshark application.
You can also open Wireshark through the Graphical User Interface (GUI) by opening the activities on the Ubuntu desktop, and in the search bar, type “Wireshark,” and click on the application result.
Conclusion
This article provided a simple, easy tutorial for installing Wireshark. Wireshark is the best tool for network analysis and packet investigation, and is an open-source and freely available network analyzing tool.
from Linux Hint https://ift.tt/3fIQHQr


0 Comments