In this article, we will explain the use of grep utility with different examples. We will use Debian 10 for explaining the commands and methods mentioned in this article.
Installing Grep
Grep comes installed in most of the Linux distributions. However in case, it is missing from your system, you can install it using the following method in Terminal:
Using Grep
Here is the basic syntax of grep command. It starts with grep followed by some options and search criteria and then ends with the file name.
Search for files
To search for a file name in a directory that contains a specific string in it, you can use grep in the following way:
For instance, to search for a filename that contains a string “test“, the command would be:
This command lists all the files that contain the string “test”.
Search for a string in a file
To search for a string in a particular file, you can use the following command syntax:
For instance, to search for a string “test” in a file named testfile1, we have used the following command:
The above output has returned the sentence from the testfile1 that contains the string “employee”.
Search for a string in multiple files
To search for a string in multiple files, you can use the following command syntax:
For instance, to search for a string “employee” in our two files testfile1 and testfile2, we have used the following command:
The above command will list all the lines that contain the string “employee” from both files testfile1 and testfile2.
You can also use a wildcard character if the all the filenames begin with the same text.
Like, if we take the above example in which our filenames were testfile1 and testfile2 , the command would be:
Search for a string in a file by ignoring the case of the string
Most often, you have encountered that when you search for something using grep but do not receive an output. This happens because of a case mismatch while searching for a string. Like in our example, if we mistakenly use “Employee” instead of “employee”, it will return nil as our file contains the string “employee” in lower case letters.
You can tell grep to ignore the case of search string by using –i flag after the grep as follows:
By using the –i flag, the command will perform the case insensitive search and will return all the lines containing the string “employee” in it without taking into account the letters are in uppercase or lowercase.
Search using the regular expression
If properly used, the regular expression is a very effective feature in grep. With the Grep command, you may define a regular expression with a starting and an ending keyword. By doing so, you will not need to type the whole line with the grep command. The following syntax can be used for this purpose.
For instance, to search for a line in a file named testfile1 that starts with the string “this” and ends with the string “data”, we have used the following command:
It will print the whole line from the testfile1 containing the expression (starting keyword “this” and the ending keyword “data”).
Print particular number of lines after/before the search string
You can also display the specific number of lines in a file before/after a string match along with the matched string itself. The following syntax can be used for this purpose:
It will display N number of lines after the string is matched in the specified file including the matched string.
For instance, this is our sample file named testfile2.
The following command will output the matched line containing the string “employee”, along with the 2 lines after it.
Similarly, to display N number of lines before the matched string in a specific file, use the following syntax:
To display N number of lines around the string in a specific file, use the following syntax:
Highlighting the search
Grep by default print matched lines but does not show which portion of the line is matched. If you use –color option with grep, it will show where the machining strings appear in your file. Grep by default use the red color for highlighting.
The following syntax can be used for this purpose:
Counting the number of matches
If you want to count how many times a particular word appears in a specific file, you can use the grep with –c option. It returns only the number of matches rather than the matches itself. The following syntax can be used for this purpose:
This is our sample file looks like:
Following is an example of a command that returned the number of times the word file appeared in a file named testfile3.
Inverted search
Sometimes, you want to perform a reverse search that displays all lines except that matched the input. To do so, simply use the –v flag followed by grep:
For instance, to display all the lines in a file testfile3 that do not contain the word “account” in them, we have used the following command:
Using Grep with other commands
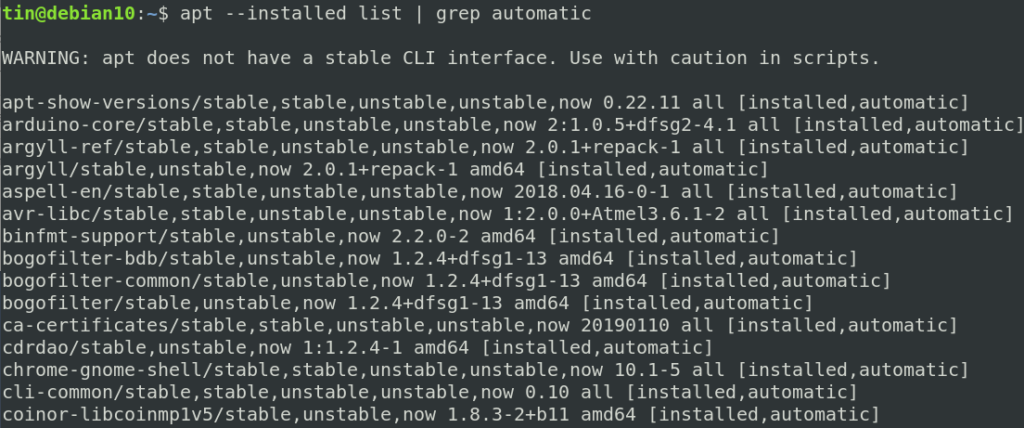
Grep can also be used to filter out the required result from different commands output. For instance, from the “apt –installed list” command output, you want to find only the packages that were installed automatically, you can filter out the result using grep as follows:
Similarly, lscpu provides detailed information about the CPU. If you are just interested in the information regarding the CPU architecture, you can filter it out using the following command:
In this article, we have described some examples that will help you in understanding the grep commands and its use in different conditions. Having a strong grip on grep command can save a lot of time if you need to look at large configuration or log files and skimming useful information through them.
from Linux Hint https://ift.tt/37BBJb2


0 Comments