This guide will showcase how to install and use VirtualBox on openSUSE.
Virtualization and VirtualBox
Here’s a quick example that implements virtualization. Did you ever try running Android on your PC? Android emulators are handy tools that allow running Android apps on your PC. Here, the emulator software creates a virtual machine on which the Android OS runs.
It’s an oversimplified workflow of how the Android emulators work. When you run any of those emulators, it allocates the existing hardware resource (CPU, GPU, RAM, and storage) to an Android OS and interfaces you with the virtual system. You have full control over how much CPU, GPU, RAM and storage it’ll consume.
Virtualization started early in the 1960s where the goal was to logically divide the hardware resource of mainframe computers to different apps. Here’s a short list where virtualization is currently used.
- Memory virtualization is a useful technique for sharing RAM resources between all the virtualized systems from a single memory pool.
- Storage virtualization abstracts logical storage from physical storage.
- Storage virtualization is useful for abstracting the need of physical storage. The virtual disk is such an implementation where it’ll appear as if it’s a single disk irrespective of its physical location.
- Desktop virtualization is such a technology that allows creating a logical desktop on top of a physical client device. This way, the hardware resource is more efficiently distributed. Android emulators can be an example of desktop virtualization.
In this article, we’ll be focusing on the last point because VirtualBox is such a tool that allows desktop virtualization on your PC.
Why use VirtualBox
The features of VirtualBox are useful in a number of situations. For example,
- Running multiple OS: Using VirtualBox, you can run multiple machine with different OS at the same time. You can switch quickly from one OS to another seamlessly. You have full control over what “virtual” hardware each virtualized system gets.
- Testing: Using VirtualBox, you can have a safe environment to test anything you want. As you’re making changes to the virtual systems, there’s no threat of breaking down your current system. Personally, I use VirtualBox for testing new Linux distros and trying out critical system tweaks.
- Simplicity: Among all the virtualization tools out there, VirtualBox is one of the simplest ones to learn and master. While it’s not the best, it’s probably the easiest way to get accustomed to the world of virtualization. It’s free of cost and you can play around without breaking down your computer.
- Easier deployment: Let’s take a complete mail server for example. Setting a mail server on a real machine is a tough job. However, it can be run directly from the virtual system without the need of making any changes to the host. VirtualBox allows exporting virtual machines. Thus, the machine can even be deployed without having to go through the installation again. For example, OSboxes is such a place where you can grab VirtualBox VDIs of different OS.
Installing VirtualBox on openSUSE
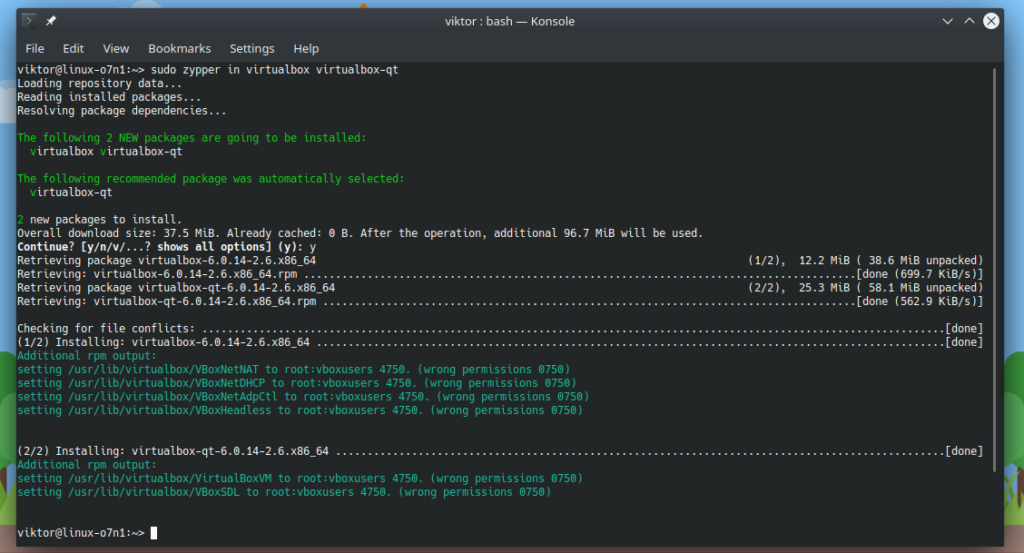
VirtualBox is directly available from the official repo of openSUSE. Run the following commands.
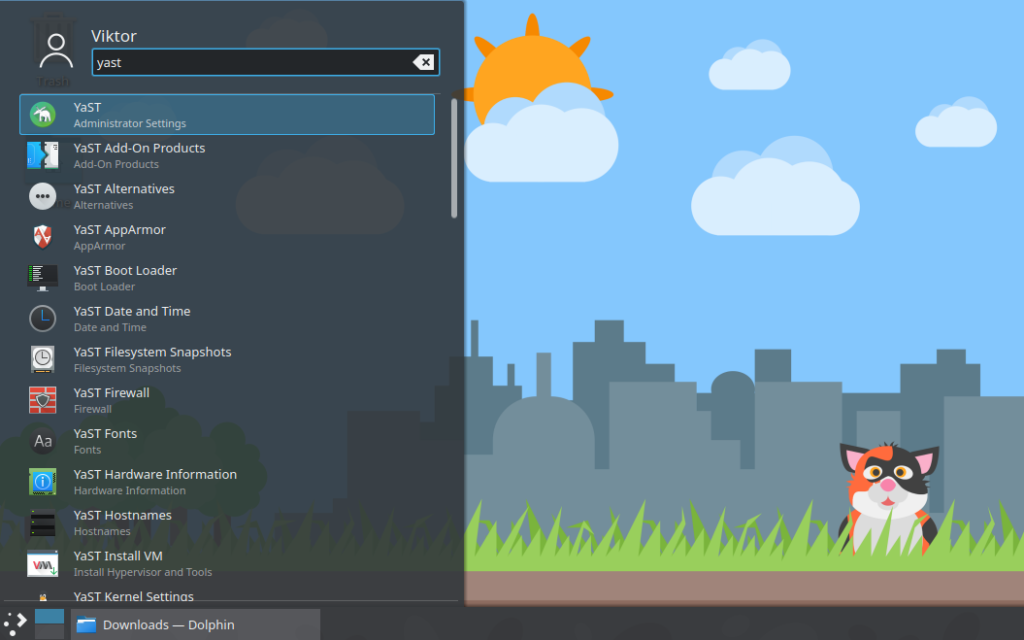
For using VirtualBox, the current user account has to be under the group “vboxusers”. We’ll be taking the help of YaST for this. Start YaST from the menu.
Enter the admin password.
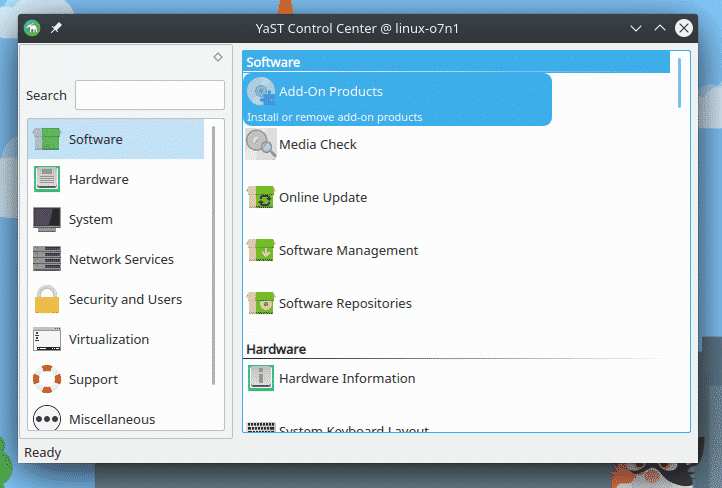
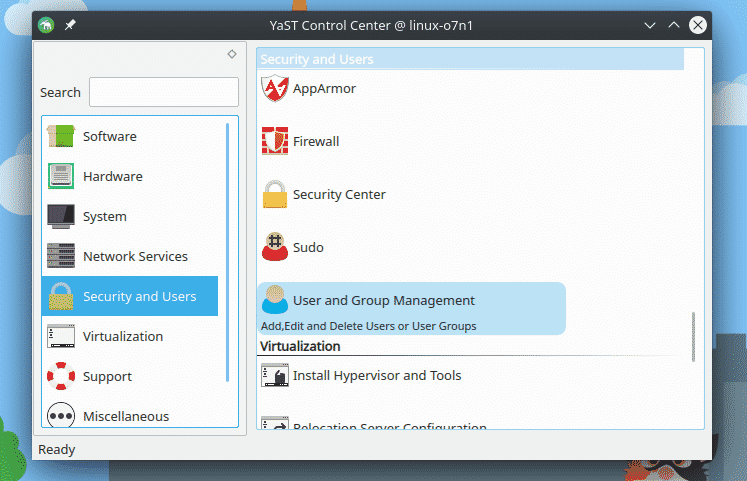
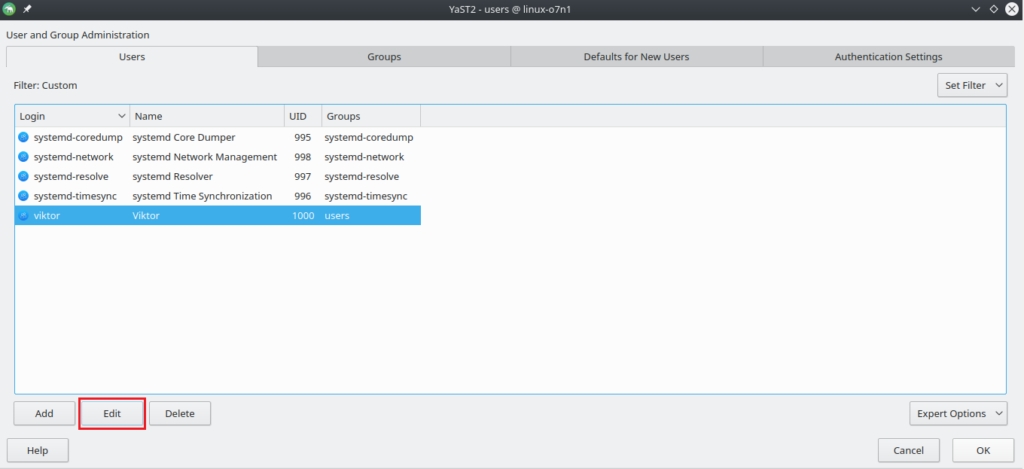
From the YaST Control Center, go to Security and Users >> User and Group Management.
Select your user account from the list and click “Edit”.
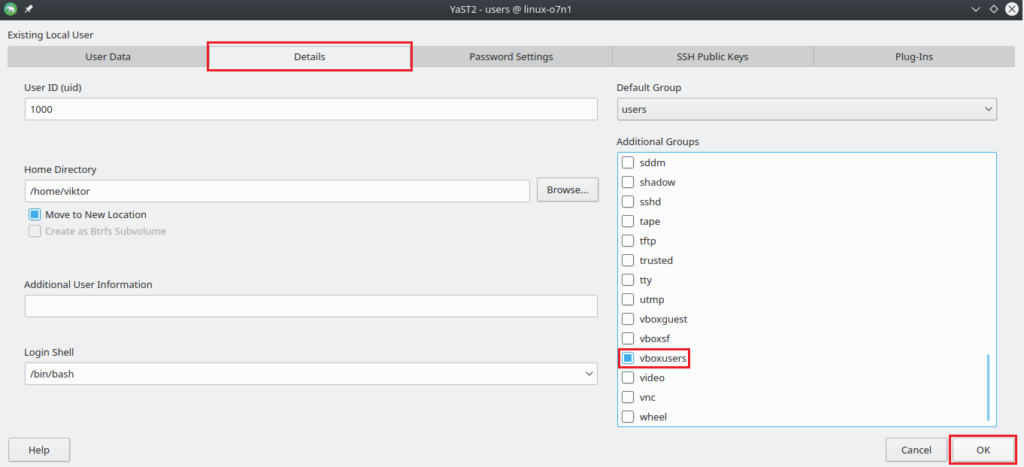
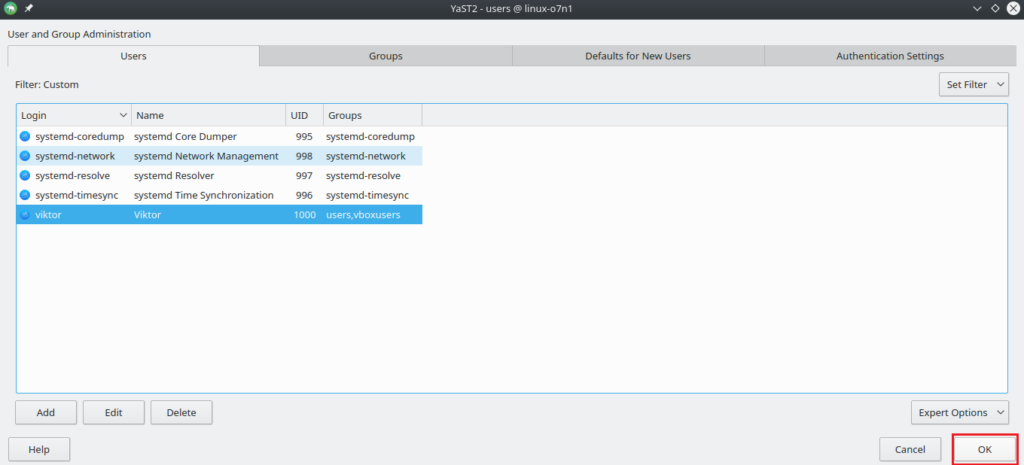
Under the “Details” tab, check the “vboxusers” group under the section “Additional Groups”. Then, click “OK”.
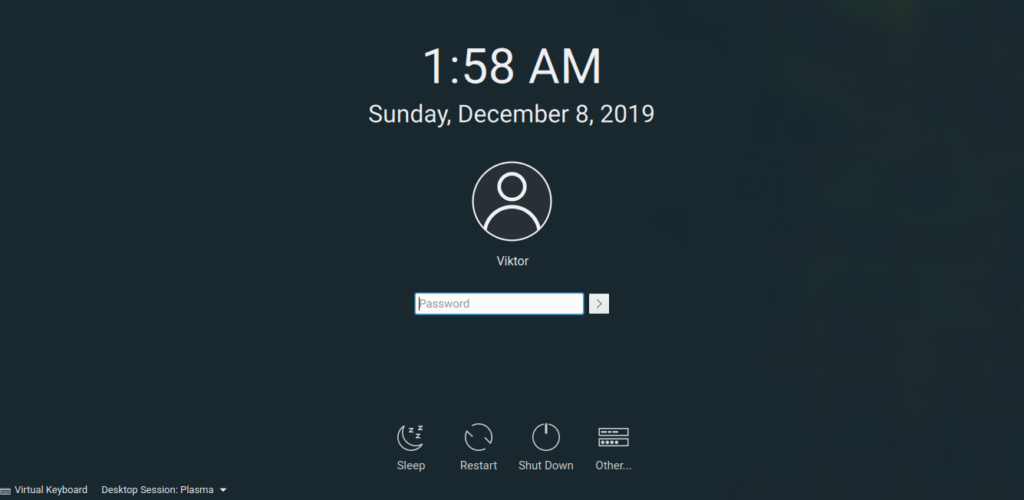
To take the changes into effect, you need to log out and log in.
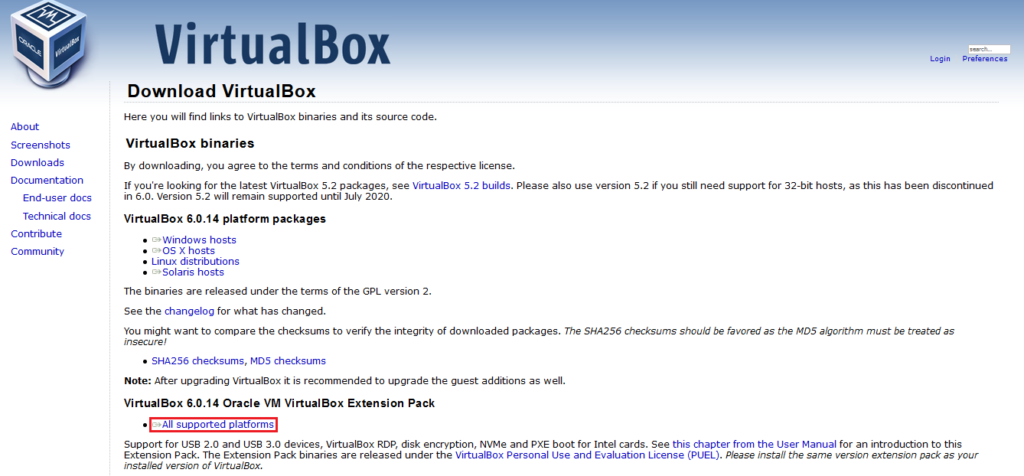
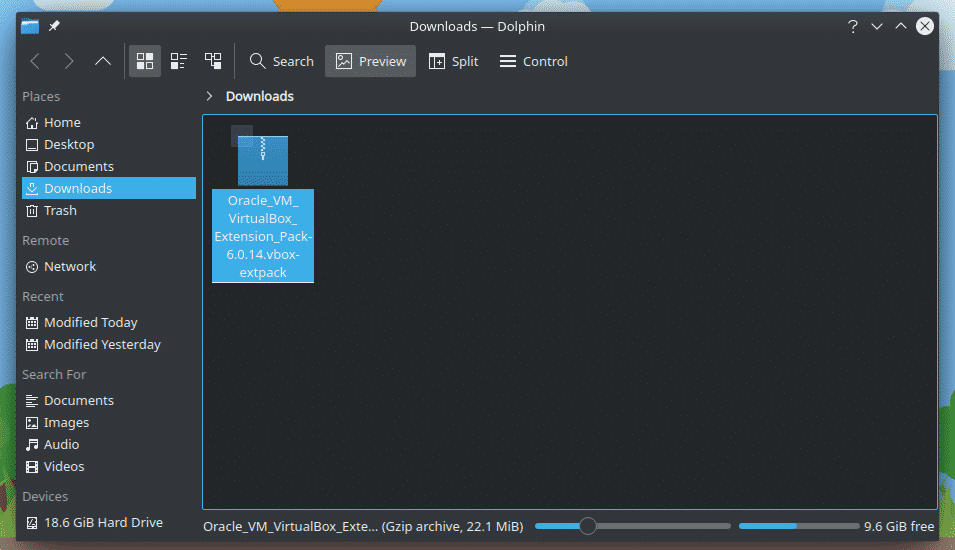
For unlocking the maximum features of VirtualBox, it’s also recommended to install the VirtualBox extension pack. Get VirtualBox Extension Pack.
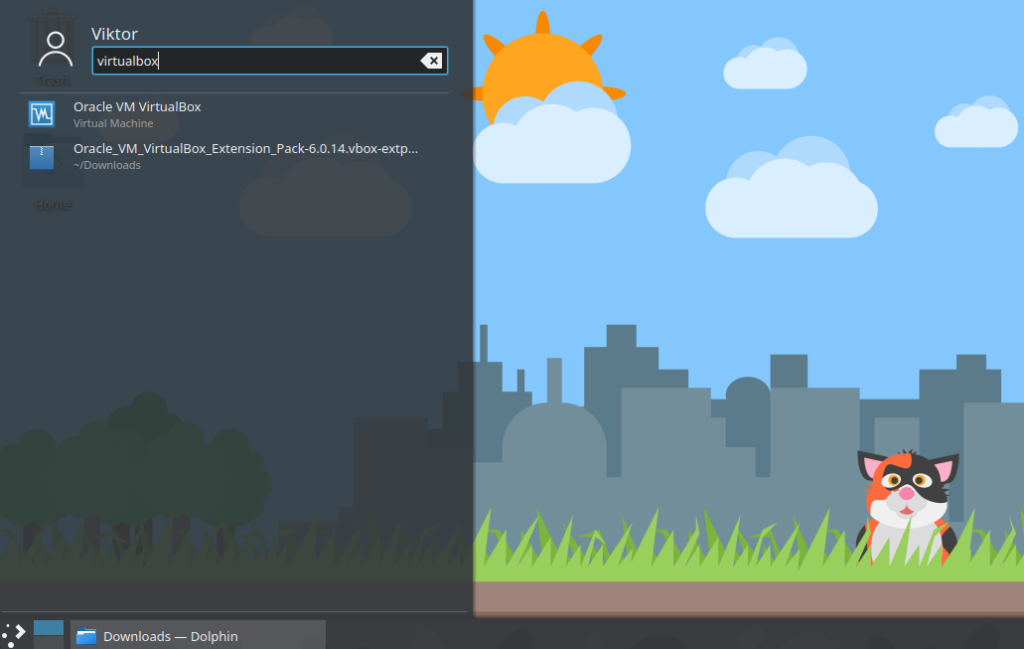
Fire up VirtualBox.
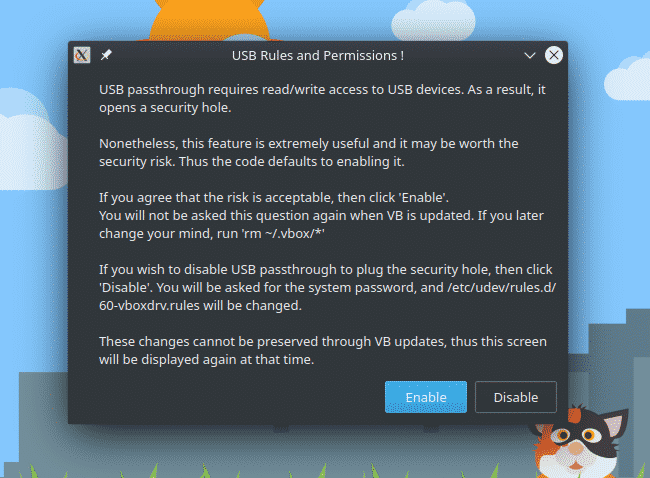
At first, you’ll have this notification. Read it carefully and make sure that whether you want to enable or disable it.
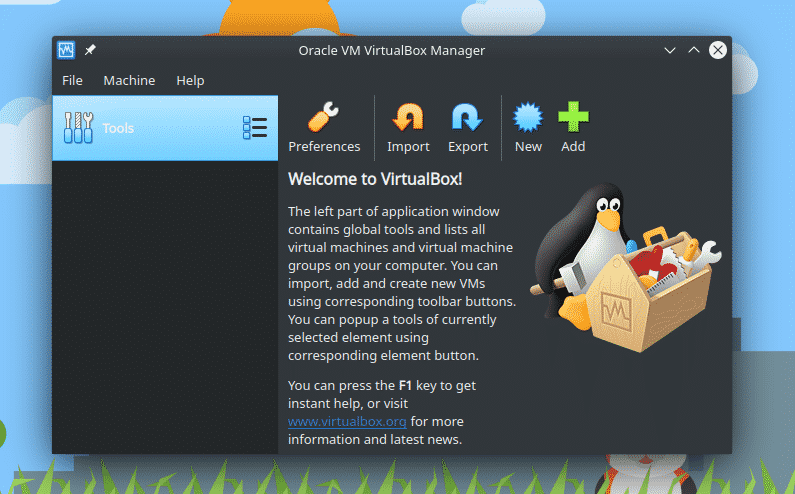
This is the main window of VirtualBox.
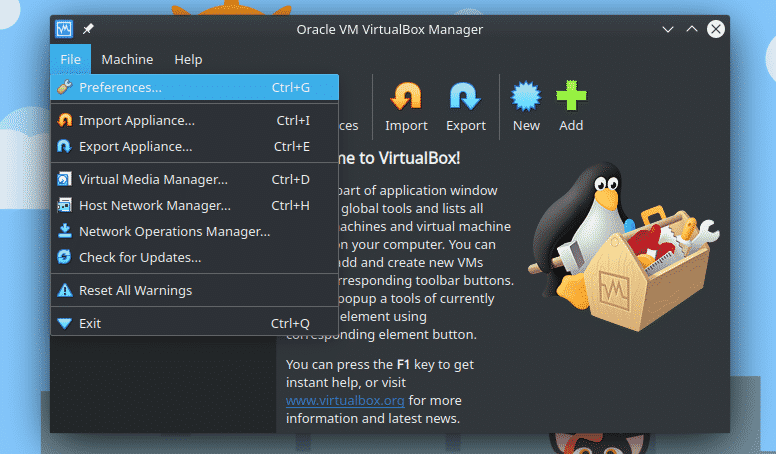
For installing the VirtualBox Extension Pack, go to File >> Preferences.
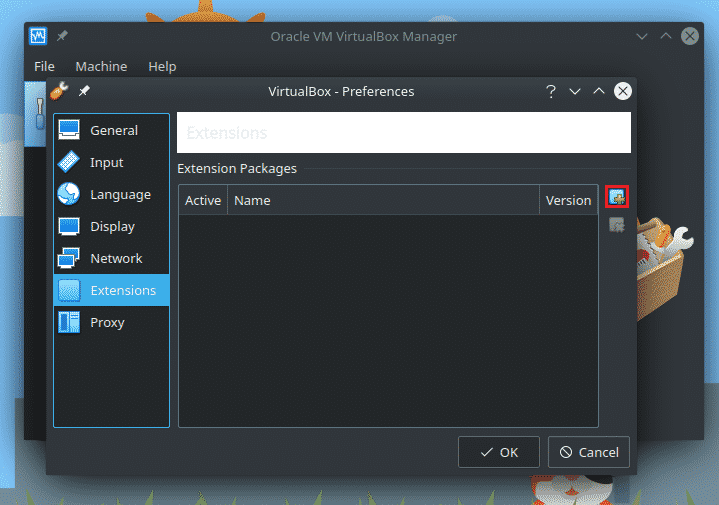
From the left panel, select “Extensions”. Click the “+” icon. You’ll be prompted to select the location of the extension pack.
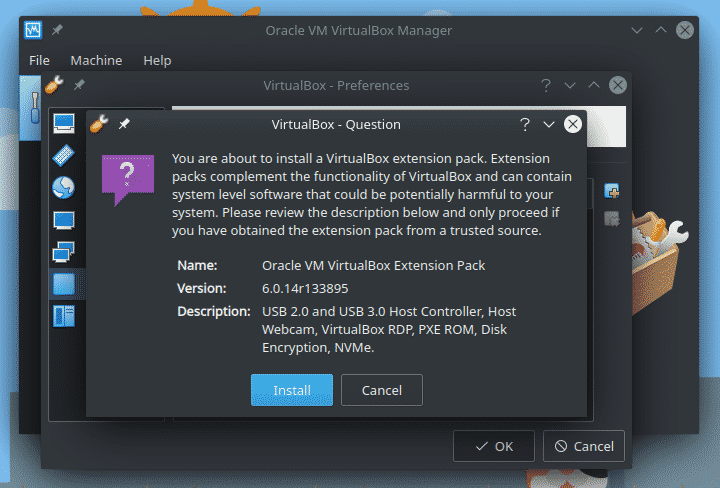
When selected, this VirtualBox “Question” dialog box will pop up. Click “Install”.
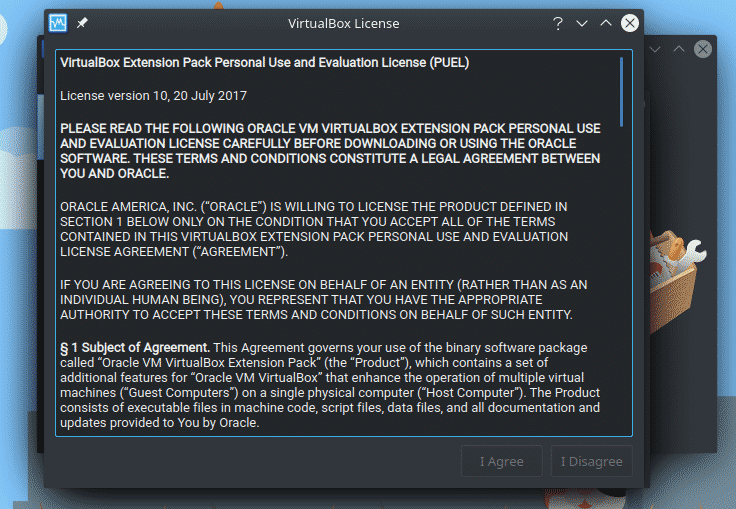
You’ll be prompted with the VirtualBox Extension Pack license agreement. Scroll to the bottom to agree with it.
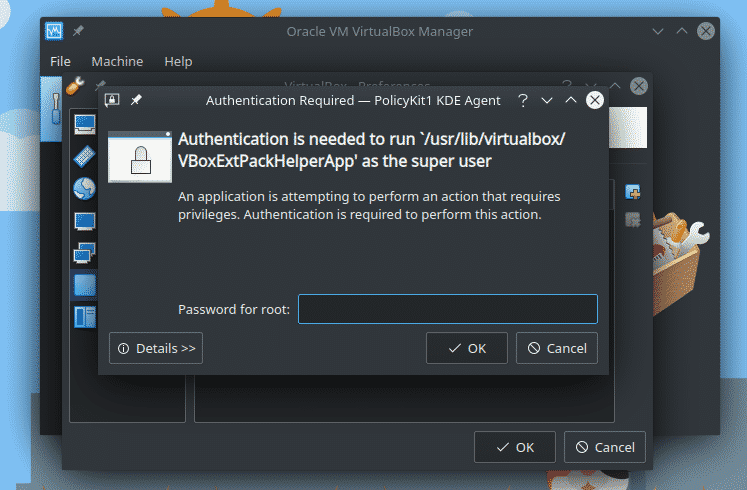
The action will require “root” permission.
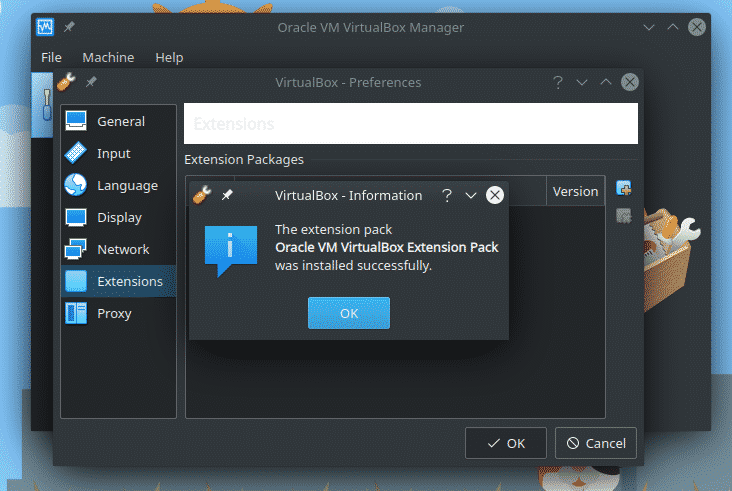
Once the installation is complete, the success message will pop up.
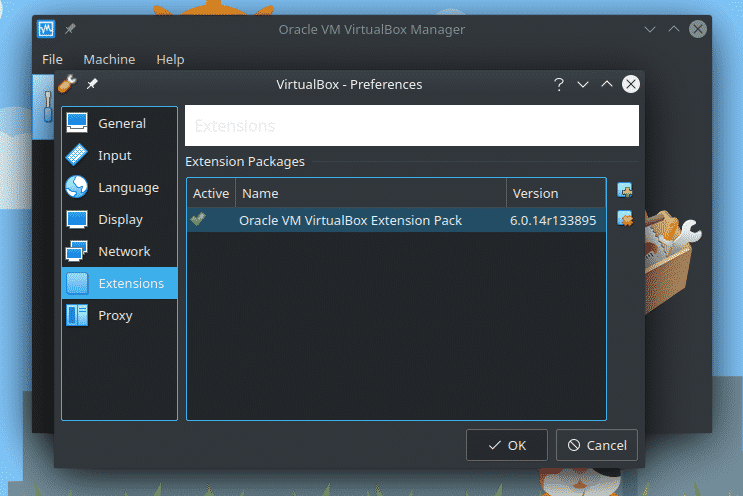
The extension pack will be added on the list of installed extensions.
VirtualBox terminology
Here are some of the common terminologies you’ll come across when dealing with VirtualBox and virtualization in general.
- Host OS: By the term “host”, we refer to the machine on which VirtualBox is running. Thus, the term “host OS” refers to the operating system that’s running the machine. In the case of VirtualBox, it can be any supported OS, for example, Windows, Linux, and macOS etc.
Interestingly, the “host” here can be physical/virtual. - Guest OS: By the term “guest” here, we regard to the machine that’s being virtualized. Thus, “guest OS” signifies the OS that’s running on top of the virtual machine. In theory, any x86-based OS will run on VirtualBox without any problem. In practice, however, not all will work properly.
- Virtual machine (VM): This is the virtualized computer that’ll act as if it’s a physical machine. In this case, we’ll be using VirtualBox to create VMs. You can configure every single aspect of the VM, for example, memory (RAM), storage, CPU, and networking etc.
- Guest additions: It’s a special package of drivers and software for the guest OS. Installing guest addition offers better integration with VirtualBox and unlock some interesting features.
Using VirtualBox
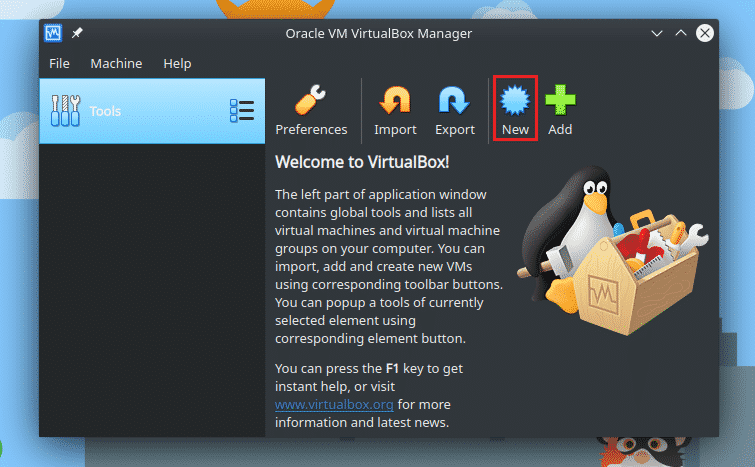
Let’s have a look at how to create a virtual machine using VirtualBox. From the main window, click “New”.
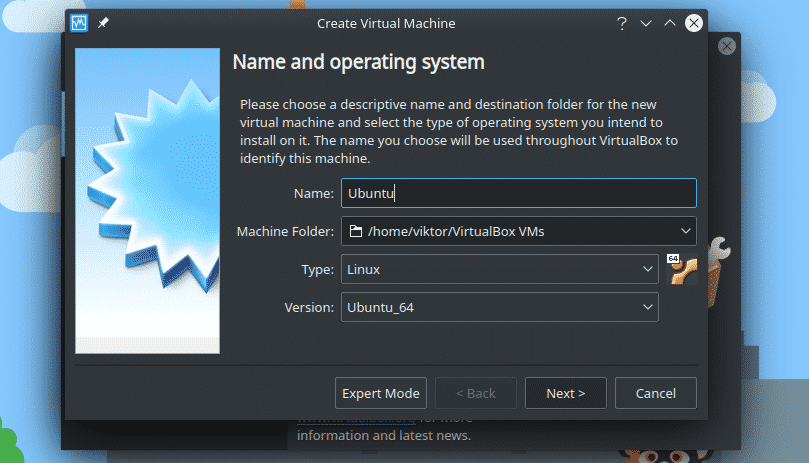
The first step is giving the virtual machine a proper name. Select the proper type of OS you’re going to run on that virtual system.
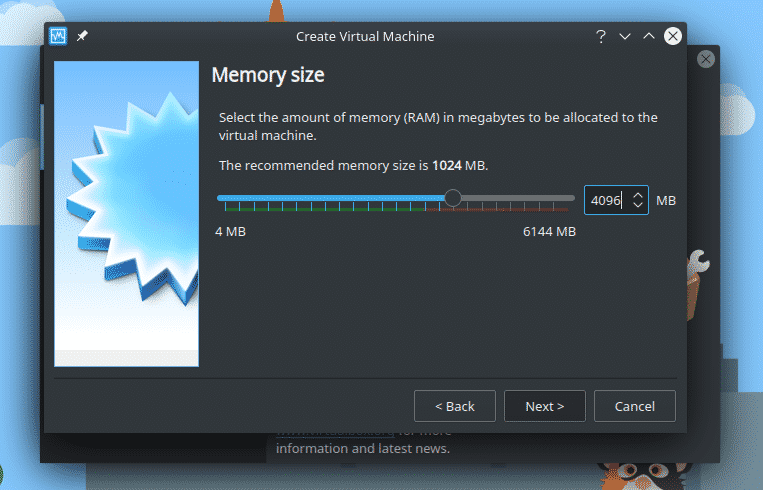
Next up, select the proper amount of RAM the virtual machine can use. This can be tricky as you have to offer enough memory to the guest OS while maintaining enough memory for the host OS to function properly.
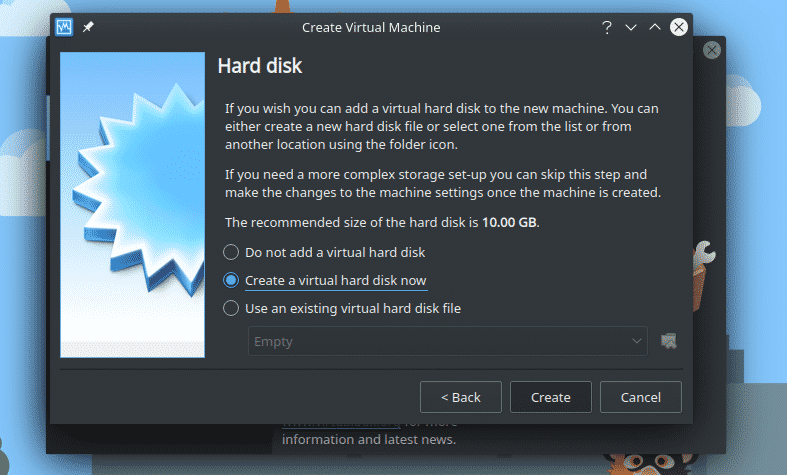
It’s time to manage the virtual storage for the virtual machine. Select “Create a virtual hard disk now”.
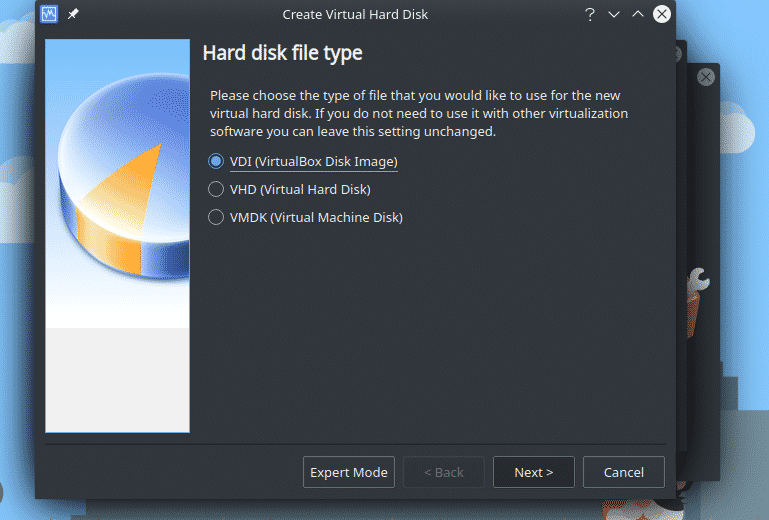
There are 3 types of hard disk file types available to choose from. For VirtualBox, I recommend going with the VDI (VirtualBox Disk Image) type.
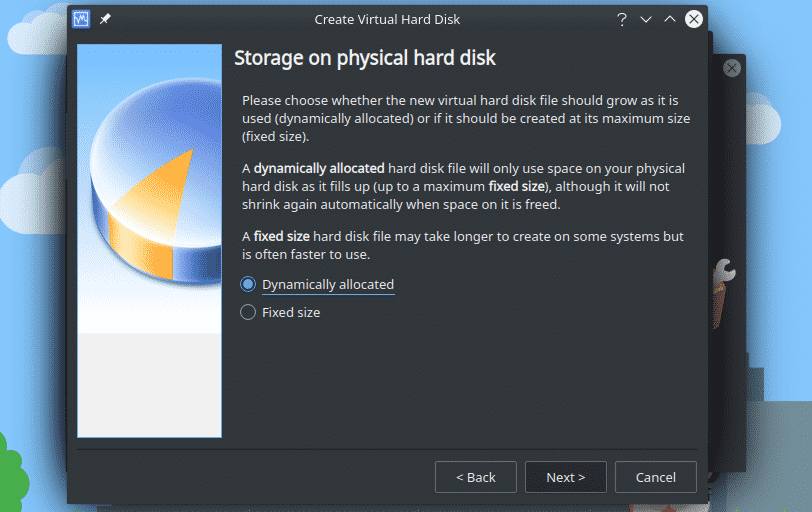
As of this step, “Dynamically allocated” means the virtual disk will expand gradually as it gets more loaded. On the other hand, “Fixed size” will allocate the fixed amount of storage directly from your storage.
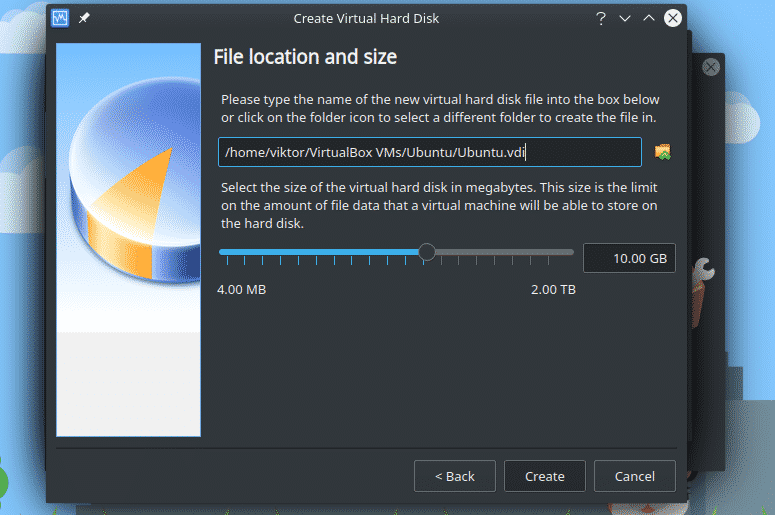
Choose where you want to allocate the virtual storage. As of the storage size, it should be enough to run the guest OS while not clogging up your physical storage.
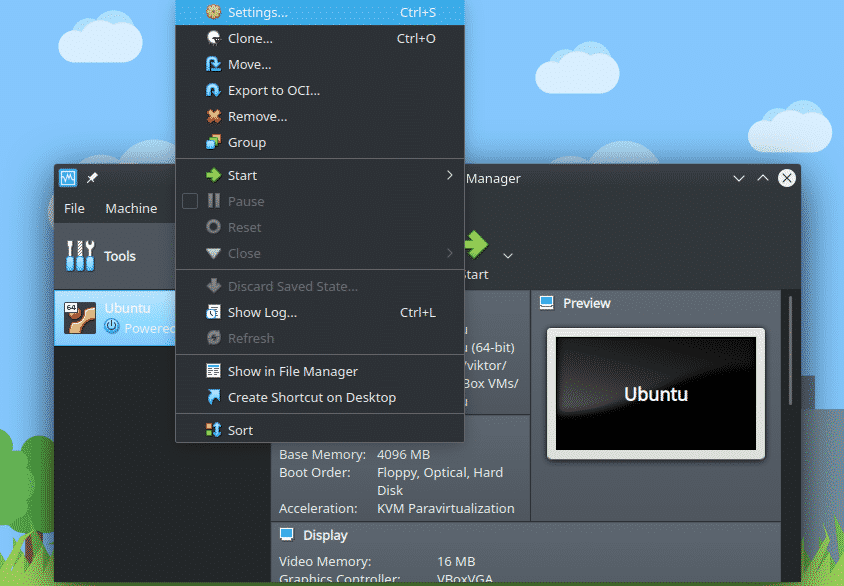
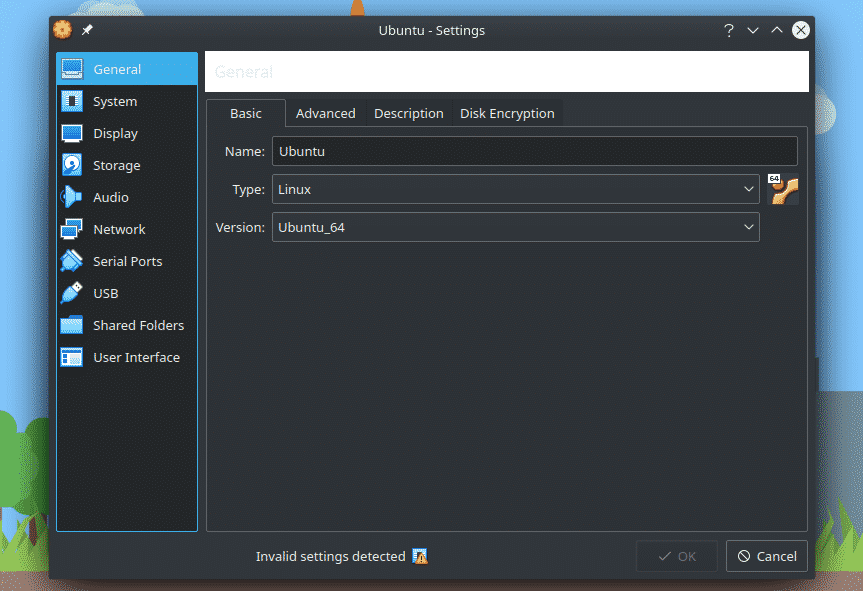
Voila! The virtual machine is ready to go! If you want to perform further customization, select the virtual machine, right-click and select “Settings”.
Final thoughts
VirtualBox is an incredibly powerful yet super-simplified virtualization tool. It’s also incredibly forgiving. Feel free to explore your way around it. We have plenty of VirtualBox tutorials.
Check out how to install Debian, CentOS, OpenStack, and FreeBSD on VirtualBox.
Enjoy!
from Linux Hint https://ift.tt/2M8ZYVm




0 Comments