The source files that are used to manage Docker containers are known as Docker images. These Docker images provide instructions to the container for managing and deploying projects. Developers work on several projects, and they occasionally need to update them. For this purpose, they also need to upgrade the Docker images. In such scenarios, it is required to specify the version of the Docker image. Thanks to Docker “tags”, which help us specify the various versions of Docker images.
In this write-up, we will demonstrate:
How to Create Image in Docker?
To create an image in Docker, first, create a simple Dockerfile. Then, utilize the “docker build” command to create a new Docker image. To do so, go through the provided instructions.
Step 1: Create Dockerfile
Create a simple Dockerfile to run a simple Python program. The file name must be stored as “Dockerfile”:
WORKDIR /src/app
COPY . .
CMD [ "python", "./pythonapp.py" ]
Step 2: Create Program File
Next, create another file named “pythonapp.py” with the program code:
Step 3: Build Docker Image
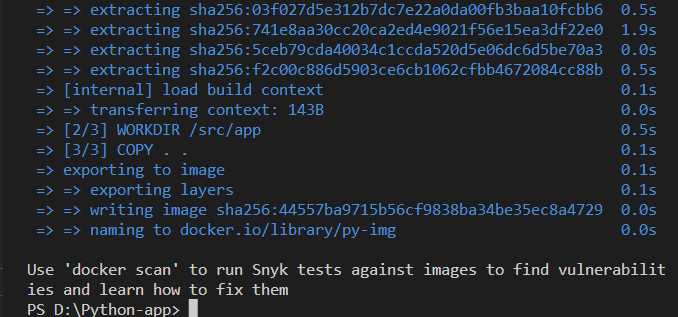
Build the new Docker image through Docker “build” command. Here “-t” option is used to specify the image name:


Step 4: Build New Tagged Image
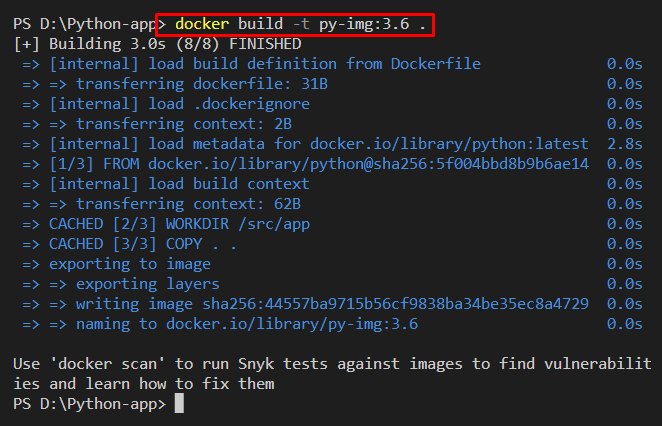
Users can also specify the image version or tag the image while creating a new image using the provided command. Here, the image name is specified as “image-name:tag”:
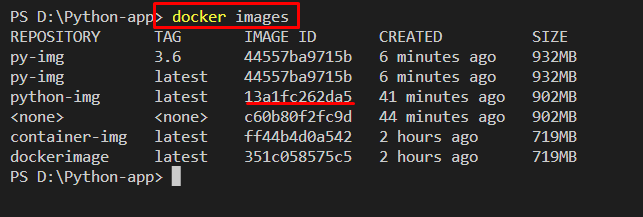
 Next, list down all images to verify if the Docker image is created or not:
It can be observed that we have successfully created a docker image along with the tag “3.6”:

Note: If we do not specify the tag of the image, then the default value of the tag will be set as “latest”.
How to Tag Docker Image?
The version of an image can be specified using the Docker “tag” command. Developers often upload images to the Docker registry with the same name. However, updated images can be identified by unique versions. The syntax used to tag the image is as follows:
Look at the provided instructions to tag the images in Docker.
Step 1: List All Images
First, list down all images and note the id of the image you want to tag:

Step 2: Tag the Image
Utilize the “docker tag” command along id of the image you want to tag, the new image name, and tag value:

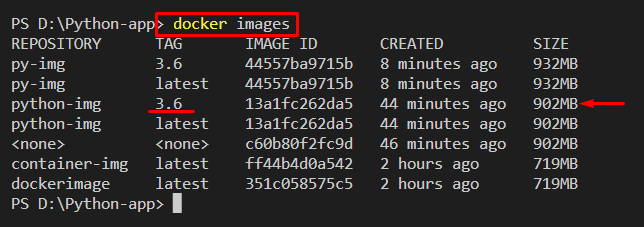
Again, list down the Docker image to confirm if the image is tagged or not:

Step 3: Tag the Already Tagged Image
You can also tag the image which is already tagged, as shown below:
We have demonstrated how to create and tag images in Docker.

Conclusion
Docker “tag” command is used to specify the version of the image or tag the image. Users can also specify the image version while building the new image. To tag the already built image, utilize the “docker tag <image-id> <new-image-name>:<tag>” command. This write-up has demonstrated how to Docker an image and how to tag the image.
from https://ift.tt/be3ykoG


0 Comments