Let’s talk about the integration model that continues the project of software requiring a stable and permanent version of the code so, in the maven building tool, we can perform this software continuous automation of the process by creating the stable version of the build. We will be discussing the method of installing maven in the smooth steps for better understanding.
There is a thing that we cannot install maven directly from anywhere, there is no option like that. We have to extract it and then add its location into our system environment variable. There are some important requirements that the system should meet before the maven download. The requirement includes a good internet connection, running laptop, access to cmd, and java installed of any version that has been set up with the environment variable set up with java. The following is the method we will be implementing for the installation process of maven in java.
The installation process of maven in Windows 11 includes the following:
- Creation of system variables.
- Verification of the maven installation in Windows 11.
- Creation of a first project.
Method # 01: Creation of System Variable
For the creation of the system variable in Windows 11 for the maven, installation is as follows.
Step # 01:
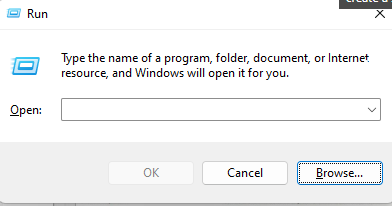
First, we have to open the run command by pressing “Windows + R”.
Step # 02:
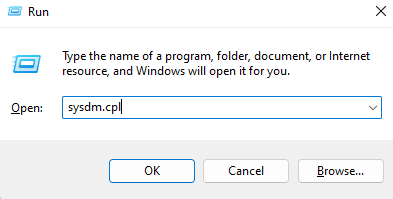
The box will appear to write the “system. cpl” in the bar there with the Open tab.
Step # 03:
After inserting the command, press the “enter” key. The system properties Window will be opened.

Step # 04:
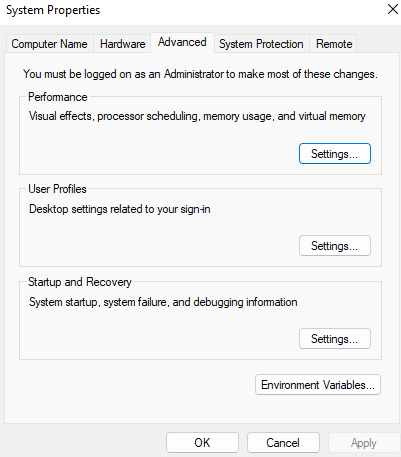
On the system property Window, click on the “advanced” tab at the third option at the top after “hardware”.
Step # 05:
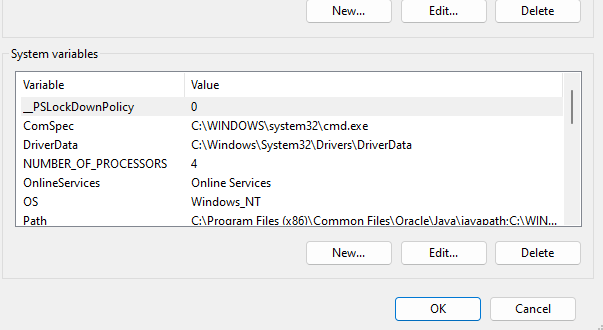
From the advanced tab, go to the environment variables at the end showing up. Click it. A Window like this will pop up:
Step # 06:
Hover the cursor to the new button and click it.

Step # 07:
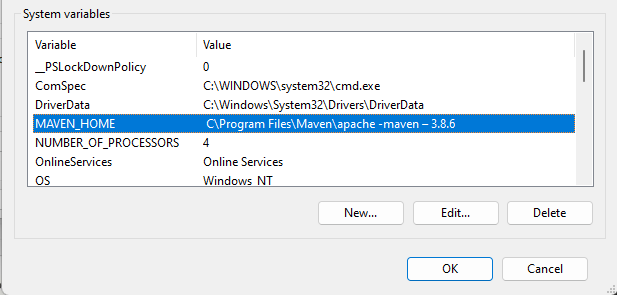
As we are now creating a new variable for the installation of maven in Windows 11 so, after clicking the “new”, a Window will show which will ask for the variable name and the variable value to insert. We have to name it as we are doing here for the maven. So, the name of the variable should be “MAVEN _ HOME” in capital letters as shown.

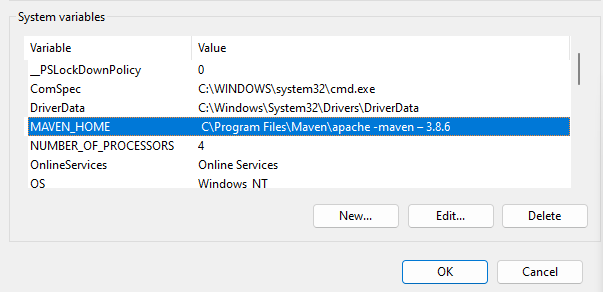
The value of the variable we add should also be the same as the one we added as “ C\Program Files\Maven\apache -maven – 3.8.6”. The image shows the example of the implemented one.
Step # 08:
Now, click on the “ok” after inserting the variable name and the variable value. As we click the “ok” button, we will see the file created in the system variables in the “c” folder by the name we have given.
Step # 09:
Click on that created file of “MAVEN _ HOME” from the system variables list and then click edit. Press the apply button from the options and close the system properties screen.
Verification of the Maven Installation in Windows 11:
The verification is important to know that the installation of the maven is performed successfully in Windows 11. The following are steps for verifying the installation of maven in Windows 11.
Step # 01:
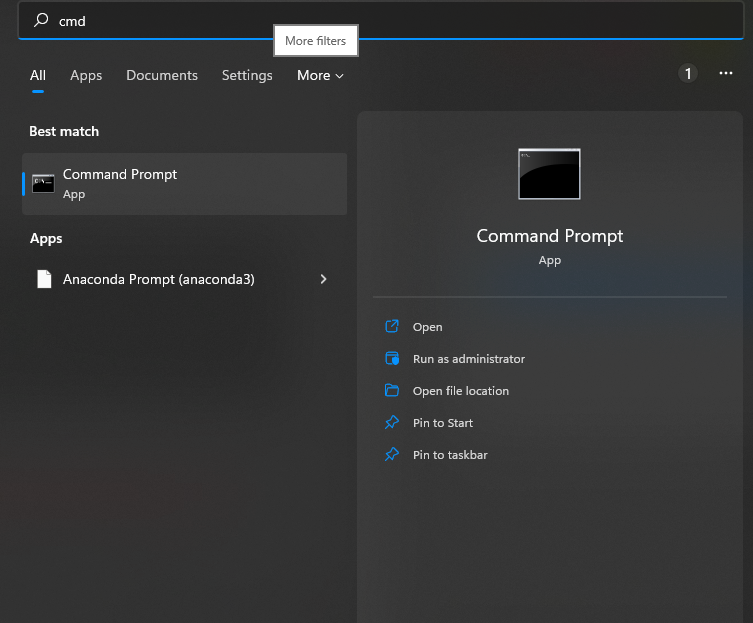
We have to open the cmd (the command prompt) in Windows 11 by searching in the search by clicking the search icon or on the start menu search cmd.
Step # 02:
In the command prompt Window write “ mvn – – version”. If the comment shows the version of maven, it means the installation is successful. And if the comment shows something with the internal-external file not recognized, operable program, or batch file.

Project in maven for the first-time usage:
The users who have worked on the maven should already know about the creation of the project in maven. But those who are new to working in the maven and using it for the first time should first go to the “apache” website and search that on Google. This will provide a lot of knowledge about the usage process and functions of the maven in Windows 11.
Creating a Project on Windows 11 in Maven:
In the command, the terminal writes or just copies and pastes the following command:
“-DgroupId = com.mycompany.app ” “ -DartfactId = my-app ” “ -DarchetypeArtifactId = maven-archetype-quickstart ” “ -DarchetypeVersion=1.4 ” “ -DinteractiveMode = false ”
We can even replace and add the value as per the choice and the requirement needed in the id of the group, the id of the artifact, and the other values.
Tip:
Here is a quick tip that many do not follow as they are entering the correct commands but still face the error. So, the problem is that they do not insert the command with the inverted commas in Windows. Windows users face this difficulty of error. So, make sure to write the above commands not in the first and in the last one but each command should start and end with an inverted comma to avoid errors. The app directory used for the commands is the “my – app”. If we are stuck anywhere in the creation of a project, follow the official documentation on the maven projects building where we get all the solutions we want according to the problem.
Conclusion
The maven tool of Apache is more secure, efficient, and transparent in building the management projects of the software. In this tutorial, we have gone through the complete installation process of the Maven in Windows 11 and talked about the requirement list check. We have done the verification of the maven installation as well that it is installed with success and no error occurs. Also, we have explained the basics of the creation of the project as someone is trying the maven tool for the first time and that information will help them. So, with all that information, we are done with all the possible ideologies we can talk about.
from https://ift.tt/gr1AbKJ


0 Comments