If you are looking for a way to disable Screen Blanking on Raspberry Pi, you should follow this article that will guide you in overcoming this issue on your device.
Screen blanking on Raspberry Pi? How to disable it?
There are generally two methods to disable screen blanking on your Raspberry Pi device and their details are discussed below:
1: Disable Screen Blanking on Raspberry Pi through Terminal
You can disable Screen Blanking on Raspberry Pi through terminal using the following steps:
Step 1: Open Raspberry Pi terminal using CTRL+ALT+T.
Step 2: Then, execute the following command-line to open up Raspberry Pi configuration on the terminal.
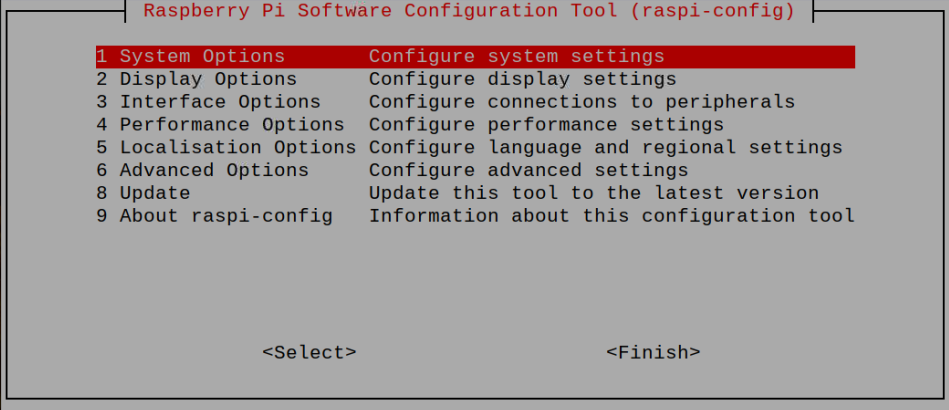
Step 3: Navigate to the “Display” option.
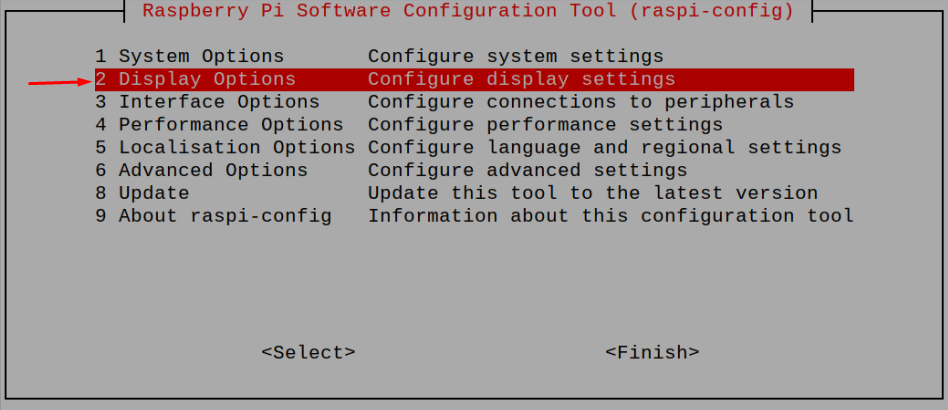
Step 4: Press Enter on the option “Screen Blanking”.
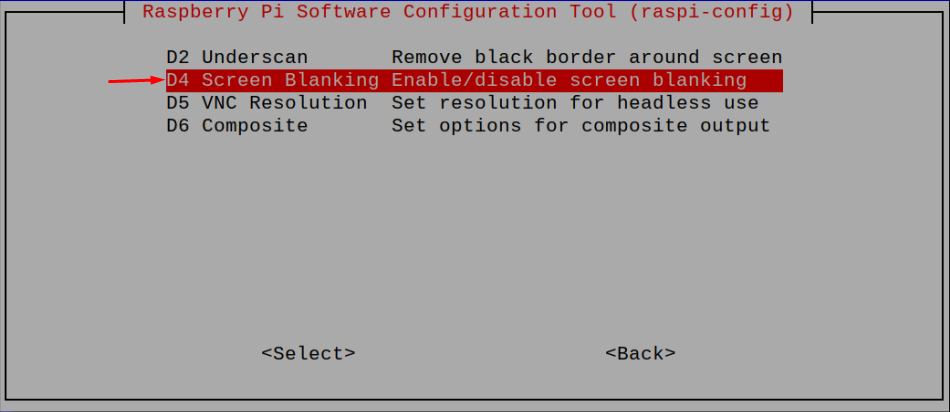
Step 5: Then disable Screen Blanking on Raspberry Pi by choosing to go with the “No” option.
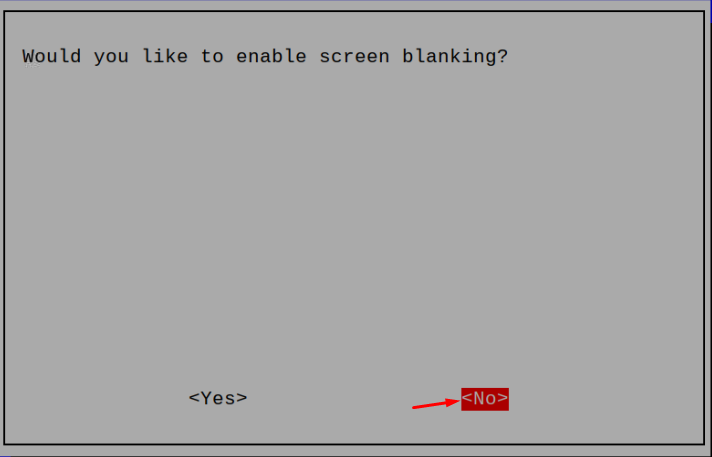
The above step will disable the Screen Blanking on Raspberry Pi.
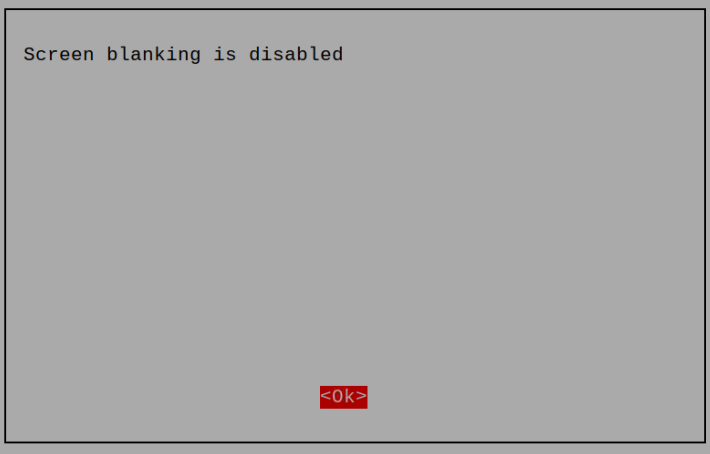
You can restart the Raspberry Pi device to enable the changes.
2: Disable Screen Blanking on Raspberry Pi through Desktop Interface
You can also disable Screen Blanking on Raspberry Pi by going into the configuration option from your desktop interface. Follow the below steps to disable Screen Blanking on Raspberry Pi through desktop interface:
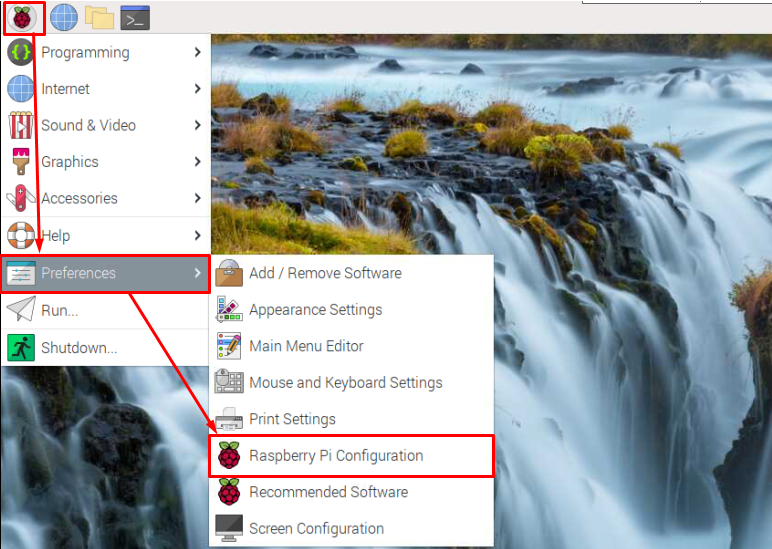
Step 1: On the main Raspberry Pi menu, find the “Raspberry Pi Configuration” in the “Preferences” option as shown below.
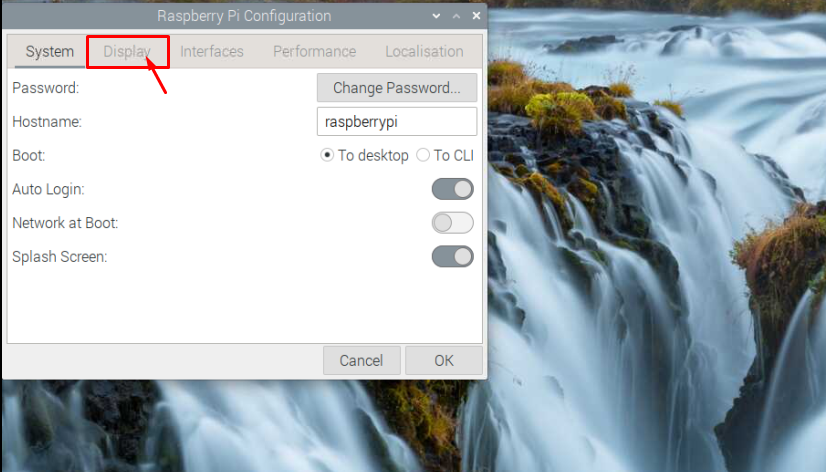
Step 2: Navigate to the “Display” option.
Step 3: Disable the “Screen Blanking” as shown below.
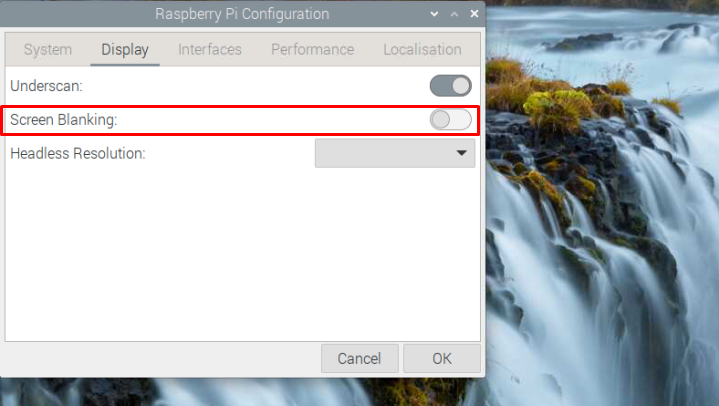
This disables the Screen Blanking on your Raspberry Pi device keeping your Raspberry Pi active for a longer time.
Conclusion
Screen Blanking feature causes your Raspberry Pi device to go into sleep mode if it is inactive for an extended period. You can disable this feature on your Raspberry Pi device from the configuration option, which can easily open either from the command terminal or through the desktop interface. Once you disable it, your device will never go into sleep mode, even if you are inactive on your device.
from https://ift.tt/v72JnRr


0 Comments