


Python is one of the most demanding languages nowadays which can be easily learned by anyone in a few days. Not only it provides you the opportunity to improve your coding skills but it also helps you to design your own applications as well. Moreover, it also helps you to interface with the tools which are connected to Raspberry Pi.
If you are passionate about programming and want to learn new things then you should definitely try to code in Python language. In order for you to begin coding in Python language you are required to have a Python IDE on Raspberry Pi. The good news for the users of Raspberry Pi is that they don’t need to install any Python IDE for that as Python is the official language of Raspberry Pi and it’s already loaded in your operating system.
In this article, you will learn how you can start programming in the Python language in Raspberry Pi.
Getting started with Python in Raspberry Pi
Here you will go through some of the steps, which will help you in starting your first code in Python language in your beloved Raspberry Pi OS:
Step 1: The first thing you need is a Raspberry Pi OS. You are going to start writing code in the Python language on Raspberry Pi. So, you must need a Raspberry Pi OS.
Step 2: The next important thing for you is to set up the keyboard setting, so that it might not disturb you in writing your code. It’s better to choose the US keyboard layout for your Raspberry Pi system. Go to the Raspberry Pi configuration option and choose the US keyboard and press ok.

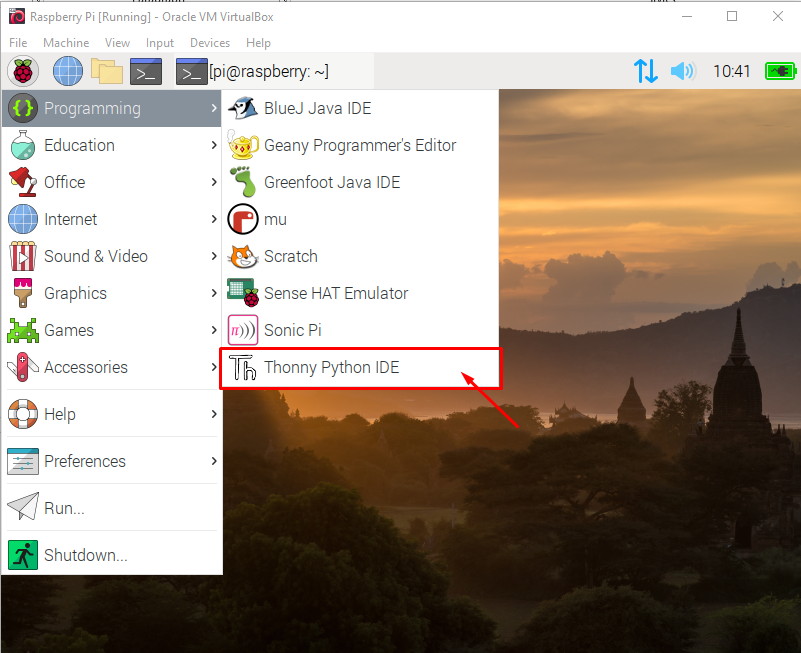
Step 3: Now you have finished configuring your Raspberry Pi keyboard setting, you can then move on to write your first code in Python. There are many IDEs available on the internet, which are used by programmers for writing the code in Python. You can install any if you want but if you are a beginner, you can start writing code in Raspberry Pi pre-installed Python IDE named as Thonny Python IDE.
The Thonny Python IDE is a fast and lightweight programming tool which allows you to write code in Python language. So, why go for other IDEs when you already have a lightweight programming tool for you to start your journey.
You can find Thony Python IDE in the “Programming” option of the Raspberry Pi. Click on the option to start writing your first code.
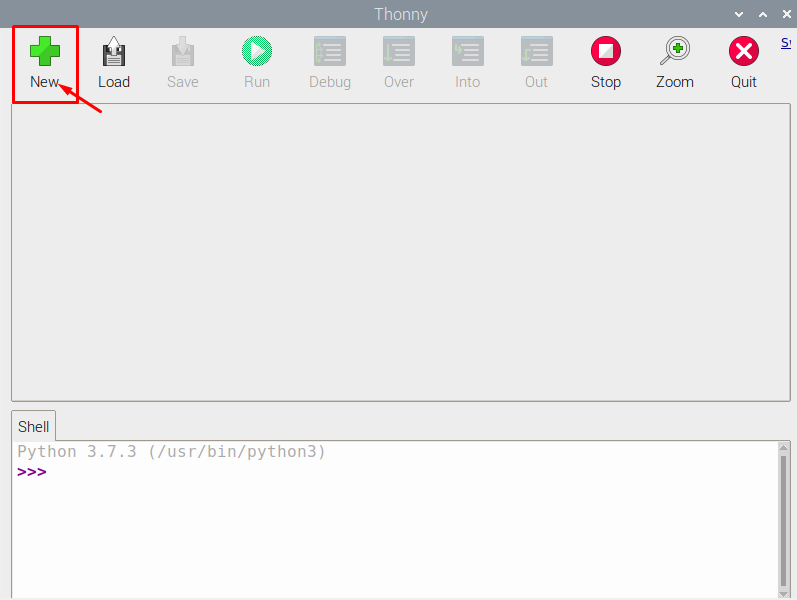
Step 4: Click on the “New” option which will open a new script for you where you can write your code in Python language.
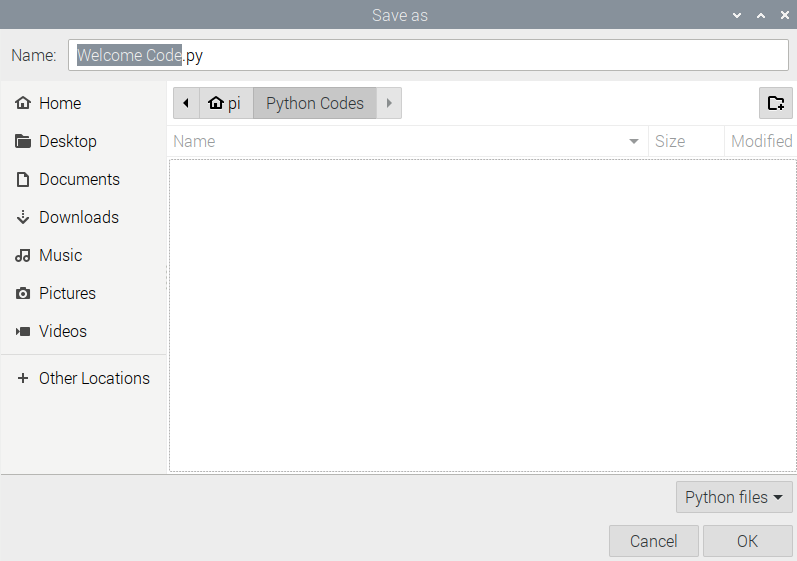
Step 5: Save the file with an appropriate name in a folder where you want your codes to be saved. It is considered a better option if you create a new folder with the name and put only codes there with an appropriate name.
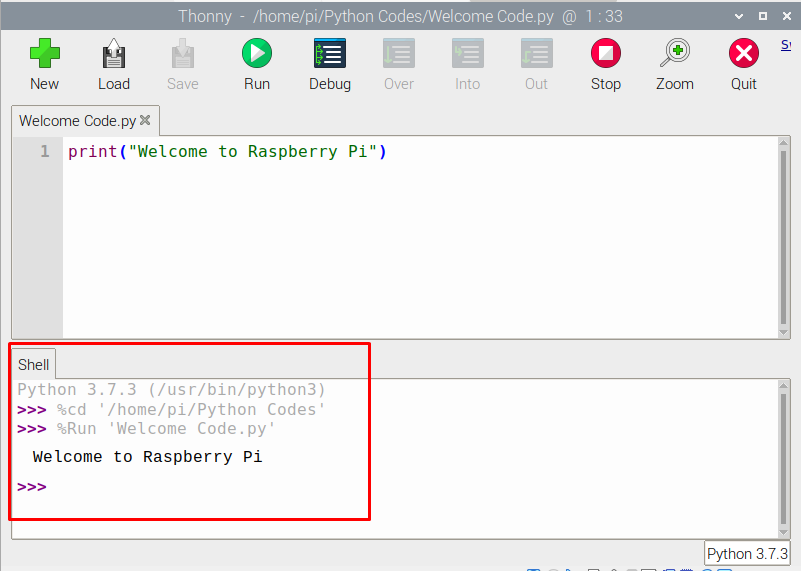
Here, I am creating a folder with the name “Python Codes” and saving the file with the name “Welcome Code”.
Step 6: Don’t use complicated code. If you are a beginner, write the simplest code possible to learn the Python language.
Step 7: Now write your first basic code to understand how you can print a message using Python language. Here in Thony, I write the below code, which prints the message “Welcome to Raspberry Pi”.
Step 8: Now you need to run the code by clicking on the “Run” option.
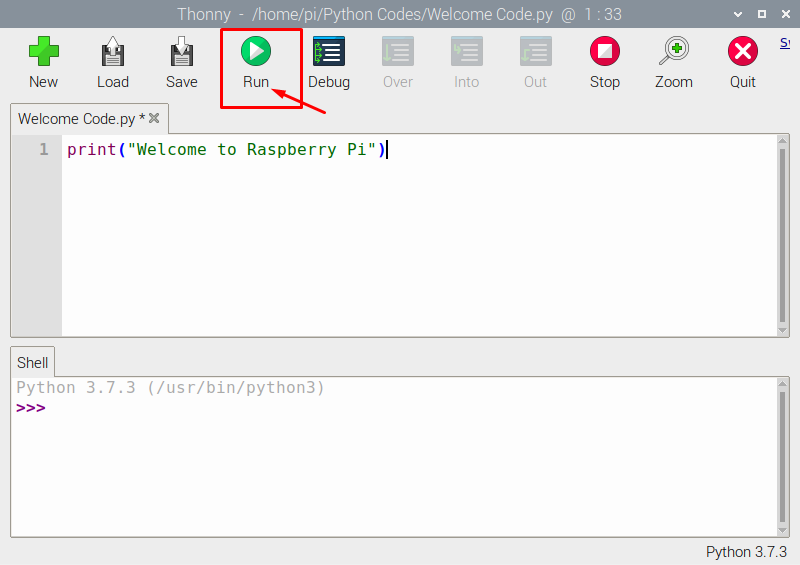
Step 9: Your code will be executed with the output “Welcome to Raspberry Pi” in the below window.
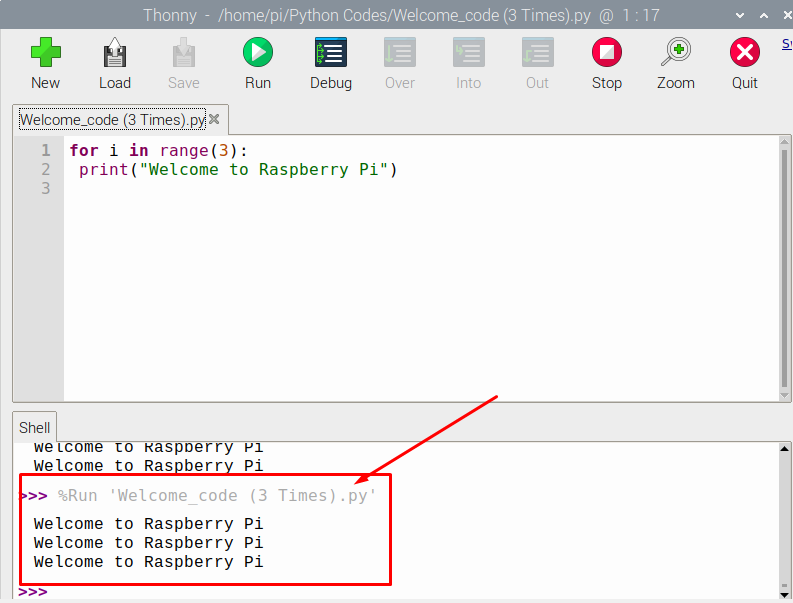
Step 10: If you want to type the same message three times you can use the loop. Below is the code you can write in Thonny to print the message three times.
print(“Welcome to Raspberry Pi”)
Conclusion
What is stopping you from starting to write code in Python? If you enjoy coding and have experience with C or JavaScript, you will definitely enjoy Python, which is simple to learn. The codes in this article are provided mainly to facilitate you in getting started with Python in Raspberry Pi. You can find various code examples and run them in your Python IDE. If you code and code with passion, you will find it easy to get a good job.
from https://ift.tt/LUb7NBJ
![How two Build a House in Minecraft [Step by Step]](https://lh3.googleusercontent.com/blogger_img_proxy/AEn0k_tA5-9TeyCraWW-0jryT-VpCZwdyuT1QJLlWctGrQvHD_9K024MjQ1G8BhzWl70vE2pJaeNHllG1iWwSMGC7b1LPCr-DBpdBn8bLJa2IxudKvyS-brGktn7nDD294ao3RfQnYqPuN6qNBpqJ4-FQktv7rzKk2kAAo8aU9VaPA=w100)


0 Comments