


How to create a Minecraft server account
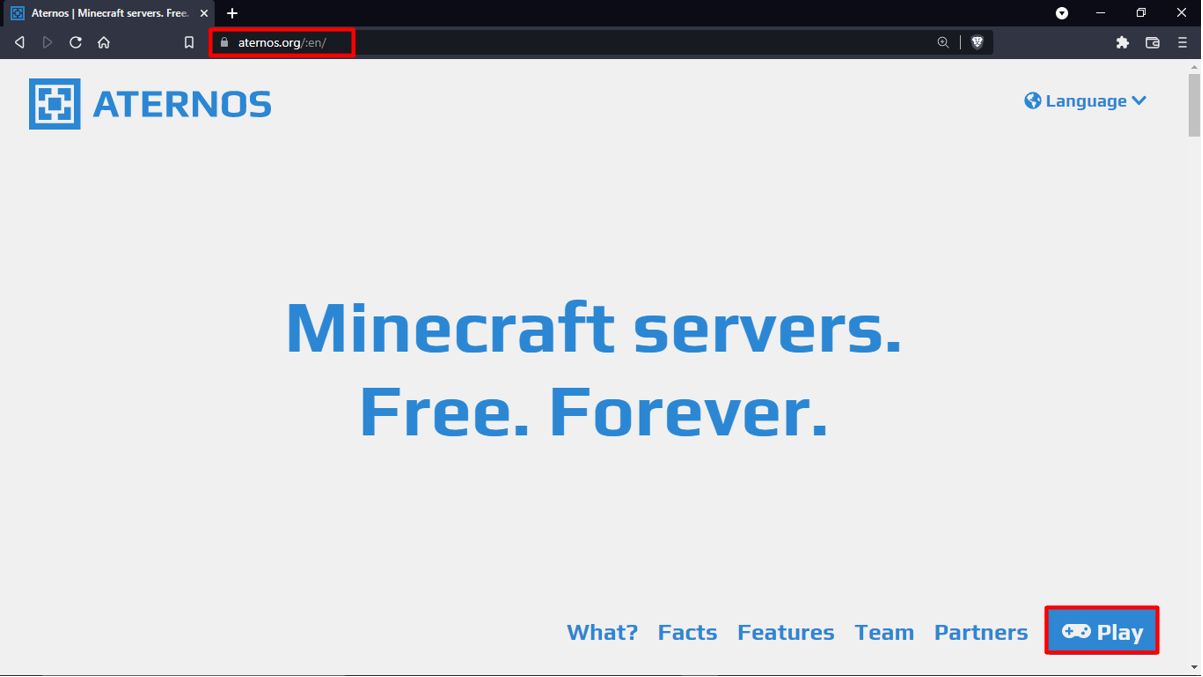
The first step is to open Your browser and write ‘aternos.org’ on the search bar. You will see the main interface of the website after it has been fully loaded as shown below and then you need to click on the play button that appears on the bottom right side of the screen:
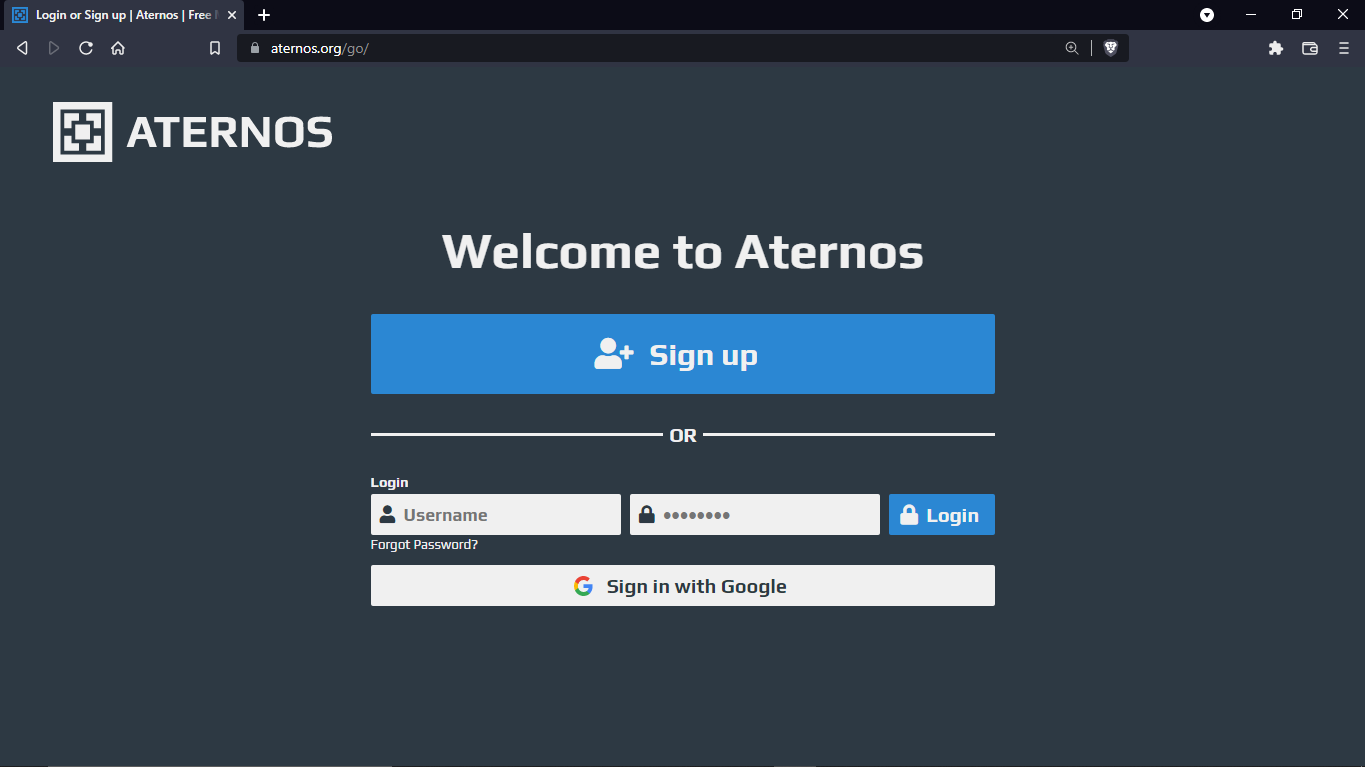
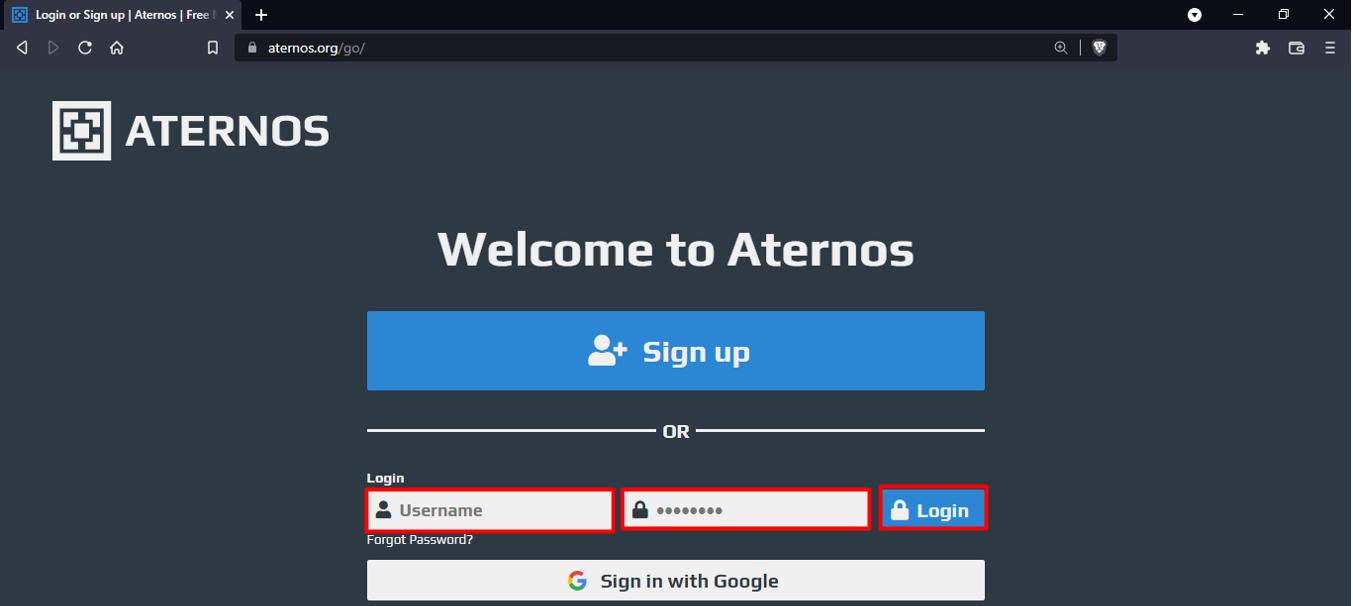
Now you will get redirected to this page where you will get a choice to make an account by clicking SIGN UP or login into your account or connecting with google. Now this will move you to a new set of options where you can either signup if this is your first time or you can log in using your existing account:
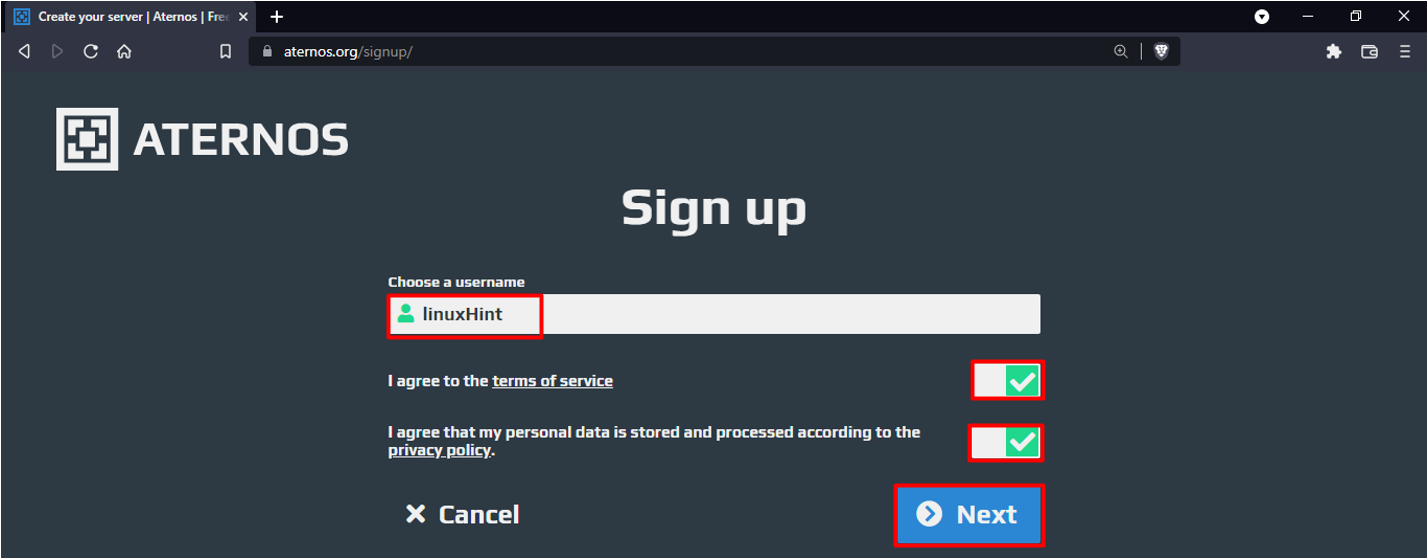
So, for the new user, we would like to create a new account by choosing the ‘sign up’ option. Choose a username as we did as a ‘linuxHint’ and then agree to terms and conditions:
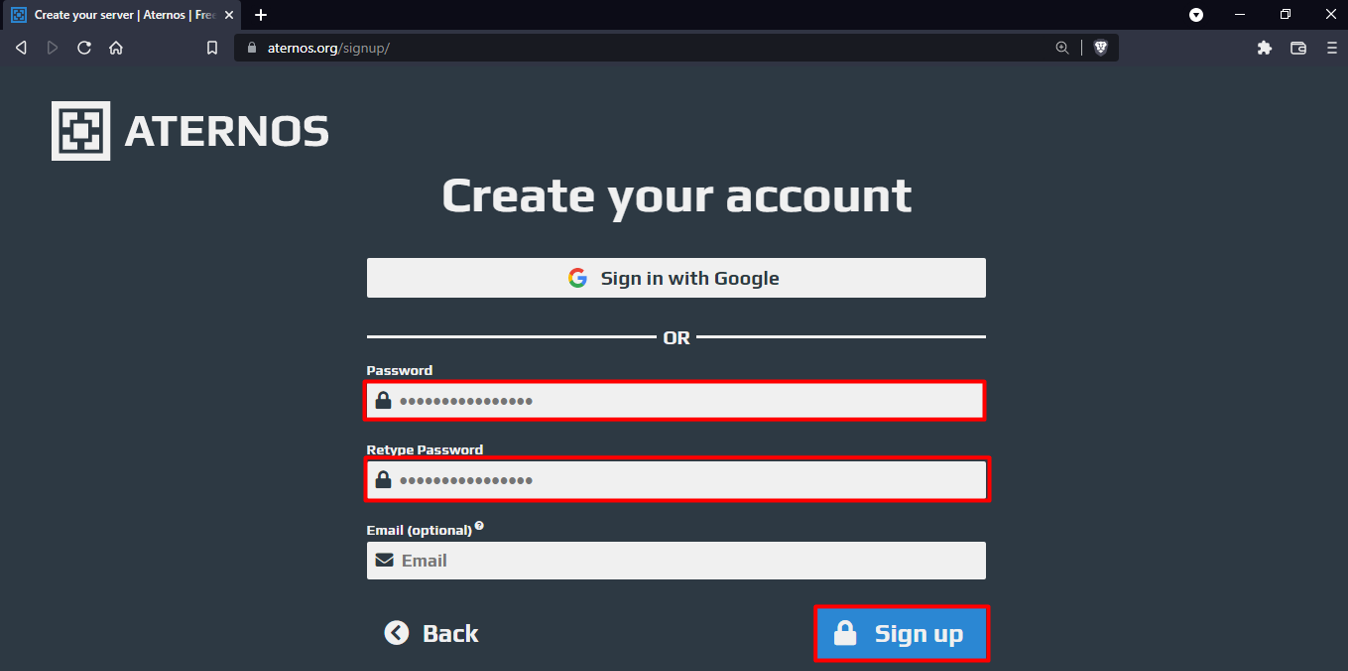
Now click NEXT and set a password of your own preference and retype it:
After setting up the password you need to click on sign up to complete your account creation process. You can also sign in with google and add your email if you want. Later you need to go back and click type your username and password in the login tab to access your new account as shown:
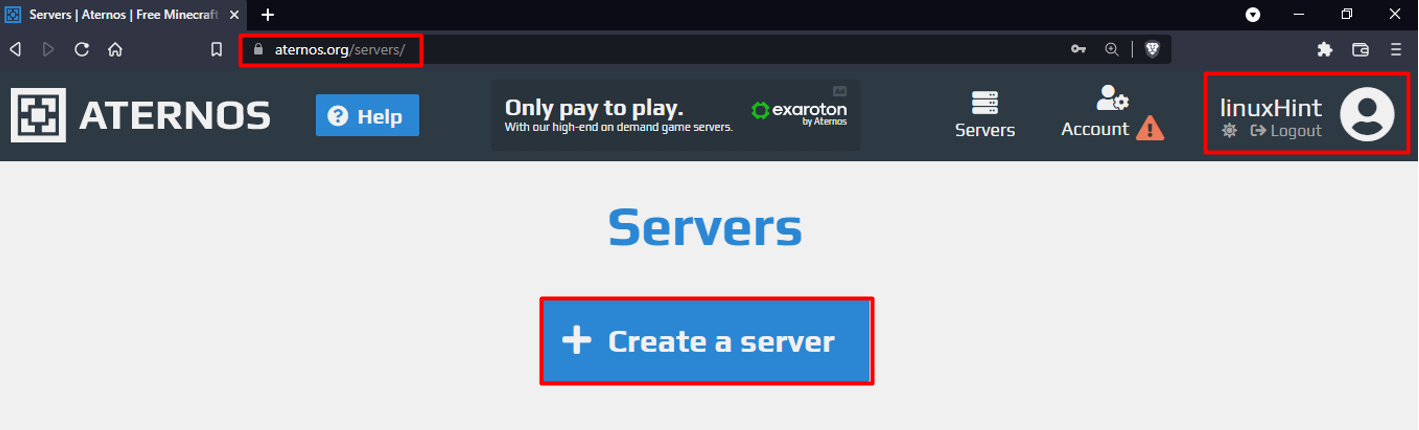
The next thing you will see is to ‘create a server’ option:
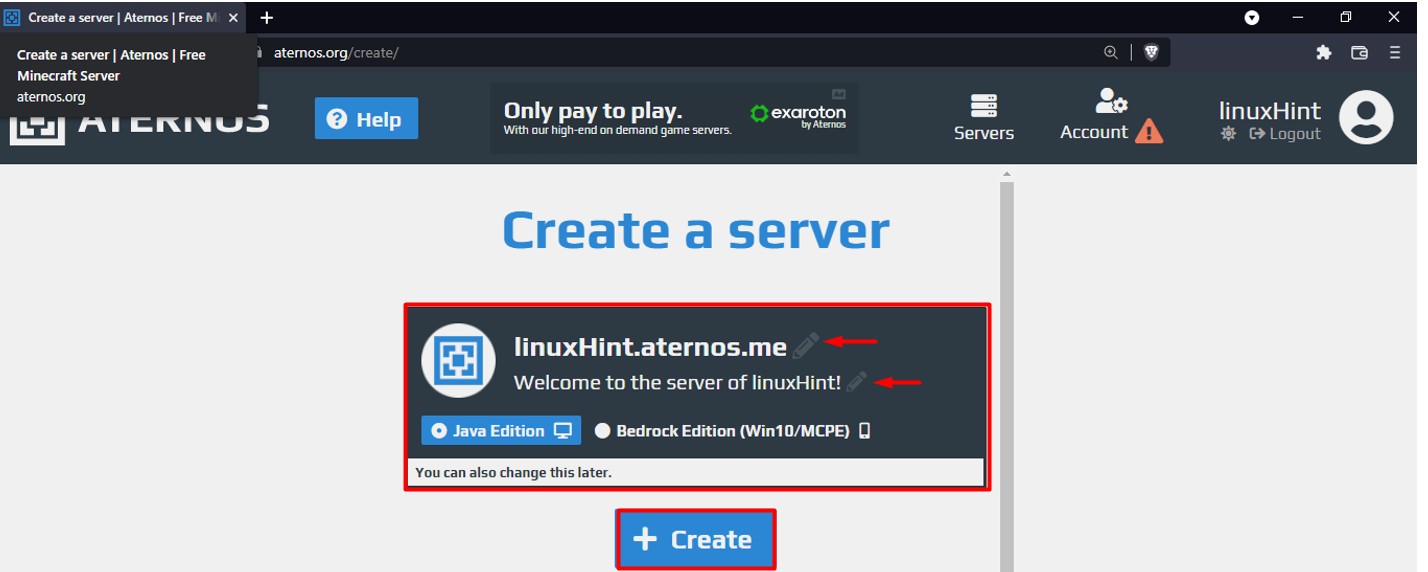
After clicking it will automatically set a server name for you with your username as shown below but it can be changed as well:
You will see the basic interface from where you need to click on the ‘Server’ tab where you need to select the ‘Address’ for your server, ‘Software’ on which you want to build it, and then the ‘Version’ as shown below:

Now after that you need to select the ‘Options’ tab where different settings related to your server will appear and you need to select or unselect them as per your preferences as shown below:

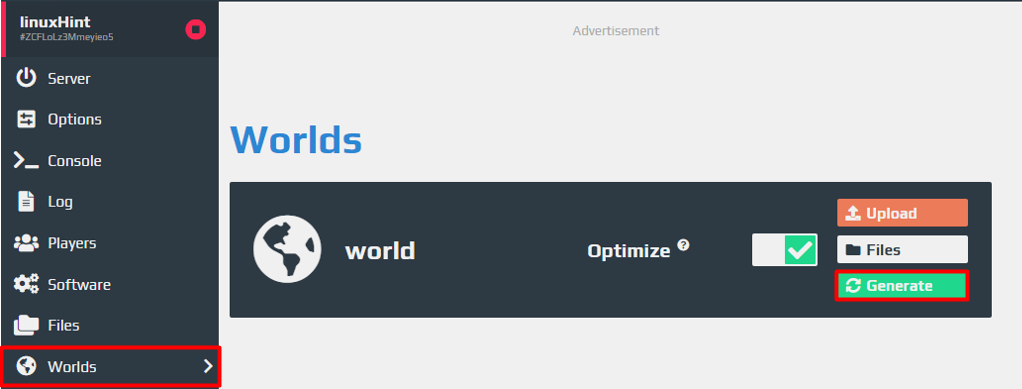
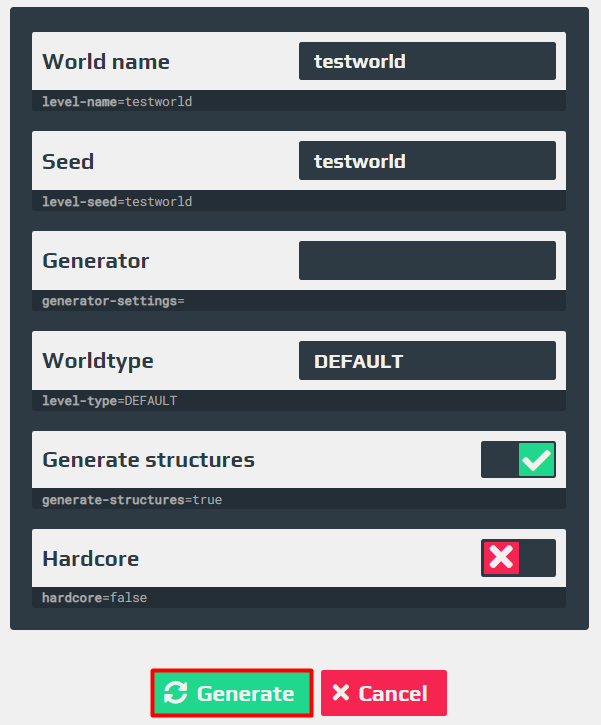
After implementing the above settings, you need to select the ‘Worlds’ tab and then click on the ‘Generate’ button that will be used to create your world.
Clicking on the Generate button will ask you for the multiple options that you can choose for your choice as you can see, here we can name our world and select its seed.
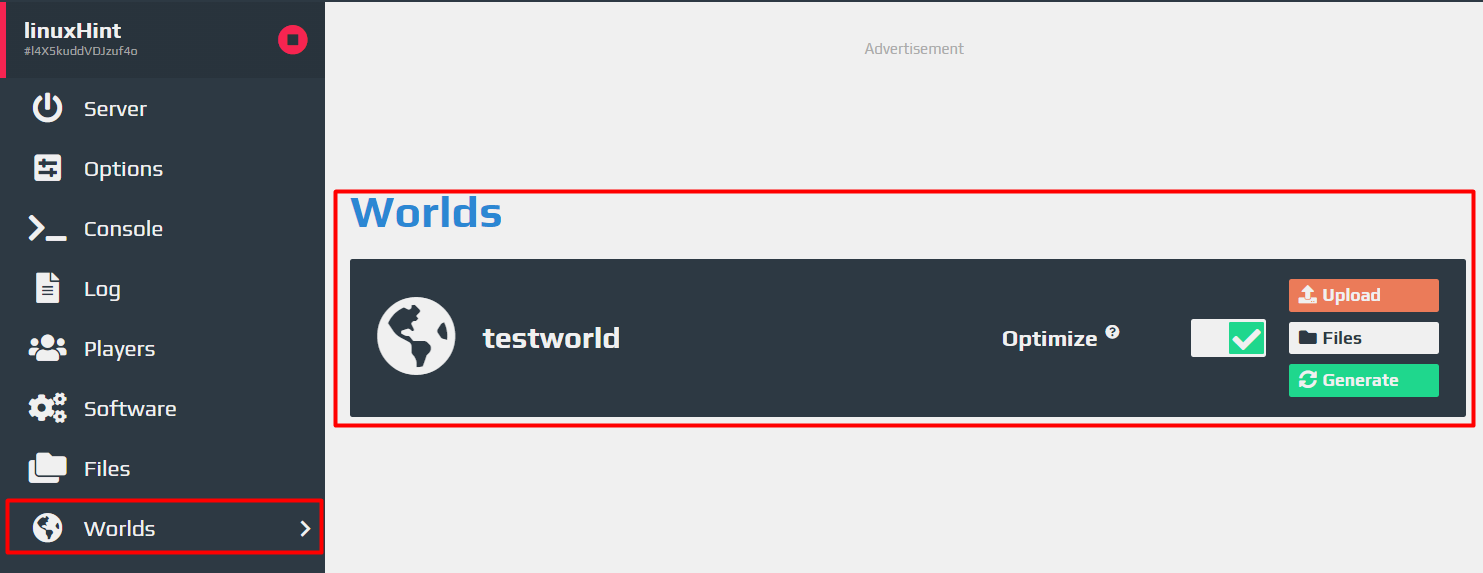
After clicking on the ‘Generate’ button, you will be able to see your world as shown below that is now saved in the ‘Worlds’ tab.
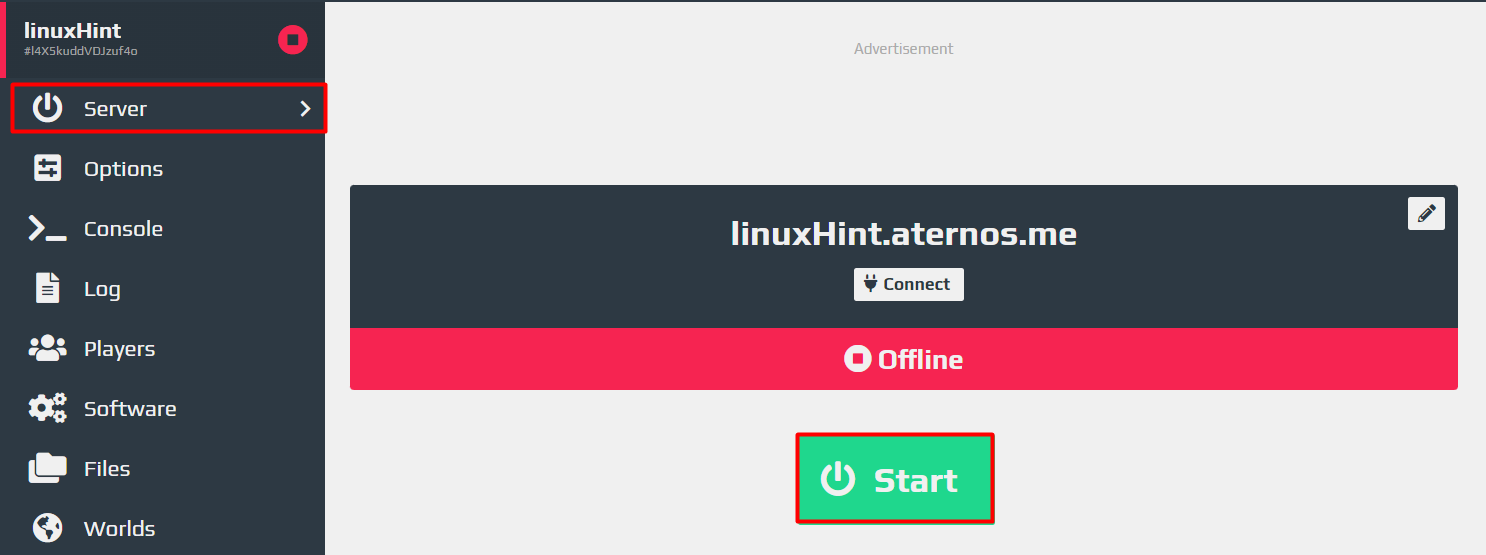
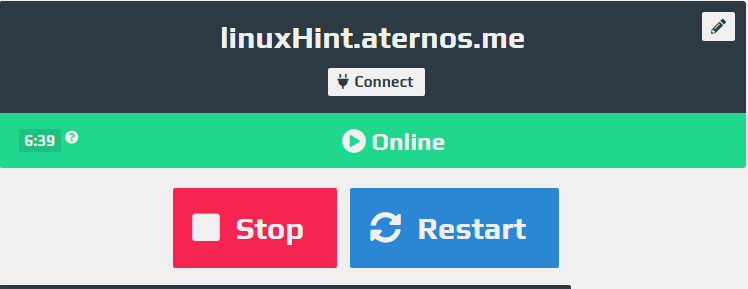
Now your server is complete, by default it is offline and you need to click on the ‘Start’ button to make it online:
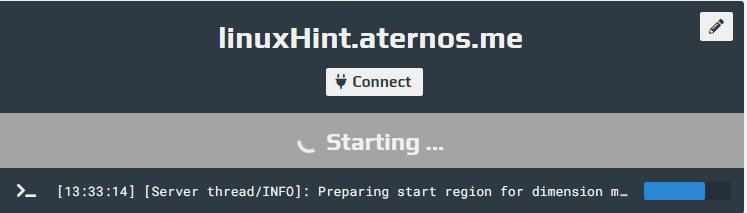
Now after that, the server will start loading, which will take some time, and then you will be able to see the ‘Online’ status of a server as shown below.

How to select your own server in Minecraft
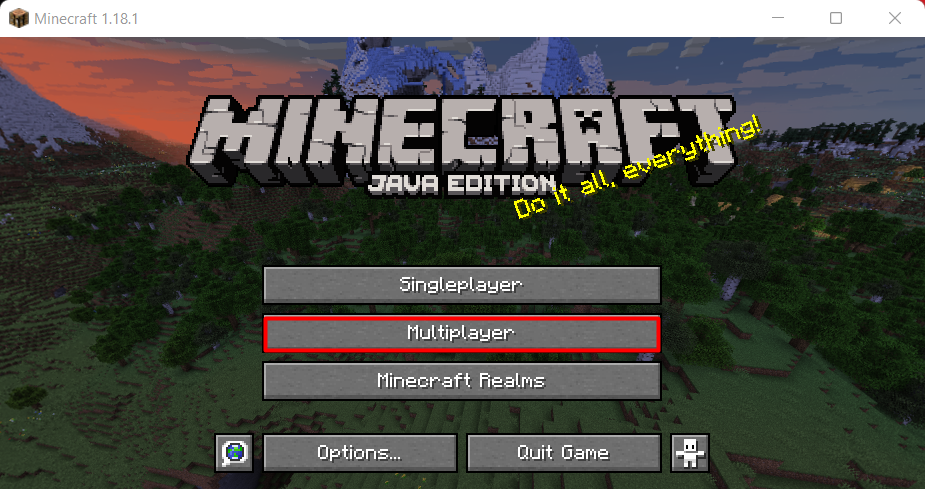
First, you need to launch a Minecraft game and then select the ‘Multiplayer’ option from the menu.
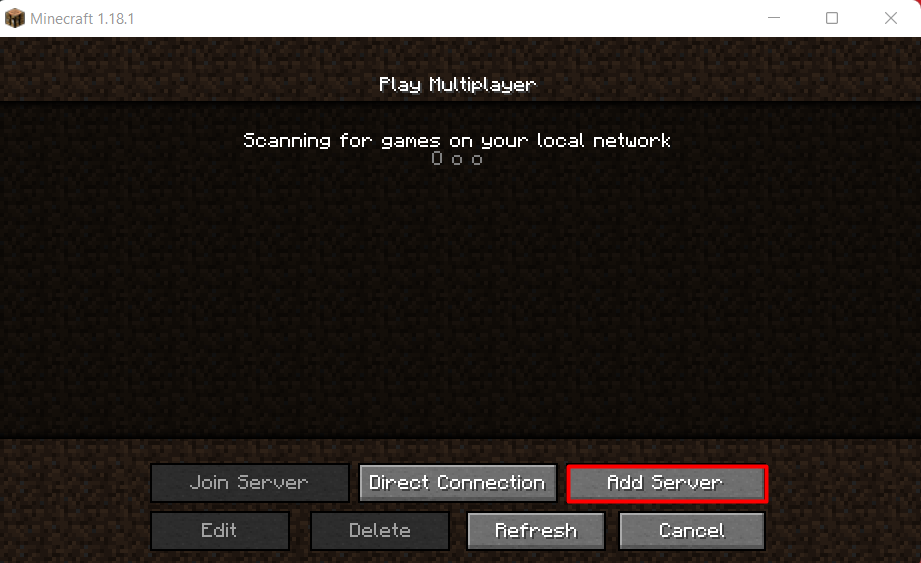
The next step is to click on the ‘Add Server’ as shown below:
Now you need to write the ‘Server Name’ and ‘Server Address’ as shown below.
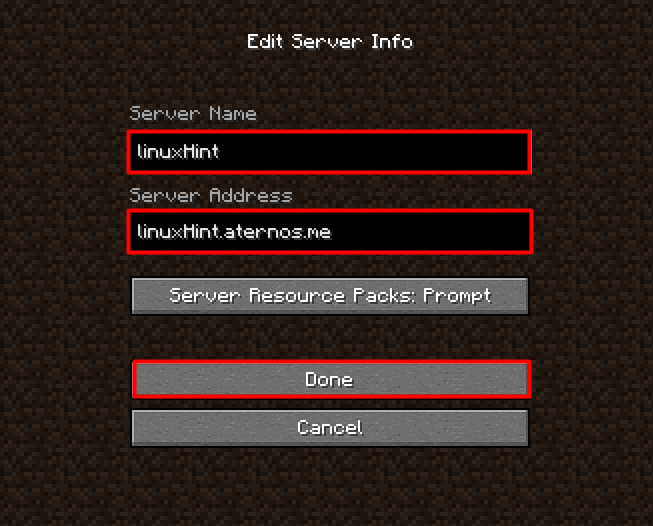
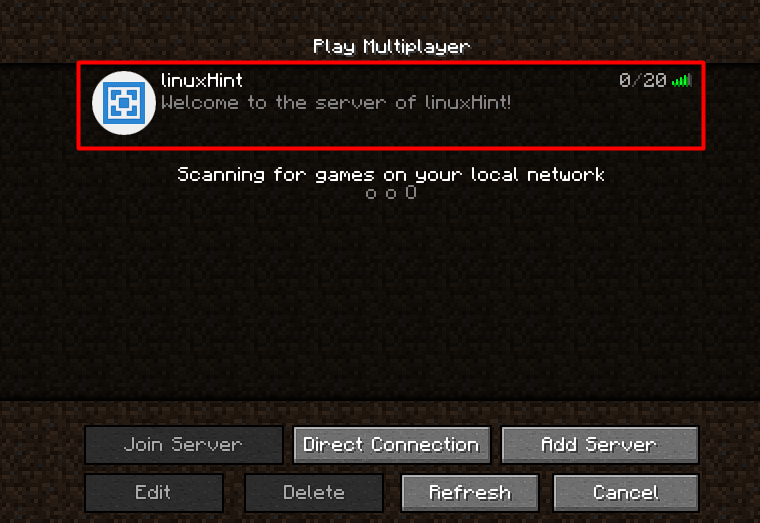
After clicking on the ‘Done’ you will be able to see the server that you have created and after that, the last step is to select the server, click on the ‘Join Server’ button, and then you are good to go.
Conclusion
The Minecraft game is designed to test the imagination of the player so that they can be as creative and innovative as they want that stands out from other games on the market. In this article, we have explained how you can improve your gaming experience by playing with your friends by creating your own server for free using the ‘Aternos’ server application.
from https://ift.tt/33C1A6g
![How two Build a House in Minecraft [Step by Step]](https://lh3.googleusercontent.com/blogger_img_proxy/AEn0k_sKcmxOIrzEEu4UzisKET46x_2jYaTjW_SazUMvKA5tiTDnYYhWlcgsiaKkt0EEsK_J6w45bxNG-wOuoeOBh1jkjeOpe-plFmE2DdaMra7WdS1xgDxe8IWv7Lw2sULzbO2qawPnUw1IUQoTEfy52zVsMghTkv0K2osW3t30bA=w100)


0 Comments