


Shallow Copy vs. Deep Copy
Before looking at the example of deep copy, one needs to understand the shallow copy as well. So, the shallow copy has been created when you want to copy all variables of one object to another object. You can call it a mirror image, but it is not the original one. Both the original and new objects, i.e., replica, will be referencing the same memory address within the shallow copy. This means both original, and replica objects will be recognized and fetched with the same memory address. When a user tries to make changes in one object, it will automatically reflect the change in another object as well due to the same memory address. This may cause many errors while execution, and the real and replica object will be destroyed. Thus, it is said to avoid using shallow copy when you have been working with dynamically allocated variables of a certain object.
It is recommended to use the deep copy instead of the shallow copy while using the dynamically allocated variables. The deep copy can be obtained by copying all the data of an object, i.e., variable values, memory allocation, and resources, to the new one while both the real and replica object has a completely different memory address. It can be used for an object having variables that are allocated dynamically. So, let’s begin it.
Example: Deep Copy
We have started our example to demonstrate the deep copy concept within C++ programming by opening the shell console of the Ubuntu 20.04 system. The first thing to do is to produce a new C++ file for code. The everlasting, old, and simplest command provided by the Linux distribution to create a document in its shell terminal is “touch” instruction. The simple word “touch” will be used with the title of a document to be generated. Make sure to add the C++ extension at the end of the document name; otherwise, the code will not work on the shell upon the file execution. After this file creation, there comes the step to open it.
The very best thing about the Ubuntu 20.04 is, it comes with some built-in editors to open and edit files. It contains the “vim” editor to edit in a very colorful environment, the text editor to update and edit the code in the simplest environment, and the GNU Nano editor to create and edit the code within the shell. Thus, we have cast off the code editor, i.e., GNU Nano editor in our case, and the nano word is used to open the document “deep.cc”. The instructions for generating and launching the document “deep.cc” are stated in the screenshot below.
![]()
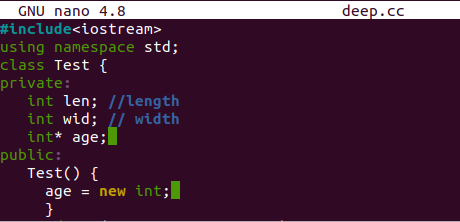
After the GNU Nano editor for code has launched the text document “deep.cc” in it, we have to add some libraries in it first. These libraries are required for the execution of code in a certain way. The input-output stream “io” is included using the word “include” with a hash character, i.e., “#”. The use of a standard namespace is necessary for C++ code to use the cin and cout statements in it. The code has been started with the declaration of a new Class named “Test”. This class has been initialized with three private type integer data members. The variables “len” and “wid” are the normal integer variables, while the “age” is a pointer variable. The Test() constructor has been initialized, and it is used to directly initialize the pointer “age” with some integer type value dynamically.
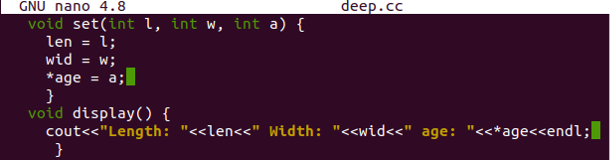
A user-defined function named “set” with no return type has been started. It takes three integer type arguments in its parameters, i.e., “l”, “w”, and “a”. This function is used here to get the values from the main() function and store them within the variables, or data members declared before at the start of a class “Test” i.e., “len”, “wid”, and pointer type variable “age”. Another user-defined function named “display()” has been used with no parametric values. This function uses a single standard cout statement within it. The cout statement uses the variables “len”, “wid”, and “*age” to display the already set values by the set() function.
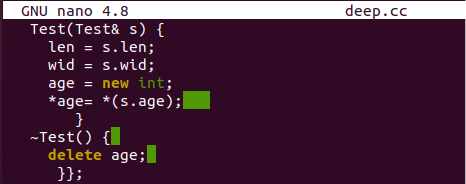
Now, we have been using the parameterized constructor function Test() of class “Test” to implement the concept of Deep Copy in our program. This parameterized constructor will be called when a new object is created. It is getting the Class “Test” type pointer in its parameter, i.e., original object. This first object passed within parameters will be used to copy all the original object’s data within the new object as it is demonstrated in the image. The class Test destructor has been used to destroy the object of the class Test while deleting the dynamically allocated memory variable “age” after the program execution is about to complete. The Test class has been closed here, and the execution will be started with the main function.
Now, the main function comes. The execution starts from here when the first object, “t1” of the class Test, is created. The “Test()” constructor will run automatically with the creation of object “t1” and assigning dynamic dome memory to the dynamic variable “age”. The set() function has been called using object t1, and to set the values to the variables, the display() function will be called to show the values on the shell. The second object, t2, has been created file deep copying all the data of object t1 by assignment. The parameterized constructor will be called here. When we call the display() method with object t2, it will show the same result as it does for object 1. The destructor will be executed automatically as the object has finished working.
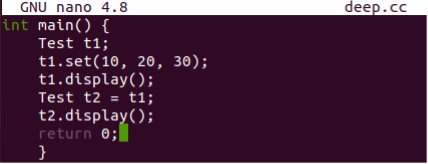
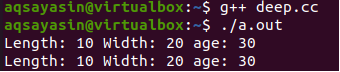
After the compilation with g++ and execution with “./a.out,” we have got the same results of the display() method for objects t1 and t2.
Conclusion
Within this article guide, you will find out the explanation of Deep copy along with an example demonstration. We have started this guide by defining the Copy, Deep copy, and Shallow Copy terms. Then, we have covered the difference between using deep copy and shallow copy within C++ code to copy objects. We have added a brief and simple example of the Deep Copy program to demonstrate it more. Therefore, we believe this article would be very beneficial for all the naïve C++ users and those who are already experts in their domain.
from https://ift.tt/3cSg2bh


0 Comments