Nginx keeps track of its events in two logs: error logs and access logs. Before moving ahead, let’s understand the basic concept of error logs and debug logs.
What are error logs in Nginx
Any errors that Nginx encounters, such as unexpectedly stopping or facing problems related to the upstream connection or connection time, are recorded in the error logs. The error logs record information related to the server and application issues.
What are access logs in Nginx
Nginx logs all client requests in the access logs shortly after they are handled. The information of the accessed file, the browser a client is using, how Nginx reacted to a request, and the client IP addresses can be found in the access logs. The access logs data can be utilized to analyze traffic and track the site use over time.
This post will show you how to enable error logs and access logs for debugging purposes in Nginx. So, let’s start!
How to enable error logs in Nginx
Press “CTRL+ALT+T” to open your terminal. After that, execute the below-given command to open the nginx config file to enable the error log in the Nginx configuration file:

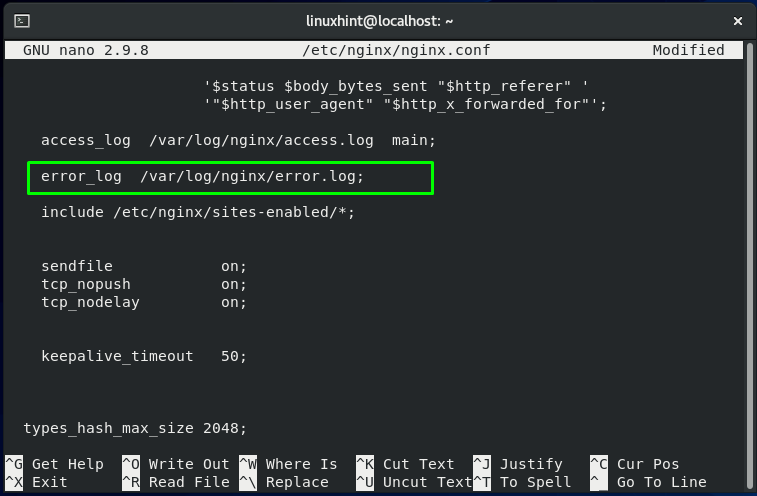
Your Nginx configuration file will somehow look like this:

In the error log file, Nginx records messages about the common server failures and issues related to the application. If you have problems related to your web-based application, then the error log is the first place to go for solutions. In Nginx, the “error_log” directive enables and configures the error log location and log level.
Context of error_log in Nginx
The “error_log” directive can be added in the server{}, http {}, location {} block.
Syntax of error_log in Nginx:
For configuring the error_log, you have to add the path of the log file and set the log level. If you do not set the second parameter, then the error_log will take “error” as its default log level:
The log_level argument determines the logging level. Here is the list of the log_level utilized by the “error_log” directive:
- debug: “debug” log level is set for message debugging.
- warn: “warn” is set as log_level to notify warnings.
- info: This log_level assists error log to provide informational messages.
- error: errors that occur during the processing of a request.
- alerts: alerts are a type of notification for which immediate action is required.
- crit: It handles issues that need to be addressed.
- emerg: A situation that necessitates immediate action.
The error_log directive is defined by default in the http {} block. However, you can also place it inside the location{} or server block.
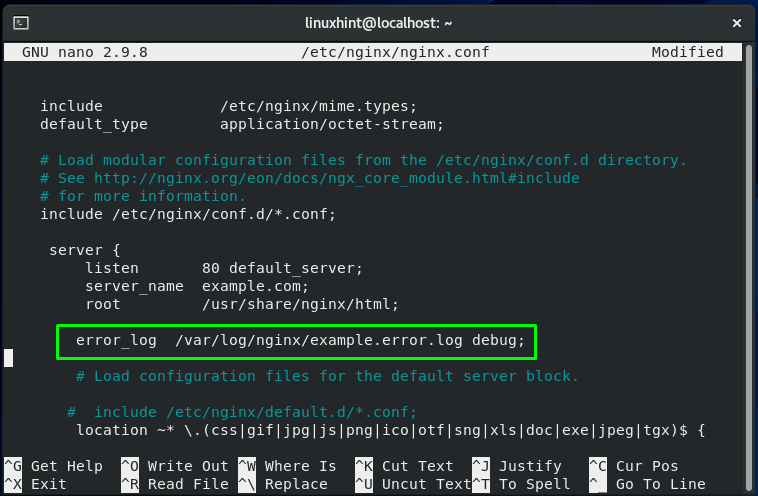
Now, we will add the below-given line in our server block to enable error logs with the “debug” log_level:
How to enable access log in Nginx
Nginx adds a new event in the access log whenever a client request is handled. These logs store the visitor location, information about the web page they view, and the amount of time spent on the page. Each event record includes a timestamp as well as different details about the requested resources by the client.
The log format directive permits you to determine the your logged messages format.The access_log directive is used to enable the log file location and its format. By default, access log is enabled in the http{} block.
Context of access_log in Nginx
The “access_log” directive can be added in the server{}, http {}, location {} block.
Syntax of access_log in Nginx
If you do not specify the “log_format”, then the access_log will enable the default “combined” access_format. However you can customize the log format as follows:
'$status $body_bytes_sent "$http_referer" '
'"$http_user_agent" "$http_x_forwarded_for"';
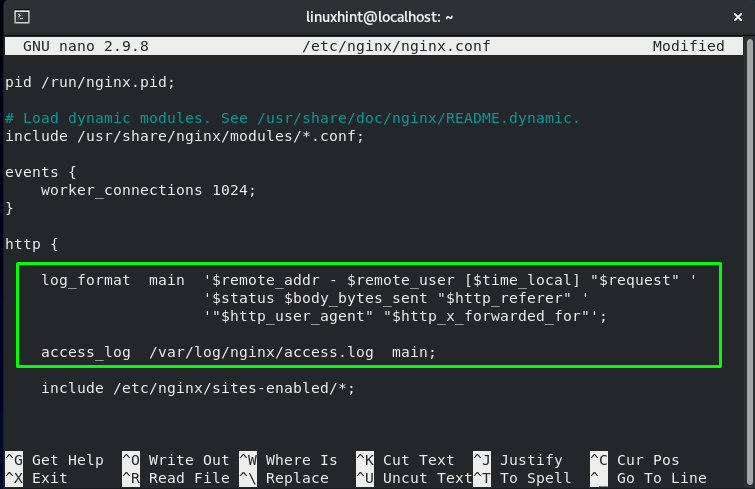
After customizing the format of the log, you can add the following line in the http{} block for enabling the access log:
To add the access_log in the server {} block, follow the below-given syntax:

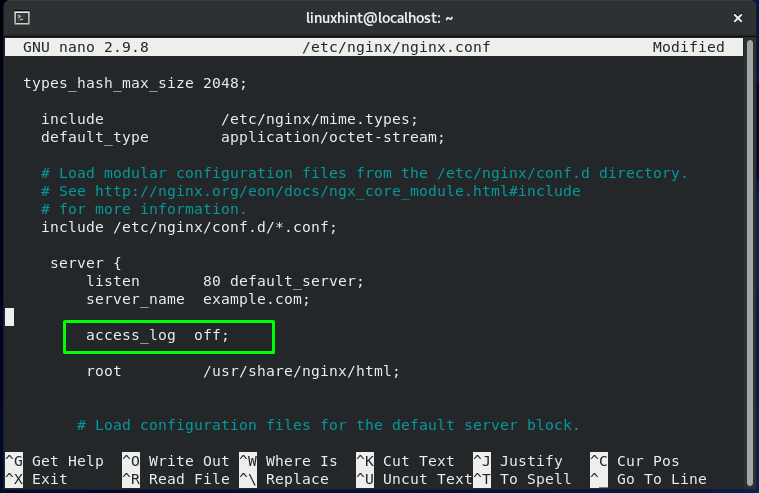
You can disable the access log; if you have a busy website or your server is on low resources. To do so, you have to set “off” as the value of access_log:
After configuring error_log or access_log in the specific block, press “CTRL+O” to save the added lines:
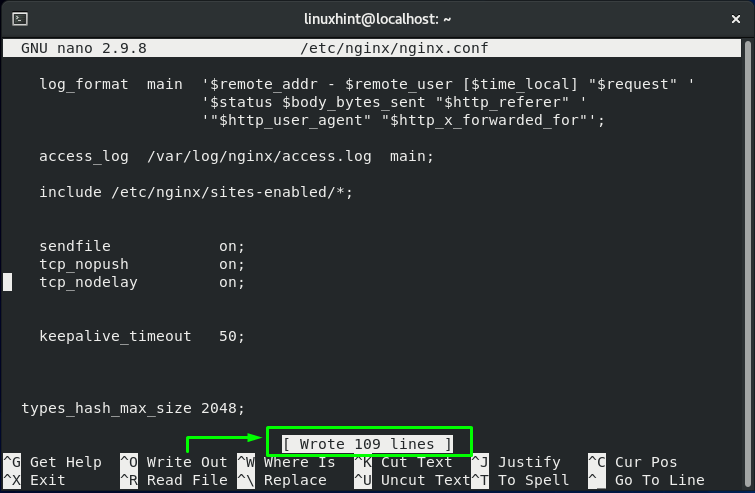
Now, in your terminal, execute the “nginx” command with the “-t” option to test the Nginx configuration file and its context:
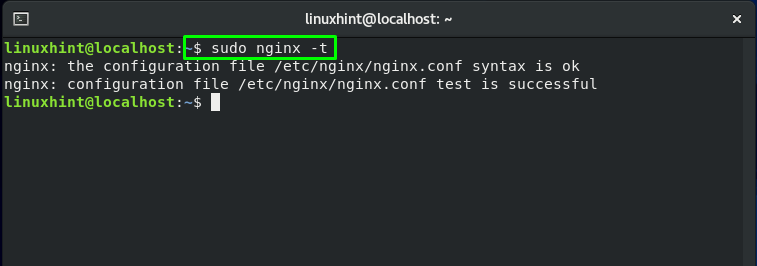
In the end, restart your Nginx service, and you are all done!

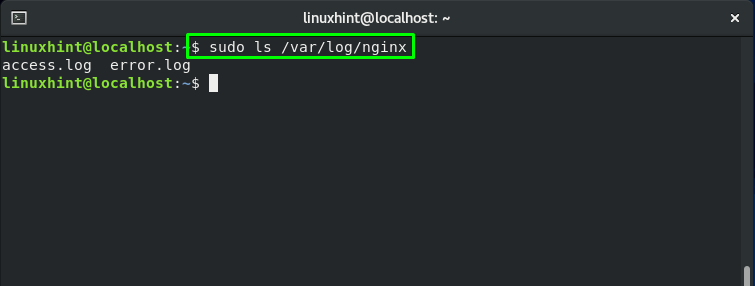
To verify if the logs are enabled and working, check out the log directory of Nginx:
From the output, you can see access and error logs are enabled on our system:
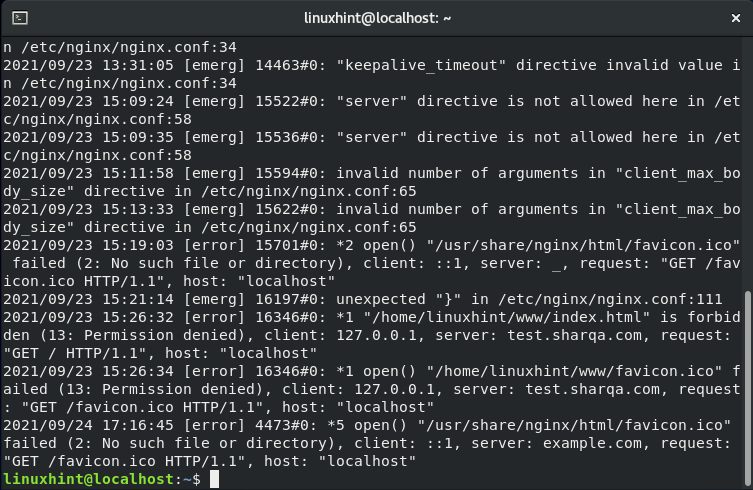
How to view error_log in Nginx
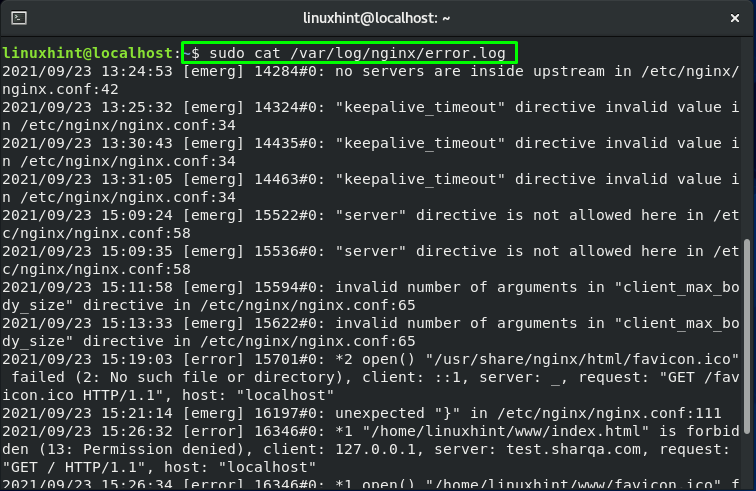
You can utilize the “cat” command for extracting the content of the error_log present in the “/var/log/nginx/error.log” file:
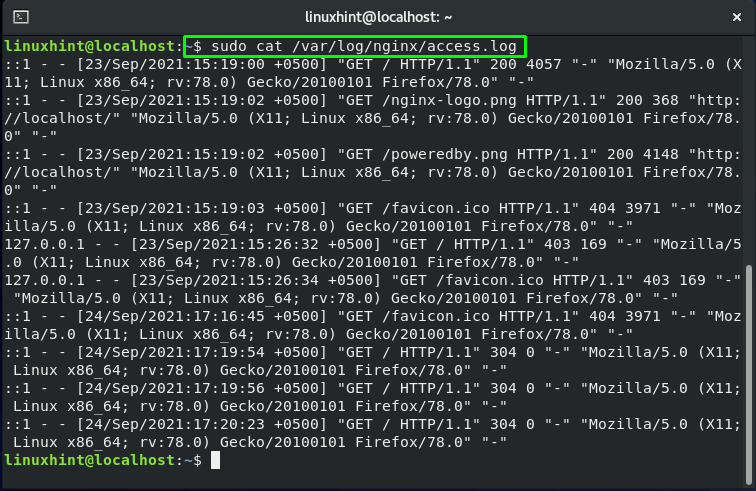
How to view access_log in Nginx
To check out the content of the access_log, execute the “cat” command and specify your access_log directory:
Conclusion
Nginx includes customizable debugging options that are utilized for collecting the information which assists you in understanding your web server behavior. Nginx provides two files for logging web server data: error_logs and access_logs, where error_logs record the unexpected or informative messages and access_logs store information related to client requests. In this post, we have explained error_logs, access_logs, and how you can enable the error_logs and access_logs in Nginx.
from https://ift.tt/30oW2tA


0 Comments