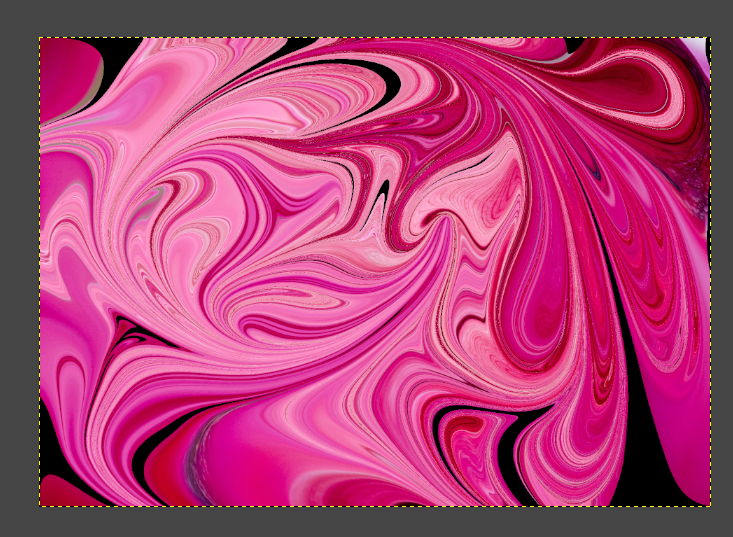
The best way to liquify an image in GIMP is with the warp transform tool. This tool lets you transform the most boring and simple of everyday pictures into something extraordinary and abstract.
The beauty of using the warp transform tool is that there are so many amazing possibilities. This tutorial will show you how to achieve three popular liquify effects using different settings in this tool.
(1) THE SWIRLY LIQUIFIED LOOK
Step 1: Launch GIMP
Step 2:Open the picture you’d like to liquify
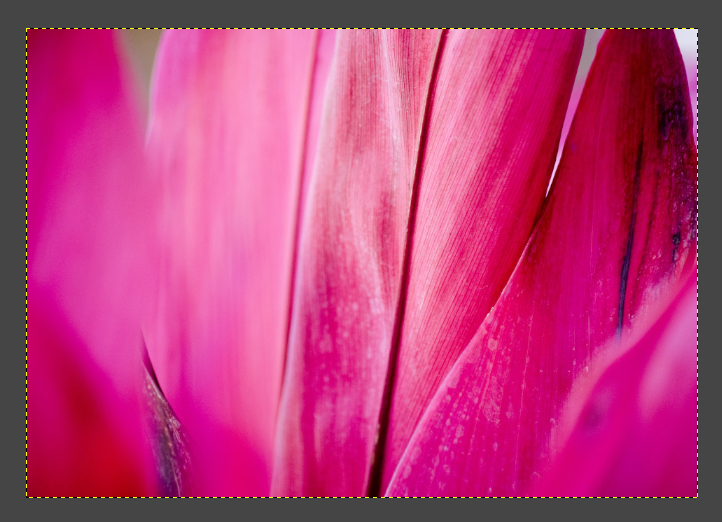
For this tutorial, I’m using a close-up picture of pink, textured leaves.
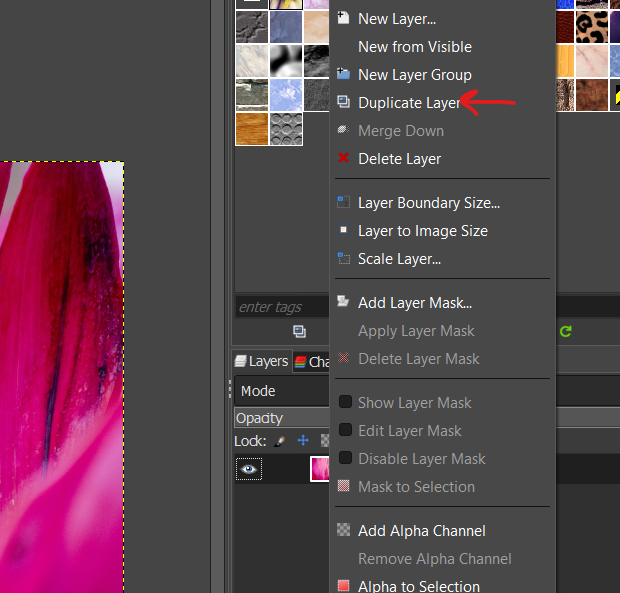
Step 3:Go to the layers panel, right-click the original image layer and duplicate it.
It’s always best to work on a duplicate layer instead of the original image layer because it’s much easier to delete the duplicate and start afresh if you’re not happy with the outcome.
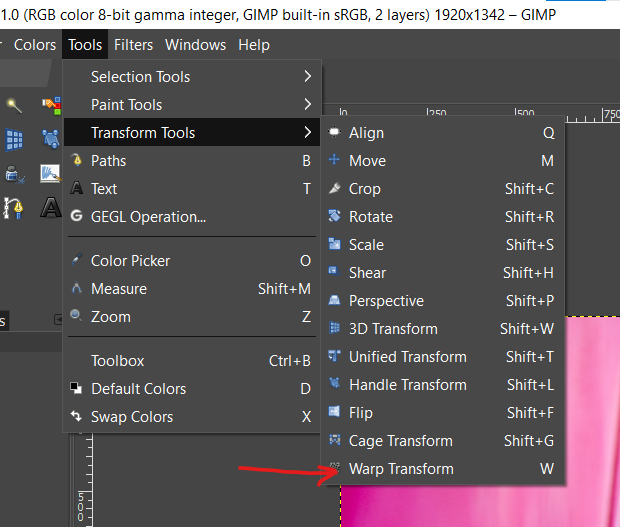
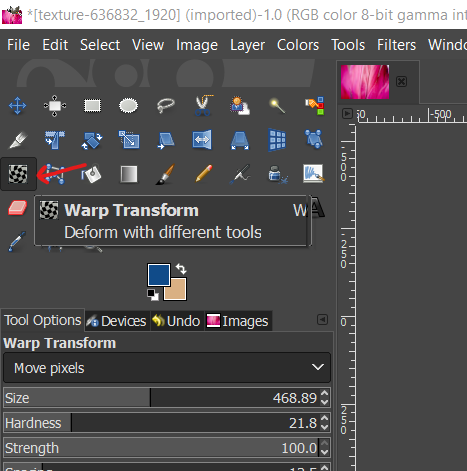
Step 4: Then, go to the ‘Tools’ tab, ‘Transform Tools’ and click ‘Warp Transform’. This should bring up the tool options for warp transform.
Another way to activate the ‘Warp Transform’ tool is to click the ‘Warp’ icon.
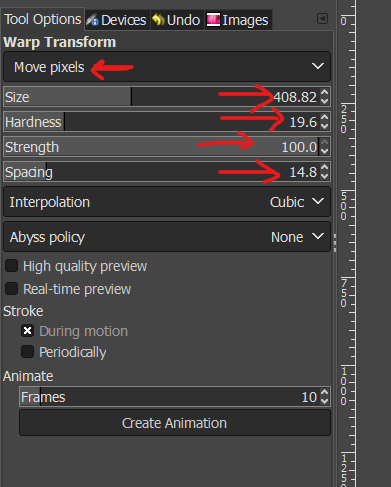
The main settings of the warp tool are:
– Warping method, which is set to ‘Move Pixels’ by default. Other warping methods include ‘Grow Area’, ‘Shrink Area’, ‘Swirl Clockwise’, ‘Swirl Counterclockwise’, ‘Ease Warping’ and ‘Smooth Warping.’
– Size: This sets the size of the brush that will apply the warp effect. You’ll need to vary the size of your brush depending on the liquify effect you want to create and the composition of the image you want to liquify.
For instance, it’s best to use a medium to large brush size to liquify a picture composed of large elements like the one I’ve used for this tutorial. A much smaller brush size would have been better if my picture contained a small colorful element.
– Hardness: This determines how much jitter we get when we apply the warp effect. It is best to leave this set small or medium as high hardness settings can create hard edges and artifacts, especially if ‘Strength’ is also set to medium or high.
– Strength: This determines the strength of the effect.
– Spacing: This determines how far the pixels can shift with each warp movement and the gaps between warp movements. So high spacing will create a liquify effect with more gaps, while medium to low spacing creates a smooth and interlinked effect.
Step 5:To achieve the swirly liquify look, use ‘Move Pixels’ as the warping method, set ‘Size’ to between 400 and 500, ‘Hardness’ to between 15 and 30, ‘Strength’to 100, and ‘Spacing’ to between 10 and 20. Leave all other settings at default.
Step 6:Then, with the duplicate layer active, click and brush over the image in round, swirling movements. Be sure to swirl in darker colors to create contrast.
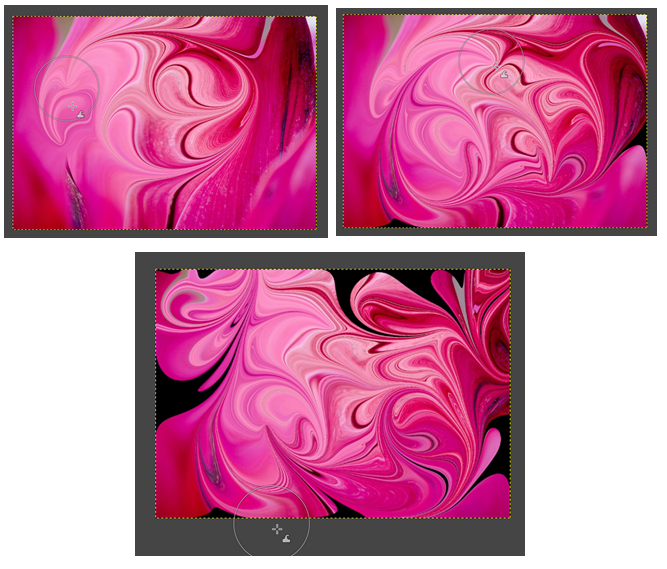
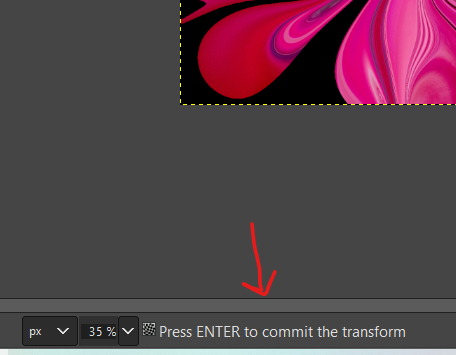
Step 7:When you are satisfied with the effect, press ‘Enter’ to apply.
Step 8:Then, delete the original image layer and go to ‘File’, ‘Export as’ to save as a JPEG or PNG file.
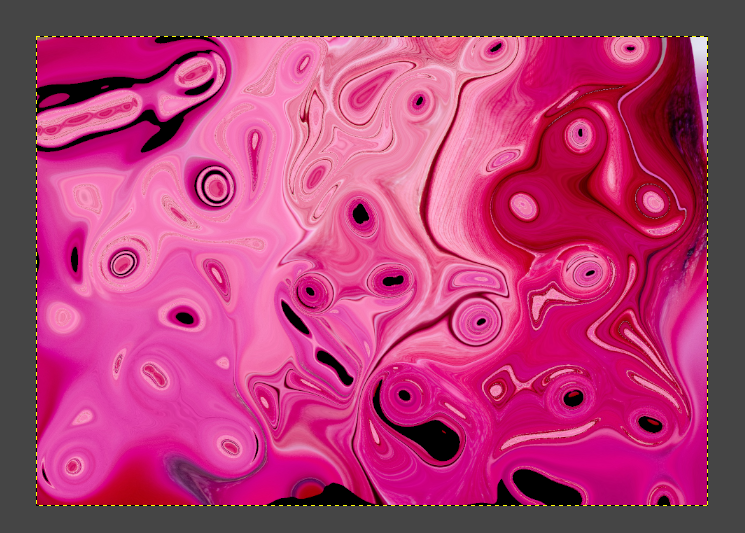
(2) LIQUIFY EFFECT WITH DOTTED SWIRL POOLS
Repeats steps 1 – 4
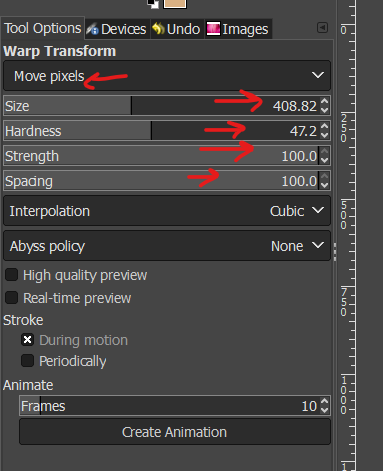
Step 5:Keep ‘Move Pixels’ as the warping method, set ‘Size’ to between 400 and 500, ‘Hardness’ to between 45 and 70, ‘Strength’to 100, and ‘Spacing’ to 100. Leave all other settings at default.
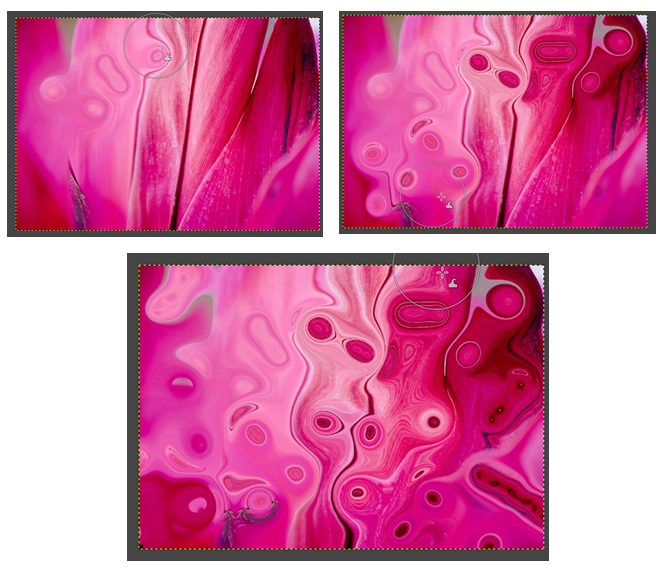
Step 6:With the duplicate layer active, click and brush over the image in round, swirling movements.
To achieve the desired effect, you may need to repeat multiple times, alternating between clockwise and counterclockwise swirls.
Step 7:press ‘Enter’ to apply the effect.
Step 8:Delete the original image layer and go to ‘File’, ‘Export as’ to save as a JPEG or PNG file.
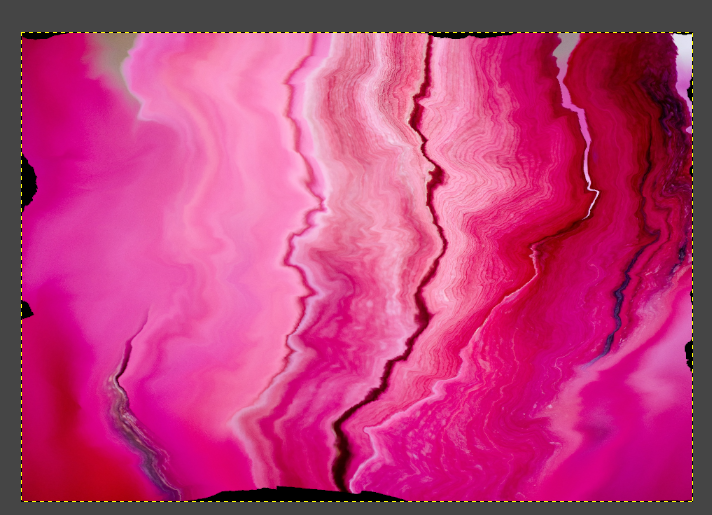
(3) FLOWING (PAINTERLY) LIQUIFY EFFECT
Repeats steps 1 – 4
Step 5:Keep ‘Move Pixels’ as the warping method, set ‘Size’ to between 400 and 500, ‘Hardness’ to 100, ‘Strength’to between 10 and 20, and ‘Spacing’ to between 1 and 10. Leave all other settings at default.
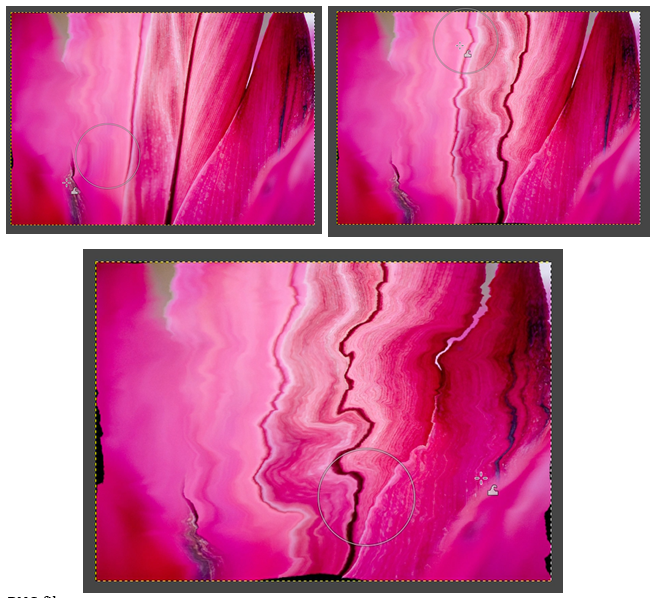
Step 6:With the duplicate layer active, click and brush over the image from side to side. You’ll notice swirling brush movements have very little effect. For best results, simply move the brush quickly from side to side. Repeat multiple times until you achieve desired effect.
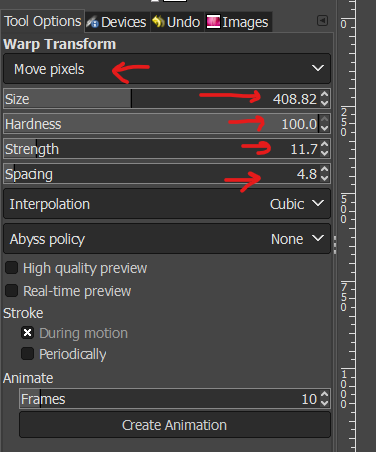
Step 7: press ‘Enter’ to apply the effect.
Step 8:Delete the original image layer and go to ‘File’, ‘Export as’ to save as a JPEG or PNG file.
CONCLUSION
The liquify effect is a popular photo manipulation effect. Use it to repurpose your old pictures or any of the simple images you can download for free online. Applying this effect is not unlike painting with a brush and canvas. The only difference is that you’re doing it on your PC and don’t really have to start from scratch.
from https://ift.tt/3paYcaQ


0 Comments