In this post, we will demonstrate various methods to print the file using PowerShell ISE scripts.
How to Print File Through PowerShell Script
Open PowerShell ISE by following the steps given below.
Click on the Search icon on the Taskbar, and search for “PowerShell ISE“. Then, click on the name and open it:
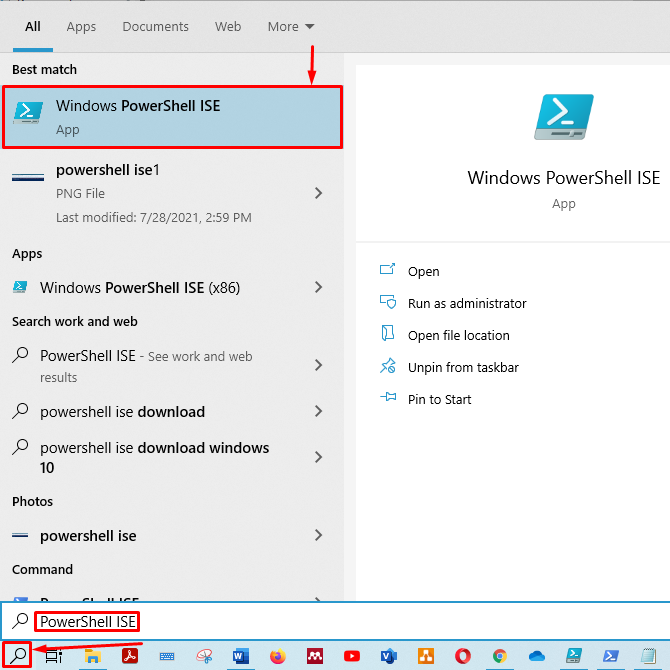
The scripting pane and output pane of the PowerShell ISE will be displayed:
First, save your untitled script with the preferred name. Then, press “ctrl+s” to save your script. We have saved the script with the “test.ps1” name.

If you do not know the cmdlet used for print, write the following line in your script and press “ctrl+s” to save the script. This Get-Command will print all the functions, cmdlets, and applications in which the “print” word exists:

Moreover, to run the script from the output pane, you must redirect your terminal to the folder where the script is saved. We have kept the script in C:\users\adnan\downloads.
Once you have saved the script, go to the output pane and run the script, as shown in the image below. Note, the PowerShell cmdlet for print is “Out-Printer“.
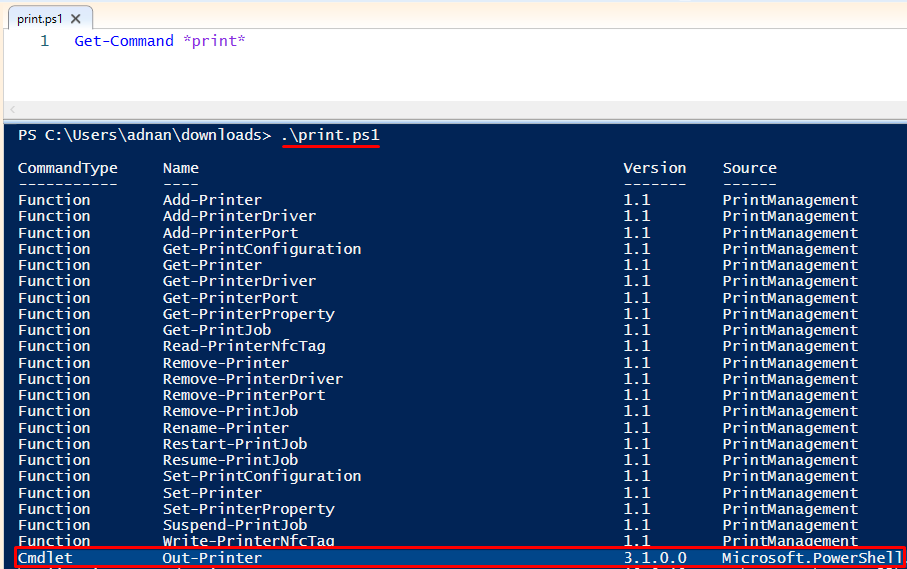
The “Out-Printer” cmdlet of the PowerShell will only send data to your printer.
Now, we will move towards printing a file using this “cmdlet“.
I have created a .txt file and saved it as “printfile.txt” in the same directory where the “print.ps1” script is saved.
You have to use the “Get-Content” cmdlet and pipe it with “Out-Printer” to get the print of the content inside “printfile.txt“. The “Get-Content” will take the content from the file and send it to the Out-printer. Furthermore, the Out-Printer will send the information to the printer. The command to print the file using PowerShell script is shown below:
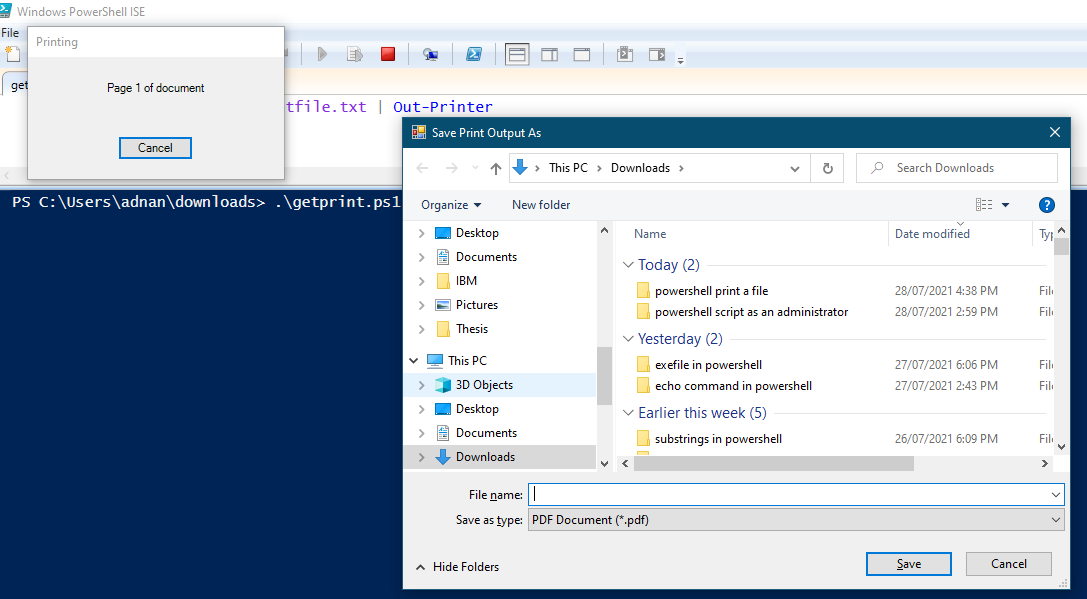
Copy and paste the command in your script. You can create a script with your path of a file to print. We have made another script, “getprint.ps1,” in the same directory:

When you run this script, it will print the content of the file. If your machine is not connected to the printer, it will redirect you to save your file as a PDF, as shown below:
Parameters
Parameters that are supported by “Out-Printer“:
– InputObject: You can save the file’s content in a variable and then pass that variable to “Out-Printer“.
– Name: The print cmdlet “Out-Printer” will print the file using a default printer. However, if you want to print the file on a specific server, then this -Name parameter is used.
We will discuss both parameters in the latter part of this guide.
InputObject Parameter
You can print the content of the file using the “-InputObject” parameter of “Out-Printer“. We will get the content of “printfile.txt” and will save it in a variable. After that, Out-Printer will get the information from the variable and sends it to the printer.
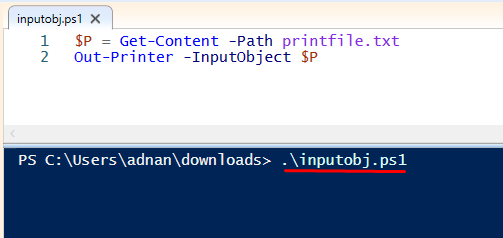
We have created another script and saved it as “inputobj.ps1“. Write the following code in the script to get the content of “printfile.txt” in a variable “$P“. Moreover, the second line of the code shows that “-InputObject” passes “$P” variable to “Out-Printer“, and it will send the data to the printer:
Out-Printer -InputObject $P

Execute the script in the output pane. Once the script is executed successfully, it will print the selected file:
Name Parameter
If you want to print the file using another printer that is not your default, you need that printer’s name or the printer’s location. In case you do not know the name or location of the printer, click on the search icon and search for “Printers & scanners“:
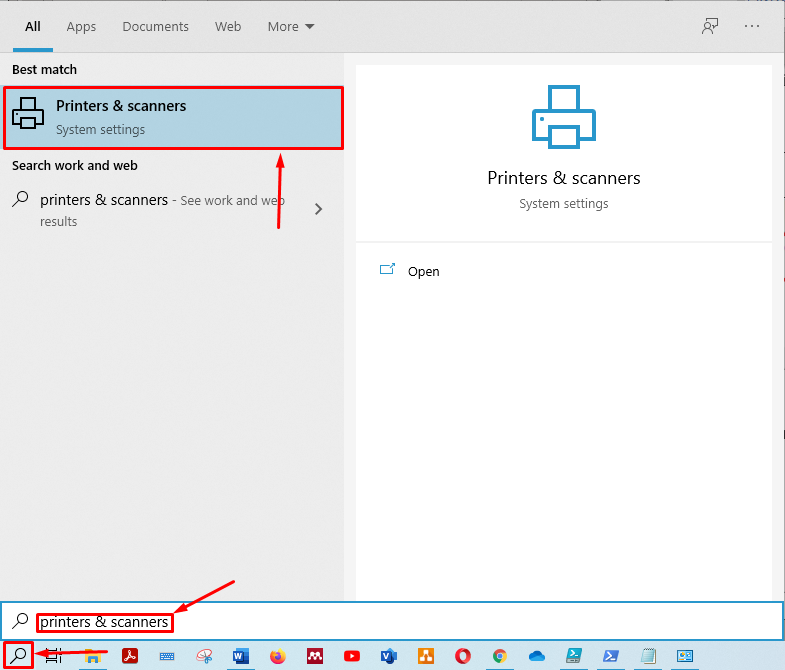
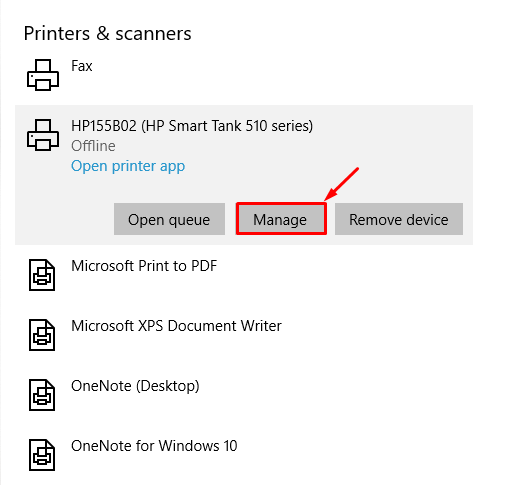
Open the “Printers & scanners“. You will get the list of added printers and scanners. Click on the printer of your choice and select “Manage“:
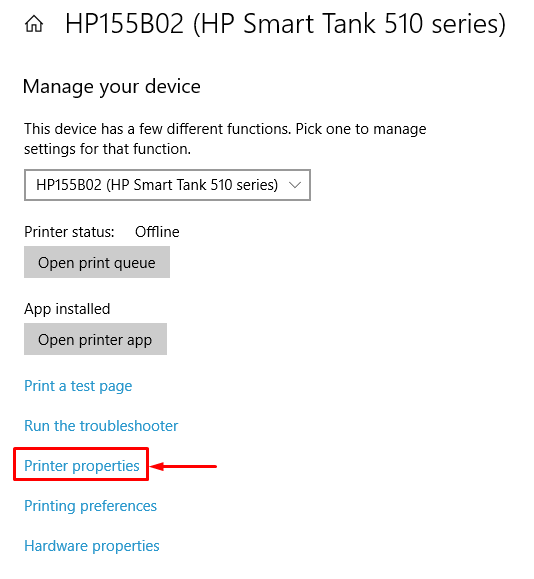
Once you clicked on “Manage“, it will open another window. Select “Printer Properties” from that window:
After that, you will get the name and location of the printer as shown below:
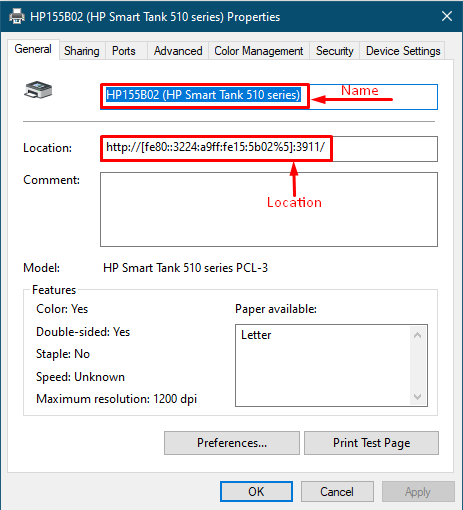
You can use the name or location of the printer.
The following command will print the file:

Now, run the script in PowerShell ISE to print the file on the printer with the specified name:

Conclusion:
PowerShell ISE allows the users to interact with the different tasks of Windows using the command line. Printing has emerged as a widely used action of most computer users, either printing documents or printing photos. In this article, we have demonstrated the ways to print a file using PowerShell ISE scripts. The Out-Printer cmdlet of PowerShell ISE enables you to print the file via ISE scripts. Moreover, we have shown the use of various parameters like “-InputObject” and “-Name“.
from https://ift.tt/3m8eqzP


0 Comments