


To understand the concept of looping over files in the directory, you need access to the Ubuntu application and services. When you have some privileges, you can only operate with files and directories.
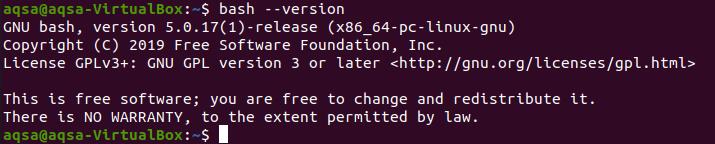
You should have installed Bash on Ubuntu operating system. In some installations, it is installed by default in the updation of packages. If it is already installed, you need to upgrade the version because it must be above 4. To continue the current guide, you need to keep the version above 4. To check the version of the pre-installed Bash in your system, use the command on the Ubuntu terminal.
So you have to perform some functions on files and directories. You can execute the below explained commands on any directory of your choice. But to be precise, it is preferable to create a new directory so that all the belongings of this directly are easily accessible when you open it.
The very first step is to create a directory. We have taken a sample name of the directory “abc”. Create a directory by executing the command.

After creating the directory, now you need to perform all the commands on that. So after the creation of the directory, switch to that directory. Use the below-cited command:

After going to the directory, now create some files by using the touch command.
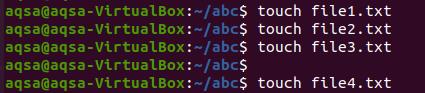
Many methods are used to create a file in Ubuntu. Besides the touch command, we have used the echo command here to create a file and add the content in it collectively in a single command:

This file is created on a simple directory that is currently running by default. So the name of the newly created directory is not added with the command prompt. You can also create files by using a range and expansion in the touch command.
By using this command in new files of .txt extensions will be created by using a single command.
After that, now you can loop through the directory that is newly created. Display the file names. As we have to loop through the files present in the directory, we need a loop. Loops are very effective to use as they fetch the data in less time, requiring less input. Here we will use a “for” loop. By using this loop, each file name will be shown in the next line.

“*” is used for all the files present in this directory. This allows the ‘for’ loop to grab all the files. But to make the output precise, you can add some terms with the asterisk sign. For instance, ‘file-*’ is used for all the files that start from the file. And *.txt to fetch the files that have .txt extensions. We will use these examples further in the article.
This loop will work so that it will fetch all the files from the directory and then display all the files through the echo command. The “$” sign here represents the name of the file. From the result, you can see that each file name is shown.
After verifying the files created by displaying the names of files, now it’s time to enter the value in the files because the files created are empty. This can be done manually by opening each file in the text editor and then writing the data. The second option is to enter data in each file through the command in the terminal. But it requires time to enter the data in each file through single command for each file. But it can be done easily and collectively by using for loop in a single command.

After the execution of the command, the value has been entered in each file we created. When used with echo, the ‘-e’ flag will preserve the new line in the file. To see the data entered, you can navigate to the ‘abc’ directory. Now open any text file. The file is not empty anymore.
‘$file” will show the file name first in the file, and the data you entered will be previewed on the second line because “\n” is used to shift the words used after this to another line. You can also check the data entered through the command.
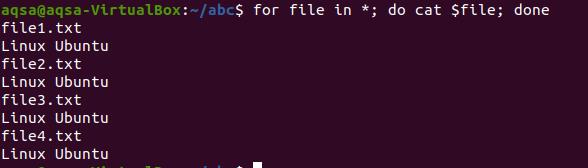
Cat command is used to fetch the data present in all the files of the directory.
Both the procedure of entering the data and fetching it can be done through a single command.

The first step is to write the data in the file and then display it. When you execute the command, the output will be as follow:
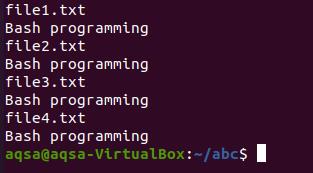
Each file contains the same value. This is because of the ‘for’ loop.
We know the loop for fetching the data and inserting the values, etc., but the loop is also used to create backups. These files have the extension “.bak” at the end. Now execute the backup command in the shell to see the backup of each file.

The “cp” keyword is used to back up all the files. Now to see the files on which this command is applied. We use the command as:
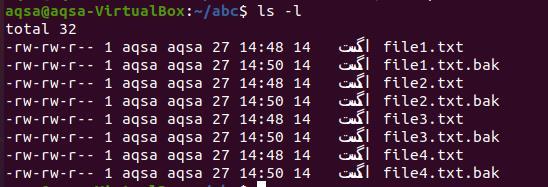
Now it is visible from the output that the detail of the files is shown. Date, file name, user name, and time also at which it was deleted. Also, you have an accurate copy of each file.
If we want only the jpeg files. We will use this in the command

This will bring the names of images only.
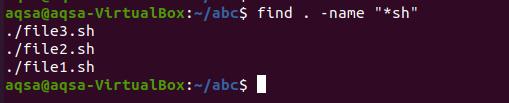
A simple “find” can also do the same function. It will fetch all the files with an extension of .sh.
We will use the keyword “find” in the for a loop.
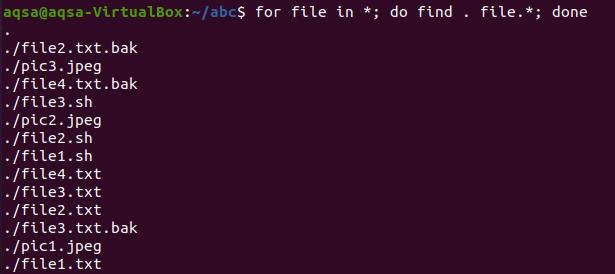
This will bring all the files to the current directory. These have extensions of .bak, .jpeg, .txt. etc.
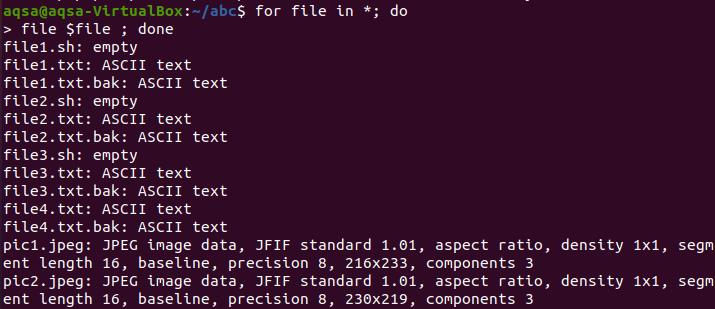
Now, if you want to see the name of all the directory files and the data inside them, this is also done by the ‘for’ loop.
Conclusion
Looping through the files in any directory is not tough anymore, as we know, using loops in Bash and performing on the Linux operating systems. This tutorial is a complete guide to creating, accessing, and performing operations on the directory using a ‘for’ loop.
from https://ift.tt/3mZhfDZ



0 Comments