Secure SHEEL, commonly known as SSH, is a popular open-source network protocol used to secure connections from a client to an SSH server. SSH allows remote control of the target host, port forwarding, executing commands, and files transfer.
SSH uses two types of methods to authenticate users; passwords and public-key authentication.
This guide will walk you through creating and initiating SSH connections using pubic/private keys. Using public-key authentication removes the need to enter a password every time you need to connect to a remote SSH host.
Step 1: Install OpenSSH
To create public and private SSH keys, we need to install the OpenSSH package. Use the default package manager.
For Debian/Ubuntu:
For Arch/Manjaro:
On an Arch-based distribution, use the command:
REHL/CentOS:
On CentOS:
Step 2: Generate SSH keys
With OpenSSH packages installed, we can create public/private key pairs to authenticate SSH connections.
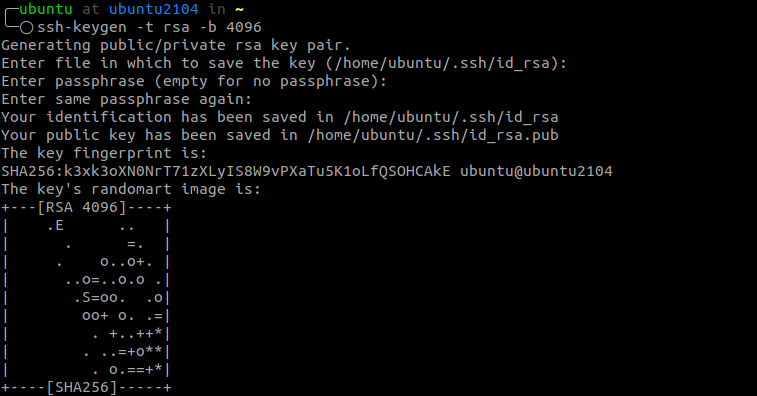
To generate a new key pair on your Linux machine, use the ssh-keygen command. This command will overwrite your old key pair and provision a new one.
Generate an RSA ssh key pair with 4096 bits using the command:
The command will prompt you for a file name. By default, the ssh key pairs are stored as id_rsa and id_rsa.pub for private key and public key, respectively.
$ Enter file in which to save the key (/home/ubuntu/.ssh/id_rsa):
To use the default filename, press ENTER and proceed.
In the next part, enter a passphrase to secure your key pairs. You can skip this by pressing ENTER.
$ Enter passphrase (empty for no passphrase):
$ Enter same passphrase again:
Executing this will complete your SSH key pair creation, and you can use it to log in to SSH.

Step 3: Copy Publick Key to Remote Host
To use the SSH key pair you created, we need to copy the public key to the remote server we wish to manage. Luckily, OpenSSH provides us with the ssh-copy-id command to do this.
Use the command:
The command will prompt you to enter the SSH password. Once authenticated, the command appends the public key to the ~/.ssh/authorized_keys file.

Step 4: SSH using Private Key
Once you complete the above process, you should log in to the remote server using an SSH private key, i.e., not prompted for a password.
Use the command as:

And with that, you have successfully used SSH key-based authentication. You can add an extra layer of security by disabling password logins.
Conclusion
This guide has walked you through the basics of creating SSH key pairs and copying the keys to remote hosts. The above operations allow you to authenticate SSH sessions without a password. In addition, using a single key pair, you can manage multiple servers at once.
from Linux Hint https://ift.tt/3etXdfB


0 Comments