But what if you’re working with the team members, it is hard to send chunks of programs to all team members individually. There is also a size limit of files on different platforms that don’t allow the user to send more than the described size.
It is hard to collaborate when the project is too large and needs modification all the time. For this, you need a distributed version control system that helps you collaborate with team members worldwide. It is good to use a distributed version control system for small and large software projects. Each of the team members will get full access to the complete repository on the local system, and they can work offline.
One such versatile software is Git, and a repository handles by Git is known as GitHub, where you can save your projects, and it is accessible by any team member.
Before starting the Git introduction, you must know about the Version Control System (VCS), as Git is one of the distributed version control systems. You must have an idea about VCS, especially if you have a software development background.
Version Control System (VCS)
While doing the teamwork, the version control system helps to keep a record of modifications, features, and tracks in the projects. Through this, a team can work through cooperation and also separate their task chunks through branches. The number of branches on VCS depends upon the number of collaborators and can be maintained individually.
As this process management system records all the history of changes in the repository, if any team member made mistakes, they can compare it with the backed-up versions of work and undo it. This helps to minimize errors as you have the option to get back to the previous state.
Other notable features of VCS are:
- It doesn’t depend on other repository systems.
- You can create a clone of repositories so that in case of failure or crash, you won’t lose the whole project.
- For all files and documents, history is available with time and date.
- There is a tag system in VCS that helps to show the difference between all types of different documents.
Types of Version Control System
The VCS is divided into three types:
- Local Version Control System (VCS)
- Centralized Version Control System (CVCS)
- Distributed Version Control System (DVCS)
Local Version Control System
In the Local Version Control System, files track are maintained within the local system; it is simple, but chances of failure of files are high.
Centralized Version Control System
In the Centralized Version Control System, the centralized server keeps track of all files; it has a complete history of all files’ versions and client information if they check the files from the server. It is like a client-server system where anyone can share the server and also access everyone’s work.
Distributed Version Control System
The last one is the Distributed Version Control System that comes to control the drawbacks of Centralized VCS. In this type, the client can create a clone of a complete repository that includes history and files track. The server gets back in case of failure using the copy of the client’s repository as a clone is considered as a complete backup of data. Open Source projects like Git etc., use such a type of Version Control System.
What is Git?
Git is one of the Distributed Version Control (VCS) system software that keeps all the track of data. The purpose behind developing the Git software is to provide a collaboration platform where all developers can share their source code during project development. Other important features of Git are; it provides an open-source platform with high-speed performance, is compatible, light-weighted, reliable, secure, ensures data integrity, manages thousands of running branches on different systems, and so on.
In 2005, Linus Torvalds decided to create a new version control system to fulfill community needs and maintain the Linux kernel system. With the help of other Linux developers, the initial structure of Git was developed, and Junio Hamano was the core maintainer since 2005. Linus Torvalds went offline, presented the revolutionary system, and name it Git. And now, vast numbers of multinational companies, such as Google, Firefox, Microsoft, and startups, use Git for their software projects. It is hard to identify Git as a Version Control System (VCS), Source Code Management System (SCM), or Revision Control System (RCS) as it is developed with the functionality of trio.
Git Workflow
When a Git project is started, it divides into three segments:
- Git Directory
- Working Tree
- Staging Area
The Git Directory is about all the files, including changes history. The Working Tree segment holds the current state of the project and all the changes. And the Staging Area tells the Git what possible changes in the file could occur in the next commit.
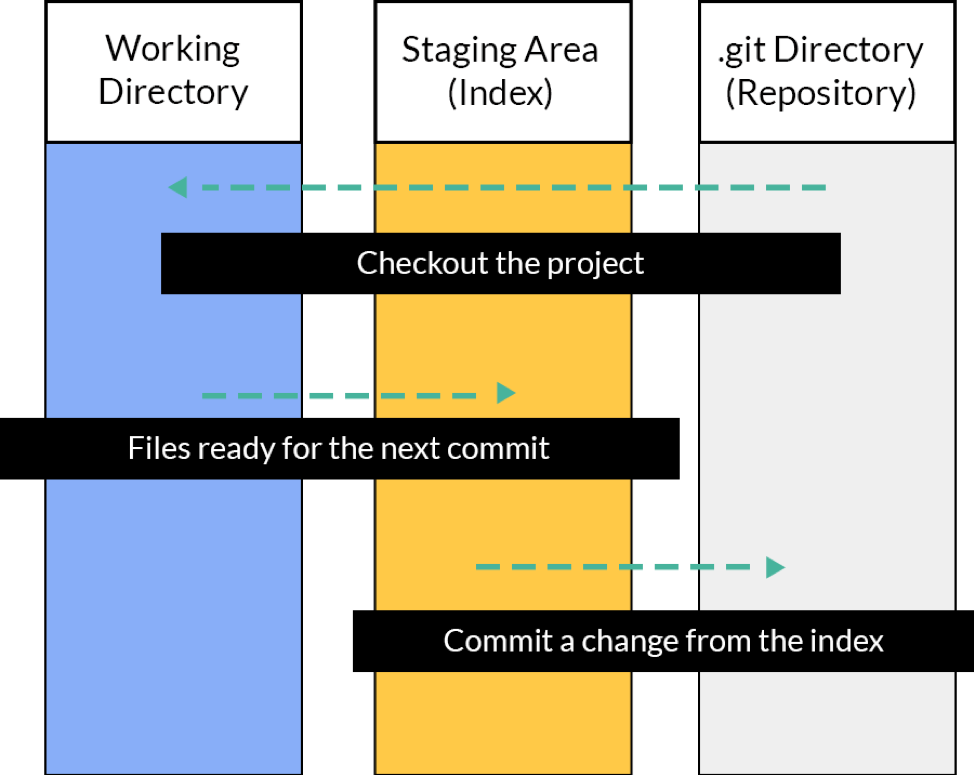
There are two possibilities of file state present in a working directory:
- Untracked
- Tracked
Either a file will be untracked, or it will lie in a tracked state.
Let’s explore these two:
Untracked State
Files that are not added but present in the working directory will be in an untracked state; git is not monitoring them.
Tracked State
Tracked files are those files that were present in the last snapshot, and Git has an idea about them.
Each of the tracked files can reside in one of the mentioned sub-state:
- Committed
- Modified
- Staged
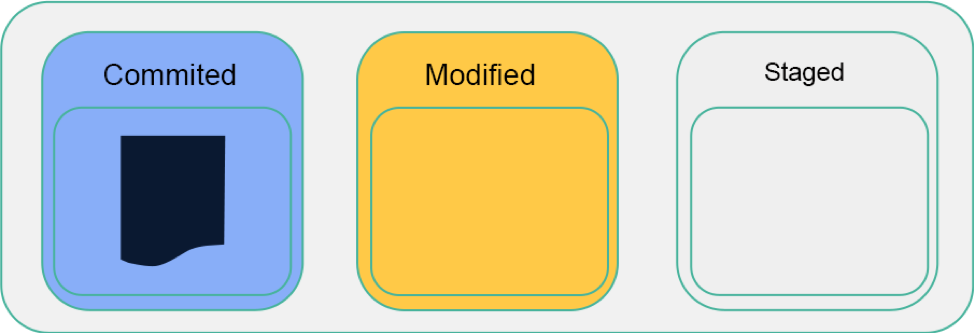
Committed
This state of the file means that all the file data is stored in the local database safely.
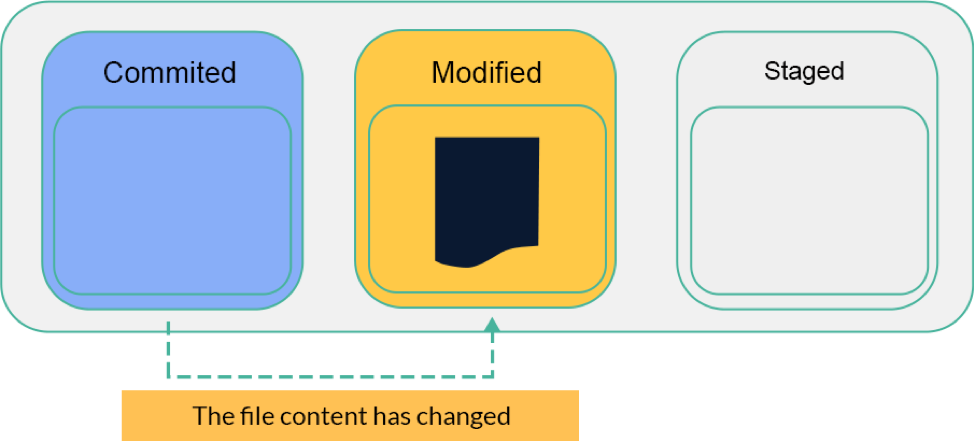
Modified
A file changes its state from Committed to Modified when changes have been made in the file. There could be any type of changes like deleting content, updating, or adding anything. Simply, this state means changes that haven’t been committed yet are now occurring.
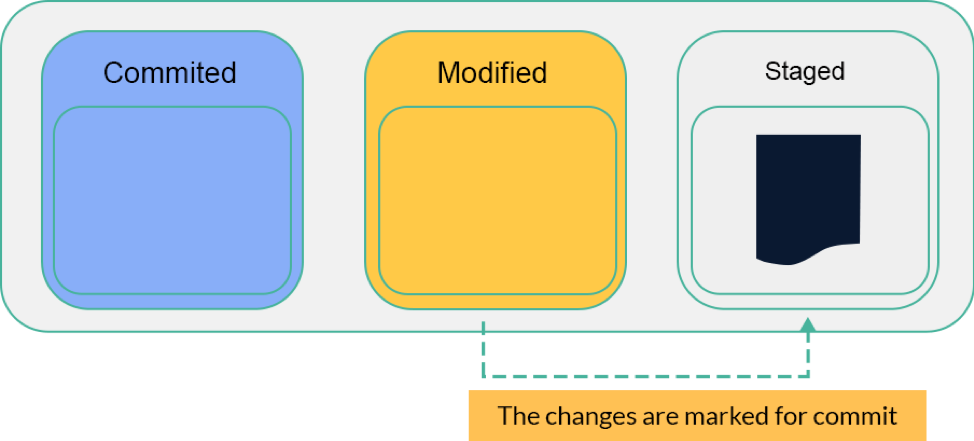
Staged
The staged state included two types of files: Modified files or Untracked files (newly created files). When all modifications of a file are finished, it is transferred to the staged state.
How to Install Git on Ubuntu
You don’t need sudo permission to install Git on Ubuntu; it can be downloaded with or without root-user.
To check if Git is already installed on your device or not, run the given command:

If it is present on your system, you will get a Git version. As it is not present in my system; to install, execute the given command:
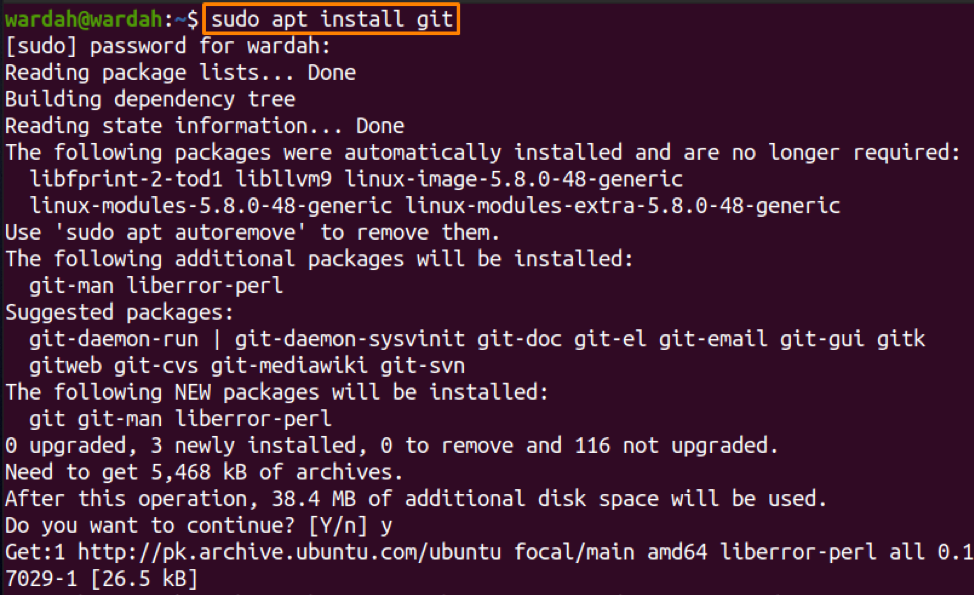
Now, run the version command again to check if it’s successfully installed:

Setting up Git
After the installation process, the next step is to configure the Git set up so that you can start with the Git software.
For configuration, you need to enter your name and email address through the “git config” command.
First, you need to enter your user name to set for the Git system; type the mentioned command for this:

Now, set the email address through the following command:

When you set credentials for the Git application, it will be stored in the Git configuration file “./gitconfig”; you can edit information by using any text editor like nano, etc.
The command used for this purpose is:
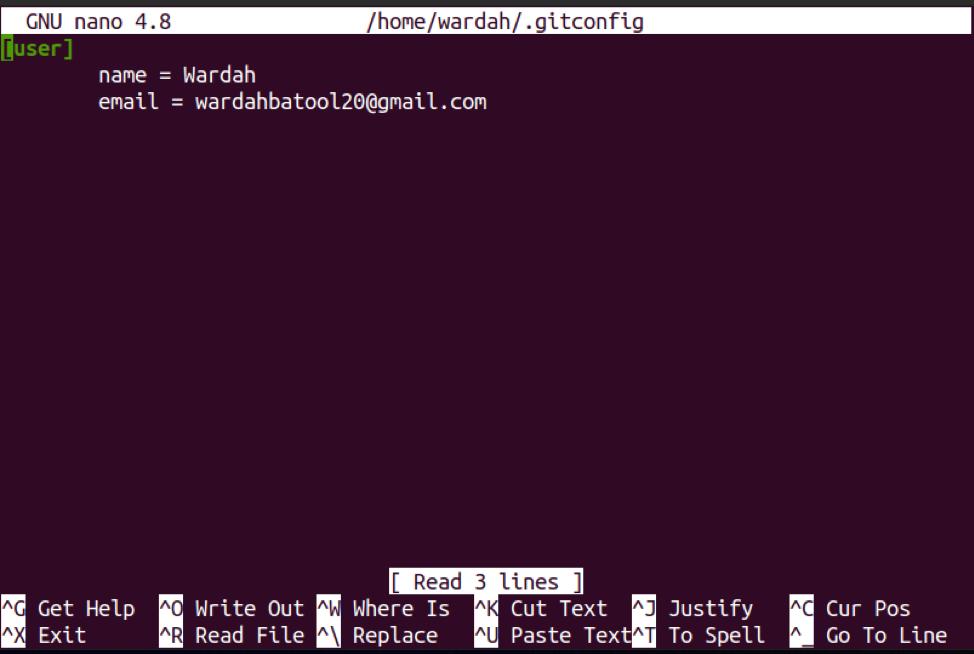
If you want to edit information like name or email, then do it in the editor and press “Ctrl+X” and then press “Y/y”; it will save the editor’s modifications and exit.
Full Guide to Restore, Reset, Revert and Rebase
When working with the Git application, you face challenges where you need to roll back to any of the previous commits. It is one of the lesser-known Git aspects, as many of us don’t know how easy it is to get back to the last state of the commit.
It is pretty easy to undo significant changes in the repository if you know the difference between the terms “Restore“, “Revert“, “Reset“, and “Rebase“. To perform the required function (back to the previous state), you should know their differences.
This article will cover four main aspects of Git:
- Git Restore
- Git Reset
- Git Revert
- Git Rebase
Let’s explain all of them separately so that you can get a better understanding:
Git Restore
The Git restore operation helps to restore contents from the staging index or any commits in the working directory. It won’t update the branch but changes the commit history while restoring the files from other commits. It specified the paths in the working tree; these paths help to find the content while restoring.
The restore uses some commands to get back the contents, if you find the “staged” command, it means files are restored from the Head or index; to restore files from other commits, use the “—source” command, and if you want to restore both “working tree” and index, you can do so through “—staged” and “—worktree” commands.
To restore recently made modifications follow the below-mentioned syntax:
For example, you have added a file by the name of “my_git.txt” using the command mentioned below:

To check whether the file exists or not, the given command would be used:

Now, let’s remove this file using:

Again check the status:
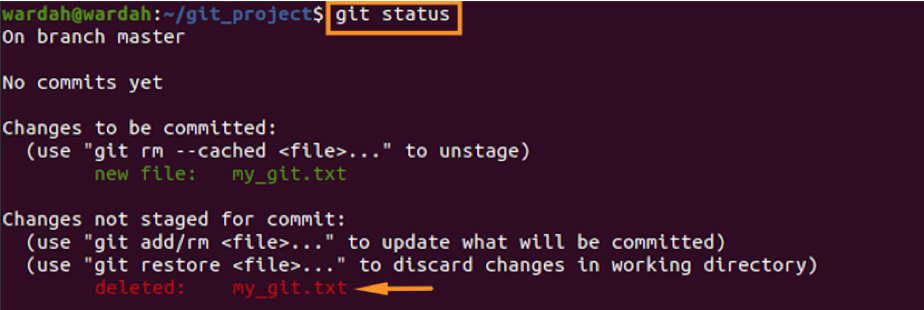
As it can be seen that the file has been deleted. Now, to restore it, use:

Check the status again:

The file has been restored. The “staged” flag is used to restore a particular file from the previously added git, so to do that, follow the given syntax:
To restore multiple files from the staging area, you need to use wildcard characters with the filename; like:
To restore the uncommitted local modifications, the same syntax would be followed as we did above, but eliminate the “—staged” flag from the command.
Remember that these modifications cannot be undone.
In the current working directory, all the present files can be restored through the following syntax:
Git Reset
You can consider Git reset as a roll-back feature because it is used to undo modifications. When you use the Git reset feature, it will return your current environment to the previous commit. This working environment could be any state like working directory, staging area, or local warehouse.
We have explained the Staging Area and Working Directory; in the reset feature, the Head is a pointer towards a new branch or current branch. Whenever you switch from the previous one, it refers to the new branch. It is a reference of the previous branch towards further, so it can be considered parent action.
To run the Git reset command, you are offered three different modes of Git; Soft, Mixed, and Hard. When you execute the Git reset command, it will use mixed mode by default.
If we move to the Git Reset Hard, it points the Head to the specified commit and deletes all the commits after the particular commit. When you use the Reset hard command, it updates the working directory as well as the staging area and changes the commit history. The Git Reset Soft resets the reference pointers and updates them; when we pass —soft argument, it doesn’t touch the Working directory and Staging Area and resets the Commit history. The Git Reset Mixed is the default mode of Git; when you execute it, reference pointers are updated, and it sends the undone changes from Staging Index to the Working Directory to complete them.
To reset (undo) all the modifications you have done in the last commit, the following command would be used:
It will discard all the changes that happen in the last commit. And for two commits before “HEAD”:
The above command is hardly used because everything, including commit history, will be updated to a specific commit. Moreover, the staging index and working directory will also be reset to that specific commit. You may lose crucial data that was pending on the staging index and working directory. To avoid that, use “–soft” in the place of hard.
The above command will not alter the working directory and staging index. Let’s use the “reset” option to unstage a file:
Firstly, create a file and add it to any branch using:

The above command is adding an “index.html” file to the master branch. To check the status:

To unstage the file “index.html”, use:

Git Revert
Git Revert operation is quite similar to the Git Reset command; the only difference is that you need a new commit to go back to the specific commit while performing this operation. The revert command is used to cancel the changes that happen after executing the reset command. For this, it will not delete any data; just add a new commit at the end that will cancel the modification in the repository.
To revert in the commit, mention the Hash with the revert option:
Git revert command needs a reference which means the command will not work. Let’s use “HEAD” as a commit reference.
The command mentioned above will revert the latest commit.
Git Rebase
The Git Rebase is used to merge or combining the sequence of commits on the new base. It is the process of integrating changes and transfers them from one branch to another (one base to another). It is an alternative to the “merge” command but somehow different from it, and therefore it might confuse us because both are similar. The “merge” command is used to combine commits history and maintain the record as it happened, whereas rebase commands rewrite or reapply the history of commits on the top of another branch.
Let’s demonstrate the concept of Rebase option through an example:
In the above history, “features” is a branch with “B” as its base. Use the following command to merge the “features” branch after the final commit:

The commit reference could be anything like a branch, ID, or tag. For instance, to rebase the “features” branch to the master, which is “D”, use the below-mentioned command:


When you execute this command, the “features” branch will be appended to the master, which is a new base:

Conclusion
In Software Configuration Management, Version Control is a crucial component to manage changes in the documentation, programs, or software projects. These changes are identified numerically and entitled “revision“. Suppose the first version is set as “revision 1”. When any team member changes the project, it will save it as “revision 2” with the timestamp and the concerned person who did modifications.
The Version Control System is divided into three categories Local VCS, Centralized VCS, and Distributed VCS. One of the examples of Distributed VCS is Git, open-source software that helps to manage all records of a development project. It provides a light-weighted collaborating platform with high performance and manages several running branches on different systems.
Whenever you start with a project on the Git system, the Git workflow helps to manage it effectively and consistently; it is divided into three segments: Git Directory, Working Tree, and Staging area.
The project you’re working on is either in an untracked state or tracked state. The Untracked file is considered a new file that wasn’t a part of the working directory before, whereas Tracked files are the part of last snapshots and further categorized into Committed, Modified, and Staged states.
A committed state means files data is stored in a local database; whenever you make any changes in the file, it transfers into the Modified state. The Staged state includes modified files and newly created files; when all modifications of a file are finished, it is transferred to the staged state.
This write-up is demonstrating how you can install and configure the Git system on Ubuntu 20.04.
After that, we discussed how to restore, rebase, revert, and reset Git operations while doing a project. The Git Restore function is used to restore content from commits in the working directory. Whenever you perform a restore command, it will change the commit history and specify the paths.
The Reset, or we can say rollback feature helps to undo modifications in the Git repository and will return the current environment to the previous commit.
Git Revert operation is quite similar to the Git Reset command; the only difference is that you need a new commit to go back to the specific commit while performing this operation.
And the last one is the Git Rebase which is used to merge or combine the sequence of commits on the repository. It is different from the merge command as the “merge” command is used to combine commits history and maintain the record as it happened, whereas “rebase” commands rewrite or reapply the history of commits on the top of another branch.
The article has shown you how you can perform these operations while using Git software on Linux.
from Linux Hint https://ift.tt/2Wok6Lr


0 Comments