


In this post, we will describe how to change ban time in fail2ban. We will also describe how to permanently ban an IP address if you ever need to do so.
Pre-requisites:
- Fail2ban package installed on Linux
- Sudo privileged user
Note: The procedure explained here has been tested on Ubuntu 20.04. However, you can follow the same procedure for other Linux distributions having fail2ban installed.
Change ban time in fail2ban
As described above, the default ban time in fail2ban is 10 minutes. The ban time is the length of time (in seconds) during which an IP is banned after a specific number of failed authentication attempts. The preferable way is to set this time long enough to disrupt malicious user activities. However, it should not be too long for the legitimate user to be mistakenly banned for his failed authentication attempts. Note that when a legitimate user is banned, you can also manually unban it instead of waiting for the ban time to expire.
The ban time can be changed by adjusting the bantime parameter in the fail2ban configuration file. Fail2ban ships with the configuration file jail.conf under the /etc/fail2ban directory. However, it is recommended not to edit this file directly. Instead, to change any configurations, you will need to create a jail.local file.
1. If you have already created the jail.local file, then you can leave this step. Create jail.local file using this command in Terminal:
Now the jail.local configuration file has been created.
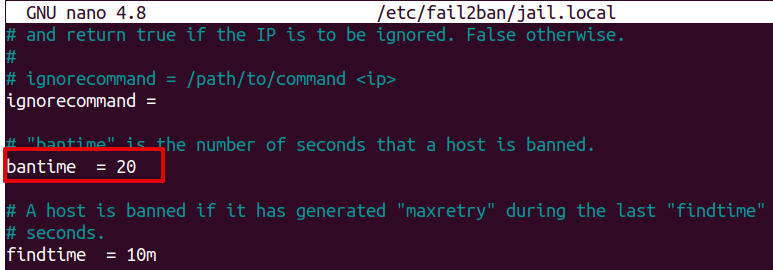
2. Now, to change the ban time, you will need to adjust the bantime parameter in the jail.local file. To do so, edit the jail.local file as follows:
3. Change the bantime parameter value to the desired value. For instance, to ban the IP addresses for, let’s say, 20 seconds, you will need to change the existing value of bantime to 20. Then Save and exit the jail.local file.
4. Restart the fail2ban service as follows:
After that, those IP addresses which make a specific number of failed connection attempts will be banned for 20 seconds. You can also confirm it by looking at the logs:

The above logs confirm the time difference between a ban and unban action is 20 seconds.
Permanently ban an IP address in fail2ban
You can also permanently ban a source IP address in fail2ban. Follow the below steps to do so:
1. If you have already created the jail.local file, then you can leave this step. Create jail.local file using this command in Terminal:
Now the jail.local configuration file has been created.
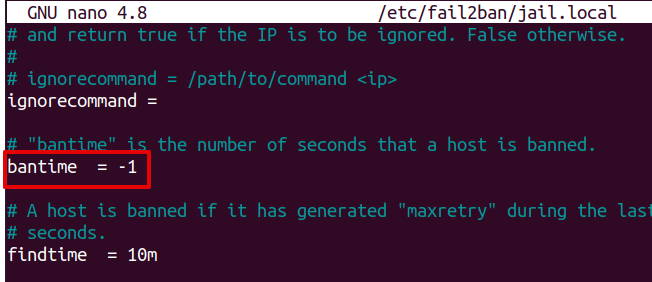
2. Now, to permanently ban the IP addresses, you will need to change the bantime parameter value to -1. To do so, first, edit the jail.local configuration file as follows:
3. Now, to permanently ban the IP addresses, change the bantime parameter existing value to -1.
Then save and exit the jail.local file.
4. Restart the fail2ban service as follows:
After that, the IP addresses which make a specific number of failed connection attempts will be permanently banned.
That’s all! This post described how to change the ban time or permanently ban a source IP making incorrect authentication attempts using fail2ban.
from Linux Hint https://ift.tt/3egkQbW


0 Comments