


Visual Studio Code, also known as VS Code, is a trendy open-source code editor built by Microsoft Inc. It comes up with some built-in powerful features like integrated terminal, embedded Git control, code snippets, syntax highlighting, auto-completion of code, code debugging, and so on. It is a cross-platform GUI code editor and available for almost all Operating systems, and in this guide, we will learn how to install Visual Studio code on CentOS 8.
Installation of Visual Studio Code on CentOS 8
This guide consists of two simple and easy ways to install Visual studio code on CentOS 8.
- Adding the VS Code repository
- From the snap store
Let’s start with the first method by adding the VS Code repository.
Install VS Code by Adding the VS Code repository
Installing VS Code by enabling or adding the VS Code repository is very easy to install and recommended by its official website. Let’s start.
Add GPG repository key of Microsoft
To add the VS Code repository, we first have to add the GPG key of Microsoft to the CentOS 8 system. Add the GPG key by typing the command given below:

Add the VS Code Repository
To add the VS Code repository to the CentOS system, create a new file “vscode.repo” in the “/etc/yum.repos.d” directory using a nano editor.
![]()
In the “vscode.repo” file, type or paste the content given below.
baseurl=https://packages.microsoft.com/yumrepos/vscode
enabled=1
gpgcheck=1
gpgkey=https://packages.microsoft.com/keys/microsoft.asc
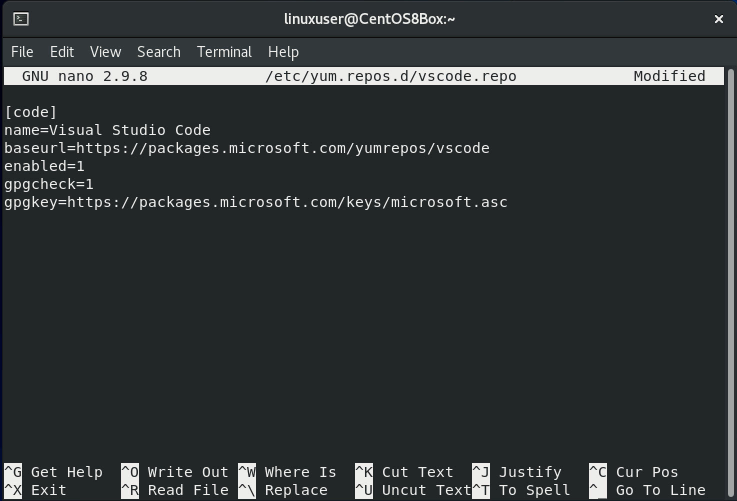
After pasting the above-given content in the “vscode.repo” file, save and close the nano editor using the keyboard shortcut (CTRL + X) and (CTRL + S), and you have successfully added the VS Code repository on CentOS 8.
Install VS Code
With the VS Code repository added on CentOS 8, now we can install the latest stable version of VS Code.
First, update the package cache repository:
Upgrade the packages if needed by typing the command given below:

Now, install the VS Code package using dnf:
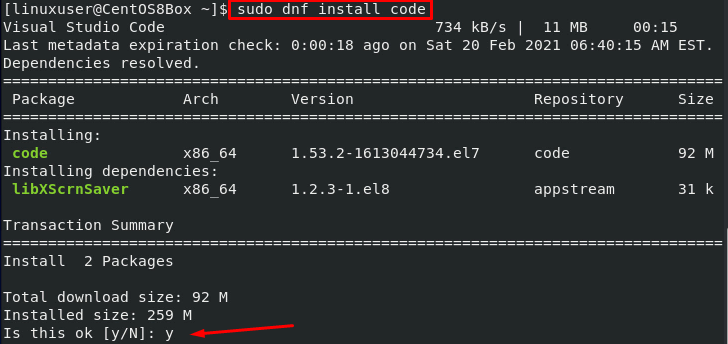
This is it. Visual Studio Code is installed on CentOS 8 by adding the repository of Visual Studio code.

After successfully installing, Simply go to the launcher of CentOS 8 and search for the VS code and start using it.

Now, let’s install VS Code using the Snap method.
Install VS Code from the snap store
VS Code is available in the Snap store, and it can easily be installed from the snap store on CentOS 8. Snap does not come pre-installed on CentOS 8. If you have not installed it on your system, you can install snap using the following method; otherwise, you can skip the following snap installation method and go straight ahead to the VS code installation part.
Install Snap if not already installed
Enable the EPEL repository if it is not enabled

Upgrade the system’s package repository

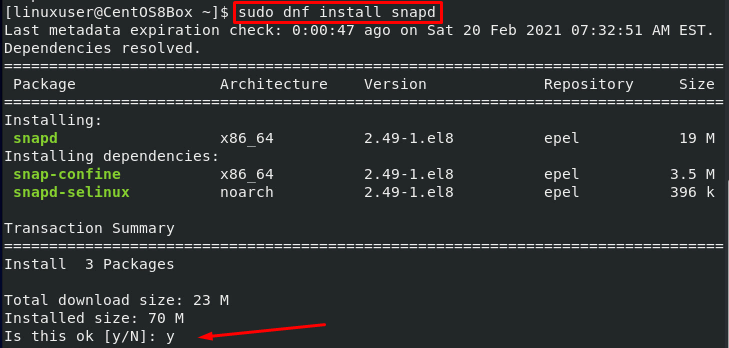
Install snapd
Enable the snap communication socket

![]()
Sign out and sign in back to update the snap’s path.
Install VS Code
Installing VS Code through the snap store is really simple; you just have to type a single command, and the rest of the care about the dependent packages is of the snap. To install the VS Code from the snap store, type the command given below:

After taking a couple of minutes, the VS code will be installed on CentOS from the snap store.

Conclusion
In this post, you have learned how to install Visual Studio Code on CentOS 8 using two profound and easy-to-understand methods. You can use the Visual Studio Code Editor to write programs in various programming languages with syntax highlighting, code snippets, and much more features like this.
from Linux Hint https://ift.tt/3atZx4c


0 Comments