In this guide, check out how to enable the “Tab Groups” in Google Chrome.
Installing Google Chrome
Google Chrome is a free browser available for all the major platforms (Windows, Linux, and macOS). For Linux, Chrome is available as installable RPM (for SUSE Linux, Fedora/CentOS/RHEL, etc.) or DEB (Debian, Ubuntu, Linux Mint, Pop!_OS, etc.) packages. Follow this guide to install Chrome on Arch Linux.
Here, let’s have a brief look at how to install Chrome on some of the most popular Linux distros.
Grabbing the installation package
For Linux, Google officially releases installable RPM and DEB packages. Go to the Chrome download page.

For Debian, Ubuntu, Linux Mint, and similar distros download the DEB package.
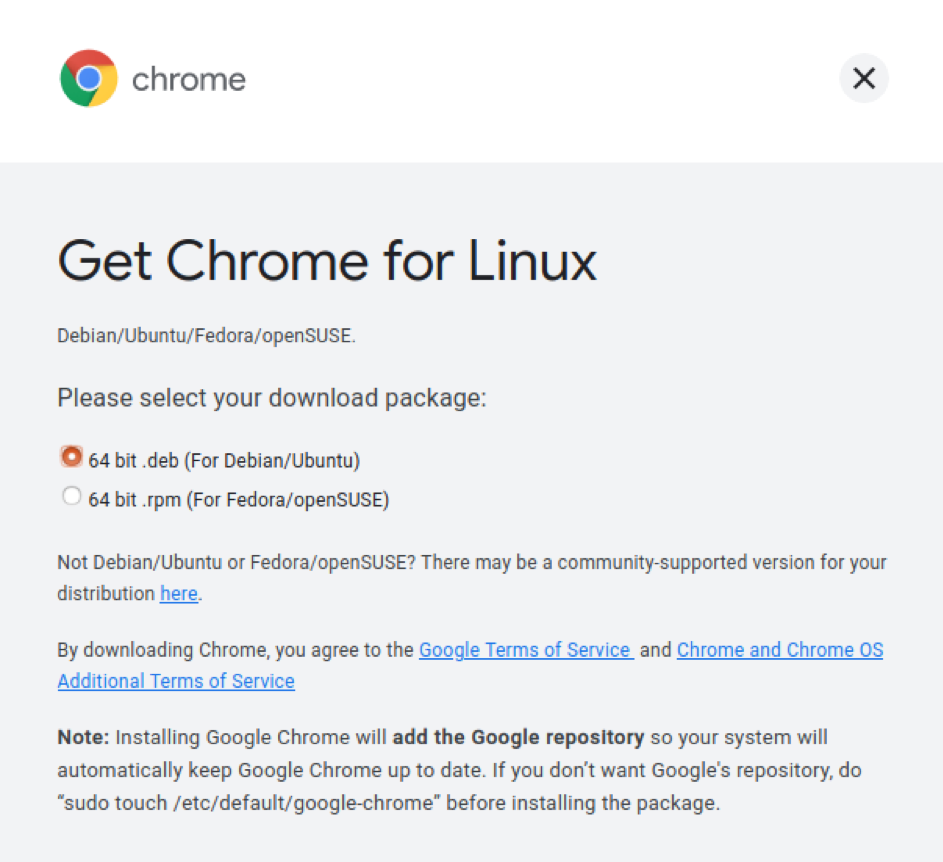
For Fedora, CentOS, RHEL, SUSE Linux, and similar distros, download the RPM package.

Installing the package
All the DEB-based distros use APT as the package manager. To install the Chrome DEB package using APT, run the following command.

In the case of RPM-based distros, various package managers are available. Here are some of the most common ones.
To install the RPM package on Fedora, CentOS, or RHEL, run either of the following commands.
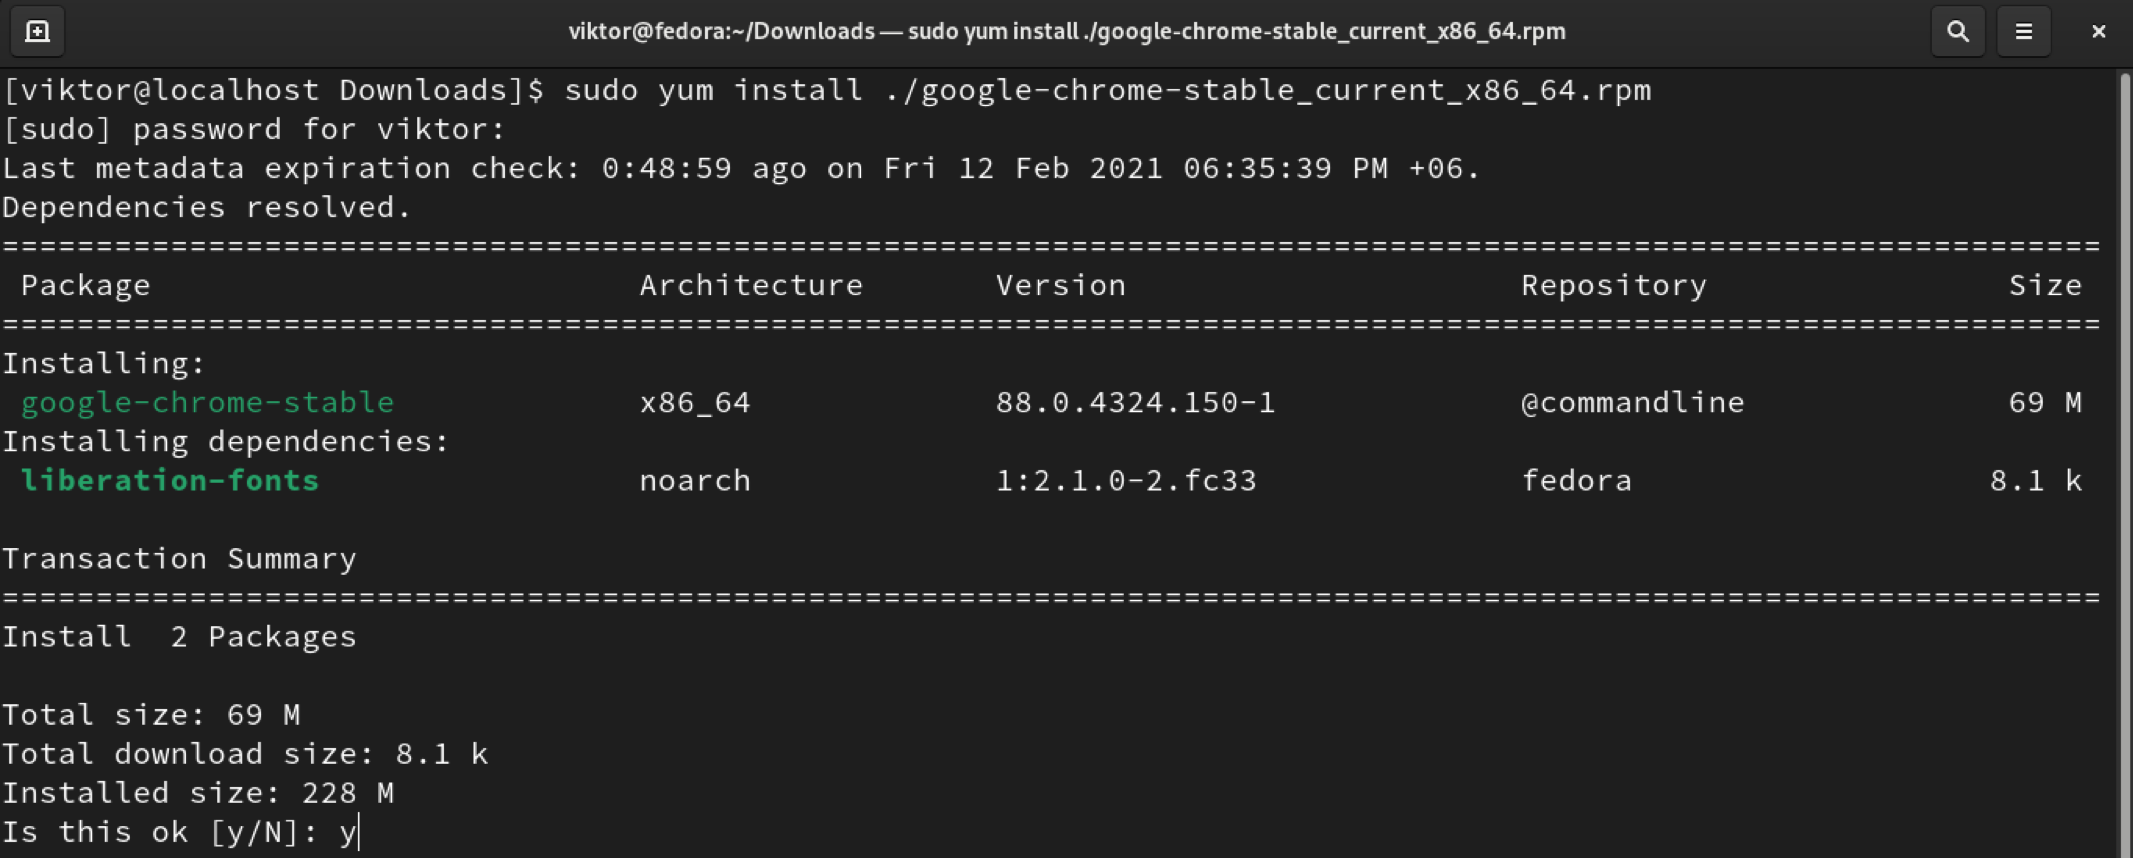
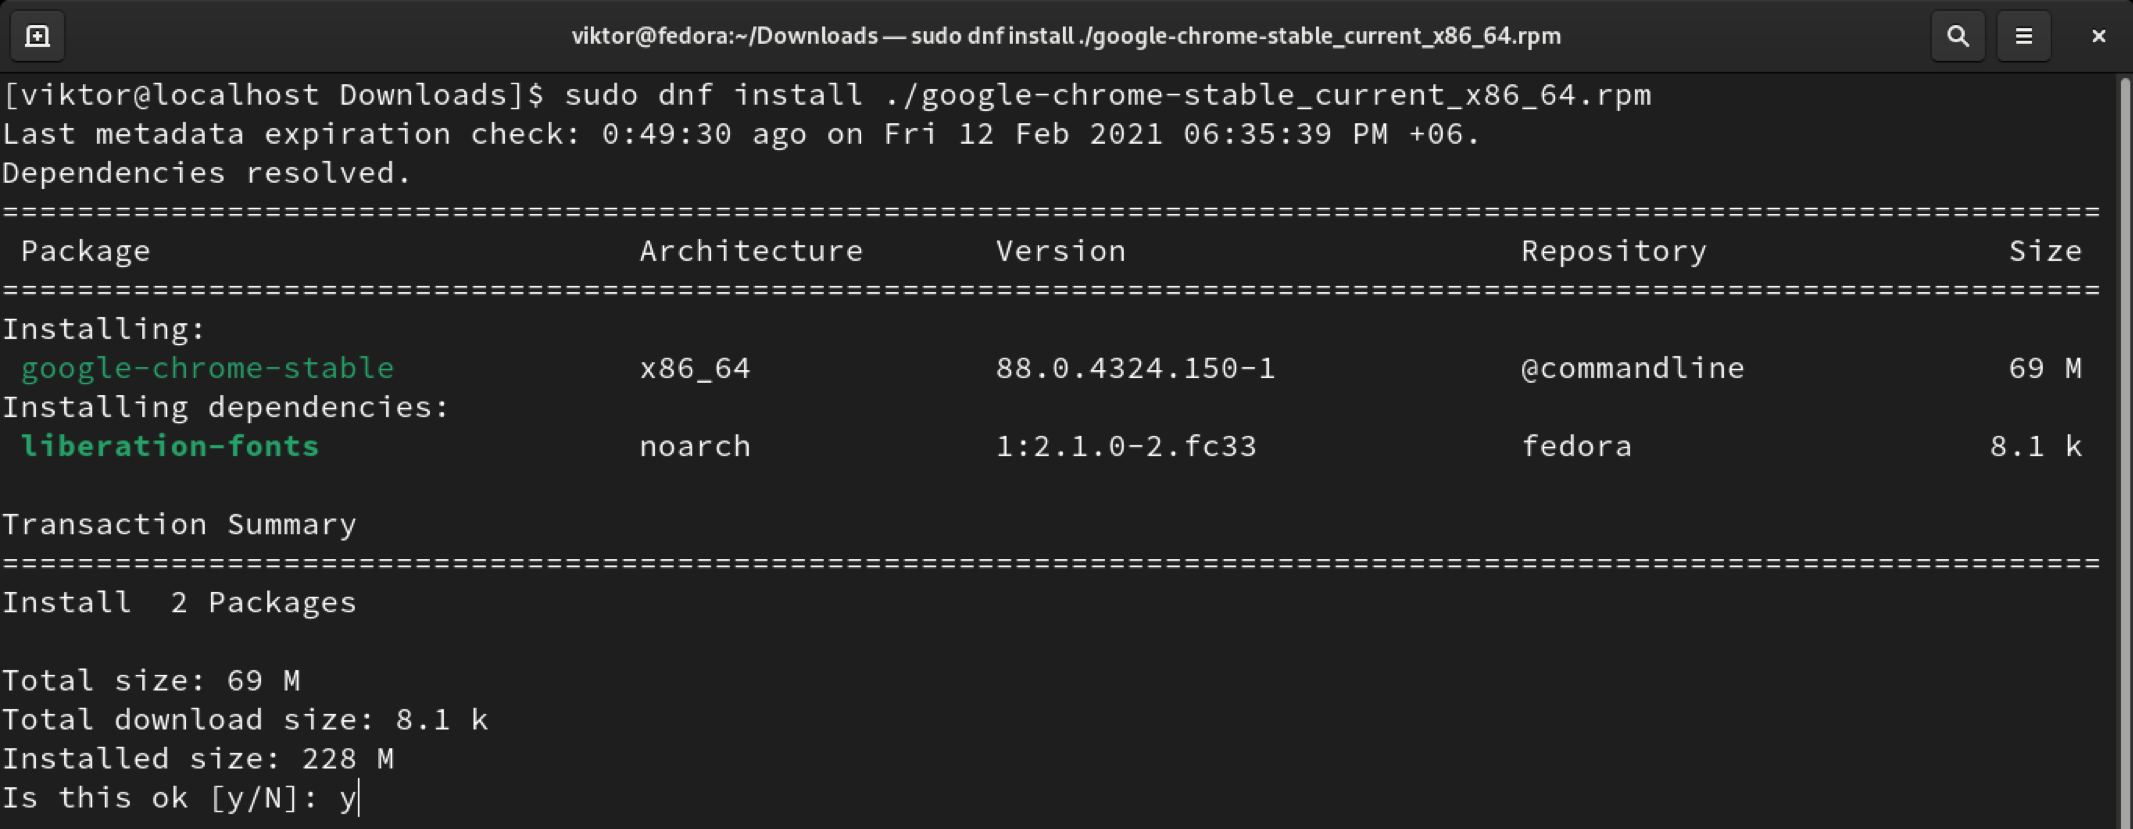
To install the RPM package on SUSE Linux and similar distros, run the following command.
Install Chromium browser
The base source code of both Google Chrome and Chromium is maintained by the Chromium project. Chromium browser is the vanilla build from the source (along with some open-source tools, like media codecs).
Both browsers support the “Tab Groups” feature. Unlike Chrome, most distros offer Chromium browser from the default package repos. Just run the appropriate command according to your distro.
To install Chromium on Debian, Ubuntu, Linux Mint, and similar distros run the following command.

To install Chromium on Fedora, CentOS/RHEL, and similar distros, run either of the following commands.
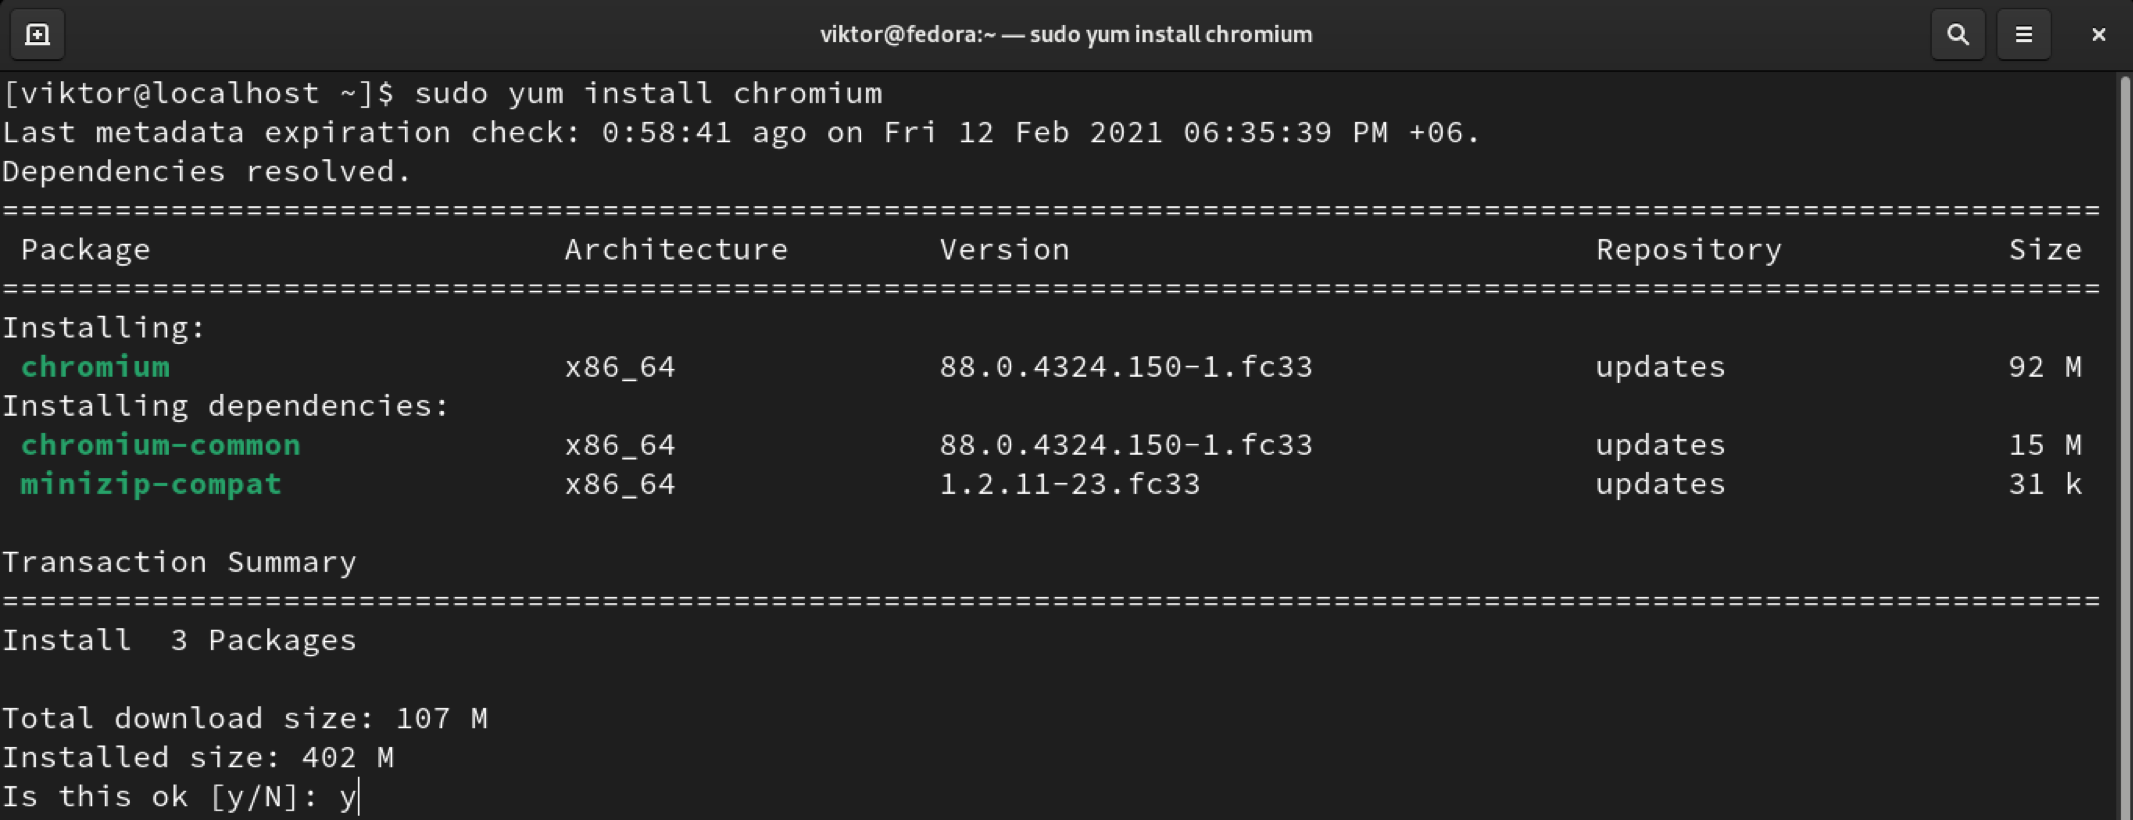
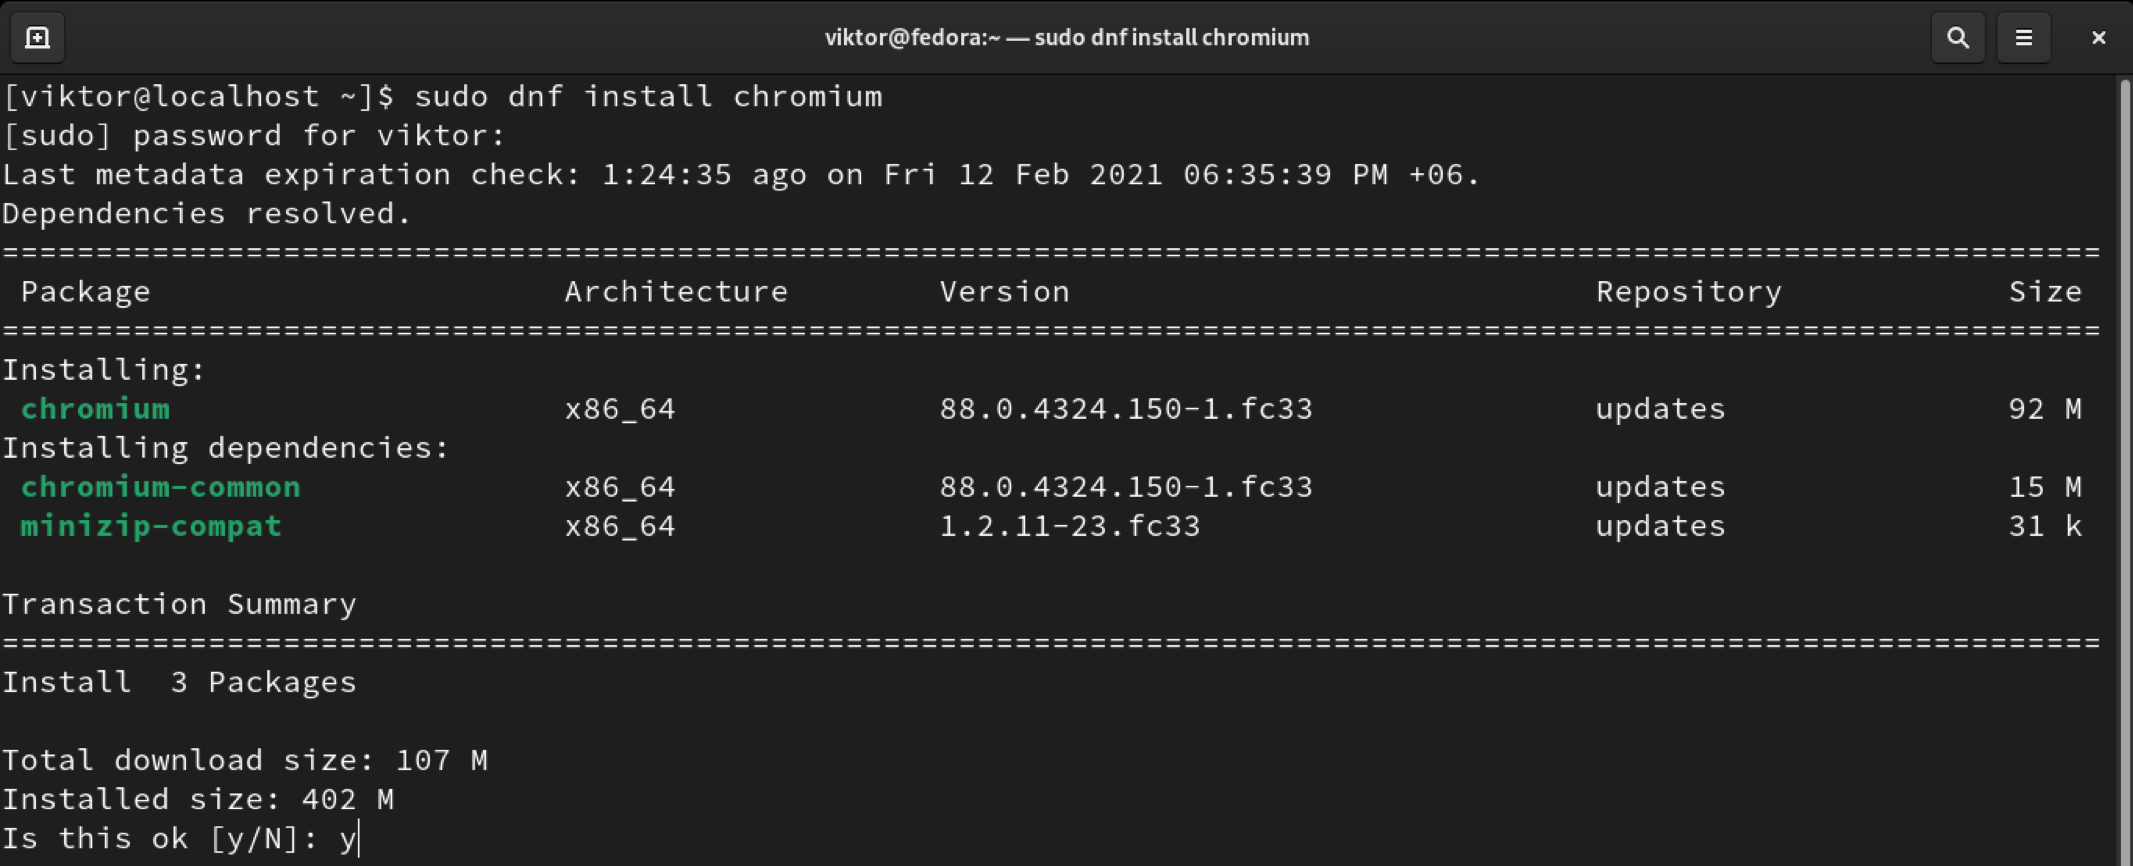
To install Chromium on Arch Linux and similar distros, run the following command.
Chrome Tab Groups
Starting from Chrome 83, Google announced that “Tab Groups” would be enabled by default. As of the latest Chrome release (Chrome 88), there’s no way of disabling this feature. While it’s still possible in older versions, it’s strongly not recommended to use an older browser.
In the case of the Chromium browser, it’s possible to enable and disable manually
Enabling “Tab Groups”
The default behavior of both Chrome and Chromium is to have this feature enabled. The method described under this section is no longer available on Chrome. Thus, it only applies to Chromium.
Open a new tab and go to the following link.
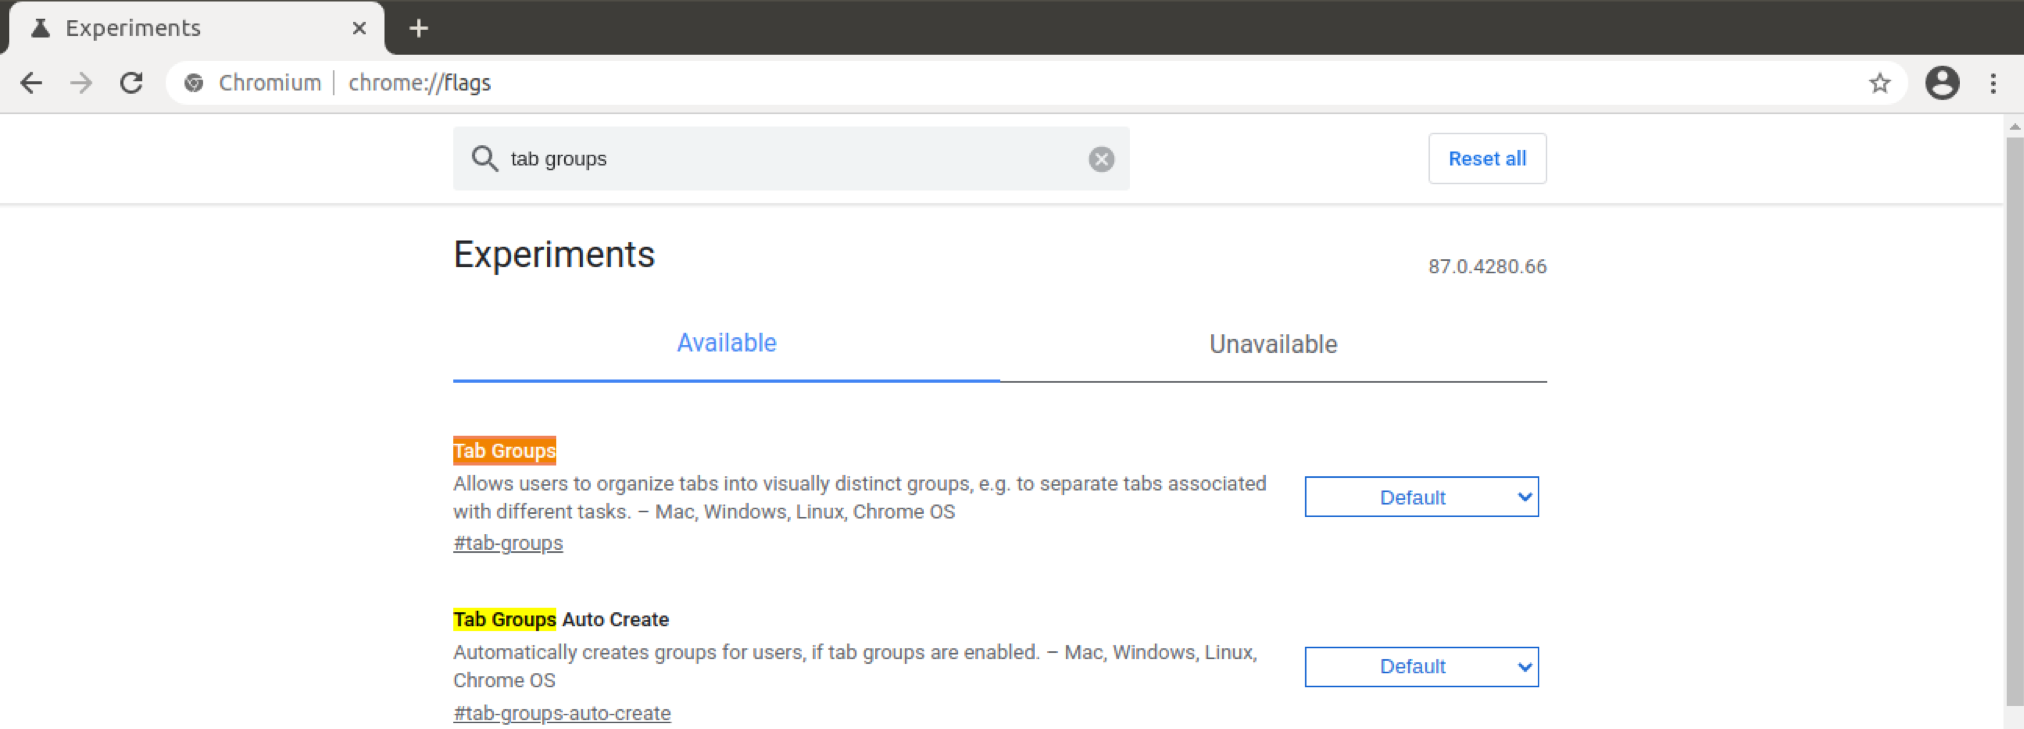
Search for the term “tab groups”.

It should highlight the option “Tab Groups”. If it wasn’t changed, it should be set to “Default”. To enable the feature, select “Enabled”.
Chrome/Chromium will ask for restarting the browser to take the changes into effect. Click “Relaunch” to restart. Alternatively, you can do it manually after saving all your works.
Using “Tab Groups”
Creating groups
To add a tab to a group, first, we need a group or more. To create a new group, right-click a target tab and select “Add tab to new group”.
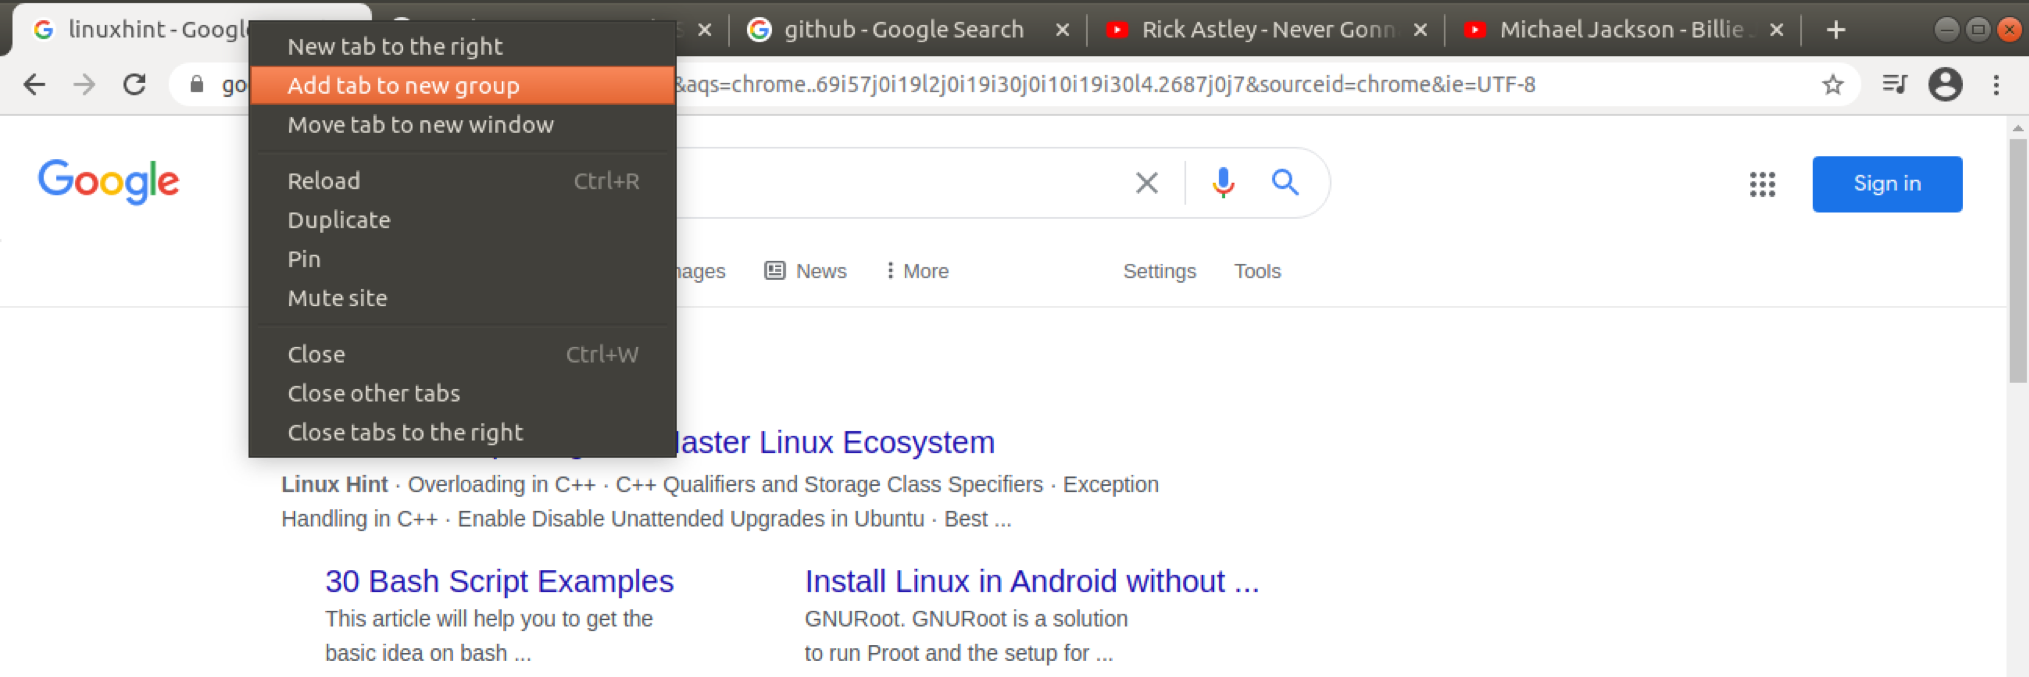
You can set the group name and color for easy identification.

Adding tabs to a group
Assuming you have your groups set properly, let’s get started. Right-click on any other tab, go to “Add tab to group”, and select the desired group. The group color will colorize the tab.

To create a new out of the new tab, you’d want to select “New group”.
Removing a tab from a group
Sometimes, individual tabs need to be removed from a group. To remove a tab, go to the tab, right-click the tab, and select “Remove from group”. The tab will be removed from the group.

Removing groups
When a group is no longer necessary, keeping it around is redundant. Removing a group is a necessary action to keep the tabs in order.

To remove a group, right-click the group icon, and select “Close group”.
Disabling “Tab Groups”
While this action isn’t recommended, it’s possible to disable “Tab Groups” because of the utility it offers. Note that this feature only applies to the Chromium browser. In the case of Chrome, there’s no way of disabling it.
First, open a new tab, and go to the following link.
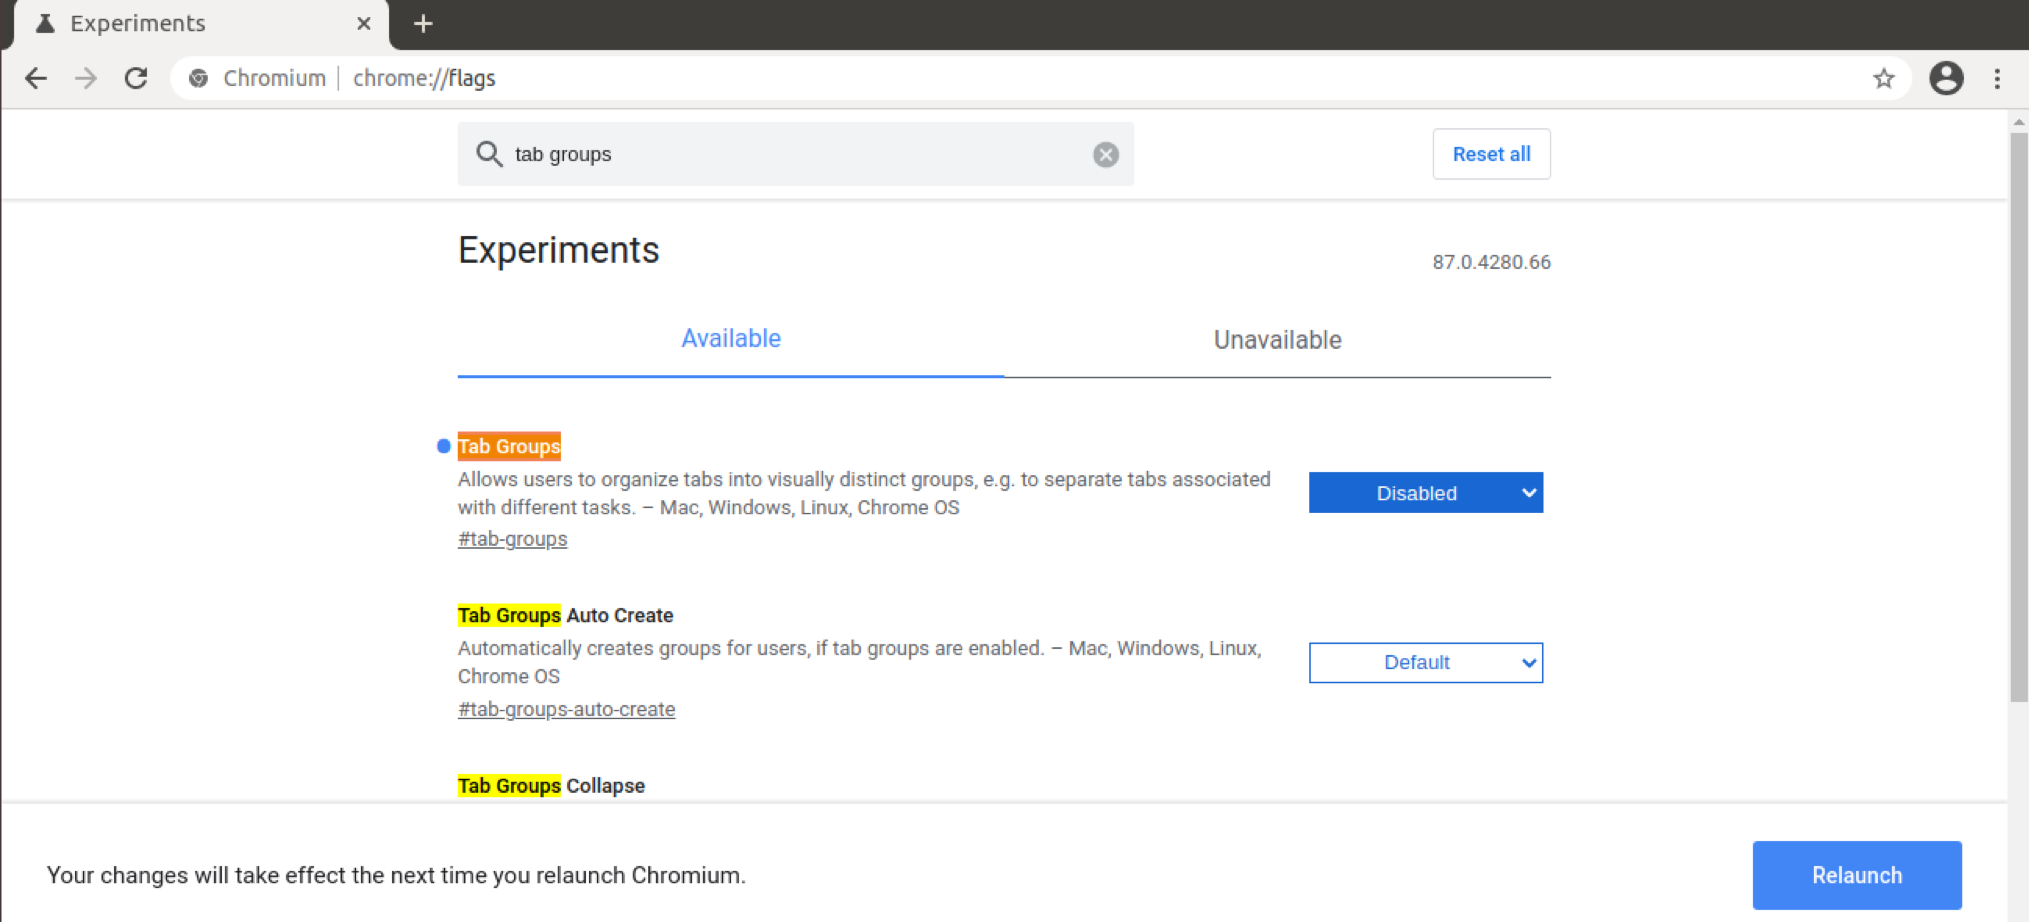
Search for “team groups”. Under the “Tab Groups” option, select “Disabled”. Finally, click “Relaunch” to take the changes into effect.
Final thoughts
The “Tab Groups” feature is really awesome in keeping the tabs organized. Of course, it’s not the ultimate solution. It lacks some features, for example, group merging. Ultimately, it’s up to you to organize your tabs. The “Tabs Groups” is just a tool to make it easier.
Interested in more Chrome tricks? Check out how to use multiple profiles simultaneously on Google Chrome.
Happy computing!
from Linux Hint https://ift.tt/3kAIHEu


0 Comments