In this quick guide, we will examine how to enable Elasticsearch Xpack security features and how to use security API to create users and roles.
Let us get started!
NOTE: We are assuming you already have Elasticsearch installed and running on your system. If not, consider the following tutorials to install Elasticsearch.
https://linuxhint.com/visualize_apache_logs_with_elk_stack/
https://linuxhint.com/install-elasticsearch-ubuntu/
How to Enable Elasticsearch Security Features?
By default, Elasticsearch Features, Xpack, are disabled, and you will need to enable them. First, stop Elasticsearch and Kibana, so you can edit the configuration.
In the Elasticsearch configuration file, edit the xpack.security.enabled entry and set it to true.
By default, you’ll find the elasticsearch.yml located in /etc/elasticsearch.
Save the file and restart Elasticsearch and Kibana.
NOTE: Depending on the license you have, once you’ve activated xpack, you will need to run the command below to set up passwords and authentication:
How to Create Users Using Kibana?
If you have Elasticsearch and Kibana coupled, you can easily create users in the Kibana stack management.
Start by launching Kibana, then log in. Use the passwords you used when setting up.
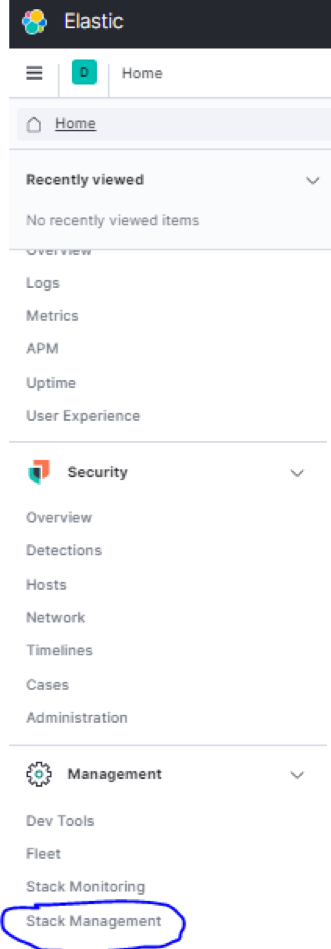
Once logged in, select the Kibana Dock and navigate to Stack Management and the security section.

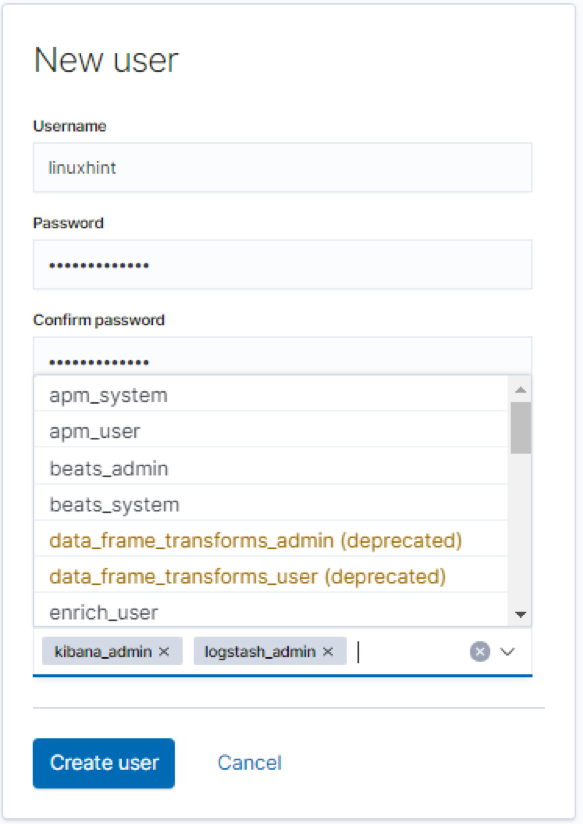
Now, navigate to users and click on “create user.” When creating a user, Kibana will ask you to assign a role. You can view all available roles in Stack Management – Security –Roles.
Provide the username, password, and full name.

Besides this simple way to create Elasticsearch users, you can use the more powerful method discussed below:
How to Create Users with Elasticsearch API?
Another way to create native users in Elasticsearch is to use the API, using {security} as the endpoint, we can add, update, and remove users in Elasticsearch.
Let us look at how to carry out these operations.
To interact with the security API, we use POST and PUT HTTP requests, making sure we have the user information in the request’s body.
When creating a new user, you must pass the user’s username and password; both are required parameters. Elasticsearch usernames must not be more than 1024 characters and can be alphanumeric. Usernames do not allow whitespaces.
The information you can provide in the request body include:
- Password: This is a required parameter of type string. Passwords in Elasticsearch must be at least six characters long.
- Full_name: This specifies the full name of the user (String).
- Email: This sets the email of the specified user.
- Roles: This is another required parameter of the type list. It specifies the roles the specified user holds. You can create an empty list [] if the user does not have any assigned roles.
- Enabled: The enabled parameter (Boolean) specifies if the user is active or not.
Once you have the body of the request containing it, send the post request to _security/user/<username>.
Consider the request below that shows how to create a user using API.
{
"password" : "linuxhint",
"enabled": true,
"roles" : [ "superuser", "kibana_admin" ],
"full_name" : "Linux Hint",
"email" : "example@linuxhint.com",
"metadata" : {
"intelligence" : 7
}
}
If you’re using cURL, enter the command below:
This should return created: true as a JSON object.
"created" : true
}
How to Enable User Information?
If you create a user in Elasticsearch and set the enabled parameter as false, you will need to enable the account before using it. To do this, we can use the _enable API.
You should ensure to pass the username you wish to enable in the PUT request. The general syntax is as:
For example, the request below enables the user linuxhint:
The cURL command is:
The reverse is also true; to disable a user, use the _disable endpoint:
The cURL command is:
How to View Users?
To view user information, use the GET request followed by the username you wish to view. For example:
The cURL command is:
That should display information about the specified username, as shown below:
"linuxhint" : {
"username" : "linuxhint",
"roles" : [
“superuser”,
“kibana_admin”
],
"full_name" : "Linux Hint",
"email" : "example@linuxhint.com",
"metadata" : {
"intelligence" : 7
},
"enabled" : false
}
}
To view information about all the users in the Elasticsearch cluster, omit the username and send the GET request as:
How to Delete Users?
If you can create users, you can delete them too. To use the API to remove a user, simply send the DELETE request to _security/user/<username>.
Example:
The cURL command is:
That should return a JSON object with found:true as:
"found" : true
}
Conclusion
This tutorial taught you how to enable Elasticsearch Security features. We also discussed how to use Kibana Stack Management to manage users. Finally, we discussed how to create users, view user information, and delete users.
This information should get you started but remember that mastery comes from practice.
Thank you for reading.
from Linux Hint https://ift.tt/2OaMJr6


0 Comments