Method of Reverting to a Previous Commit in Git in Ubuntu 20.04:
For explaining to you the method of reverting to a previous commit in Git in Ubuntu 20.04, we have designed an example scenario. In this scenario, we will first modify an already existing file named abc.txt. Also, we have two other files in our test project repository named Stash1.txt and Stash2.txt that we had not committed previously. So, we will be committing all of these changes at once. Then we will try to revert to a previous state i.e. a state in which neither the files Stash1.txt and Stash2.txt existed nor the file abc.txt was modified. To further elaborate on this scenario, we would like to walk you through the following steps:
Step # 1: Switch to your Git Project Directory:
First, we will go to the directory where our Git project repository resides in the manner shown below:
![]()
Once this command will execute, it will change the default path of your terminal as shown in the following image:

Step # 2: List down the Contents of your Git Project Directory:
Now we will list down the contents of our test project repository to see which files are already there. The contents of our Git project repository can be listed using the command stated below:
![]()
The contents of our Git project repository are shown in the following image:

Step # 3: Open and Modify any File within your Git Project Directory:
We have picked the file abc.txt from our Git project repository for modification. Now we will open this file with the nano editor in the manner shown below:
![]()
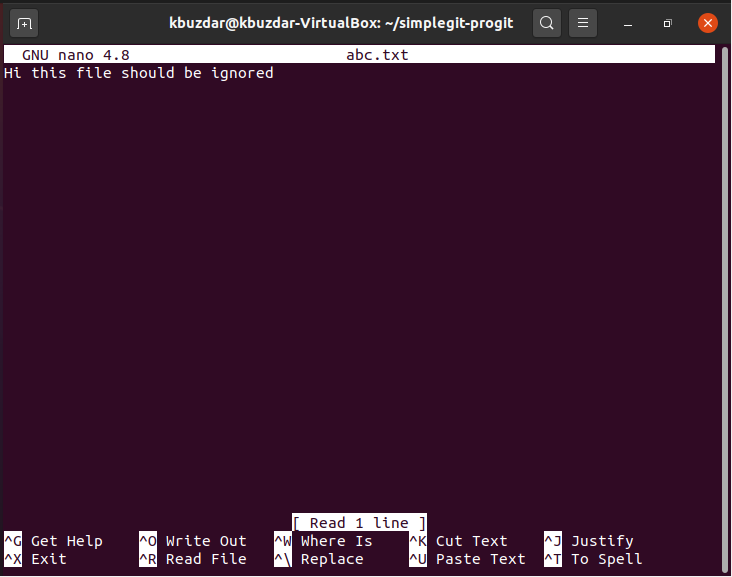
This file has some random text written in it as shown in the following image:

We will modify this text by adding a “not” in it as shown in the image below. After making this modification, we will simply exit from the nano editor while saving our file abc.txt.

Step # 4: Reinitialize your Git Project Repository:
After making all the desired changes, we need to reinitialize our Git project repository with the help of the following command:
![]()
After executing this command, Git will reinitialize while displaying the message shown in the image below on your terminal:

Step # 5: Add the Changes to your Git Project Repository:
Now we need to add the changes to our Git project repository by executing the following command:
![]()
The successful execution of this command will not display anything on our Ubuntu 20.04 terminal.
Step # 6: Commit the Newly Made Changes in your Git Project Repository:
After adding the changes to our Git project repository, we will commit these changes with the following command:
Here, you can change “Message to be Displayed” with the actual message that you want to be displayed while this command executes.
![]()
When this command will execute, you will notice that our two files that were uncommitted previously i.e. Stash1.txt and Stash2.txt will be committed.

Step # 7: Check Git Commit History:
Now we will check the Git commit history to see whether our last commit has been logged or not. The Git commit history can be checked with the following command:
![]()
You can easily see from the Git commit history shown in the image below that the Head is pointing to our last commit i.e. the transaction in which we committed the files Stash1.txt, Stash2.txt, and abc.txt (after modification). Also, we will note the transaction ID of this commit from the commit history so that we can revert it in the next step while making use of this ID.

Step # 8: Perform the “git revert” Operation:
The first five characters of the transaction ID of our last transaction are 220ac. These characters will be used for referring to this commit. Now we will revert this commit with the help of the following command:
![]()
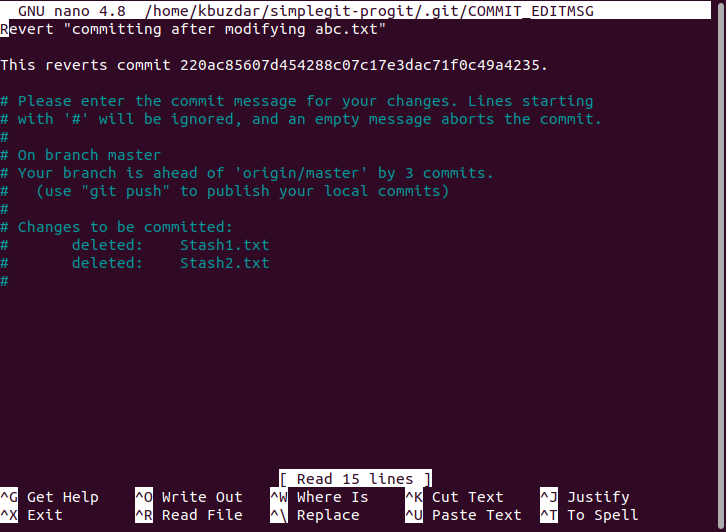
When this command will execute, it will display a message within nano editor that your transaction with the transaction ID 220ac will be reverted as shown in the image below:

You need to press Ctrl+ X after seeing this message so that you can see the exact status on your terminal as shown in the following image. This status will tell us that the changes made earlier i.e. the modification of abc.txt and the addition of Stash1.txt and Stash2.txt have been reverted. It also means that now our file abc.txt will be back in the previous state i.e. it will represent its original content without modification. Moreover, the files Stash1.txt and Stash2.txt will have been deleted.

Step # 9: Check the Git Commit History once Again:
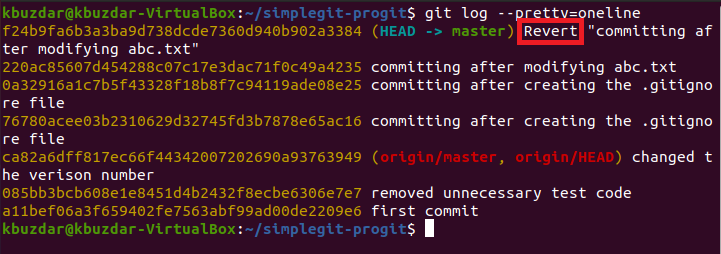
Now we will check our Git commit history once again to see the current situation. If the revert operation has been performed successfully, then the Head of our project will be pointing to this revert transaction as highlighted in the image shown below:

Step # 10: Verify if the “git revert” Command has worked successfully or not:
Although, we have already seen that our project Head is currently pointing to the revert transaction which is enough to indicate that the “git revert” command has functioned properly. However, we can still ensure it by checking the Git status. Here, we will be able to see that there will be no more files to be committed as the ones that were there previously i.e. Stash1 and Stash2 have already been deleted by the revert operation. Therefore, there will be no more new files to be committed as shown in the following image:

Also, we can try to list down the contents of our Git project repository to confirm the deletion of the files Stash1.txt and Stash2.txt as shown in the image below. A point to be noted over here is that the files Stash1.txt and Stash2.txt have been deleted by our revert operation solely because before committing the transaction having the transaction ID of 220ac, there was no existence of these two files. That is why, as a result of reverting this commit, these files will not exist anymore. However, if you will perform the revert operation once again on this revert transaction i.e. you will try to nullify the effect of the revert operation you have just performed, then you will be able to see these two files again.

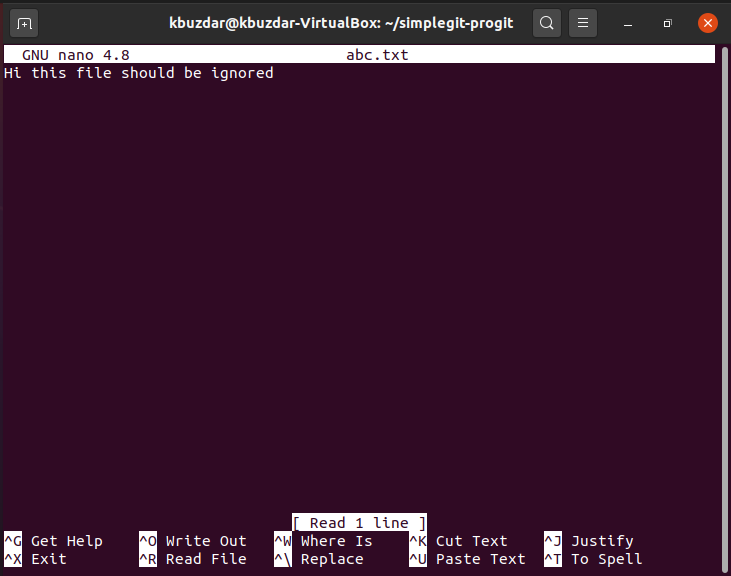
Finally, we can also check our file abc.txt once again to see if it is back with its original content or not. We will simply open this file again with the nano editor and you will notice from the following image that the modification that we did earlier to this file has been reverted.

Conclusion:
By going through the detailed scenario presented to you in this article, you will hopefully be able to use the “git revert” command in Ubuntu 20.04 in a very effective manner. This command will cancel the effect of any previous transaction while maintaining its entry within the “git log” so that at any point in time, you can conveniently go back to that transaction. In other words, we can say that the “git revert” command commits a transaction that is an exact inverse of a command that was committed previously (without deleting the previous commit). That is exactly why it manages to cancel its effect.
from Linux Hint https://ift.tt/2WJJMPk


0 Comments