


The standard proxy server only works according to their client’s requests by providing filtering and content privacy. When we talk about the reverse proxy server, it works on behalf of server requests, used for intercepting and routing traffic to a separate server. This proxy feature is useful for load distribution and improves performance among various available servers. It shows all the content which it takes from different online sites. Using the proxy method, you can pass requests for processing to the server applications over specified protocols other than HTTP.
There are many reasons due to which you might install the reverse proxy. One important reason is content privacy. The reverse proxy method provides a single centralized point to contact with clients. It can give you the centralized logging feature and can report across several servers. Nginx quickly processes the static content and passes dynamic requests to the Apache server; this feature improves the overall performance.
In this article, we will learn how to set up a reverse proxy in Nginx.
Prerequisites
You should have access to the root account or a user who can run sudo commands.
Creating a Nginx Reverse Proxy Server
For setting up the new Nginx proxy server, you need to follow the following steps on your system:
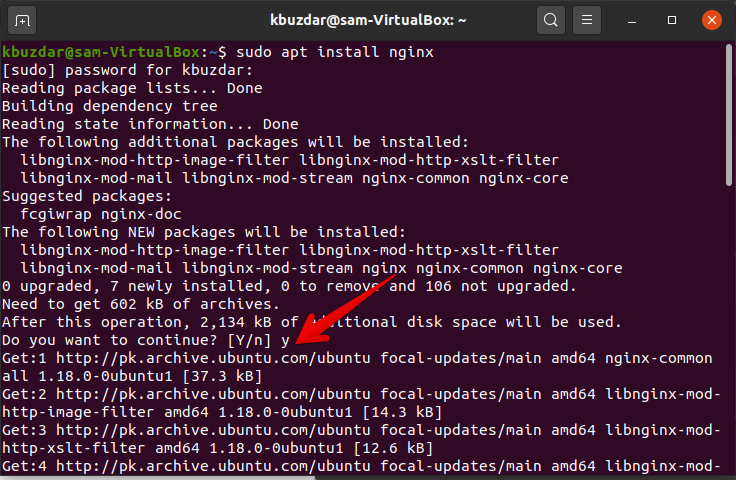
Step 1: Install Nginx
Open the terminal application and then open the file /etc/apt/source.list in your favorite text editor and then add the below-given lines at the end of this file. In this line, you need to replace the ‘CODENAME’ with your Ubuntu release, which you are using on your system. For example, we have a Ubuntu 20.04 focal fossa on this system. Sp, insert Focal to replace the ‘CODENAME’.
deb-src https://ift.tt/2uxbCzs <CODENAME> nginx
Next, you have to import the following packages repository signing key and then add it to the apt repository:
$ sudo apt-key add nginx_signing.key
Now, update apt manager packages and install the latest release of Nginx on your system from the official apt repository by running the following command:
$ sudo apt install nginx
Now, start and enabled the Nginx server by using the following commands:
![]()
$ sudo systemctl status nginx
Step 2: Configurations for Nginx Reverse Proxy
Create a new configuration file custom_proxy /etc/nginx/conf.d/custom_proxy.conf and then paste the following lines of code in it:
listen 80;
listen [::]:80;
server_name myexample.com;
location / {
proxy_pass http://localhost:3000/;
}
}
The directive ‘proxy_pass’ specified inside the location makes this configuration as reverse proxy. This line proxy_pass http://localhost:3000/ directs all requests that match with location root/path must be forwarded to the port 3000 on localhost where your domain website is running.
To activate and link the new configuration file run the below mentioned command:
Step 3: Test Configurations
Now, test the above configurations by using the following command:
After successfully testing, if no bug is reported then, reload the new Nginx configuration.
Configure Buffers
The above configurations are enough to create a basic reverse proxy server. but, for complex applications, you need to enable some advanced options, which are given below:
proxy_pass http://localhost:3000/;
proxy_buffering off;
}
Configure-Request headers
proxy_pass http://localhost:3000/;
proxy_set_header X-Real-IP $remote_addr;
}
In the above example, the $remote_addr sends the IP address of the client to the proxy host.
Conclusion
From the above-mentioned details, you are able to understand how to create an Nginx reverse proxy. This tool is good for several server environments. Try all these configurations on your system for a better understanding.
from Linux Hint https://ift.tt/2VqSSQs


0 Comments