


The Oculus is a VR headset device, which is assembled for playing games, watching VR movies, medical and military training purposes, physical fitness, and much more. It enables the customers to have interaction with 3-dimensional artificial surroundings. It was launched on the 28th of March 2016, but still getting much more fame and significance in the VR world.
Oculus is a registered trademark by Facebook. It has launched several VR headsets like Oculus Rift, Oculus Go, Oculus Rift S, Oculus Quest, and Oculus Quest 2. The latest headset is Oculus Quest 2, which is more advanced, better, and more powerful than the previous ones. It is untethered, compact, budget-friendly, and, above all, user-friendly. Let’s have a glance over how can we start using Oculus Quest 2 headset.
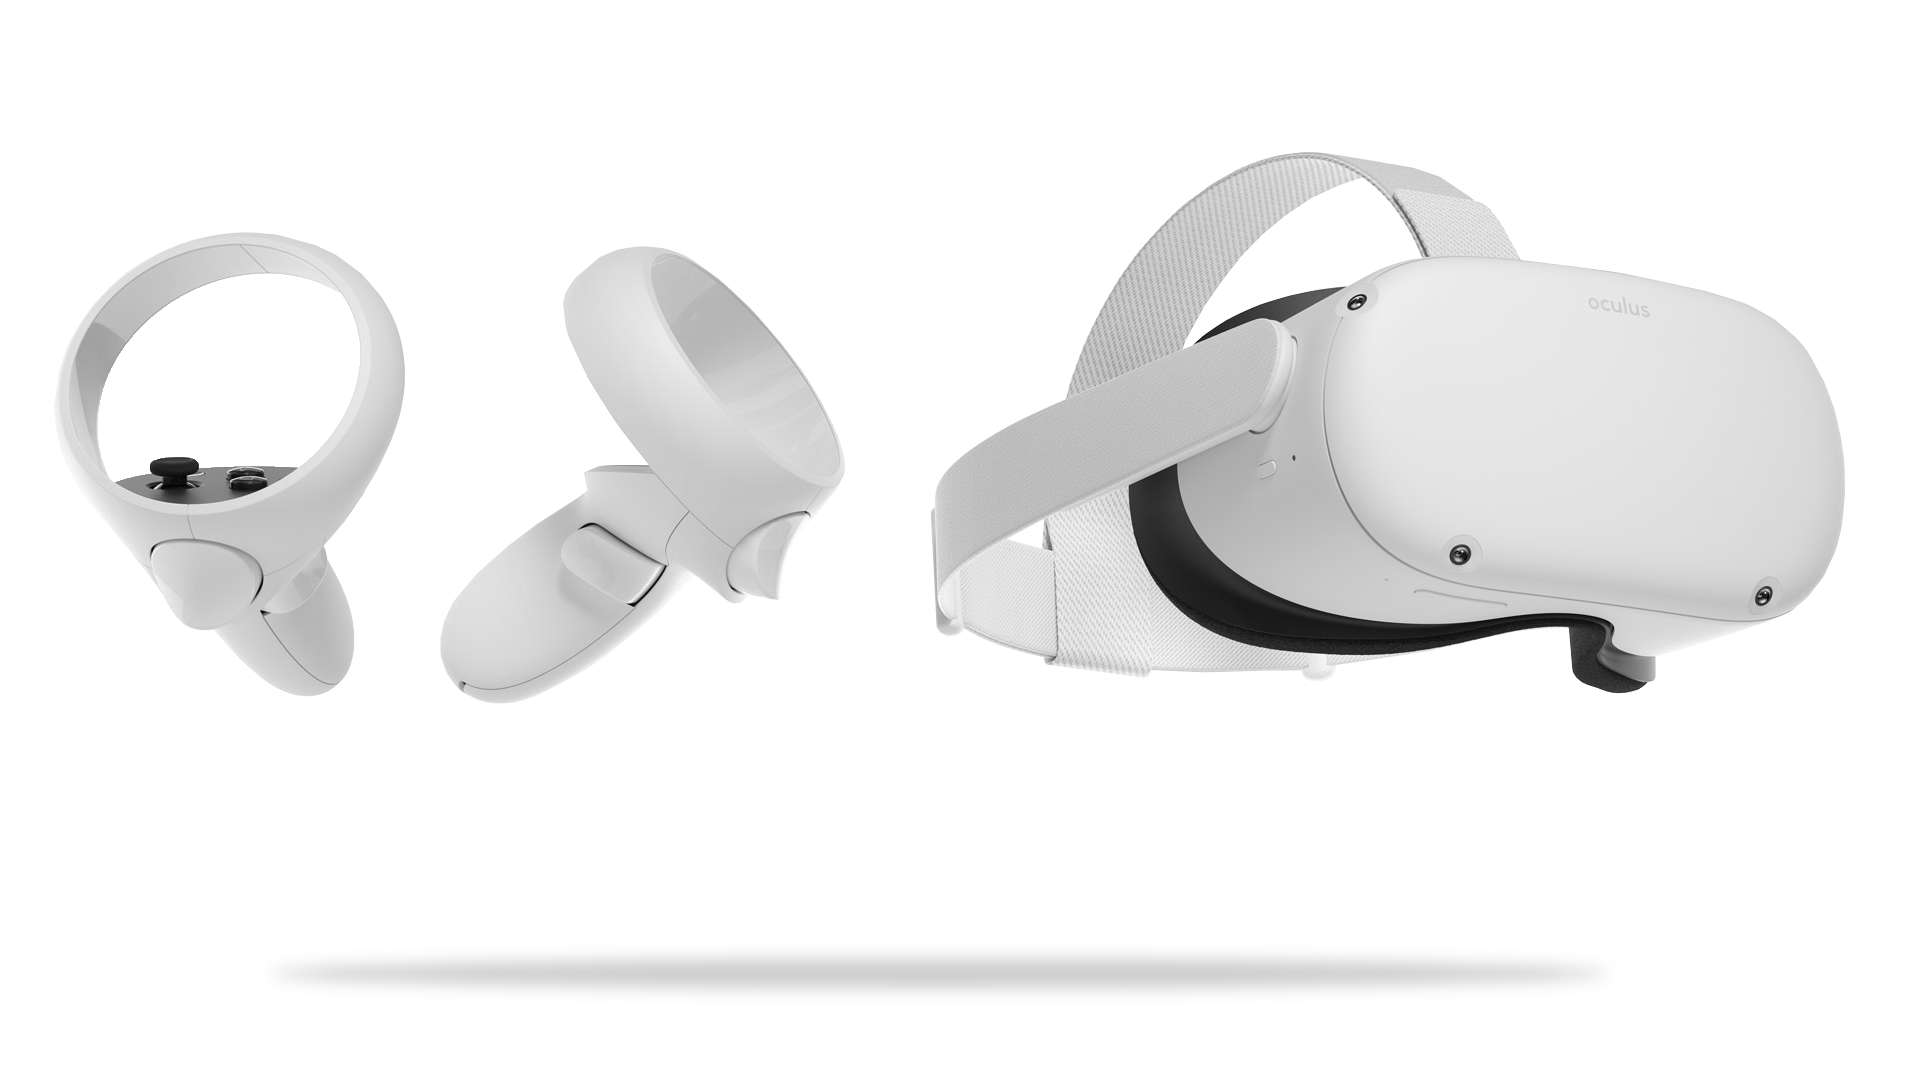
Product Details: Amazon
These are the following directions, which must be followed to start your Oculus headset.
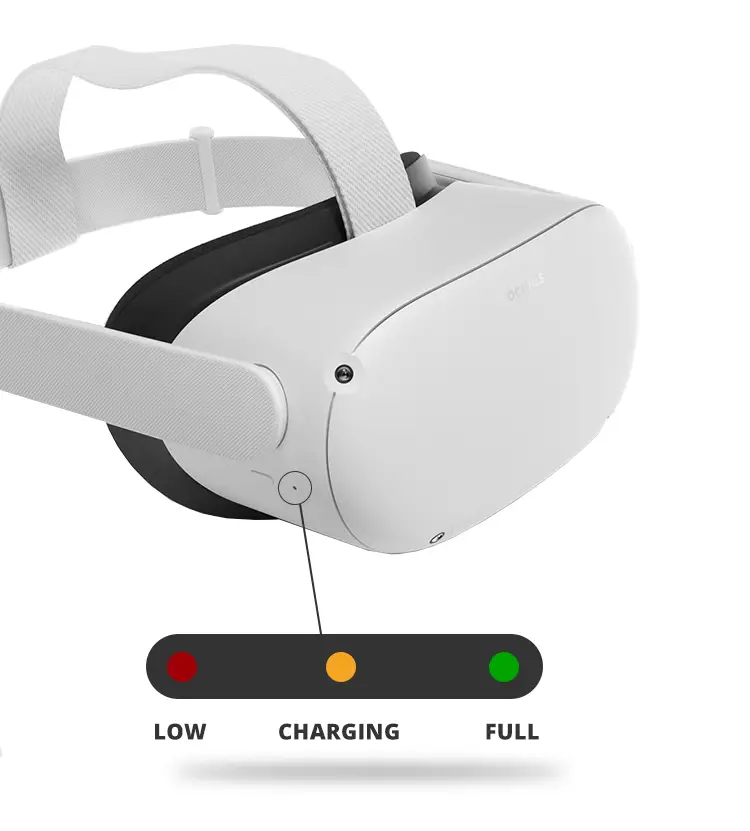
1. Charge your headset
The first and foremost step of using a headset is to charge it completely. Connect your headset with the power cable and turn the switch on. After supplying electric current, let’s wait for the headset to get charged. When the green light on the headset turns on, it means the headset is now fully charged. Now, you can unplug the charger.
2. Install the Oculus application
The second step is to install the Oculus application from your Google play store or Apple application store. Other than that, this Oculus application can be utilized to buy new games and videos, find out the game manual, and execute many other tasks.
3. Make Facebook Account if required
After installation of the Oculus application, you need to log in to the Facebook account. For Oculus 2, having a Facebook account has been made compulsory, and it would not work without having a Facebook account. So, if you don’t have a Facebook account, sign up first, and then you can move on to the next step.
For Facebook signing up, go to the Facebook website, put your email address, and set a password for it. Personalize your privacy settings, add a profile picture, make friends by sending them friend requests, and you’re done. Now that you are finished, you can use this Facebook ID for the Oculus Quest 2 device.
4. Run the setup
For running the Oculus Quest 2 setup, you need to do few things first:
- Login to the Oculus application via Facebook account
- Create your VR profile by adding a display picture
- Personalize your settings
- Produce your Oculus passcode
- Choose your payment technique
After completing all the above-mentioned steps for setup, select the option of your headset, which you are using, i.e., Oculus Quest 2.
In case, Oculus Quest 2 option is not given, verify that you have turned on the Bluetooth of your mobile phone. If you don’t see the option of Quest 2, you need to delete the Oculus application and then download it again. After that, pair up your headset with your mobile phone. It will either match automatically with the cellphone or will request the pin code.
After pairing up with the Oculus application, read and follow the instructions given in the guide. Now, your setup is done. The new upgrades of a headset come online frequently, which can be installed for new features and updates.
5. Adjust your headset and view
First, you need to set the lenses smoothly by moving them left to right till the time the lenses are set in the position where you can clearly see what’s on the screen.
Then, balance the straps from both sides and the top one. Keep in mind that when you need to adjust or re-adjust the side straps, you will have to take off the headset.
Moving the sliders close to the top strap will lose the side straps, and moving the sliders away from the top strap will make the side straps tight. After shifting the sliders, confirm that your top strap is in the center of your headset and both the side are equal after you put on the headset.
Glass spacer is required if you have worn glasses. Make sure that you are wearing your headset from front to back so your glasses will not get disturbed. You can do more adjustments if required.
You can calibrate the fitness and clarity of your headset by smoothly shifting the arms on both sides of the headset in upward and downward motion to set its angle.
6. Draw your play space
Once you have turned on the Wi-Fi and entered your data there will be a tutorial on how to create your play area. After that, your headset and controllers will update for the first time. It will only take a few minutes. Connect your headset with your cell phone application. Now, you can use your Oculus Touch controllers to create your playing zone.
The benefit of creating your own play space is that you cannot hit the real-life objects accidentally. You can play in your safety zone rather than jumping here and there in the room. As soon as you created your space for playing games, you can easily take a look at the Oculus menu, visit the Oculus store, get connected with friends, send them challenges, and much more. You will additionally be able to practice hand tracking by using these touch controllers.
Conclusion
Oculus Quest 2 is the latest head-mounted device by Oculus, which is an improved version of Oculus Quest. It has high-resolution graphics and a fast processor, and most importantly it is inexpensive. Due to these benefits, one can really feel the 3D effect all around. It also helps people to connect and interact with other people. You can explore new games in the VR world. It seems to have great fun in the world of gaming with this latest headset.
from Linux Hint https://ift.tt/2UYyK81


0 Comments