In the Linux system, the most popular command is LSOF, abbreviated for List Of Open File. This command shows the information about the files opened on your system. In other simple words, we can explain that the LSOF command provides information about the files that are opened by which process. It simply lists down the open files on the output console. It lists directory, shared library, block special file, regular pipe, an internet socket, character special file, Unix domain socket, and more others. Lsof command can be used to combine with the grep command to do more advanced features for listing and searching.
This article will give you a basic understanding of the LSOF command. Moreover, you will explore how to use this command in the Linux environment.
Pre-requisites
You must be login as a root user on your system or must have sudo command privillages.
We have performed all task on Ubuntu 20.04 system, which is mentioned below:
List open files using LSOF command
You can list all opened files with a complete description using the LSOF command.

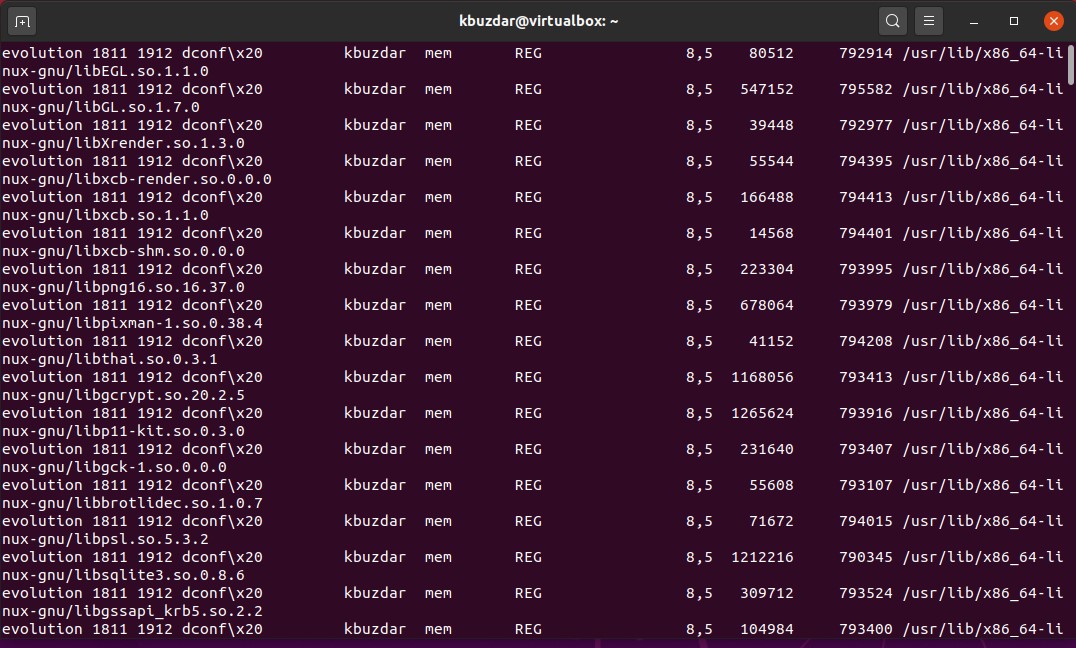
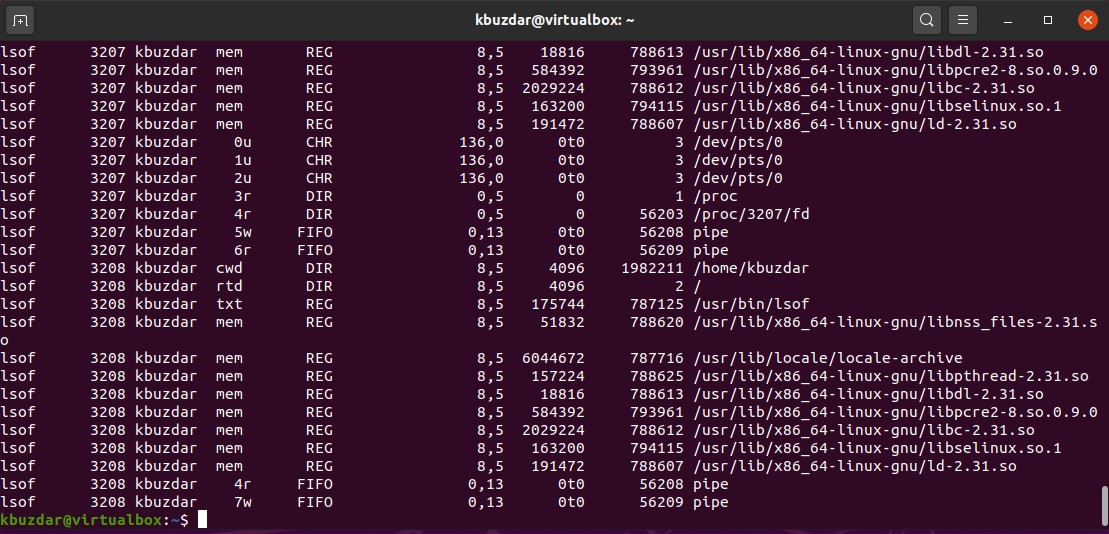
For example, here we have listed some open files for your better understanding. In the below screenshot, you will see the information in the form of columns like Command, PID, USER, FD, TYPE, etc.
Let’s explain each term one by one. In the first column, you will see Command is used for the command name. PID shows the process id. Under the column named USER, you will see the user role type or name. The above-displayed values in the image are self-explanatory. However, we will review the TYPE and FD columns.
FD is used for a File descriptor that has some values as:
- cwd – Represents the current working directory.
- rtd – Shows the root directory
- txt – Used for program code and text data
- mem – Used for memory-mapped file
- 1u – file descriptor u for read and write mode, w for write mode, and r used for reading mode.
The TYPE column contains all files and identifications using keywords. DIR means directory. REG represents the regular file. CHR is used for character special files. FIFO means First In First Out.
List User-specific files using LSOF command
For example, if we want to list all opened files of user name kbuzdar then, using the following command, you can do this:

Search processes working on a specific port
You can search those files or processes those running on a specific port number. For this purpose, you just need to use the following command with -i option and enter a specific port number.
If you want to list all open files running processes of TCP Port that ranges between 1-1024 then, execute the below-mentioned command:
Display open files Only for IPv4 & IPv6
For example, you want to show only IPv4 and IPv6 network files. Run the following command to open files for IPV4 on the terminal window:
For IPV6, use the following command:
Display files by excluding specific users
If you want to exclude a root user then, you can exclude a root user by using the ‘^’ character with the command which is shown in the below screenshot:
![]()
You can exclude a specific user by using their name.
Display all network connections using lsof command
Type the following lsof command with option -i to display the list of all network connections:
![]()
Search process by PID
In the following example only shows those files or processes whose PID is 2 [two].

Kill particular user activities
Sometimes you may need specific user processes. In this case, by executing the following command, you can kill all the processes of the ‘kbuzdar’ user.
![]()
Conclusion
In this article, we have seen how to use the lsof command on the Linux system. We have implemented different examples for a better understanding of lsof command. It’s not possible to elaborate on all available options but, you may explore the man page of lsof command to get more about this command. Share with us your feedback via comments.
from Linux Hint https://ift.tt/3dTqhMa


0 Comments