Cyberattacks are also on the rise, and there is always the possibility of falling victim to a virus or malware, which can cause serious damage to your system and data. There might also be a case where your system becomes damaged or accidental deletion of data occurs. These cases can easily be avoided if you have a backup strategy.
Backing up your data is crucial, allowing you to easily store your data. If you happen to lose your data, you can recover it simply by using a backup. Since backups play such a key role, having the right set of programs is essential for safekeeping your data.
For Linux users, KUP Backup Scheduler can be a great tool for backing up data. In the sections below, this article discusses the KUP Backup Schedule and how to use this program.
What Is KUP Backup Scheduler?
KUP Backup Scheduler is a KDE-based application that allows users to make backups of their files. Along with a simple and easy-to-use interface, KUP Backup Scheduler offers some fascinating backup schemes, each offering different functionalities. Since this program was developed by the KDE Community, the KUP Backup Schedler is completely free and open-source.
KUP Backup Scheduler also supports several file system formats, such as NTFS and FAT32, so issues of non-compatibility should not arise when using this program. It is important to note that although the KDE Backup Scheduler comes under the KDE Project, this program can still be used with other Linux distributions.
Installing KUP Backup Scheduler Using the Apt-Cache
The KUP Backup Scheduler package should be available in the official repository of your Linux distribution, which is the case for both Ubuntu and Arch Linux systems. Ubuntu users can easily install KUP Backup using the apt command. Before installing KUP Backup Scheduler, be sure to run the update command, so that everything is updated to the latest version. This can be done by running the following command:
Next, KUP Backup Scheduler can be installed by inputting the following command into the terminal:

Using KUP Backup Scheduler
After installing KUP Backup Scheduler, open the System Settings application in your system.

Next, open the Backups section, which can be found under the Personalization section. The initial screen that appears should look as follows:
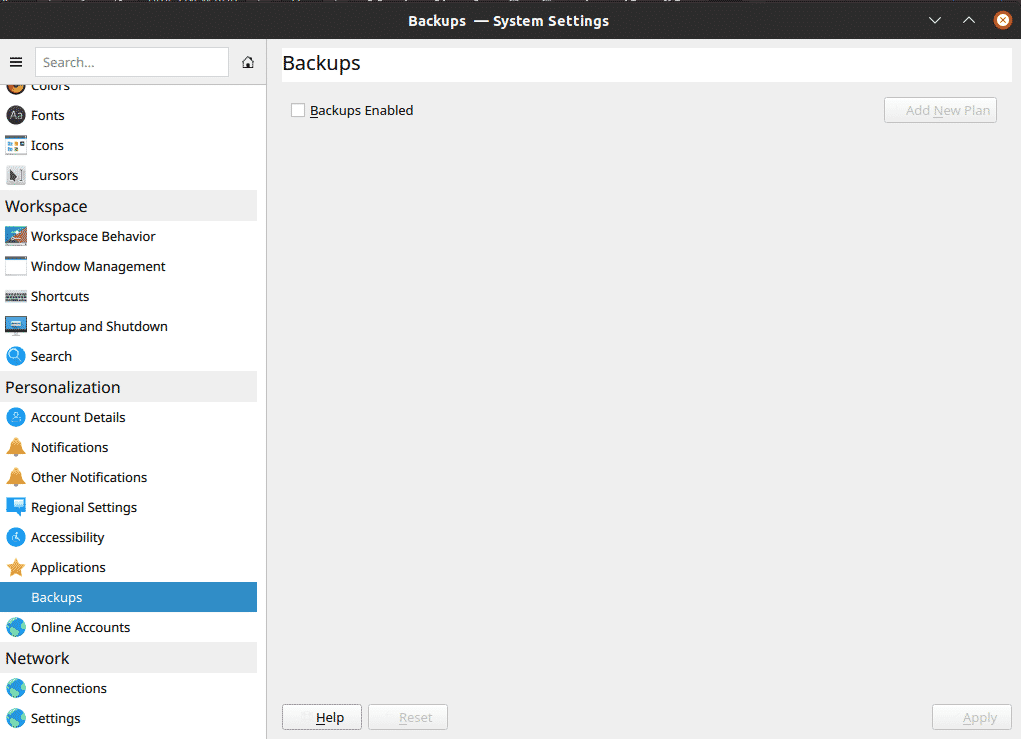

To make a new backup of your system, first click Backups Enabled, followed by Add New Plan.
When you click Add New Plan, you will get the Backup Type window. This window will give you two options for choosing the type of backup scheme that you want to use. The Versioned Backup selection allows you to keep a record of all the backups that you have made, while the Synchronized Backup selection simply makes copies of your file and stores them on your system.
The Versioned Backup is unavailable in Ubuntu 20.04, as it requires bup, which was dropped from Debian testing due to Python 2 reaching the end of its life (bup uses Python 2 and does not support Python 3).

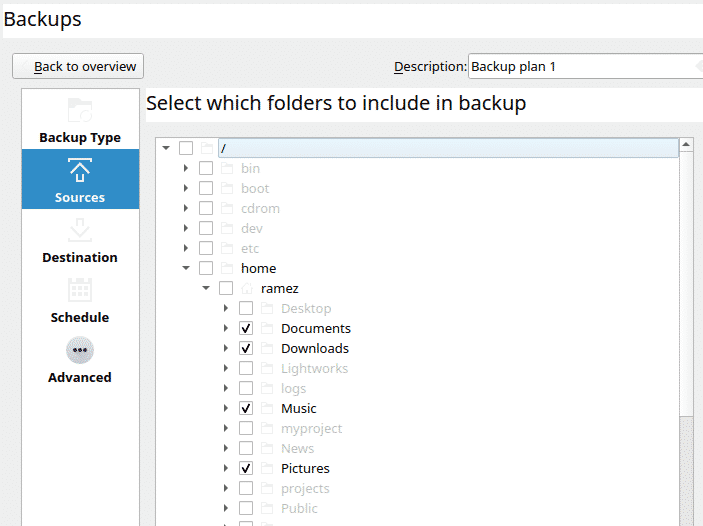
After selecting your backup scheme, next, you must choose the files and folders that you want to back up. KUP allows you to back up both your own data and the data of other users, including the main root directory. This requires permissions to gain access to the selected files.
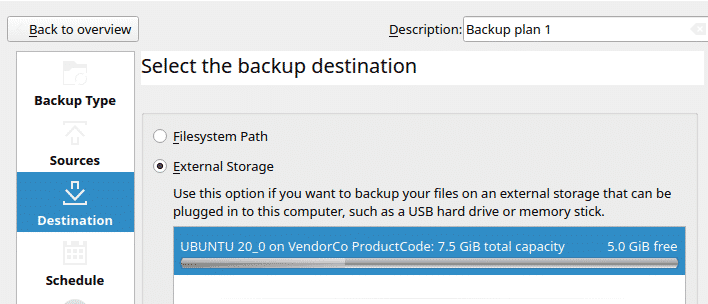
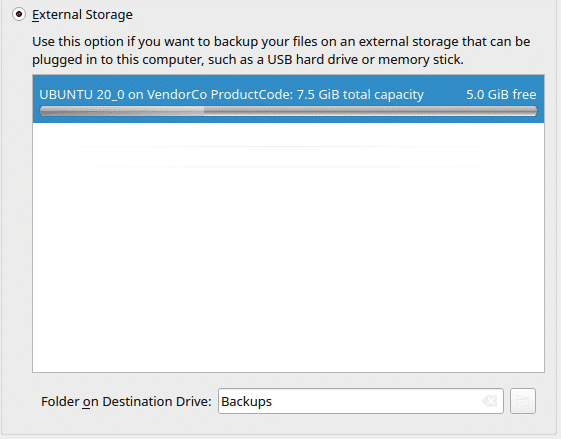
After selecting the source for backup, you must now choose where to save your backup file. KUP Backup allows users to either save the files on their current disk drive, or on an external storage memory. By default, the application always saves data on the external disk, which is the preferred option.
For both internal and external drives, you can specify the destination path and folder for your backup.
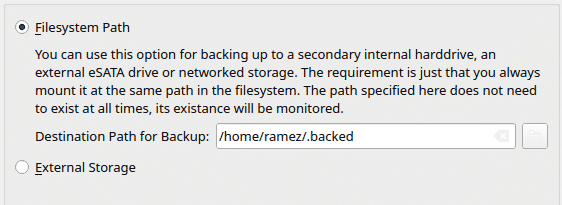 Internal Drive
External Drive
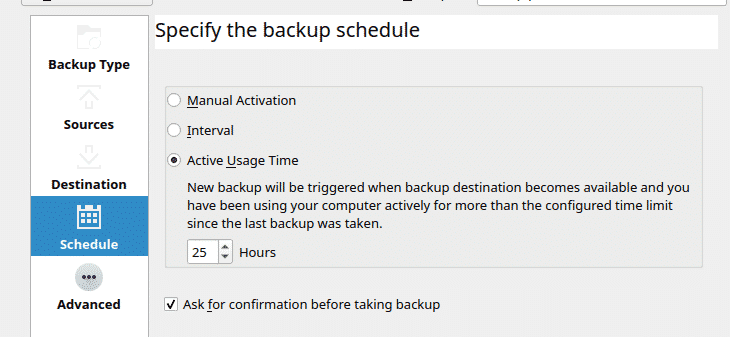
The next phase can easily be called the best thing about KUP. The power that lies behind this simple-looking tool can be seen in its ability to schedule backups.
KUP provides users with three different options for scheduling. The first option, Manual Activation, is as the name says: this option allows users to perform backups manually.

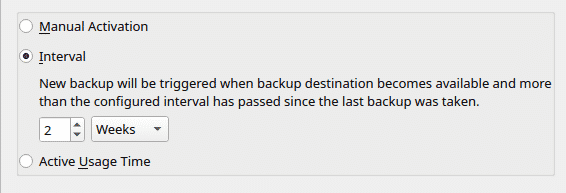
The second option, Interval, allows users to set up time intervals for backups to occur. For example, a backup can be set to occur every two weeks.
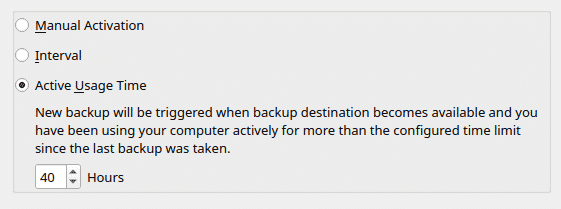
The last option, Active Usage Time, is the highlight of this feature and works by backing up your system after it has been active for a specified amount of time. For example, if the limit set is around the 40-hour mark, then once the system reaches this time limit, KUP will start the backup immediately.
KUP also provides other options to users, including adding hidden folders to the backup, checking for corrupted files, and even restoring a partially corrupted file.

Once this step is done, click the Apply button in the bottom-right corner of the window. And with that, your backup process will be complete.
Why Use the KUP Backup Scheduler?
The KUP Backup Scheduler is an amazing tool. Even though it has a simple-looking interface, KUP Backup Scheduler covers all the features required for an excellent backup tool. For fast and frequent scheduled backups, this program is the perfect tool to have.
from Linux Hint https://ift.tt/3hqj3zd


0 Comments