What Is TensorFlow?
TensorFlow is an end-to-end platform that comes with a variety of tools for implementing machine learning models and techniques. It was released by Google in 2015 as a completely free and open-source utility. It is used by corporate giants all over the world, most notable services like Twitter, Airbus, PayPal, Intel, and Uber.
Software devs use TensorFlow to present the movement of data along with a series of processing nodes by means of dataflow charts. The graph visualizes a strict logical or mathematical equation, with nodes representing operations, while connections among the nodes reveal the node as a multidimensional data array or tensor.
This article provides a walkthrough on how to install TensorFlow in a Python-oriented virtual environment in Ubuntu 20.04. A virtual environment, also known as VE, allows you to use several separate, parallel Python environments on one computer system. Virtual environments also allow you to install any module, with a version of your choice per project, without creating any interference in other projects you are currently working on.
Installing TensorFlow with a Virtual Environment
Ubuntu 20.04 comes free with Python v3.8. Check if you have Python 3 installed on your computer with the following command:

If you are new to creating virtual environments, we recommend using the venv module, which ships with the python3-venv package.
Creating a Virtual Environment
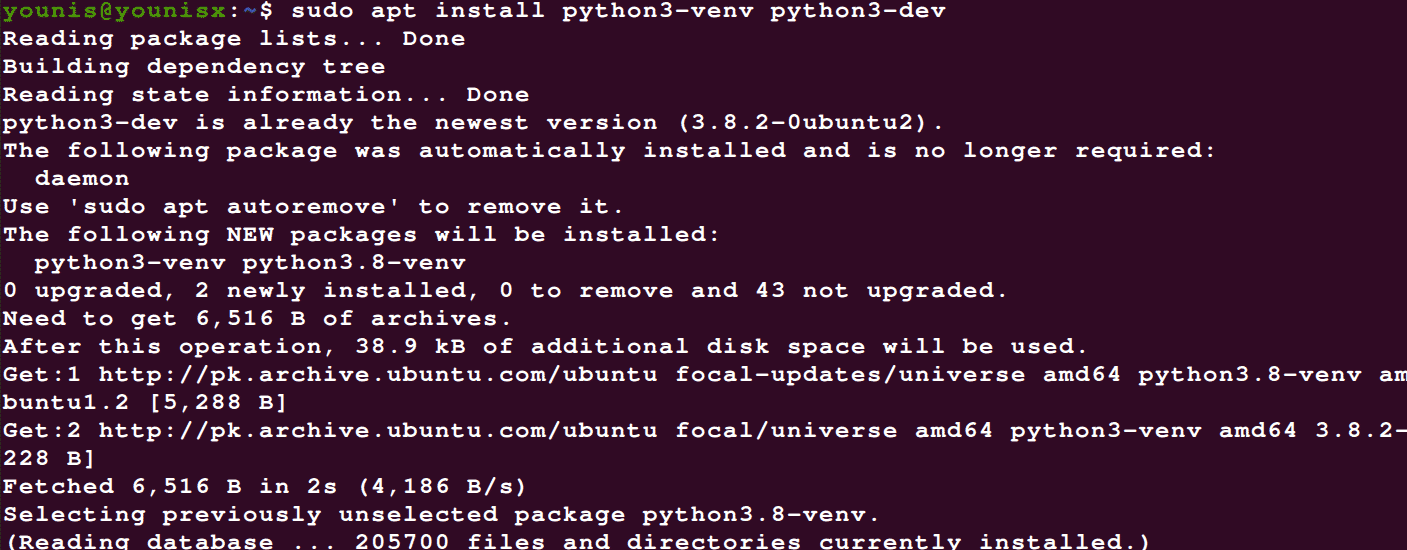
Step 1: Installing python3-venv
First, install the python3-venv utility with the command below:

After the module finishes installing, you can move on to creating a VE.
Step 2: Select a Directory to Install the VE
Head over to the directory where you want your Python 3 virtual environments installed. We suggest making this your home directory. If the home directory is not available, choose a directory where you have the privileges to view and edit files.
Add a new directory to store the TensorFlow project by entering the command below:

Step 3: Create the VE
Issue the following command to create a virtual environment in the chosen directory:

We have named our VE venv, as indicated by the second venv term in the command-line above. Replace the second venv term in the image with the name you want to give your virtual environment. In our example, we have created a directory called venv and placed duplicates of the Python binary, the Python library, and other secondary files in this location.
Step 4: Access the VE
Now, we can move on to using the VE we just created. Begin by activating the VE with the following command:

Upon execution of the above command, the virtual environment’s bin directory will be appended before the system’s $PATH variable. You will also notice a change in the shell’s prompt, as well as the names of the Ves that are running. In our case, we see ‘venv,’ which is the name we gave to our Virtual Environment.
Installing TensorFlow
The following steps cover how to install the TensorFlow utility, now that we have a virtual environment set up.
Step 1: Upgrade pip to the Current Version
Pip version 19 or above is a prerequisite to install TensorFlow. Use the following command to start the upgrade:

Step 2: Run the Installer
Our virtual environment is now fully functional, and we can finally install TensorFlow on our system. Use the command below to open the installer:

You can seriously improve the processing power of your system if you have NVIDIA GPU or equivalent. To switch to better GPU support, install the TensorFlow-GPU package in place of TensorFlow.

As you can see, TensorFlow is very easy to install in Ubuntu 20.04.
Step 3: Verify the Installation
Make sure that the installation went smoothly by entering the following command:
![]()
The output of this command shows what version of TensorFlow is installed on your system.
You can always disable the virtual environment once you are finished. Enter the following command to return to the default shell:

And there you have it! TensorFlow is installed on your local machine, and you can finally start using it.
Conclusion
This tutorial showed you how to install TensorFlow in Ubuntu 20.04 with a Python VE. We went through the process of setting up a VE in detail, which included installing a python3-venv package, setting up a directory to install the VE, and then activating the VE with the $python3 -m venv venv command. Finally, we ran the pip installer to install TensorFlow. We hope that you found this walkthrough helpful and that, after reading this article, it will be easier for you to install TensorFlow on your system.
from Linux Hint https://ift.tt/2GQXUS8


0 Comments