Introduction
PHP (Hypertext Pre-Processor) is a server-side scripting language that can be integrated into HTML and is particularly suitable for web development. Developed in 1994 by Rasmus Lerdorf, PHP runs on all platforms and is compatible with almost all servers. A few important things to know about PHP include the following:
- PHP is an interpreted programming language; therefore, a compiler is not required.
- PHP must be installed on a web server to run and execute PHP code.
- PHP is a server-side scripting language, meaning that PHP is executed on the server, and the result is sent in plain HTML to the browser.
- PHP is free, as well as open-source.
- PHP is very simple to learn and is easy to understand, code, and deploy on servers.
- PHP works fast when compared with other scripting languages.
Uses of PHP
The uses of PHP include the following:
- Find the date, and then build a monthly calendar.
- If you are hosting banner advertisements on your website, you can rotate them randomly using PHP.
- Receive and send emails/building email applications.
- Interact with any server back-end/database.
- Interact with the Operating System’s native file system.
- Implement logical layers for the business (one or more).
- Dynamic web pages can also be created using PHP.
Requirements
To use PHP, you must create a new Ubuntu 20.04 server. To set this up, follow the initial server setup guide for Ubuntu 20.04.
Installing PHP in Ubuntu 20.04
PHP is one of the most famous Web development programming languages. It lends power to some of the most popular websites and web apps in the world. PHP processing acts as a bridge between the web server and the PHP interpreter. This enables better overall performance across most PHP-based websites. You can install PHP to process code and generate more dynamic content.
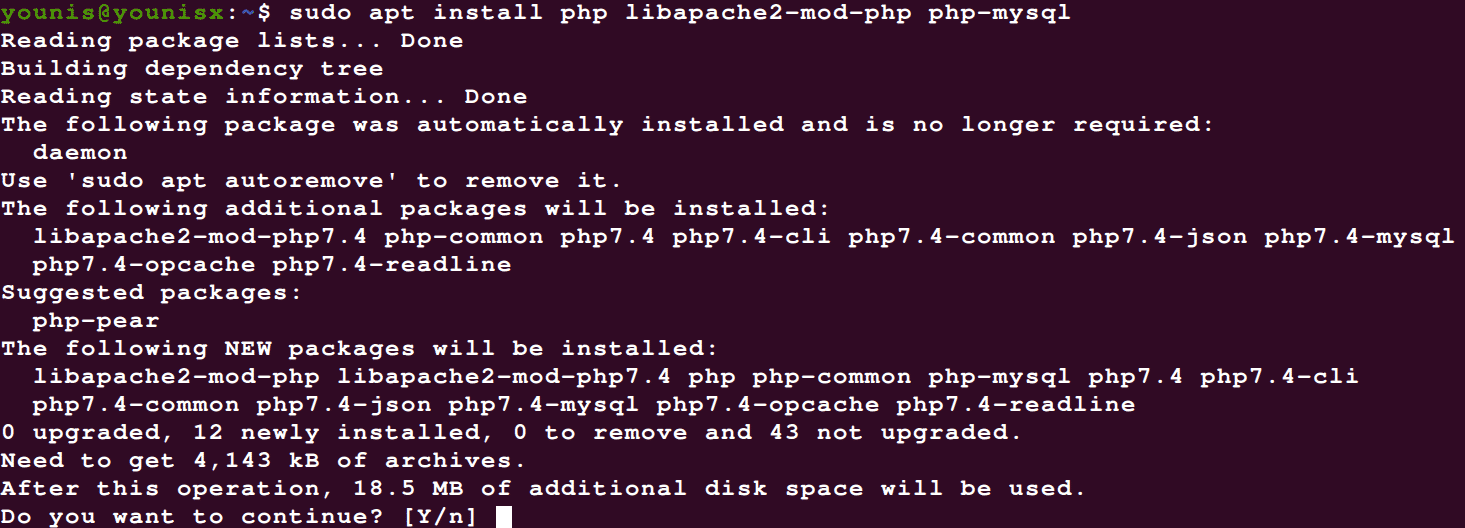
To install PHP, run the terminal command below:

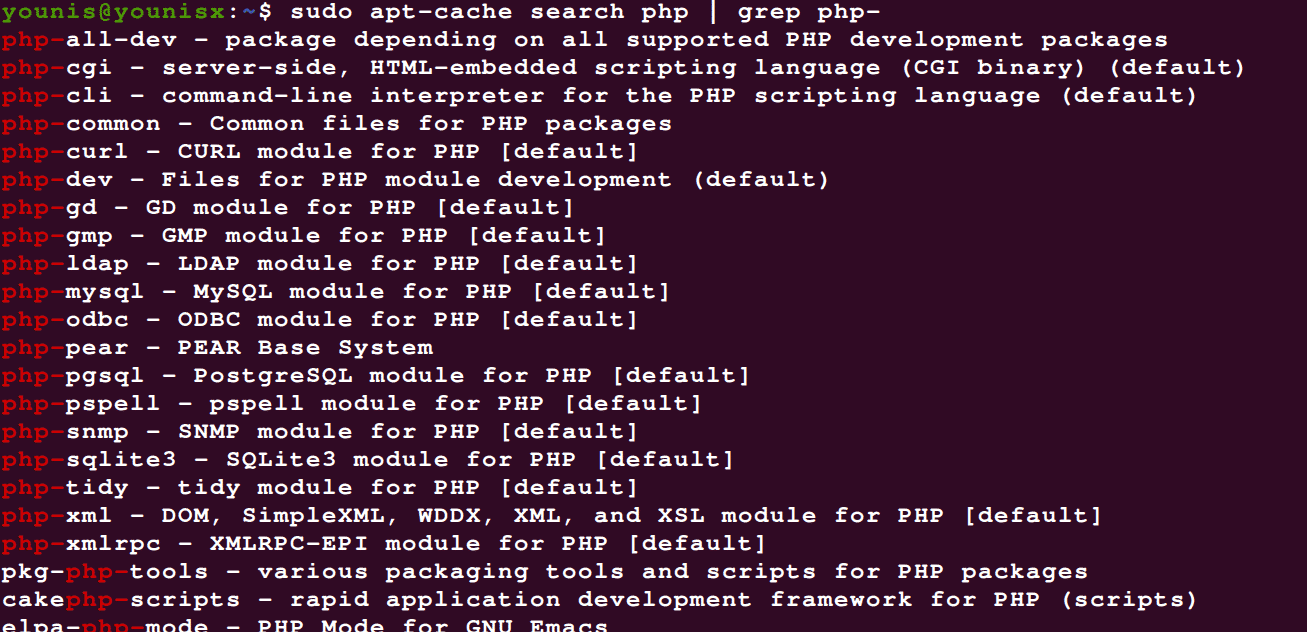
Now, your PHP components should be installed. Depending on your project, you might want to install some of the PHP extensions for your required application. You can look for relevant PHP extensions as shown.

You can install the extension you want after finding it in the list.
In the next section, you will configure PHP for use.
Configure PHP
You can configure PHP for web applications by changing certain values in the php.ini file.
The following directory contains the exact location of PHP. The given directory is for PHP 7.4 with apache.

Press CTRL + F to search for and update the following performance values within the Editor.
# After max size = 48 M
# Speicher limit = 256 M
# Max perform time = 600
# Input vars = 3000
# Input time max = 1000
After changing your PHP settings, you must restart Apache to make the changes.
Test the PHP
You can create a new PHP test file in your web directory once you have performed the steps above. Enter the following command to do so:
![]()
Paste the code below within the file.

Then, save the file.
Go ahead and check the info.php in the URL of your domain name (domainname.com/info.php).
Conclusion
This article covered all you need to know about installing PHP in Ubuntu 20.04. By following the above steps, you can successfully install PHP onto your Ubuntu 20.04 system. This guide established a flexible basis for serving your visitors with PHP websites and applications.
from Linux Hint https://ift.tt/3bUmFIE


0 Comments