In this article, we will explain how to install Gnome shell extensions on the Ubuntu system. Gnome extensions can be installed in Ubuntu using the following ways:
- Using the Ubuntu repository
- Using the web browser
- Installing offline
Note: Note: We have explained the procedure and commands on Ubuntu 20.04 LTS (Focal Fossa).
To manage the extension and its related settings, you will need the Gnome Tweak utility. Use the Ctrl+Alt+T keyboard shortcut to open the Terminal. Then run the following commands in Terminal to install Gnome tweak utility:
$ sudo apt install gnome-tweaks
After running the above command, the system might ask for confirmation that if you want to continue the installation or not. Hit y to continue; after that, the installation will be started on your system.
To launch the Gnome Tweaks, hit the super key on your keyboard and type tweaks. Then from the search result that appears, click on the Tweaks utility.
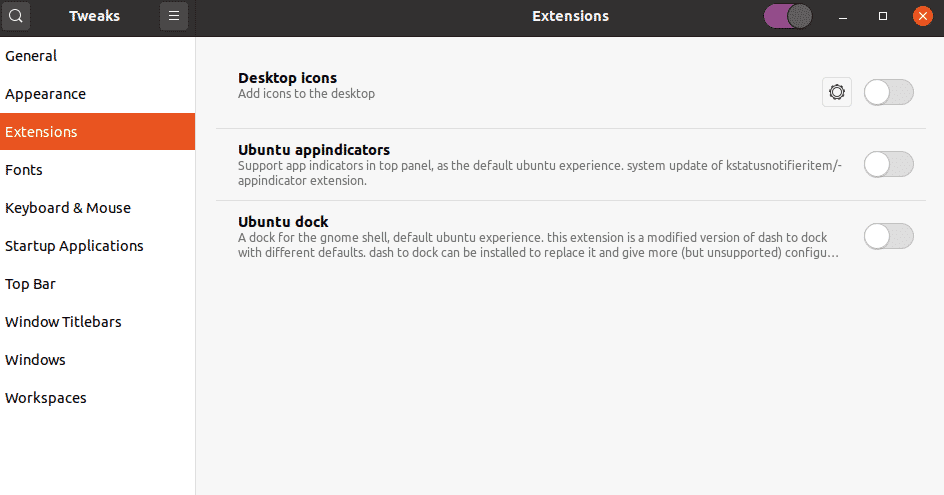
The Tweaks utility will open in the following view:
Installing Gnome extensions
Let’s describe the ways to install Gnome extensions in our system:
Install extensions using the Gnome shell extensions package
The gnome-shell-extensions package in Ubuntu includes a set of extensions to add additional functionalities to Gnome shell. Gnome shell extensions package is included in the default Ubuntu repositories, so we can easily install it using the apt command.
Issue the following command in Terminal to install Gnome shell extension package:
After running the above command, the system might ask for confirmation that if you want to continue the installation or not. Press y to continue; after that, the Gnome-shell-extensions package will be installed on your system.
Now you will need to restart the Gnome shell. Hit Alt+F2 keyboard shortcut and then type r and hit Enter to do so. Now you will see the new extensions added to the extensions list. To enable an extension, switch the button in front of it to on position.
Install extensions from Gnome.org using the web browser
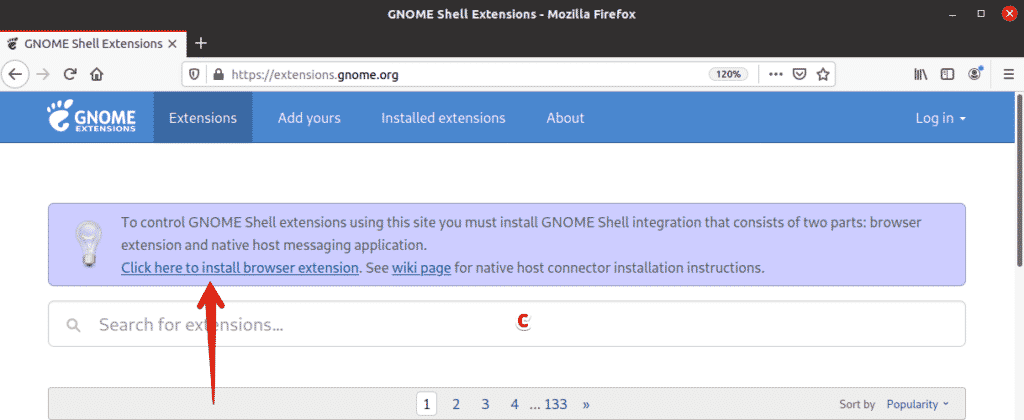
Gnome shell extensions can also be downloaded from its official website using a web browser. Open any web browser in your system and navigate to the following address:
To install Gnome shell extensions from your browser, you will need a browser extension (add-on). Hit “Click here to install browser extension”.
When the following prompt appears, click Continue to Installation.
Then click Add.
Once installed, you will be informed of it. Click Ok to close the dialog box. Now reload the website. You may receive an error at this step informing you about the native host connector is missing. If this is the case, install the native host connector using the following command in Terminal:
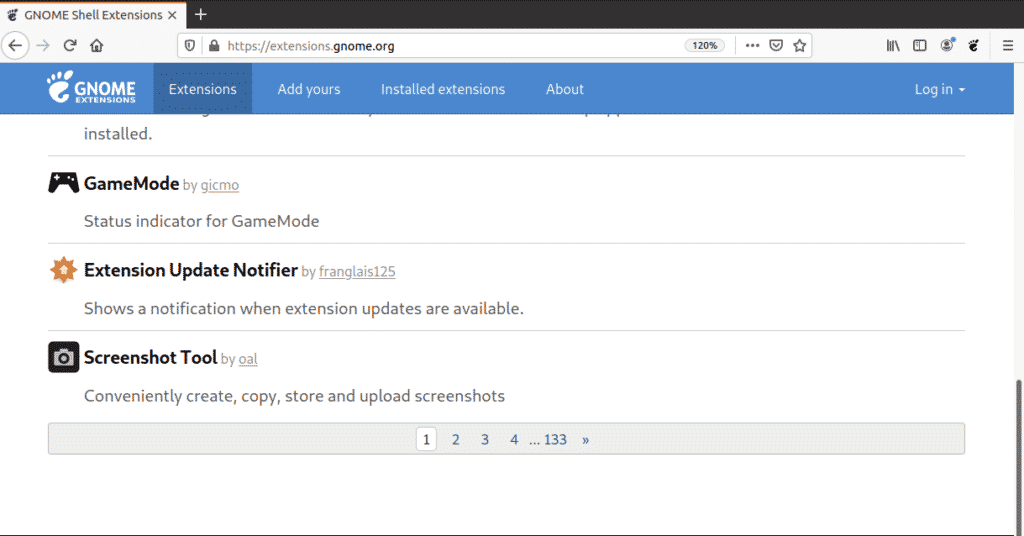
Now you are ready to install Gnome shell extensions on your system. Open any extension that you want to install by clicking on it.
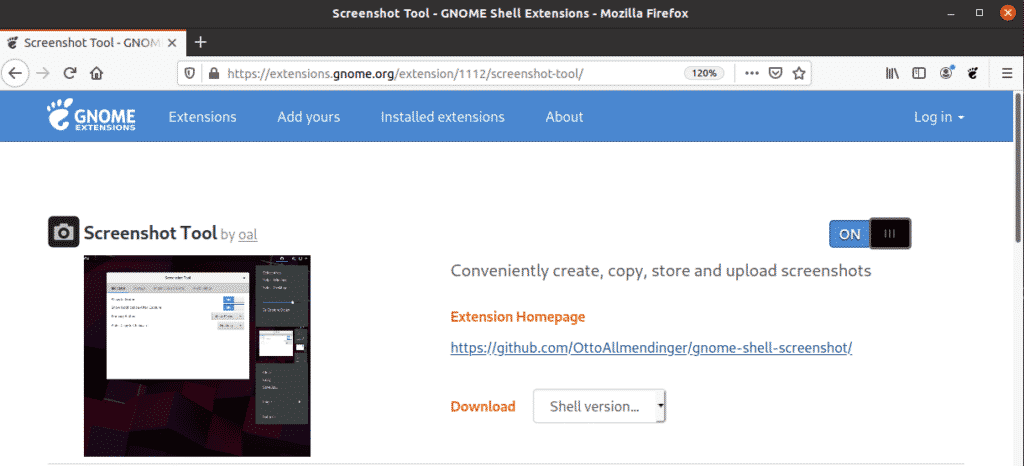
Now on the extension page, switch the button to ON position.
You will see the following dialog. Click the Install button to download and install this extension.
Once the installation is completed, you will be able to use the extension. If you open the Gnome Tweaks utility, you will be able to see recently installed extensions. Use the ON/OFF switch to enable/disable the extension.
Install Gnome extensions offline
You can also install the Gnome extensions offline without an internet connection. However, for this, you will need to download the extensions beforehand. Open any browser and navigate to the following page:
Open any extension that you want to install by clicking on it. Then select the shell version using the drop-down menu. Once you have selected the shell version, another drop-down menu named extension version will appear beside this. Also, select the extension version using this menu.
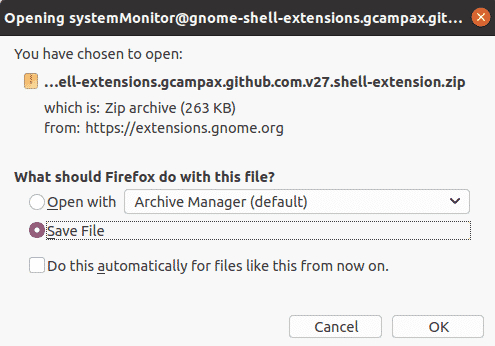
By doing so, the following dialog will appear, asking if you want to open or save the file. Click on Save File radio button and click OK.
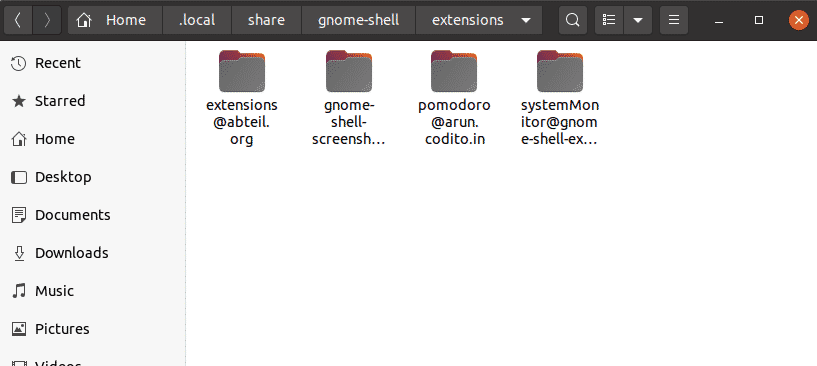
The downloaded extension file will be saved to your ~/Downloads directory by default. Now extract the folder and copy the extracted folder to the ~/.local/share/gnome-shell/extensions directory.
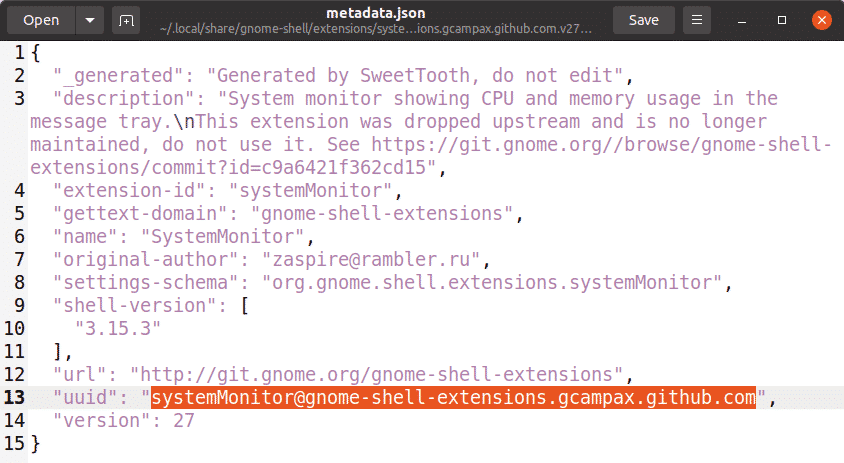
Now move inside the extension folder that you have copied and opened the metadata.json file. Locate uuid (unique identifier) entry in the metadata.json file and note down its value. Now rename the extension folder to this uuid value. The value of uuid in the following example is systemMonitor@gnome-shell-extensions.gcampax.github.com.
Now you will need to restart the Gnome shell. Hit Alt+F2 keyboard shortcut and then type r and hit Enter to do so. If you open the Gnome Tweaks utility, you will be able to see recently installed extensions. Use the ON/OFF switch to enable/disable the extension.
You can also enable/disable the extension using the following command providing the uuid of the extension.
In the above example, the command would be:
This is how you can install Gnome extensions on Ubuntu 20.04 LTS (Focal Fossa) system using various ways. I hope now you can easily add an extension to your Gnome shell.
from Linux Hint https://ift.tt/2XSkoYv









0 Comments