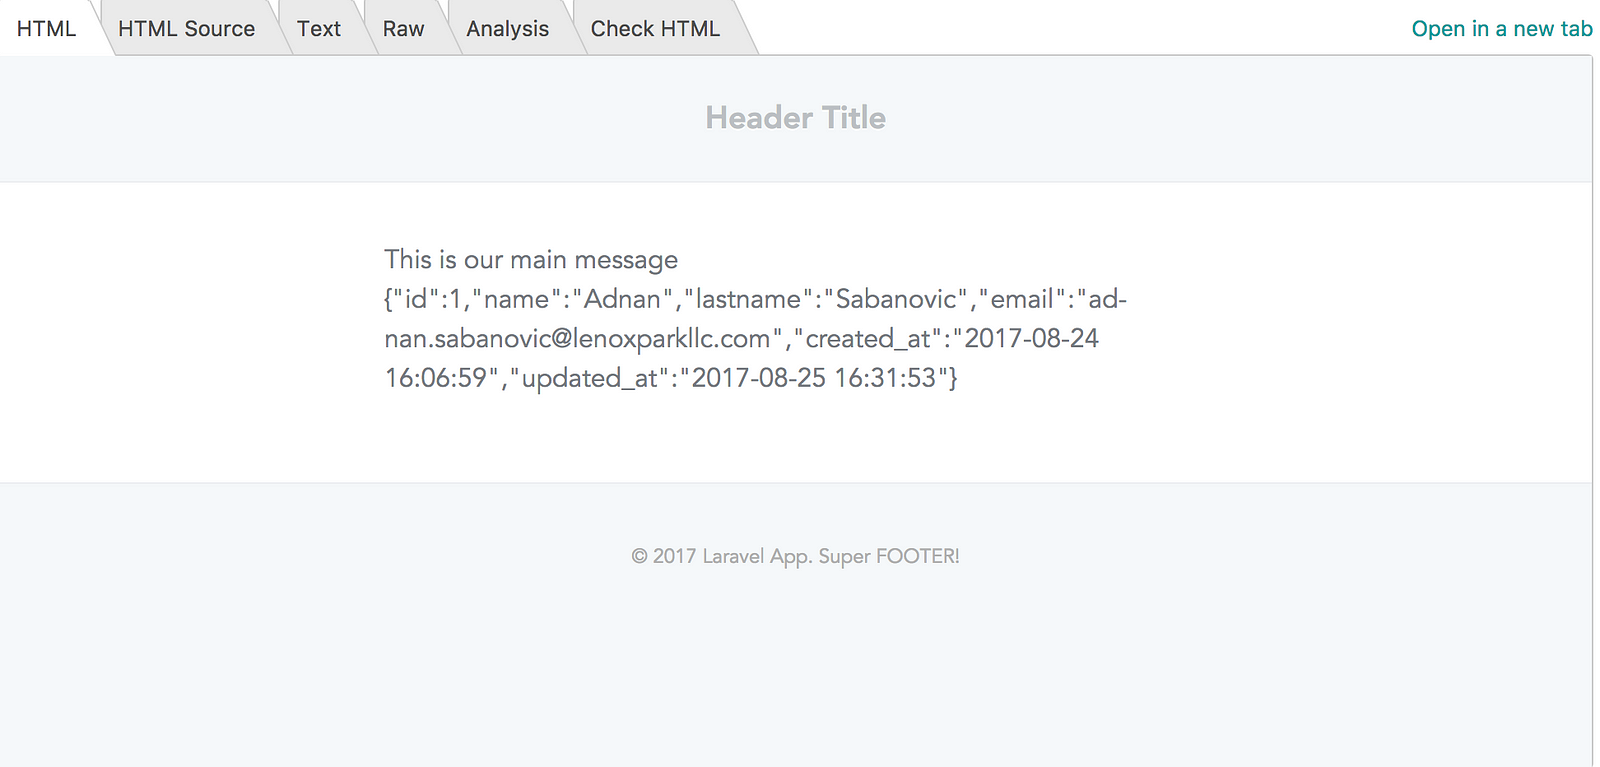
Alright, so I ran into this issue of setting up an email template for my Laravel 5.4 app. It was a ‘Welcome’ email, using the default Laravel template. The challenge was to change the header and footer of the template.
We all try to read through the documentation as quickly as possible and if that doesn’t work, after full 3 minutes of reading the documentation, we would switch to stackoverflow, or laracasts or any other forum, expecting ‘copy and paste’ ready code.
Continue …
Things are easy if you just want to change the text message, and you have many examples on how to do so, using the mail components. However I didn’t find any answers on how to change the default header and footer.
Components
Laravel 5.4 introduced Mailable components. You can read about it here.
<div class="alert alert-danger">
{{ $slot }}
</div>
This would be one alert component, which is basically a blade template. Then the would be a variable/place to drop your content from another template/component.
<strong>Whoops!</strong> Something went wrong!
@endcomponent
Like that. This would render
<strong>Whoops!</strong> Something went wrong!
</div>
Publish Vendor Publish
Initially Laravel will use their components hidden in the core of the framework, that you can export by doing
It will create a mail and markdown folders inside your resources/view/vendor folder. Inside you will find component like layout or header etc.
Creating Notification
What you want to do, is either create a notification, event or a mail class in order to fire off an email when something happens.
I decided to go with a notification. When creating any notification (You can read more about how to create a notification via artisan) you will get a class like this:
namespace App\Notifications;
use Illuminate\Bus\Queueable;
use Illuminate\Notifications\Notification;
use Illuminate\Contracts\Queue\ShouldQueue;
use Illuminate\Notifications\Messages\MailMessage;
class UserRegistered extends Notification
{
use Queueable;
/**
* undocumented class variable
*
* @var string
**/
public $user;
/**
* Create a new notification instance.
*
* @return void
*/
public function __construct($user)
{
$this->user = $user;
}
/**
* Get the notification's delivery channels.
*
* @param mixed $notifiable
* @return array
*/
public function via($notifiable)
{
return ['mail'];
}
/**
* Get the mail representation of the notification.
*
* @param mixed $notifiable
* @return \Illuminate\Notifications\Messages\MailMessage
*/
public function toMail($notifiable)
{
return (new MailMessage)
->from('info@sometimes-it-wont-work.com', 'Admin')
->subject('Welcome to the the Portal')
->markdown('mail.welcome.index', ['user' => $this->user]);
}
/**
* Get the array representation of the notification.
*
* @param mixed $notifiable
* @return array
*/
public function toArray($notifiable)
{
return [
//
];
}
}
Here, pay attention to the toMail method as well as the constructor of the class because we will pass an object to it. Also note that we are using
The next step is to push this notification to work. Somewhere in your RegisterController you might want to call this (Not going into how you will execute it, either sync or queued … ). Don’t forget to include the namespace of the notification at the top.
'name' => $data['name'],
'email' => $data['email'],
'lastname' => $data['lastname'],
'password' => bcrypt($data['password']),
]);
$user->notify(new UserRegistered($user));
Why am I going so deep? Well because I also want to show you how to pass your data into the email template.
Next you can go to resources/views/mail/welcome/index.blade.php (It can be any folder and filename you want) and pasting this:
{{-- Header --}}
@slot('header')
@component('mail::header', ['url' => config('app.url')])
Header Title
@endcomponent
@endslot
{{-- Body --}}
This is our main message {{ $user }}
{{-- Subcopy --}}
@isset($subcopy)
@slot('subcopy')
@component('mail::subcopy')
{{ $subcopy }}
@endcomponent
@endslot
@endisset
{{-- Footer --}}
@slot('footer')
@component('mail::footer')
© {{ date('Y') }} {{ config('app.name') }}. Super FOOTER!
@endcomponent
@endslot
@endcomponent
You can now easily add any image to your header or change the link inside the footer etc.

Hope this helps.
from Linux Hint https://ift.tt/2XUP0c6


0 Comments