


In-Depth Usage of Vim Visual Mode
To make use of Vim visual mode in Ubuntu 20.04, you will need to perform the following steps:
1. First, you will need to launch the terminal in Ubuntu 20.04. To do so, you can press Ctrl+ T, or you can click on the Activities icon located at your desktop and then type “terminal” in the search bar that appears, double-clicking on the search results to launch the terminal. You can also right-click on your desktop and then select the Open Terminal option from the menu that pops up. The newly launched terminal window is shown in the image below: 
2. Next, create a dummy text file for demonstrating usage of VIM’s visual mode. To try this out, type the following command in your terminal and then press the Enter key:
vim FileName.txt
Here, replace the FileName with the name of your dummy text file. This command is also shown in the following image: ![]()
3. As soon as you run this command, an empty text file will appear on your screen. Type any random text in the file, and then press :wq, while being in the Cmdline mode for saving your newly created file. This step is shown in the image below: 
Select and Edit a Phrase in Simple Visual Mode
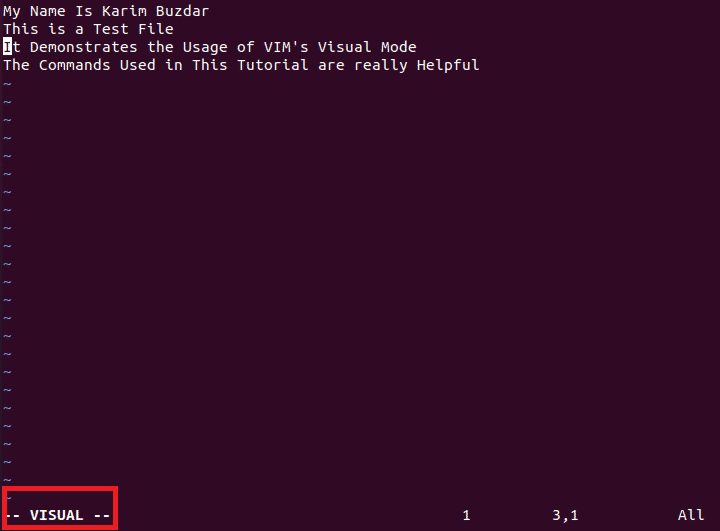
1. Open the dummy file again and point the cursor to the beginning of the phrase that you want to select. Press “v” to enter the simple visual mode, as highlighted in the following image:
2. With the help of the arrow keys, select as many parts of a line as you want, as shown in the image below:

3. To delete the selected text, press “d,” and you will see that the selected text is no longer present, as shown in the image below:

4. To paste this selected text somewhere else, point your cursor at the desired location and then press “p.” You will notice that the selected text has been pasted at the selected location, as highlighted in the image below:

5. To replace the selected text, after selecting the text, press “c.” The selected text will immediately disappear, and you will be able to insert new text at the selected position, as shown in the following image:

Select, Edit, and Indent Lines in Visual Line Mode
1. Point your cursor to the line that you want to select and press “V” to enter visual line mode. You will notice that the line where your cursor is pointed is immediately selected. Use the arrow keys to select more than one line, as shown below:

2. To delete the selected lines and place them elsewhere, press “d” and point your cursor to where you want to place the lines. Press “p,” and the selected lines will be pasted at your chosen location, as shown in the following image:

3. To change the indentation of the selected lines, use the “>” key to increase indent and use the “<” key to decrease indent, as shown in the image below:

Check Indentation of Columns in Visual Block Mode
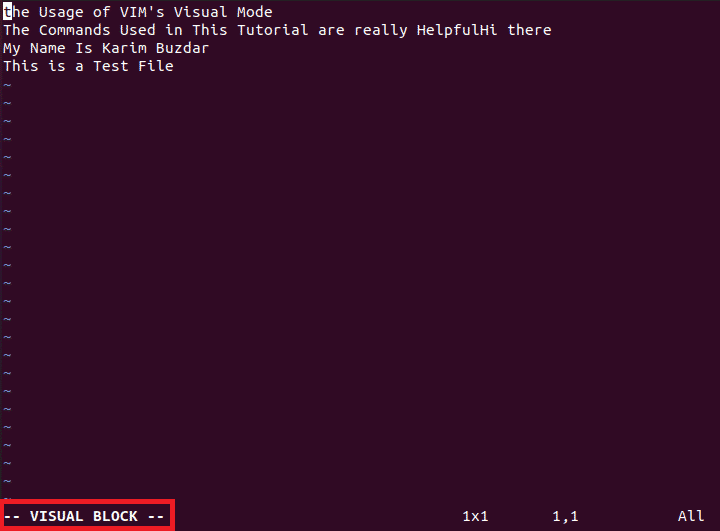
1. You may need to check if every character in a specific column, or in more than one column, is indented alike. To enter visual block mode, point your cursor to the column and press Ctrl+ v, as highlighted in the following image:
2. Use the down arrow key to check the indentation of all the characters in the selected column. To check the indentation of more than one column, use the right arrow key to navigate and select the columns, as shown in the image below:

Conclusion
By following the steps described in this article, you can easily master VIM’s visual mode, allowing you to edit the text within your files with ease.
from Linux Hint https://ift.tt/2ZpkEzA


0 Comments