This article will explore a few tricks that are useful to check CPU usage for Linux systems on Ubuntu 20.04. If you are the administrator of the server or working on a personal desktop, it is easy to monitor the system’s CPU usage on Ubuntu 20.04 using the command line.
This article will discuss commands that are useful to monitor your system’s CPU usage in Ubuntu 20.04. First, open the terminal application using the shortcut Ctrl + Alt + T.
Monitor CPU Performance with top Command
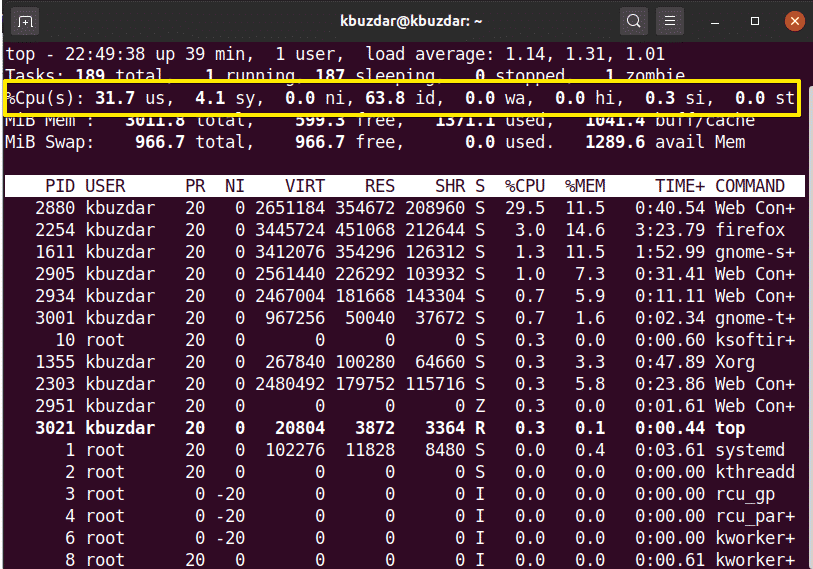
The top command is used to check your system’s CPU usage. To understand the output from the top command is complex, but this command provides the complete CPU usage information on your system. In Ubuntu 20.04 and more other Linux environments, this utility is installed by default. Input the following command on the terminal to monitor the system’s CPU usage:
The following output will generate on your terminal, giving live insights into the services running on the system, the total number of resources being used, and a summary of CPU usage in your system.
Monitor CPU Usage with htop Command
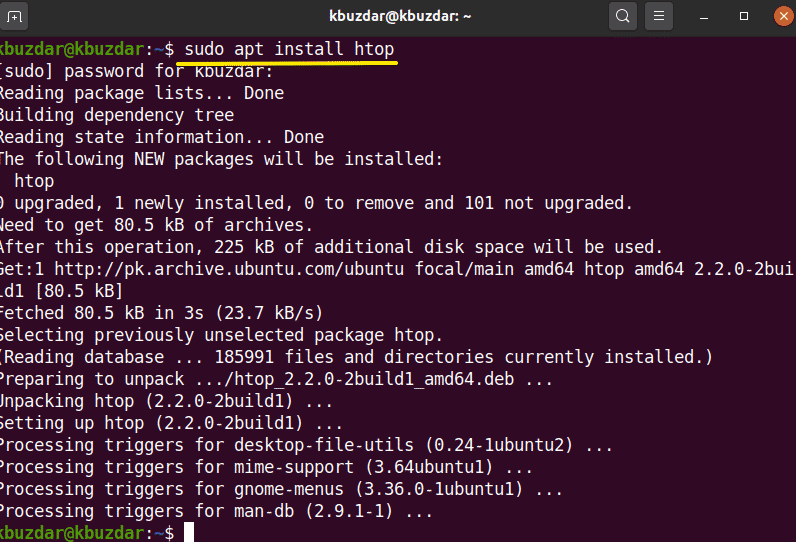
The htop command is similar to the top command. The htop command gives detailed information about your CPU and other resource usage. This command is not installed on the Ubuntu system, so you will need to install the htop command on your system. To install the htop command, first update the apt repository of your Ubuntu 20.04 system using the following command:
Next, install the htop on your system using the apt repository:
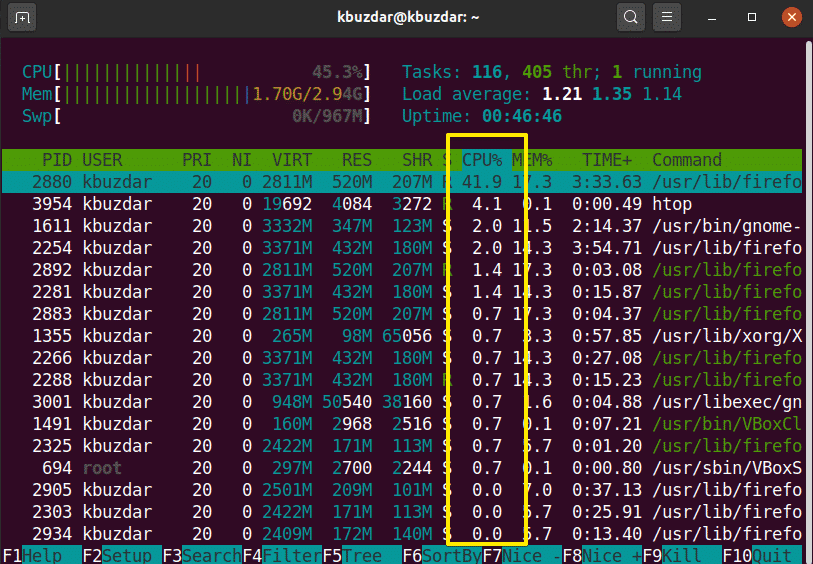
Once you have installed the htop utility on Ubuntu 20.04, you may view a detailed summary of the CPU usage on your system using the following command in the terminal application:
Monitor CPU Usage with sysstat Package
There are additional methods available to monitor CPU usage on your system. To use these methods, install the ‘sysstat’ package on your Linux system. To install this package, run the following command in the terminal:
Once the sysstat utility is installed on your system, you may access the ‘mpstat’ command to view the CPU usage on your system. The ‘mpstat’ command gives the same output as a ‘top’ command, but in a more precise format, as follows:
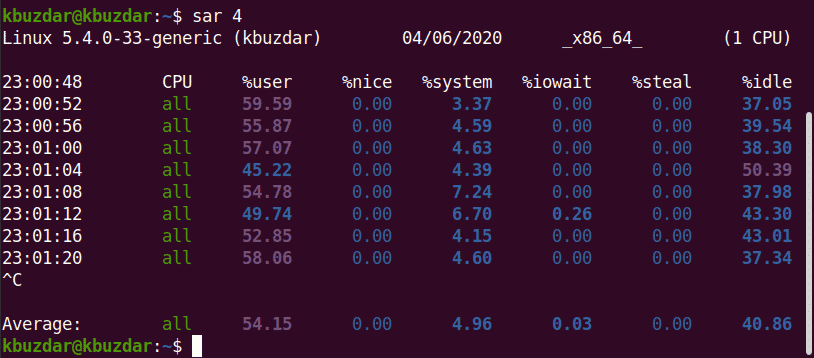
In a sysstat package, one more command is included. This command is known as the ‘sar’ command, in which you can define a number that gives the information in seconds of CPU usage.
For example, if you want to monitor CPU usage after every 4 seconds, enter the following command:
Using the sar command, you can also stop the command after a specified number of iterations.
For example, in the following image, the sar command will monitor CPU usage every 3 seconds for 4 iterations.
The vmstat Command
You can also check CPU usage sing the vmstat command. Run this command on the terminal, as follows:
Monitor CPU with gnome GUI
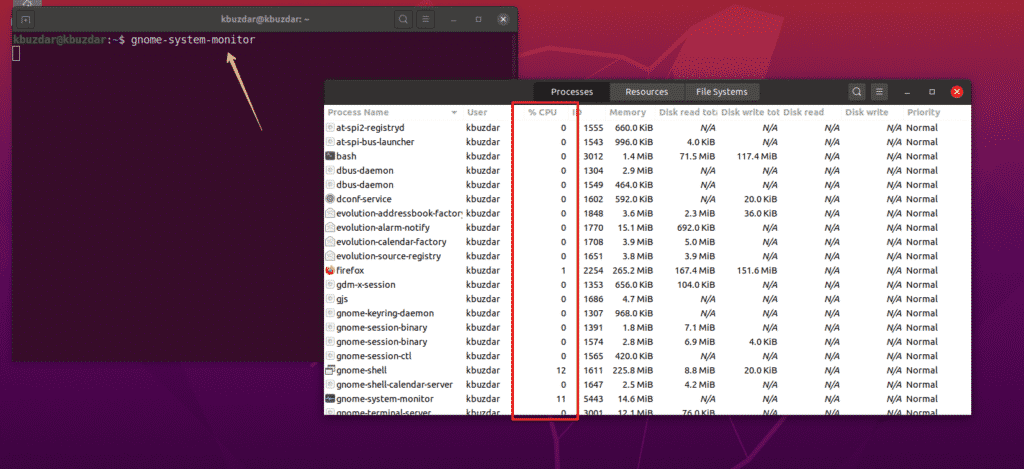
If you would like to monitor your system’s CPU usage using the GUI desktop environment, you may use the default gnome tool. To open the gnome tool, you need to execute the following command on the terminal. You may also open this tool from your system’s applications.
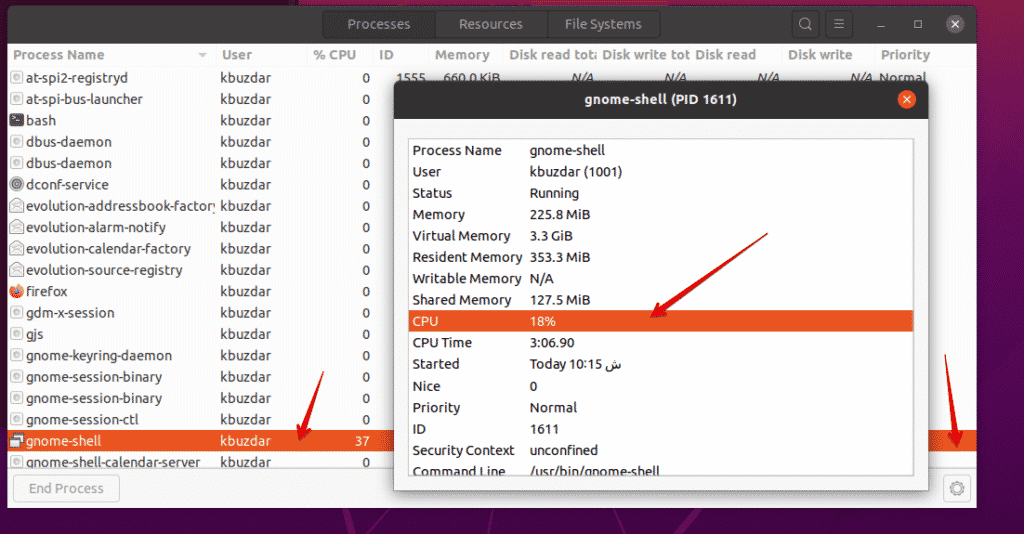
The gnome window will appear on the system. In this window, you can check running processes and their CPU usage. Select a process and click on the setting icon. Here, you can see the details about the selected task:
Conclusion
In this article, you have seen how to monitor CPU usage on your Ubuntu Linux system. You learned about various tools that you can use to monitor your system’s CPU usage. Using these methods, you can perform a detailed analysis of CPU usage on your system and you can handle system resources according to your needs.
from Linux Hint https://ift.tt/3eHAJpv






0 Comments