We will cover the following:
- View List of Installed Packages
- Install .deb package using dpkg
- Verify package installation using dpkg
- Remove installed package using dpkg
We have performed the procedure mentioned in this article on the Ubuntu 20.04 system. Moreover, we have used the command line Terminal application for running the commands in Ubuntu. To open the Terminal, you can use the Ctrl+Alt+T keyboard shortcut.
Note that for installing the .deb package in your Ubuntu system, you must be root user or the normal user with sudo privileges.
View List of Installed Packages
Before installing a new package, you might want to list the installed packages on your system. To do so, use the dpkg command with –list or –l option as follows:
It will show you a long list of installed packages on your system.
Install .deb Package Using Dpkg
Installing a .deb package using the dpkg command is quite simple. Simply type dpkg followed by –install or –i option and the .deb file name.
Make sure you run the above command from the same directory where the .deb package resides. Alternatively, if you are running the above command from some other directory, mention the full path to .deb file as follows:
Example:
The dpkg command installs the specified package only without any dependencies. In case, you are installing a package which requires some dependencies, you will receive an error like this:
Also, the dpkg will not install the package and will leave it in an unconfigurable and broken state.
To resolve this error, run the following command in Terminal:
This command will fix the broken package and install the required dependencies assuming they are available in the system repository.
Verify Package Installation Using Dpkg
Although you can verify the package installation by searching it through the Ubuntu dash menu. If it is available there, that verifies the package is installed.
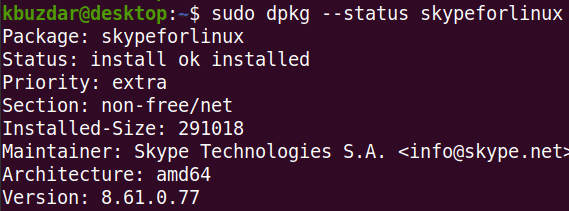
However, the dpkg also allows you to verify the package installation. Simply type dpkg with –status or –s option to verify the package installation:
Remove Installed Package Using Dpkg
Once you no longer need an installed package, you can remove it using the dpkg command. For removing an installed package, you will need to mention the installed package name instead of mentioning the .deb package name that was used to install the package.
To find out the exact package name, you can use the following command with any keyword related to the package name:
In the case of Skype package, you can simply type skype:
Once you have found the exact name of the installed package, you can remove it using the following syntax using the –remove or –r option:
Example:
You can see that instead of typing the “skypeforlinux-64.deb”, we have simply typed the Skype installed package name.
In this article, you have learned how to install a .deb package using the dpkg command in the Ubuntu 20.04 system. You have also learned how to view a list of installed packages, verify the package after installation, and remove a package when you no longer need it. I hope you liked the article!
from Linux Hint https://ift.tt/31l0UOQ


0 Comments