Let’s start with a description of some Encryption Softwares:
VeraCrypt:
VeraCrypt is a modified version of TrueCrypt, a famous open-source encryption software which can be used on both Windows and Unix like operating systems. It is a free and open-source tool that provides full disk encryption. If compared to TrueCrypt, VeraCrypt adds some new and secure encryption algos and formats for encrypted partitions. VeraCrypt provides encryption with different encryption algorithms like AES, Serpent, Twofish, Camellia, etc. Furthermore, it uses 30 times more iterations when encrypting a partition as compared to TrueCrypt.
Bitlocker:
Bitlocker is a popular full-disk encryption software available only for Windows. It uses the AES algorithm with 128 or 256-bit keys for encryption. An important thing about Bitlocker is that if you leave your computer turned on all your files will be visible. Windows Bitlocker is available to anyone using Windows Vista or above version of windows. Through Bitlocker, a user can only encrypt the whole drive at once.
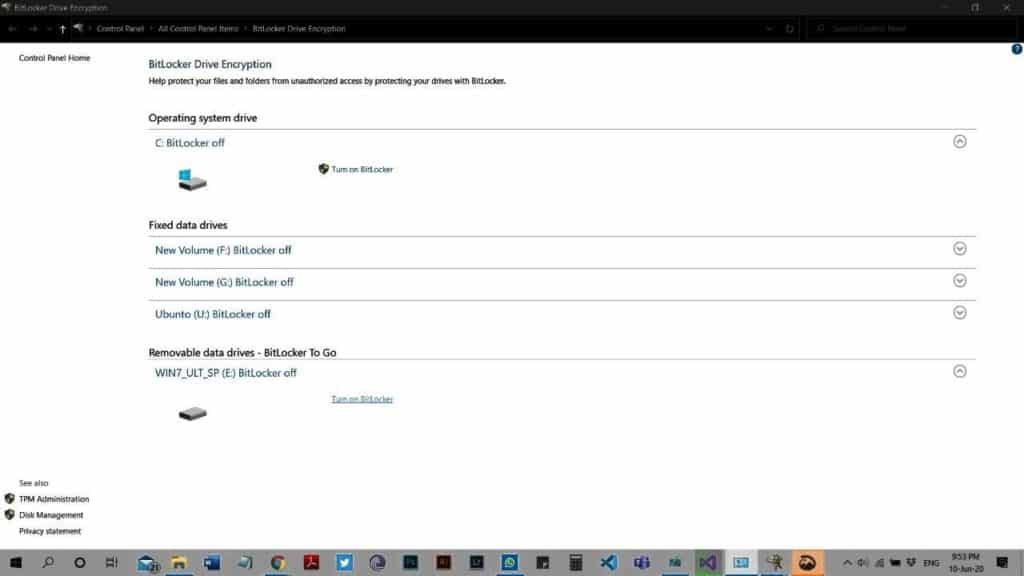
Start BitLocker by typing in the search area. A screen like this will appear
Click Turn on Bitlocker in front of the desired partition.
Now it will ask for a password. Enter a strong combination of letters, numbers, and special characters as a password and you are good to go.
To access Bitlocker protected drive on Linux, you need to install Dislocker using the following command:
LUKS:
LUKS (stands for Linux Unified Key Setup) is a Linux-based disk encryption tool designed by Clemens Fruhwirth in 2004. It doesn’t offer as many features as compared to VeraCrypt but it is flexible in using encryption algorithms. LUKS just doesn’t offer compatibility among different programs but also assures password management in a systematic manner. It is used as a standard for Hard Drive Encryption in Unix like Operating systems.
To access LUKS-encrypted drives on windows, you can use LibreCrypt.
FileVault 2:
FileVault2 is Apple’s answer to Windows BitLocker. This software is only available for Mac OS. For encryption, it uses AES-XTS 128-bit encryption algorithm and it supports only symmetric key encryption using a password. An important similar thing about Bitlocker and FileVault2 is that all their encrypted drive’s data is visible until the computer system is shut down.
Encrypting a hard drive with VeraCrypt:
Let’s take a USB or a hard drive and encrypt it with VeraCrypt and then we will try to break its encryption using Hashcat to access our data.
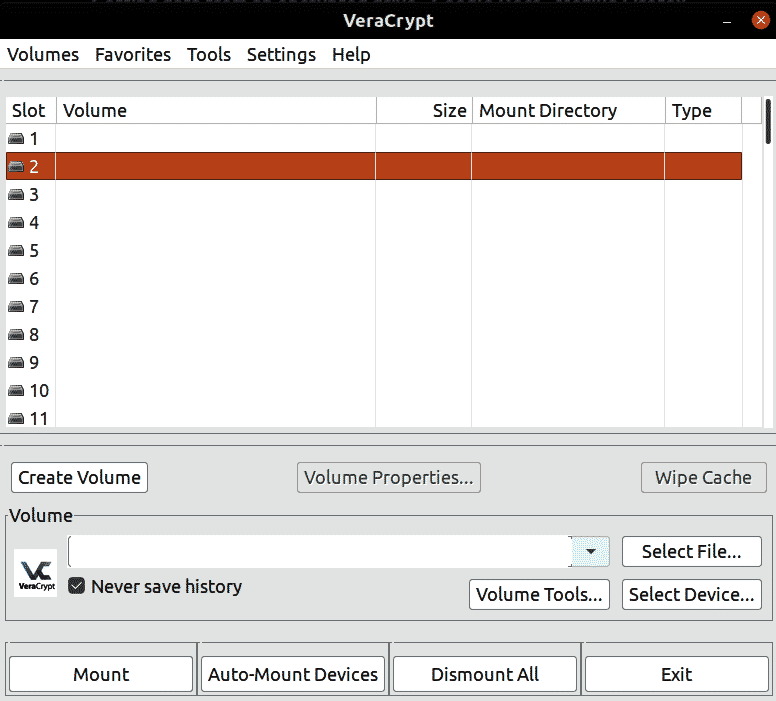
Open VeraCrypt you will see a screen like this:
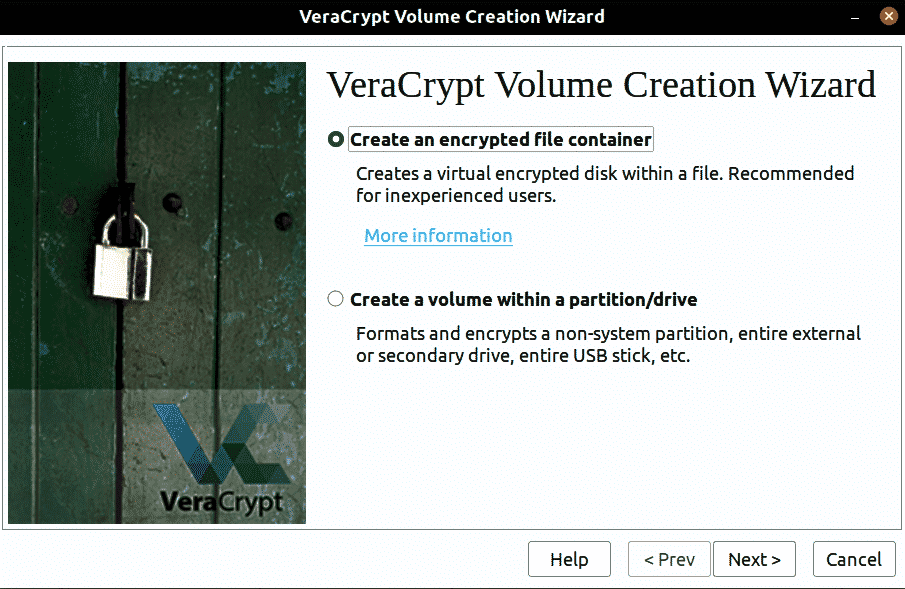
Click on Create Volume and select Create a Volume with Partition.
Click next and choose the desired partition from given partitions.
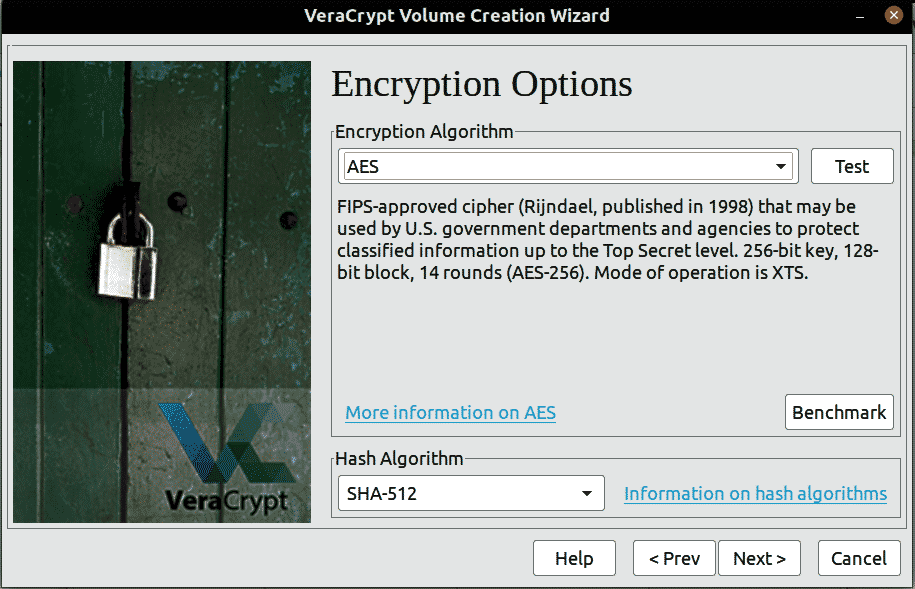
Now we have two things to choose from. Encryption Algorithm and Hash Algorithm.
Choose any other if you have a special requirement or leaving it at default should be enough.
Clicking next will bring us to Choose Password.
Choose a strong password with a combination of letters, numbers, and special characters as per instructions.
Clicking Next will ask for a format. Click OK and after a short period, your drive will be encrypted.
Cracking VeraCrypt Encryption:
Now to crack VeraCrypt volumes with Hashcat, you need to provide HashCat with the binary data containing hashes and encryption info. What you will need are the first 512 bytes of the VeraCrypt volume.
Boot drives require pulling the 512 bytes located in the last sector of the first track of the drive. 1 track is 63 sectors long so what we need to do is to skip 31744(62*512) bytes and extract the next 512 bytes where the header is stored. For non-boot drives, we need to extract the first 512 bytes.
We will do this by using dd on our encrypted USB drive named /dev/sdb1 using the following command:
conv=noerror,sync status=progress
- if= drive name
- of=file in which extracted data will be stored
- bs=block size (number of bytes getting pulled)
- conv=noerror,sync status=progress= keep doing the work in case of an error
For boot-drives we will use the following command, we have to skip the first 31744 bytes :
conv=noerror,sync status=progress
In case, while encrypting the drive if we selected a hidden partition then we have to skip first 64K (65536) bytes and use the following command :
count=1 conv=noerror,sync status=progress
Hashcat:
Hashcat is the most powerful and fastest password recovery utility out there that supports 5 modes of attacks for more than 300 highly-optimized hashing algorithms. It is compatible with different types of Graphical Processing Units (GPUs) as well which can multiply to its cracking speed. Hashcat is available for Windows as well as Unix like Operating systems.
Hashcat needs 3 things to start cracking :
- m: hash type
- a: attack type
- Binary data file
Let’s look at hashcat –help:
- [ Options ] -
Options Short / Long | Type | Description | Example
================================+======+=======================================+=======================
-m, --hash-type | Num | Hash-type, see references below | -m 1000
-a, --attack-mode | Num | Attack-mode, see references below | -a 3
-V, --version | | Print version |
-h, --help | | Print help |
--quiet | | Suppress output |
--hex-charset | | Assume charset is given in hex |
--hex-salt | | Assume salt is given in hex |
--hex-wordlist | | Assume words in wordlist are given in hex |
--force | | Ignore warnings |
--status | | Enable automatic update of the status screen |
--status-timer | Num | Sets seconds between status screen updates to X | --status-timer=1
--stdin-timeout-abort | Num | Abort if there is no input from stdin for X seconds | --stdin-timeout-abort=300
--machine-readable | | Display the status view in a machine-readable format |
--keep-guessing | | Keep guessing the hash after it has been cracked |
--self-test-disable | | Disable self-test functionality on startup |
--loopback | | Add new plains to induct directory |
--markov-hcstat2 | File | Specify hcstat2 file to use | --markov-hcstat2=my.hcstat2
--markov-disable | | Disables markov-chains, emulates classic brute-force |
--markov-classic | | Enables classic markov-chains, no per-position |
-t, --markov-threshold | Num | Threshold X when to stop accepting new markov-chains | -t 50
--runtime | Num | Abort session after X seconds of runtime | --runtime=10
--session | Str | Define specific session name | --session=mysession
--restore | | Restore session from --session |
--restore-disable | | Do not write restore file |
--restore-file-path | File | Specific path to restore file | --restore-file-path=x.restore
-o, --outfile | File | Define outfile for recovered hash | -o outfile.txt
--outfile-format | Num | Define outfile-format X for recovered hash | --outfile-format=
--outfile-autohex-disable | | Disable the use of $HEX[] in output plains |
--outfile-check-timer | Num | Sets seconds between outfile checks to X | --outfile-check=30
--wordlist-autohex-disable | | Disable the conversion of $HEX[] from the wordlist |
-p, --separator | Char | Separator char for hashlists and outfile | -p :
--stdout | | Do not crack a hash, instead print candidates only |
--show | | Compare hashlist with potfile; show cracked hashes |
--left | | Compare hashlist with potfile; show uncracked hashes |
--username | | Enable ignoring of usernames in hashfile |
--remove | | Enable removal of hashes once they are cracked |
--remove-timer | Num | Update input hash file each X seconds | --remove-timer=30
--potfile-disable | | Do not write potfile |
--potfile-path | File | Specific path to potfile | --potfile-path=my.pot
--encoding-from | Code | Force internal wordlist encoding from X | --encoding-from=iso-8859-15
--encoding-to | Code | Force internal wordlist encoding to X | --encoding-to=utf-32le
--debug-mode | Num | Defines the debug mode (hybrid only by using rules) | --debug-mode=4
--debug-file | File | Output file for debugging rules | --debug-file=good.log
--induction-dir | Dir | Specify the induction directory to use for loopback | --induction=inducts
--outfile-check-dir | Dir | Specify the outfile directory to monitor for plains | --outfile-check-dir=x
--logfile-disable | | Disable the logfile |
--hccapx-message-pair | Num | Load only message pairs from hccapx matching X | --hccapx-message-pair=2
--nonce-error-corrections | Num | The BF size range to replace AP's nonce last bytes | --nonce-error-corrections=16
--keyboard-layout-mapping | File | Keyboard layout mapping table for special hash-modes | --keyb=german.hckmap
--truecrypt-keyfiles | File | Keyfiles to use, separated with commas | --truecrypt-keyf=x.png
--veracrypt-keyfiles | File | Keyfiles to use, separated with commas | --veracrypt-keyf=x.txt
--veracrypt-pim | Num | VeraCrypt personal iterations multiplier | --veracrypt-pim=1000
-b, --benchmark | | Run benchmark of selected hash-modes |
--benchmark-all | | Run benchmark of all hash-modes (requires -b) |
--speed-only | | Return expected speed of the attack, then quit |
--progress-only | | Return ideal progress step size and time to process |
-c, --segment-size | Num | Sets size in MB to cache from the wordfile to X | -c 32
--bitmap-min | Num | Sets minimum bits allowed for bitmaps to X | --bitmap-min=24
--bitmap-max | Num | Sets maximum bits allowed for bitmaps to X | --bitmap-max=24
--cpu-affinity | Str | Locks to CPU devices, separated with commas | --cpu-affinity=1,2,3
--example-hashes | | Show an example hash for each hash-mode |
-I, --opencl-info | | Show info about detected OpenCL platforms/devices | -I
--opencl-platforms | Str | OpenCL platforms to use, separated with commas | --opencl-platforms=2
-d, --opencl-devices | Str | OpenCL devices to use, separated with commas | -d 1
-D, --opencl-device-types | Str | OpenCL device-types to use, separated with commas | -D 1
--opencl-vector-width | Num | Manually override OpenCL vector-width to X | --opencl-vector=4
-O, --optimized-kernel-enable | | Enable optimized kernels (limits password length) |
-w, --workload-profile | Num | Enable a specific workload profile, see pool below | -w 3
-n, --kernel-accel | Num | Manual workload tuning, set outerloop step size to X | -n 64
-u, --kernel-loops | Num | Manual workload tuning, set innerloop step size to X | -u 256
-T, --kernel-threads | Num | Manual workload tuning, set thread count to X | -T 64
-s, --skip | Num | Skip X words from the start | -s 1000000
-l, --limit | Num | Limit X words from the start + skipped words | -l 1000000
--keyspace | | Show keyspace base:mod values and quit |
-j, --rule-left | Rule | Single rule applied to each word from left wordlist | -j 'c'
-k, --rule-right | Rule | Single rule applied to each word from right wordlist | -k '^-'
-r, --rules-file | File | Multiple rules applied to each word from wordlists | -r rules/best64.rule
-g, --generate-rules | Num | Generate X random rules | -g 10000
--generate-rules-func-min | Num | Force min X functions per rule |
--generate-rules-func-max | Num | Force max X functions per rule |
--generate-rules-seed | Num | Force RNG seed set to X |
-1, --custom-charset1 | CS | User-defined charset ?1 | -1 ?l?d?u
-2, --custom-charset2 | CS | User-defined charset ?2 | -2 ?l?d?s
-3, --custom-charset3 | CS | User-defined charset ?3 |
-4, --custom-charset4 | CS | User-defined charset ?4 |
-i, --increment | | Enable mask increment mode |
--increment-min | Num | Start mask incrementing at X | --increment-min=4
--increment-max | Num | Stop mask incrementing at X | --increment-max=8
-S, --slow-candidates | | Enable slower (but advanced) candidate generators |
--brain-server | | Enable brain server |
-z, --brain-client | | Enable brain client, activates -S |
--brain-client-features | Num | Define brain client features, see below | --brain-client-features=3
--brain-host | Str | Brain server host (IP or domain) | --brain-host=127.0.0.1
--brain-port | Port | Brain server port | --brain-port=13743
--brain-password | Str | Brain server authentication password | --brain-password=bZfhCvGUSjRq
--brain-session | Hex | Overrides automatically calculated brain session | --brain-session=0x2ae611db
--brain-session-whitelist | Hex | Allow given sessions only, separated with commas | --brain-session-whitelist=0x2ae611db
Hash modes:
We will see more than a thousand hash modes here. These are of interest now.
X | 1 = PBKDF2-HMAC-RIPEMD160 | Full-Disk Encryption (FDE)
X | 2 = PBKDF2-HMAC-SHA512 | Full-Disk Encryption (FDE)
X | 3 = PBKDF2-HMAC-Whirlpool | Full-Disk Encryption (FDE)
X | 4 = PBKDF2-HMAC-RIPEMD160 + boot-mode | Full-Disk Encryption (FDE)
X | 5 = PBKDF2-HMAC-SHA256 | Full-Disk Encryption (FDE)
X | 6 = PBKDF2-HMAC-SHA256 + boot-mode | Full-Disk Encryption (FDE)
X | 7 = PBKDF2-HMAC-Streebog-512 | Full-Disk Encryption (FDE)
Y | 1 = XTS 512 bit pure AES | Full-Disk Encryption (FDE)
Y | 1 = XTS 512 bit pure Serpent | Full-Disk Encryption (FDE)
Y | 1 = XTS 512 bit pure Twofish | Full-Disk Encryption (FDE)
Y | 1 = XTS 512 bit pure Camellia | Full-Disk Encryption (FDE)
Y | 1 = XTS 512 bit pure Kuznyechik | Full-Disk Encryption (FDE)
Y | 2 = XTS 1024 bit pure AES | Full-Disk Encryption (FDE)
Y | 2 = XTS 1024 bit pure Serpent | Full-Disk Encryption (FDE)
Y | 2 = XTS 1024 bit pure Twofish | Full-Disk Encryption (FDE)
Y | 2 = XTS 1024 bit pure Camellia | Full-Disk Encryption (FDE)
Y | 2 = XTS 1024 bit pure Kuznyechik | Full-Disk Encryption (FDE)
Y | 2 = XTS 1024 bit cascaded AES-Twofish | Full-Disk Encryption (FDE)
Y | 2 = XTS 1024 bit cascaded Camellia-Kuznyechik | Full-Disk Encryption (FDE)
Y | 2 = XTS 1024 bit cascaded Camellia-Serpent | Full-Disk Encryption (FDE)
Y | 2 = XTS 1024 bit cascaded Kuznyechik-AES | Full-Disk Encryption (FDE)
Y | 2 = XTS 1024 bit cascaded Kuznyechik-Twofish | Full-Disk Encryption (FDE)
Y | 2 = XTS 1024 bit cascaded Serpent-AES | Full-Disk Encryption (FDE)
Y | 2 = XTS 1024 bit cascaded Twofish-Serpent | Full-Disk Encryption (FDE)
Y | 3 = XTS 1536 bit all | Full-Disk Encryption (FDE)
14600 | LUKS | Full-Disk Encryption (FDE)
16700 | FileVault 2 | Full-Disk Encryption (FDE)
18300 | Apple File System (APFS) | Full-Disk Encryption (FDE)
Attack modes:
===+======
0 | Straight
1 | Combination
3 | Brute-force
6 | Hybrid Wordlist + Mask
7 | Hybrid Mask + Wordlist
We have all 3 things hashcat needs, let’s get it done using the following command:
hashcat (v5.1.0) starting...
Hashes: 1 digests; 1 unique digests, 1 unique salts
Bitmaps: 16 bits, 65536 entries, 0x0000ffff mask, 262144 bytes, 5/13 rotates
Rules: 1
Applicable optimizers:
* Zero-Byte
* Single-Hash
* Single-Salt
* Slow-Hash-SIMD-LOOP
* Uses-64-Bit
Minimum password length supported by kernel: 0
Maximum password length supported by kernel: 64
* Device #1: build_opts '-cl-std=CL1.2 -I OpenCL -I /usr/share/hashcat/OpenCL -D
LOCAL_MEM_TYPE=2 -D VENDOR_ID=64 -D CUDA_ARCH=0 -D AMD_ROCM=0 -D VECT_SIZE=4 -D
DEVICE_TYPE=2
-D DGST_R0=0 -D DGST_R1=1 -D DGST_R2=2 -D DGST_R3=3 -D DGST_ELEM=16 -D
KERN_TYPE=6222 -D _unroll'
[Logging clang options] "/usr/bin/ld" "--eh-frame-hdr" "-m" "elf_x86_64" "-shared"
"-o" "/root/.cache/pocl/uncached/tempfile-70-00-eb-2c-aa.so" "-L/usr/lib/gcc/x86_64
-linux-gnu/9" "-L/usr/lib/gcc/x86_64-linux-gnu/9/../../../x86_64-linux-gnu"
"-L/usr/lib/gcc/x86_64-linux-gnu/9/../../../../lib64" "-L/lib/x86_64-linux-gnu"
"-L/lib/../lib64" "-L/usr/lib/x86_64-linux-gnu" "-L/usr/lib/../lib64"
"-L/usr/lib/x86_64-linux-gnu/../../lib64" "-L/usr/lib/gcc/x86_64-linux-gnu/9/
../../.." "-L/usr/lib/llvm-6.0/bin/../lib" "-L/lib" "-L/usr/lib"
"/root/.cache/pocl/uncached/ tempfile-b1-44-3f-f1-67.so.o" "-lm"
Dictionary cache hit:
* Filename..: wordlist.txt
* Passwords.: 600000
* Bytes.....: 6000000
* Keyspace..: 600000
[Logging clang options] "/usr/bin/ld" "--eh-frame-hdr" "-m" "-L/usr/lib/llvm-6.0/bin/../lib"
"-L/lib" "-L/usr/lib" "/root/.cache/pocl/uncached/tempfile-e2-ba-db-1f-ba.so.o" "-lm" "-lm"
"-lgcc" "--as-needed" "-lgcc_s" "--no-as-needed" "-lc" "-lgcc" "--as-needed" "-lgcc_s"
"--no-as-needed"
binary_data:tokyo2002
Status...........: Cracked
Hash.Type........: VeraCrypt PBKDF2-HMAC-SHA512 + XTS 1024 bit
Hash.Target......: binary_data
Time.Started.....: Thu Jun 11 20:38:17 2020 (11 secs)
Time.Estimated...: Thu Jun 11 20:38:28 2020 (0 secs)
Guess.Base.......: File (wordlist.txt)
Guess.Queue......: 1/1 (100.00%)
Speed.#1.........: 0 H/s (0.57ms) @ Accel:32 Loops:32 Thr:1 Vec:4
Recovered........: 1/1 (100.00%) Digests, 1/1 (100.00%) Salts
Progress.........: 600000/60000 (100.00%)
Rejected.........: 0/60000 (0.00%)
Restore.Point....:0/60000 (0.00%)
Restore.Sub.#1...: Salt:0 Amplifier:0-1 Iteration:499968-499999
Candidates.#1....: mango 23232 -> wrongPassword23
We got the password tokyo2002.
Encrypting a drive with LUKS:
Let’s look at how to encrypt a USB using LUKS encryption:
First of all install cryptsetup-LUKS package using the following command:
Now use the following command to set up the desired partition for encryption:
Xdc is the partition name. If you don’t know the partition name use “fdisk -l”.
Now create a logical device-mapper device mounted to encrypted luks partition using:
It will ask for a passphrase. Enter a strong combination of letters, numbers, and special characters as a password and you are good to go.
Cracking LUKS Encryption:
Now to crack LUKS volumes with Hashcat, you need to feed HashCat with a correct binary data file. We can extract that data using the following command:
conv=noerror,sync status=progress
This will create a 2mb file containing all the data hashcat needs for cracking.
Hashcat:
Let’s look at hashcat syntax:
<binary_data> <wordlist>
Now we have the binary file and the wordlist but we don’t know attack type and typeOfEncryption. For this info, we will have a look at hashcat –help.
We found out both:
typeOfEncryption:
16700 | FileVault 2 | Full-Disk Encryption (FDE)
18300 | Apple File System (APFS) | Full-Disk Encryption (FDE)
attack type:
===+======
0 | Straight
1 | Combination
3 | Brute-force
There we go, we will start cracking by typing the following command :
hashcat (v5.1.0) starting...
device #1: build_opts '-cl-std=CL1.2 -I OpenCL -I /usr/share/hashcat/OpenCL -D
LOCAL_MEM_TYPE=2 -D VENDOR_ID=64 -D CUDA_ARCH=0 -D AMD_ROCM=0 -D VECT_SIZE=4 -D
DEVICE_TYPE=2 -D DGST_R0=0 -D DGST_R1=1 -D DGST_R2=2 -D DGST_R3=3 -D DGST_ELEM=16
-D KERN_TYPE=6222 -D _unroll'
[Logging clang options] "/usr/bin/ld" "--eh-frame-hdr" "-m" "elf_x86_64" "-shared"
"-o" "/root/.cache/pocl/uncached/tempfile-70-00-eb-2c-aa.so"
"-L/usr/lib/gcc/x86_64-linux-gnu/9" "-L/usr/lib/gcc/x86_64-linux-gnu/9/../../../
x86_64-linux-gnu" "-L/usr/lib/gcc/x86_64-linux-gnu/9/../../../../lib64" "-L/lib/
x86_64-linux-gnu" "-L/lib/../lib64" "-L/usr/lib/x86_64-linux-gnu" "-L/usr/lib/../
lib64" "-L/usr/lib/x86_64-linux-gnu/../../lib64" "-L/usr/lib/gcc/x86_64-linux-gnu/9/
../../.." "-L/usr/lib/llvm-6.0/bin/../lib" "-L/lib" "-L/usr/lib" "/root/.cache/pocl/
uncached/tempfile-b1-44-3f-f1-67.so.o" "-lm"
Dictionary cache hit:
* Filename..: wordlist.txt
* Passwords.: 50
* Bytes.....: 500
* Keyspace..: 50
[Logging clang options] "/usr/bin/ld" "--eh-frame-hdr" "-m"
"-L/usr/lib/llvm-6.0/bin/../lib" "-L/lib" "-L/usr/lib" "/root/.cache/pocl/
uncached/tempfile-e2-ba-db-1f-ba.so.o" "-lm" "-lm" "-lgcc" "--as-needed"
"-lgcc_s" "--no-as-needed" "-lc" "-lgcc" "--as-needed" "-lgcc_s" "--no-as-needed"
header.luks:tokyo2002
Status...........: Cracked
Hash.Type........: LUKS
Hash.Target......: header.luks
Time.Started.....: Thu Jun 11 20:38:17 2020 (11 secs)
Time.Estimated...: Thu Jun 11 20:38:28 2020 (0 secs)
Guess.Base.......: File (wordlist.txt)
Guess.Queue......: 1/1 (100.00%)
Speed.#1.........: 0 H/s (0.57ms) @ Accel:32 Loops:32 Thr:1 Vec:4
Recovered........: 1/1 (100.00%) Digests, 1/1 (100.00%) Salts
Progress.........: 50/50 (100.00%)
Rejected.........: 0/50 (0.00%)
Restore.Point....:0/50 (0.00%)
Restore.Sub.#1...: Salt:0 Amplifier:0-1 Iteration:499968-499999
Candidates.#1....: mango 23232 -> wrongPassword23
We got the password tokyo2002.
Custom Wordlists using crunch:
Creating a wordlist in a way you want is a good skill to have in your belt. It helps a great deal in brute force and dictionary attacks. One of the tools that can be used for making a custom wordlist is Crunch.
Usage: crunch <min> <max> [options]
- min: minimum length
- max: maximum length
- options: various options we will find at its man page
Options:
b: max size
c: number of lines
d: limit number of duplicate characters
e: stop incase a certain string is reaches
f: use charset.lst file to generate from
i: invert order
O: output to file specified
r: resume a previous session
s: Specify the string with which wordlist will begin
t: set pattern using @,%^ (lowercase letters, uppercase letters, numbers, special characters simultaneously)
z: compress the output file
Let’s suppose we have to generate a wordlist with minimum characters 6 and maximum characters 8, we will use the following command and save the output to output.txt:
The crunch will now generate the following amount of data: 1945860473024 bytes
1812 GB
1 TB
0 PB
The crunch will now generate the following number of lines: 217167790528
Let’s assume another scenario where we know the target’s birthday is 2002 and he usually uses a password of 9 characters ending with his birthday. We will use the following command to generate a wordlist matching all these characteristics and save it to a file named wordlist.txt.
The crunch will now generate the following amount of data: 118813760 bytes
0 GB
0 TB0 PB
The crunch will now generate the following number of lines: 11881376
crunch: 100% completed generating output
-rw-rw-rw- 1 azad azad 118813760 Jun 13 14:43 wordlist.txt
Knowing how to create the right wordlists for your task is a skill that can save one’s lot of time in dictionary attacks.
Conclusion:
If you are trying to choose between encryption software, some encryption software like VeraCrypt won’t let someone open your drives without entering a password even if the malicious person is logged in, while using some software like BitLocker for windows and FileVault2 for apple makes all your files visible if the user is logged in. Encrypting your drives is a good thing but using weak, repeated, or guessable passwords for them will make them easy to crack. Almost every encryption type can be cracked, depending upon password length and complexity. Cracking encrypting drives using a custom wordlist will save one a lot of time and will help in doing the task efficiently. Making good wordlists is an art, many tools are available like Crunch, Cewl, etc that will help you do it. Then there are some very good tools out there like Hashcat, JohnTheRipper that can break any kind of encryption if provided with the right binary file and the right wordlist. As compared to John, Hashcat can make use of GPUs and is much faster with a speed of 882 c/s over John having a speed of 54.8 c/s.
from Linux Hint https://ift.tt/2VghRWQ


0 Comments