


Take screenshots through the user interface on Ubuntu 20.04 LTS
In Ubuntu 20.04 LTS, the Gnome Screenshot is a powerful tool that is used for screen capturing with specified time delay and has many other features. To open Screenshot utility, you will access it through the application search bar.

After clicking on Screenshot the following dialogue box will appear on the desktop of your system.
Now you will select one option at a time among the following options which are displayed in the dialogue box.
- Grab the whole screen
- Grab the current window
- Select the area to grab
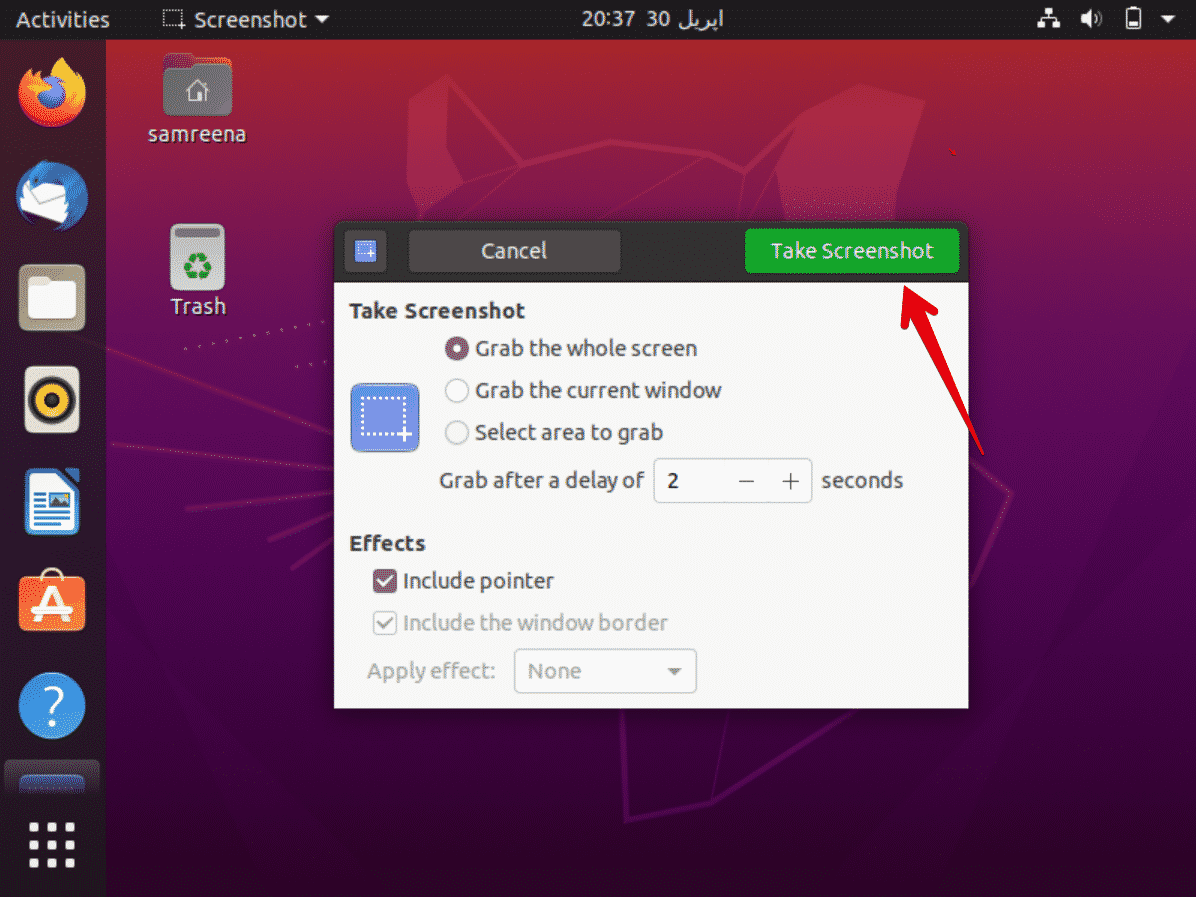
After selecting an option, you will enter the time in seconds in the ‘Grab after a delay of’ field and then press a button of ‘Take Screenshot’.
Now, you will switch to a window that you want to capture. This will take a screenshot of your window after a specified delay that you have mentioned above in the field of the dialogue box.
You will choose some desired name and location where you want to save this image and click on the ‘Save’ button.
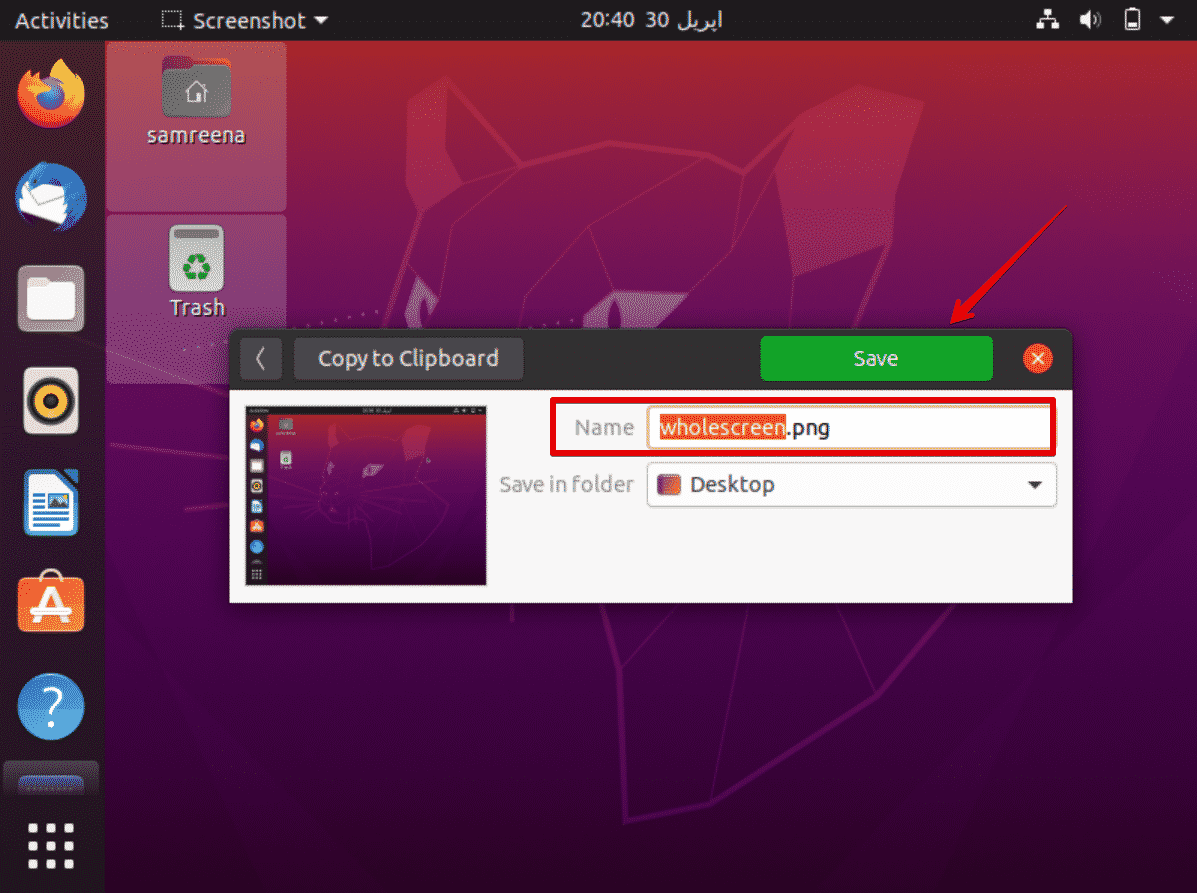
Now, you can access and open the saved screenshot from your system.
Take screenshots using the command line on Ubuntu 20.04 LTS

To take a screenshot using the command line, you will use the same screenshot utility through the terminal. For this purpose, open the terminal either through the shortcut method Ctrl + Alt + t or you can access it through the application search bar.
To take a screenshot using the terminal use the following command:
Syntax
The d option has a time limit of one Billion seconds which equals to 11574 days.
Example
For example, you want to take a screenshot of the current terminal window after 2 seconds then you will use the command as follows:
You can also switch to whatever screen you want to capture. The screenshot will be taken and saved into a specified folder. In the above-mentioned case, I did not change the window so, the screenshot looks like the following image.

Take screenshot through kazam
Kazam is a powerful utility that is used to make screenshots on Ubuntu 20.04 LTS. Kazam is also used for screen recording.
To install this utility on your system, you will use the following command:
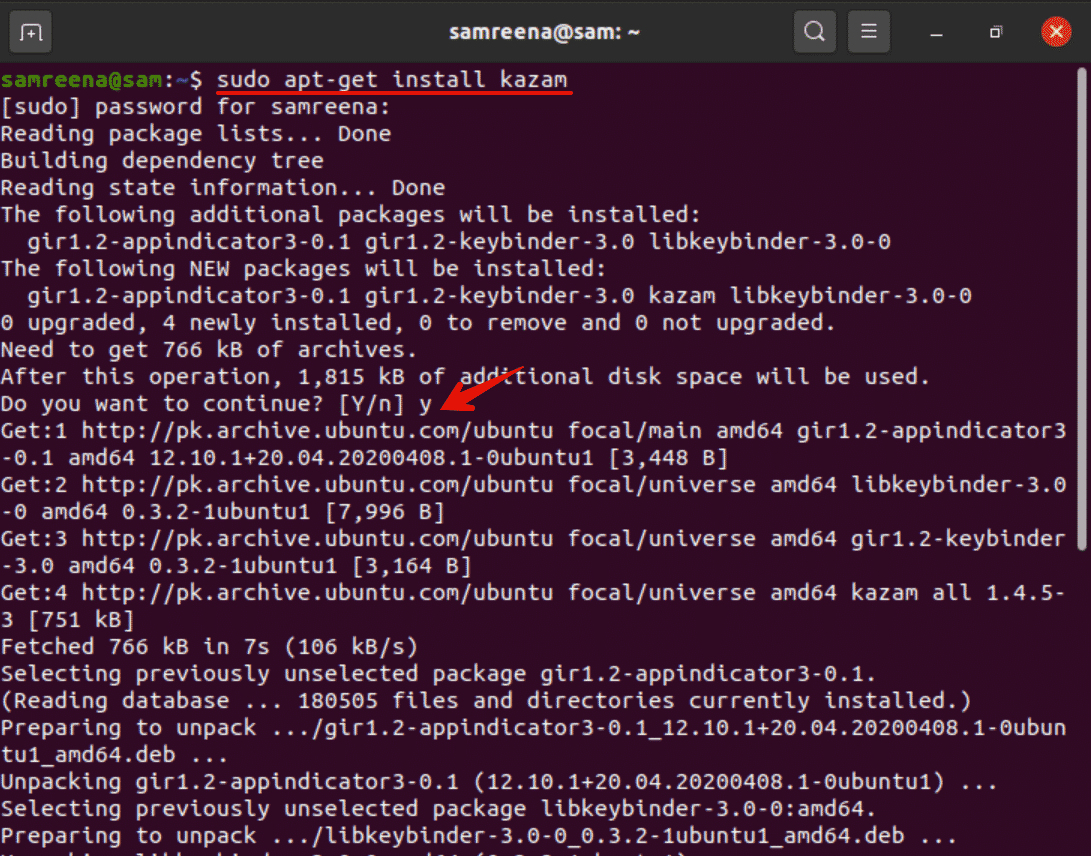
During installation of this utility, a user confirmation prompt will interrupt the installation process. You will press ‘y’ and the ‘Enter’ to further proceed.
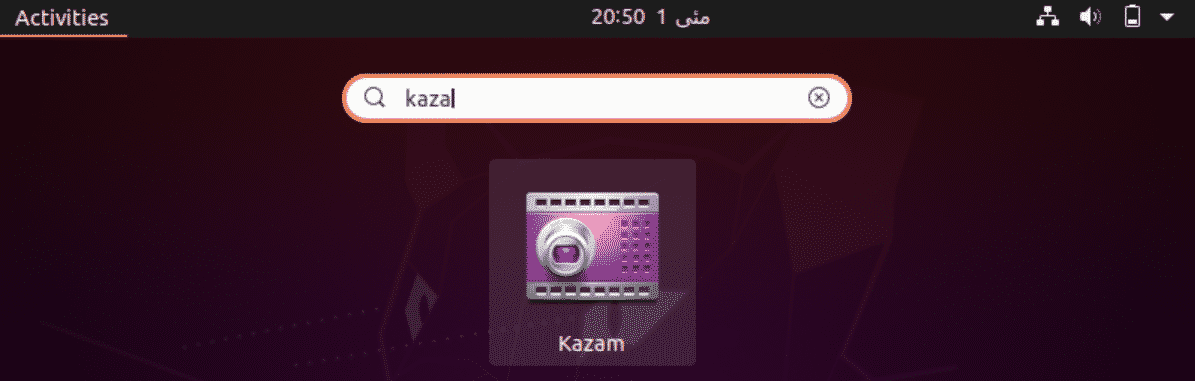
You can verify the installation, by typing ‘kazam’ in the search bar. Kazam has been successfully installed on your system. After clicking on the icon, a dialogue box will display on the screen as follows:

You will select the ‘screenshot’ from the dialogue box. You can take screenshot by click on ‘capture’ button.
In this article, we have explained how you can capture your window or screen after a time delay which you can mention in your Ubuntu 20.04 LTS Gnome UI screenshot application or using the terminal command for taking the screenshot.
from Linux Hint https://ift.tt/2L61RBe


0 Comments