


MySQL workbench is a graphics tool for working with MySQL servers and databases. It is a potent tool that helps us to visualize modules for creating, executing, and optimizing several queries. It is also used for designing, modelling and generating databases and also for configuring servers, administrating users and viewing the database health.
Before installing MySQL workbench, make sure that MySQL server is installed on your system. For this tutorial, we will use the community server. If you already have MySQL community server installed on your system, you can skip the following section and proceed directly to installing MySQL Workbench.
MySQL Server Installation:
To install MySQL community server first make sure that your all your system packages are up to date. To do that type the following commands
$ sudo apt upgrade
After this hit enter. Enter your password for Authentication. After 2 or 3 seconds Ubuntu will show you the space required for this process. Press y and hit enter to continue. If your packages are all up to date no need to type the second command.
Now to install MySQL server type the following command.
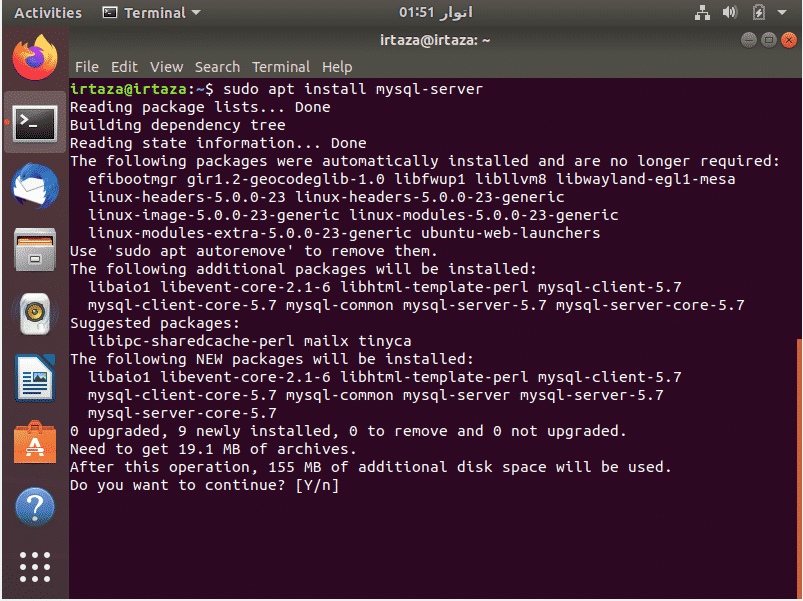
Ubuntu will show you the total space required for this process and will for your confirmation. Press y and hit enter for the installation to start.
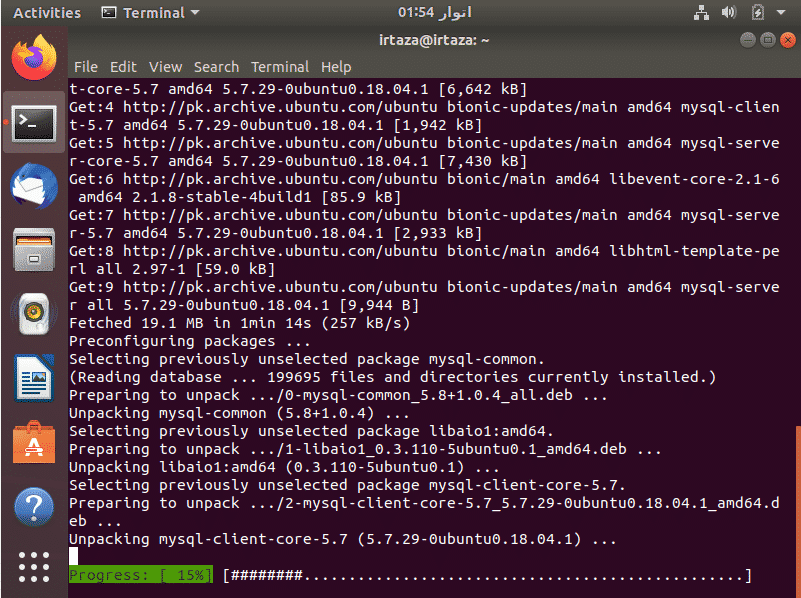
Now, wait for the installation to complete.
Once the installation has completed, we need to configure the community server you just installed. To do that, go to the terminal and type the following command.
Again type the password of your system for Authentication to proceed further.
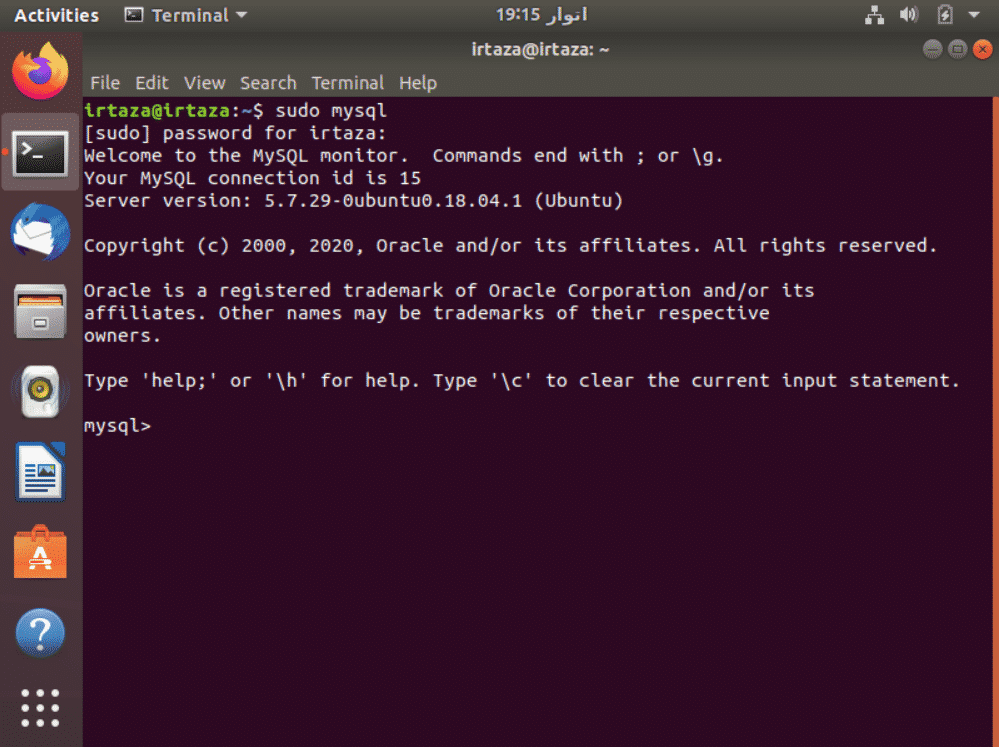
For now, you only have a default username “root”, but the password for that is not set yet. To set the password type the following command
Here we have set the password of our default root username to “root”. You can set it to anything you like by replacing “root” after password BY in the above command. After completing this step type the following command.
and exit MySQL by typing exit

After completing this step, proceed to install MySQL Workbench.
MySQL Workbench Installation:
Before installing MySQL Workbench, make sure all your packages are up to date. Now type the following command to make sure that your MySQL community server is up and running.

As you can see in the above picture, here, the server is active. Now type the following command to download and install MySQL workbench.
Again Ubuntu will ask you your system password for Authentication. Enter your password and hit enter.

Now, wait for the installation to complete.
Using MySQL Workbench:
Now go to the menu and in the search box type MySQL workbench and run it.

You will see the following screen.

Creating a local connection is very simple and provided that you have the community server installed in the default location; this task is just a matter of minutes. When you start workbench for the first, you get a straight screen with only a few options. For each locally installed server, a connection tile is automatically created for you. To start the creation of a need connection click the plus icon right beside the main MySQL Connections heading.
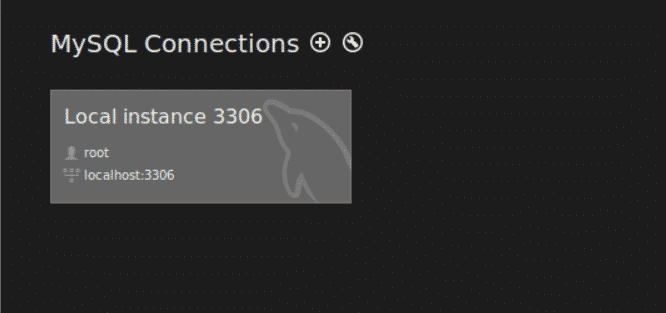
Once you click on it, the following dialogue box appears. By default values for a simple local are prefilled by default.

Give your connection a name in the Connection Name box. The most important feature here is the Hostname which determines to which machine you will connect. By default MySQL server uses the port 3306. So leave these two things as they are.

Now you need to select a user to connect with. On a fresh installation, only the root user with full access to everything in the server is available. Here we will connect with root and click Test Connection.

You will be asked for the password of the user root. Enter the password and hit enter. The following message will be shown.

Now go back to the home screen. You will see another connection tile with your connection name.

Clicking on this tile will open the new connection.

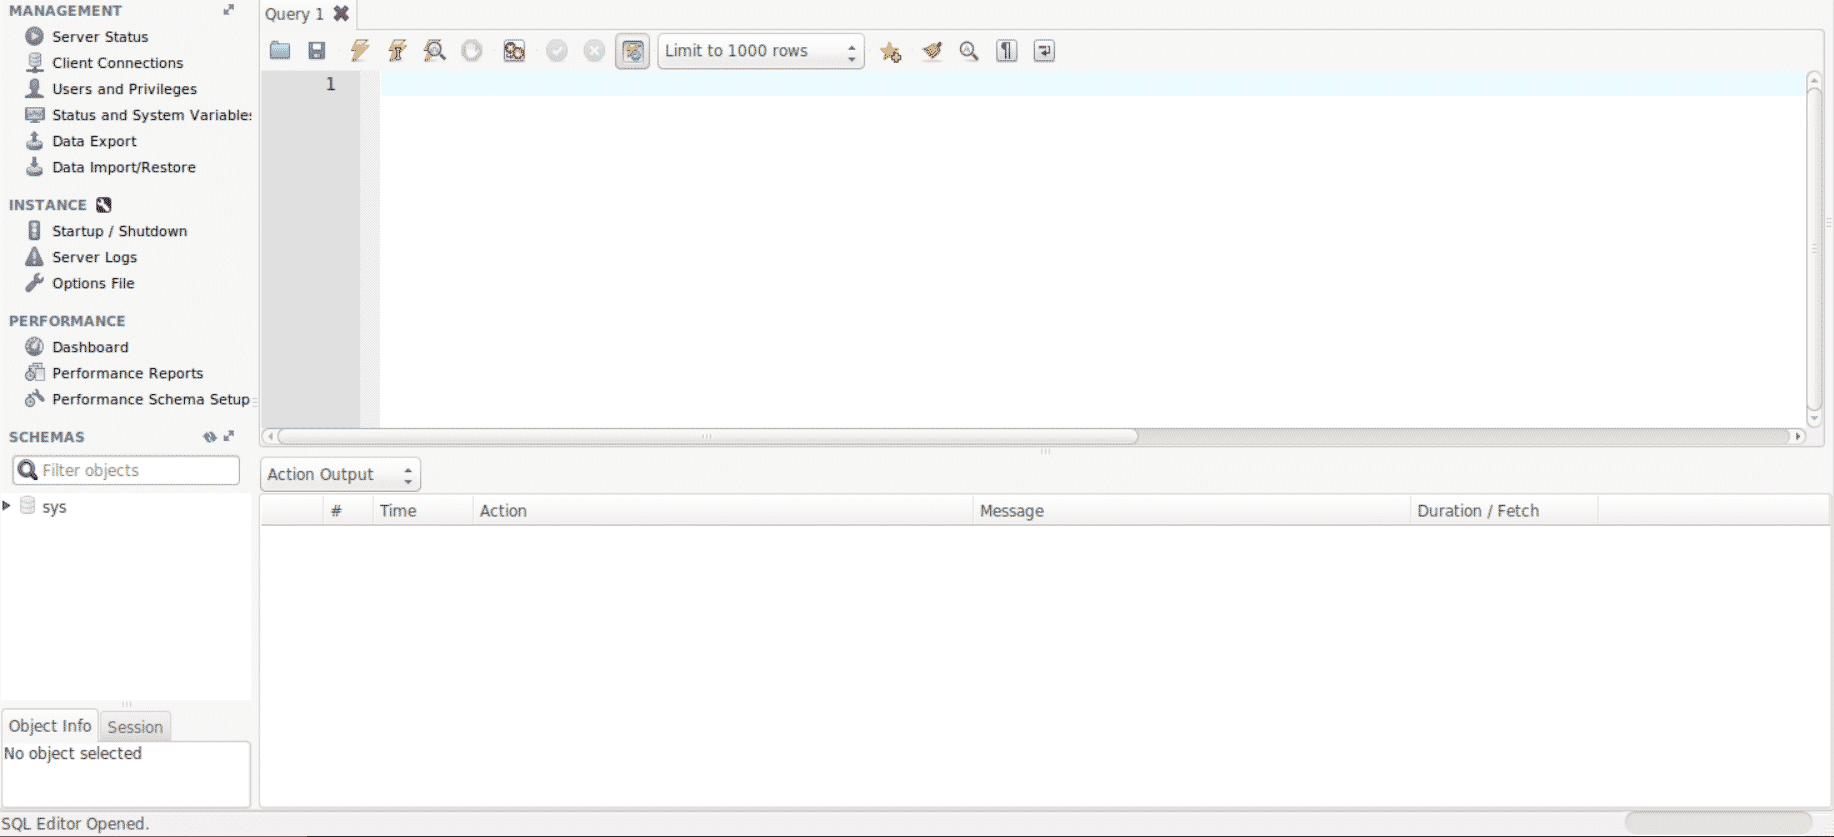
Now there is a lot you can do in MySQL Workbench. You can create schemas and tables. Add data into these tables or view specific data. You can create views, triggers, in short MySQL is a powerful graphics tool for managing your database.

Now in the above screenshot, the section labelled one is where you enter your SQL queries. The section marked two is a sidebar where you manage your Databases and schemas. The section labelled three is where the output of the SQL queries you typed in the section marked 1, is shown.
Connecting to a Schema:
You can either create a schema using SQL queries and add data to it, or you can import a schema, and it’s data from an external SQL file. As you can see in the picture below, there is only a default schema called sys. Let add our new schema.
Step 1:
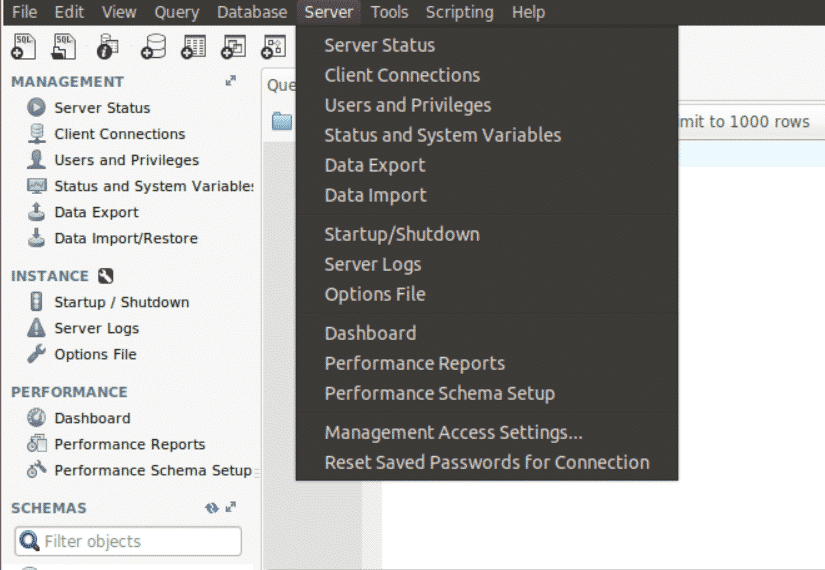
To load a schema from a file, go to the Server tab in the top navigation bar and click Data Import.
Step 2:
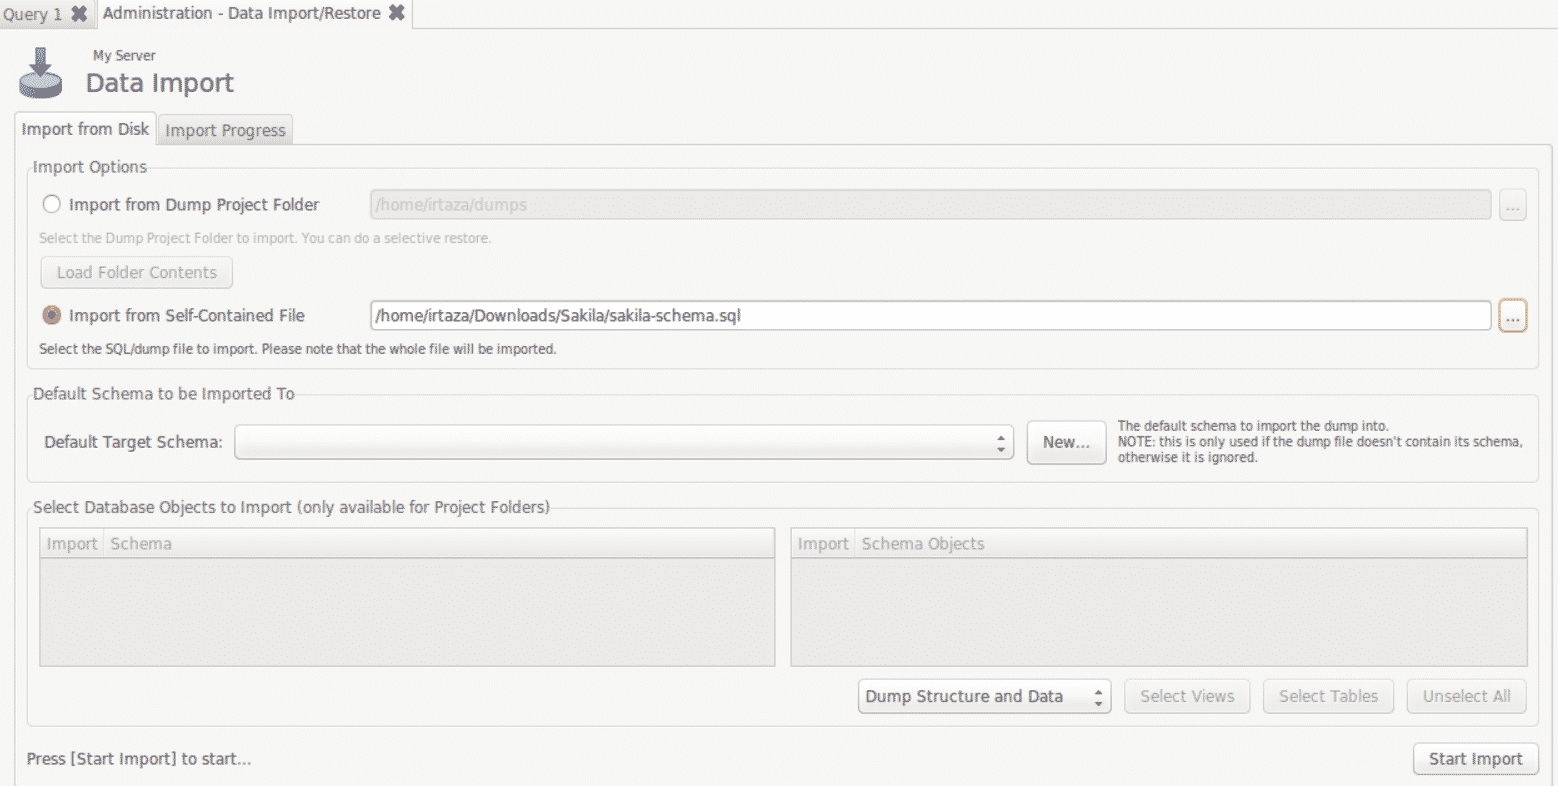
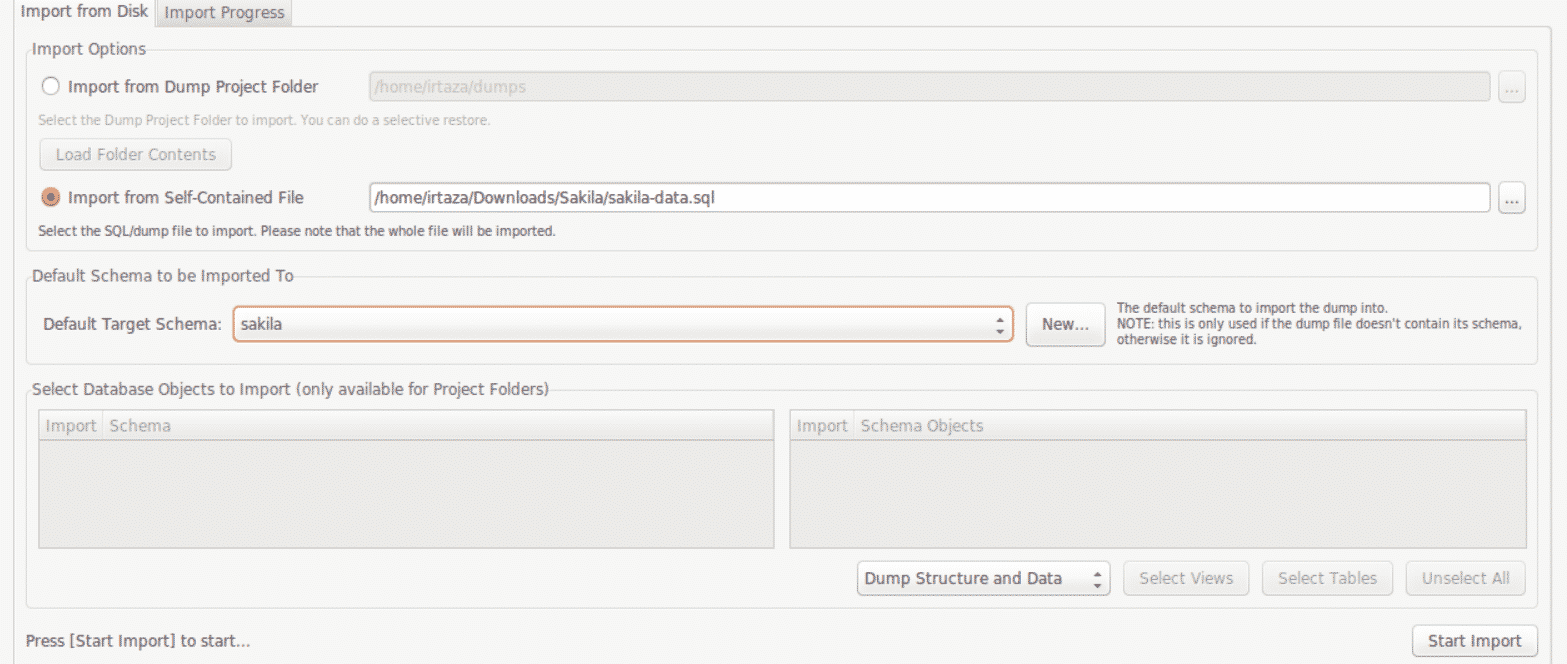
You will see the following dialogue box. Check the box Import from Self-Contained File and browse the SQL file from your system. Now click the Start Import button.
Now if your schema already has the data, no need to perform this next step. If your schema is empty and the data for your schema is in another file, perform this next step.
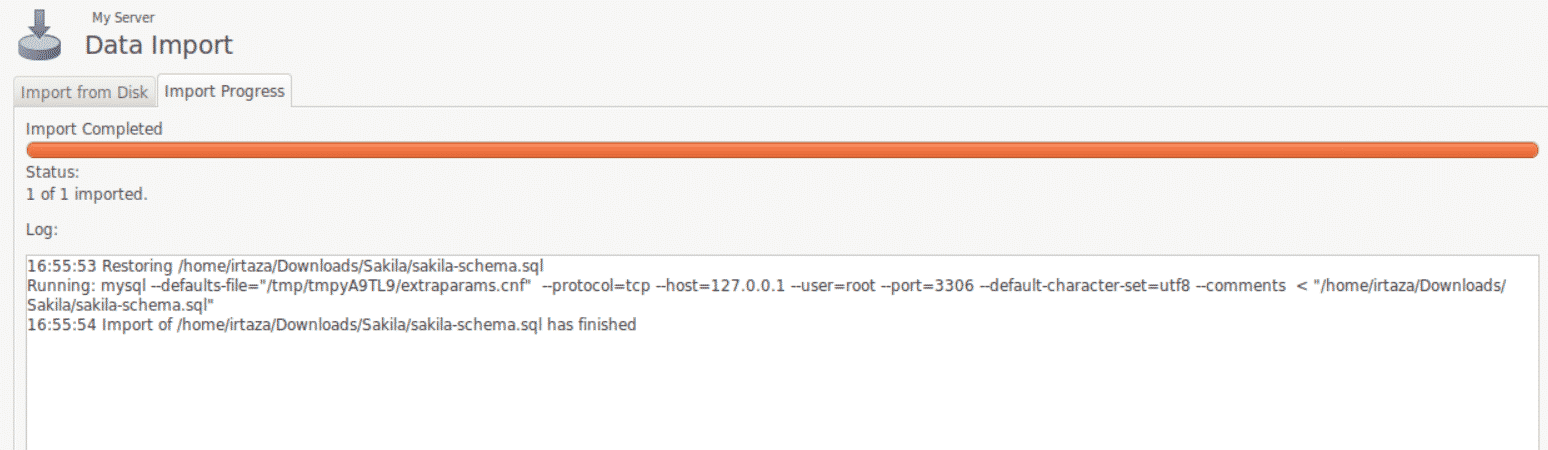
Step 3:
Again click on Data Import in the Servers tab, check the Import from Self-Contained File box and give the location of your data file. Now in the Default Target Schema, select the target schema of this data and click the Start Import button.

Viewing the Tables
Now refresh your schema by clicking the refresh button in the schema section. You will now see your schema. In this case, we see a new schema called sakila.

You can expand Sakila to view its content. You can view its tables by expanding the tables section and clicking on the calendar icon the appears at the right side of each table.

When you click on this icon, the corresponding SQL query for this action and the resulting table appears in the query section. While a success message is shown.

You can write queries to view specific rows or columns, e.g. following query selects the first name column from the actor table of an actor whose actor_id is 1.

Conclusion:
MySQL Workbench is a tool for manipulating and managing Databases. You can write SQL queries to perform different operations on your schema. Installing MySQL Workbench on Ubuntu is quite simple as it can be done with a single command. However, for MySQL Workbench to work, you need to install MySQL server on your system.
from Linux Hint https://ift.tt/3dlPU7G


0 Comments