In this topic, we shed light on how you can add or attach an EBS (Elastic Block Storage) volume on an AWS instance. An extra EBS volume supplements storage space for your instance. Once attached to the AWS instance, the EBS volume becomes a block device that is later formatted and mounted to make it available for use. Once available for use, the block device becomes accessible just like any other volume and thereby supplement storage space for your AWS instance. Let’s see how this can be achieved.
Step 1: Confirm the availability zone of your AWS instance
To start off, log in to your AWS console and confirm the availability zone of your EC2 instance. For this exercise to succeed, The EBS volume, as well as the AWS instance, ought to be in the same availability zone
Our AWS instance in this guide sits at the us-east-2c availability zone. Therefore, we must create an EBS volume in the same region
Step 2: Creating an EBS volume
Before creating a new volume, let’s have a peek at the block devices available in our instance. Run the command :
# lsblk
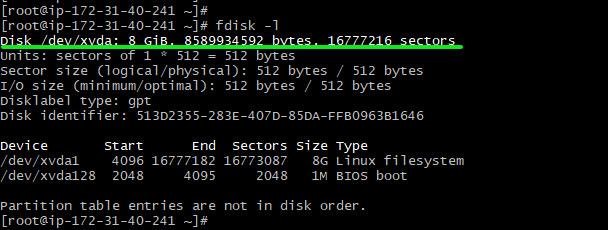
From the above output, we can clearly see that there’s only one block device xvda, with a single partition xvda1. To get more detailed output, run the fdisk -l command:
# fdisk -l
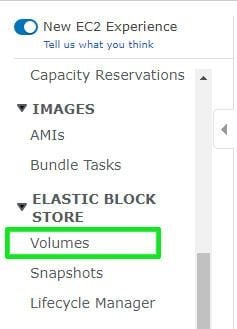
Now let’s add a new volume. On the left section of your AWS dashboard, locate and click on the ‘Volumes’ option under the Elastic Block Store section as shown.
A pre-existing volume will be displayed on the next page. This volume was created during the creation of your AWS EC2 instance.
To add another volume, click on the ‘Create Volume’ button
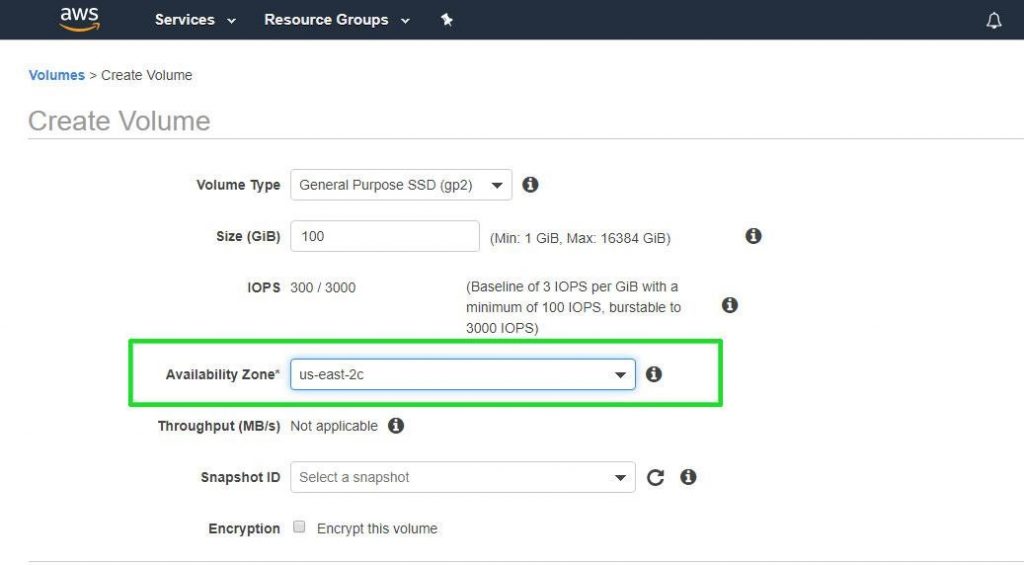
Fill in the details of the volume in the next window.
NOTE: Ensure the availability zone of the volume you are creating matches that of your AWS instance. The availability zone, in our case , is us-east-2c.
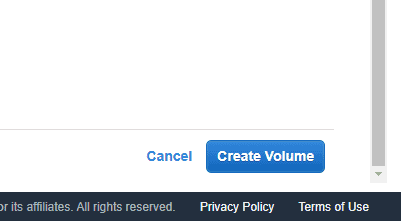
After filling out all the essential details, click the ‘Create volume’ button.
The new volume will be created and displayed as shown
The new volume’s state is indicated as ‘available’ and not ‘in use’ like the other volume. This is because It’s not yet associated with the AWS instance.
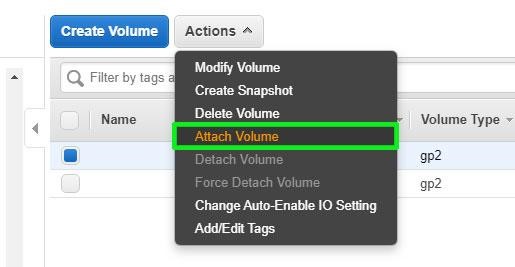
For the volume to be part of the instance, click on the ‘Actions’ button and click on ‘attach volume’
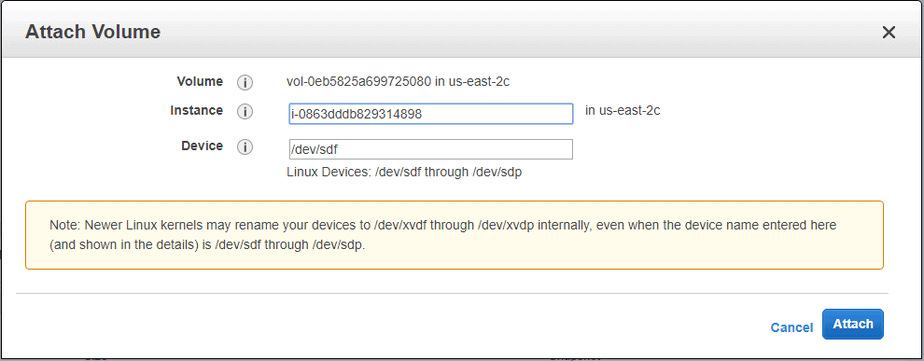
In the pop-up dialogue fill in the details accordingly and click on ‘Attach’
Back to Volumes. If you take a closer look at the new volume status, you will notice that is has changed from ‘Available’ to ‘in-use’. This means that the volume has been integrated and is now a part of the ec2 instance.
To confirm the presence of the block volume, run the lsblk command
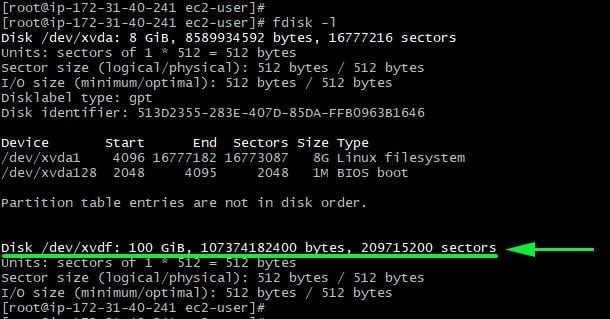
This can also be confirmed using the fdisk -l command
Step 3: Mounting the newly added EBS volume
Up until this point, we have managed to successfully create and add the EBS volume to an instance. However, we cannot access or save any data on the volume. In fact, the volume is empty and you can confirm this using the command:
# file -x /dev/xvdf
The output /dev/xvdf: data shows that block volume is empty.
To make the block volume accessible and ready to be used, we need to mount it on the AWS instance.
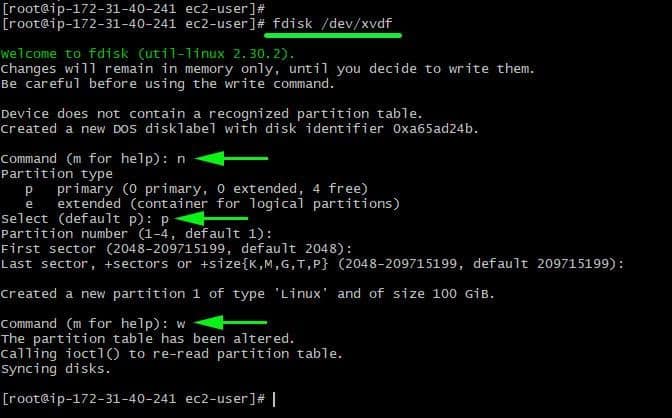
But first, you need to create a partition table as shown.
# fdisk /dev/xvdf
After creating the partition table, you need to update the kernel with the changes using the partprobe command
# partprobe /dev/xvdf
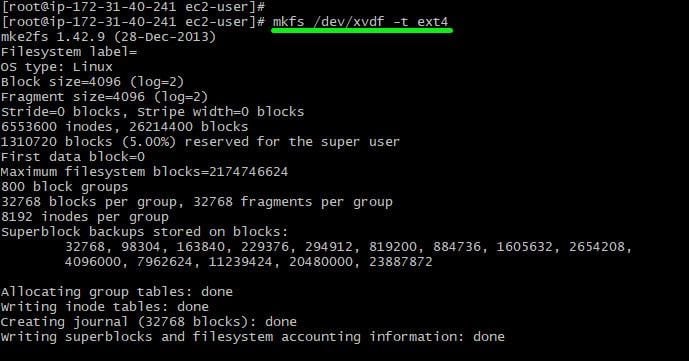
Next, we need to format the partition before mounting it.
# mkfs /dev/xvdf -t ext4
To mount the volume, first, create a mount point. We’re using the /new_storage in this case but feel free to call it whatever you want.
# mkdir /new_storage
Then mount the volume as shown
# mount /dev/xvdf /new_storage
To check disk usage of the volume, run the command:
# df -Th /new_storage
You can now navigate to the volume and create files as shown
# cd /new_storage
# touch file1.txt file2.txt file3.txt
This brings an end to our topic for the day. We hope that you can comfortably create and add an EBS volume in AWS. Feel free to reach out for any assistance or clarification.
from Linuxtechi https://ift.tt/2sItyKH











0 Comments