Basics of Konsole Terminal:
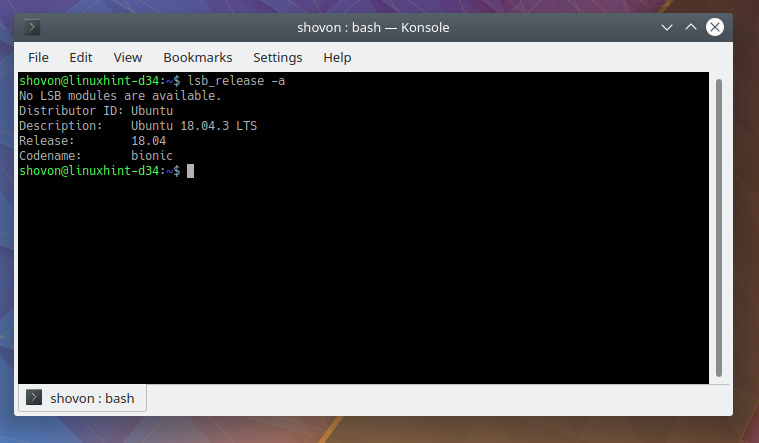
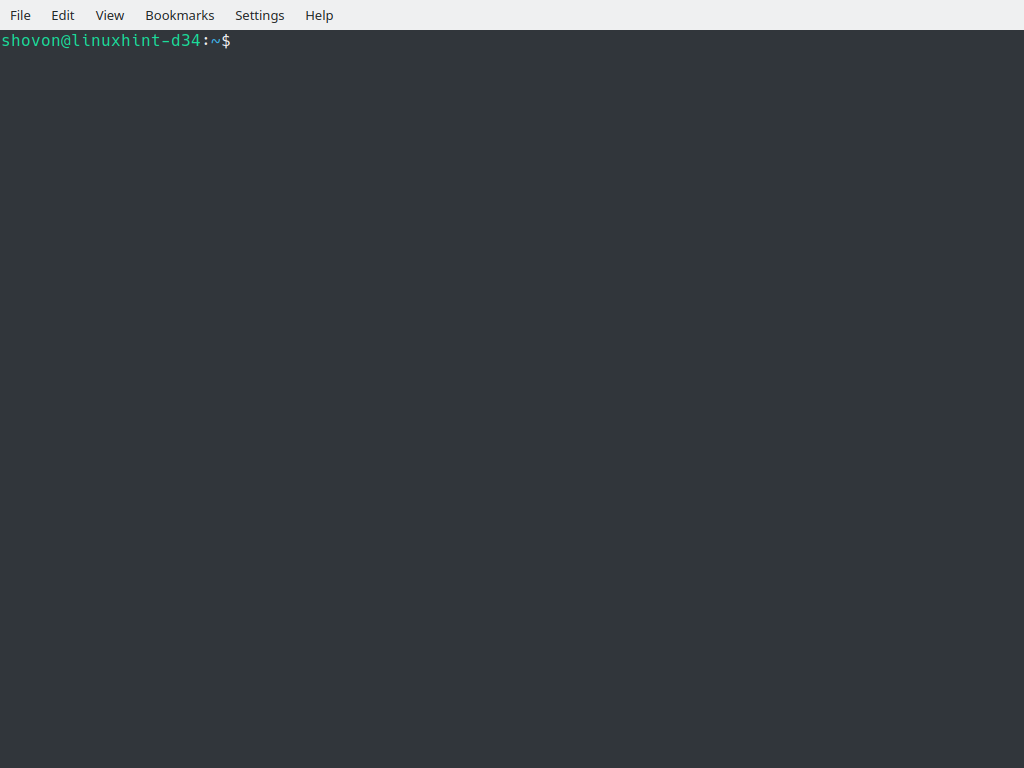
This is how Konsole terminal app looks like.
To run a command, just type it in and press <Enter>. The command should run and print the output in the Konsole display.
Working with Tabs and Windows:
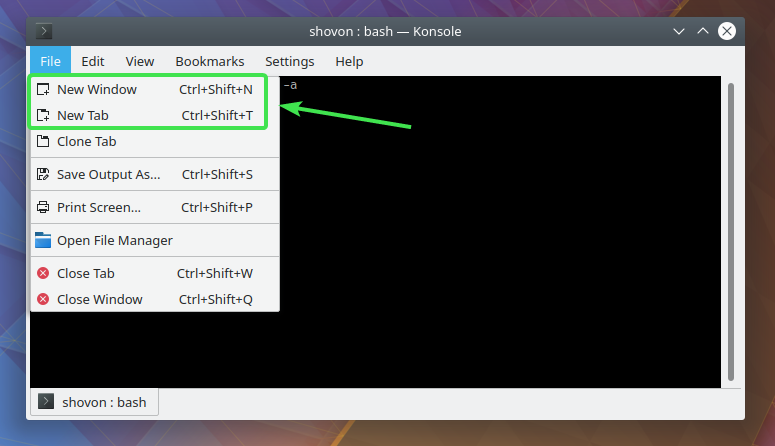
To create a new tab, click on File > New Tab.
To create a new window, click on File > New Window.
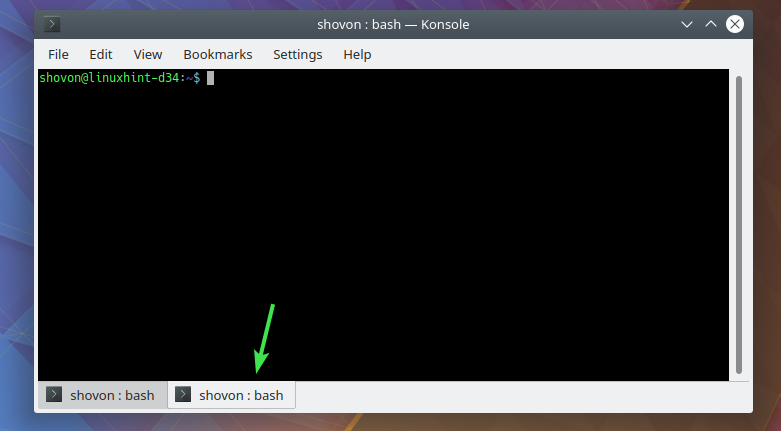
Once a new tab is created, it will show up in the tab bar. You can switch between them very easily.
You can also clone tab from File > Clone Tab.
To close a tab, click on File > Close Tab.
To close a window, click on File > Close Window.
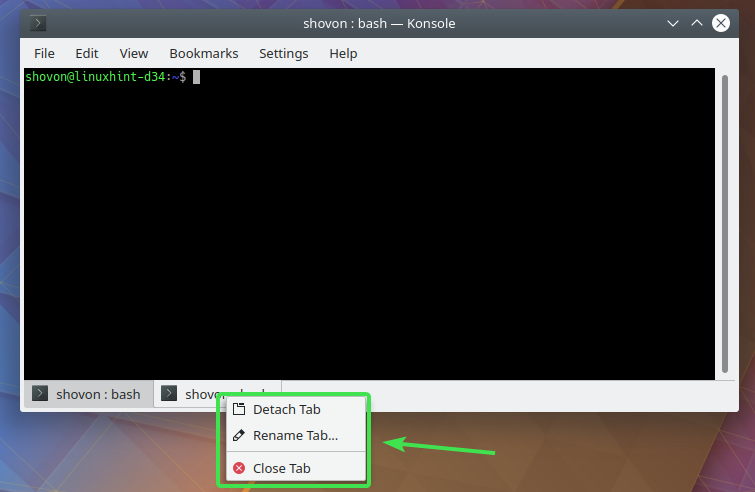
You can also right click on a tab and detach (Detach Tab), rename (Rename Tab…) and close (Close Tab) the tab.
Opening File Manager in Current Working Directory:
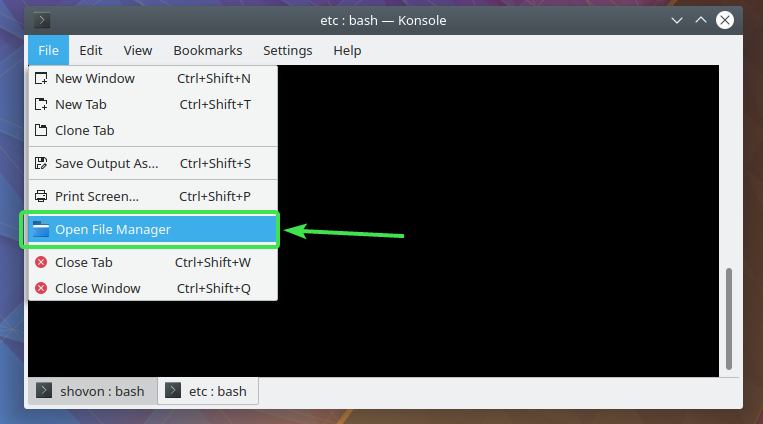
If you want to open the directory you’re currently in on the Konsole terminal with Dolphin file manager, click on File > Open File Manager.
The directory should be opened in Dolphin.
Printing and Saving Terminal Output:
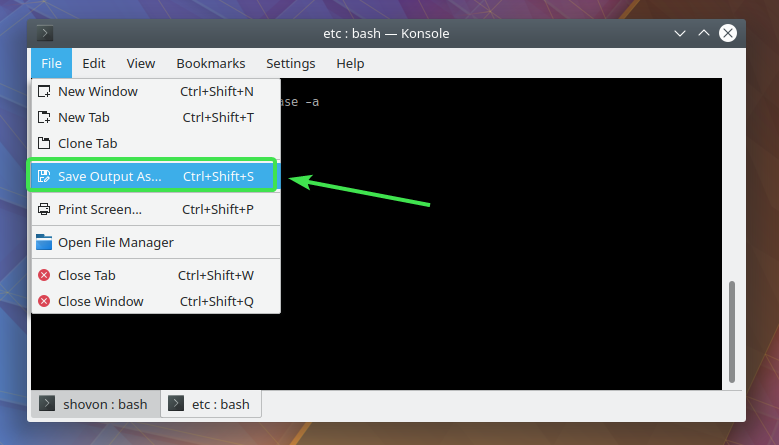
To save the output of Konsole terminal to a file, click on File > Save Output As…
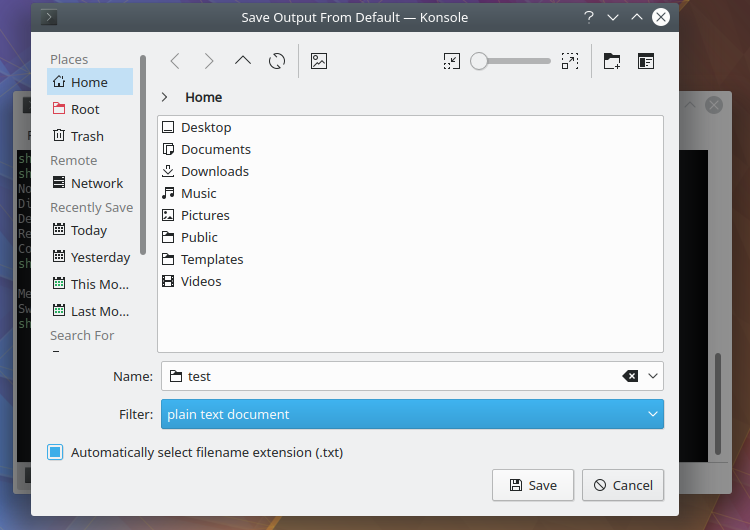
Now, select a location and a filename and click on Save.
You can click on the Filter dropdown menu and select between plain text document format (default) and HTML format.
Konsole output saved to plain text file.
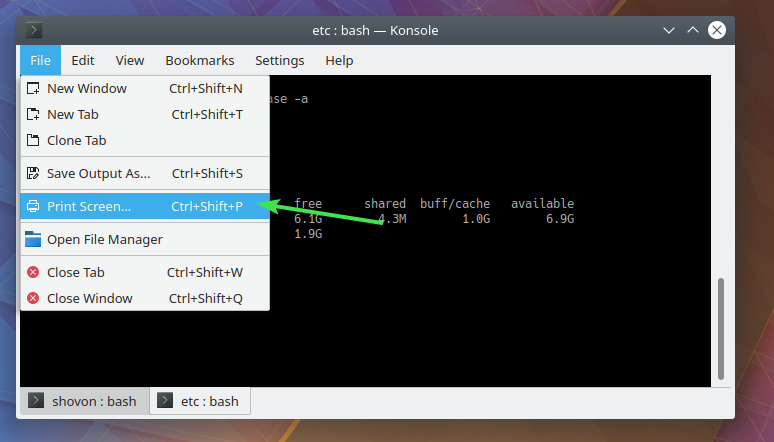
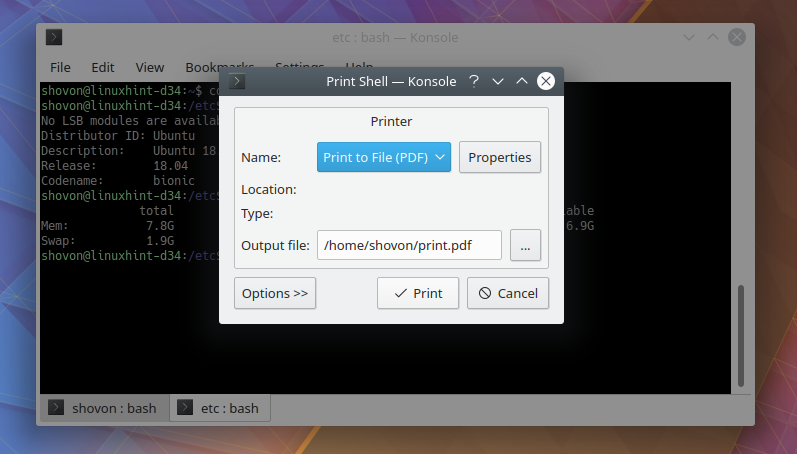
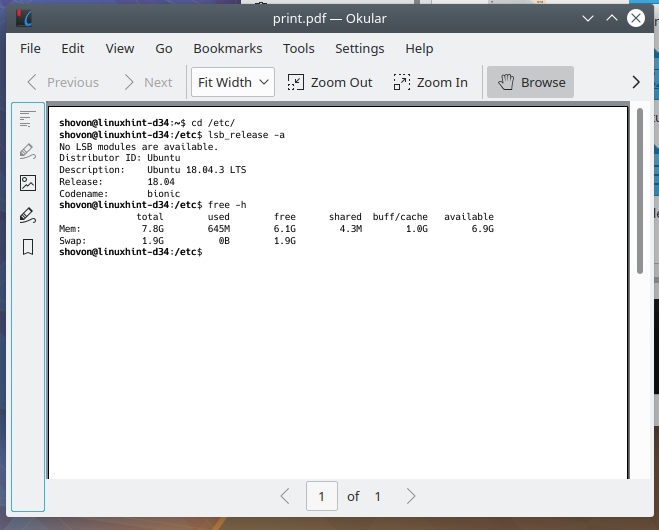
To print the output, click on File > Print Screen…
If you have a printer connected, you can print. Otherwise, you can save it as a PDF file.
Searching Terminal Display:
To search for text in the Konsole, click on Edit > Find…
Now, type in the search query and press <Enter>. The match should be selected on the Konsole.
You can press Next and Previous to navigate between search results.
To start the search from the bottom of the screen (newest output to oldest), click on From bottom.
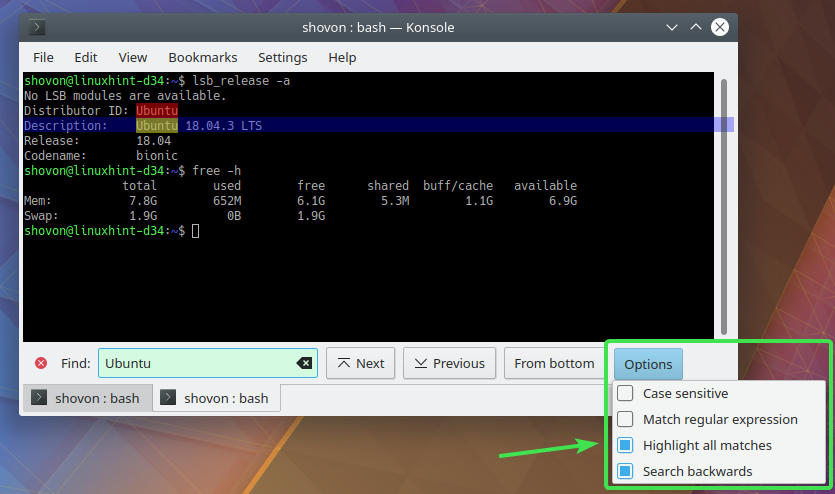
You can also do case sensitive search and regular expression search as well. Just click on Options and check or uncheck options depending on your search criteria.
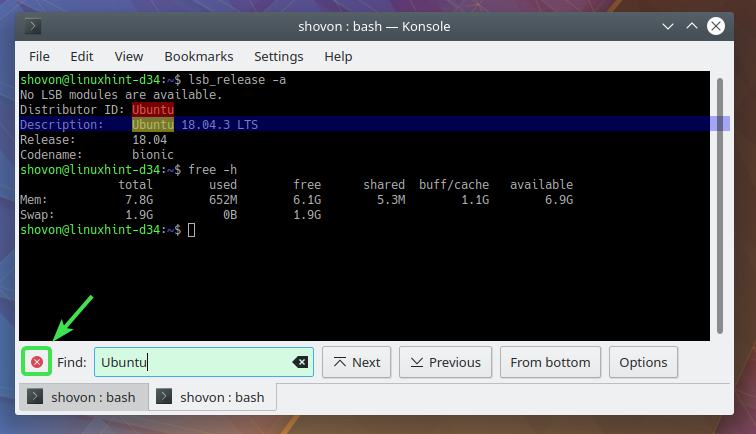
Click on the x button to close the search bar once you’re done.
Copying and Pasting Text:
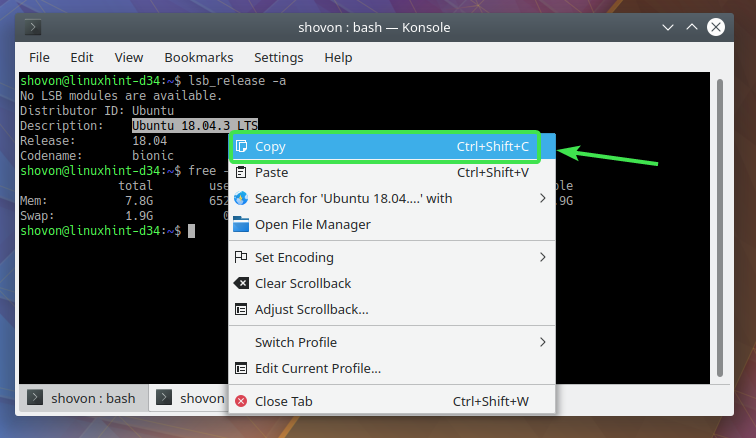
To copy text, select the text, right click and select Copy.
To paste, right click and select Paste.
Enlarging Font, Shrinking font and Setting Character Encoding:
To increase the font size on the fly, click on View > Enlarge Font.
To decrease the font size on the fly, click on View > Shrink Font.
If you want to set a character set or encoding, click on View > Set Encoding and select your desired character set.
Konsole Split View:
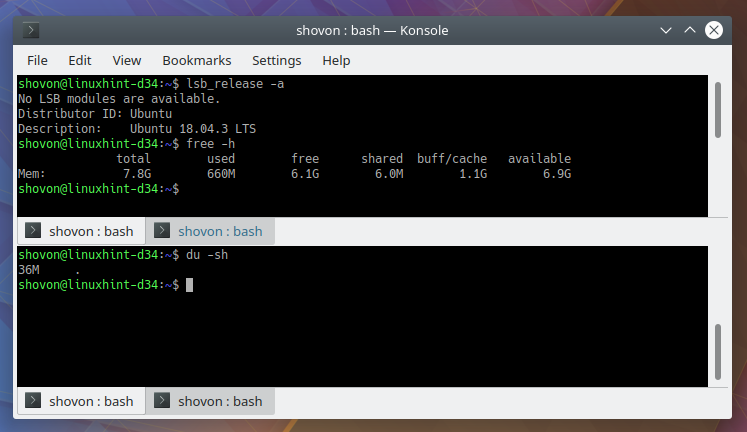
To split the Konsole view horizontally, click on View > Split View > Split View Left/Right.
To split the Konsole view vertically, click on View > Split View > Split View Top/Bottom.
Konsole split horizontally.
Konsole split vertically.
To close the active split view, click on View > Split View > Close Active.
To close the inactive split view, click on View > Split View > Close Others.
Hiding Menubar and Fullscreen Mode:
To hide the Konsole menubar, uncheck Settings > Show Menubar.
To display the menubar again, right click on the terminal and check Show Menubar.
To go to full screen, check Settings > Full Screen Mode.
Once you’re in full screen mode, press F11 to exit out of full screen mode.
Configuring Konsole:
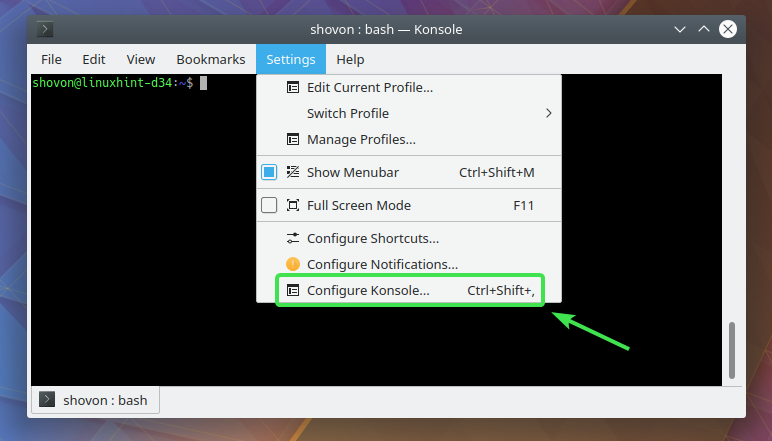
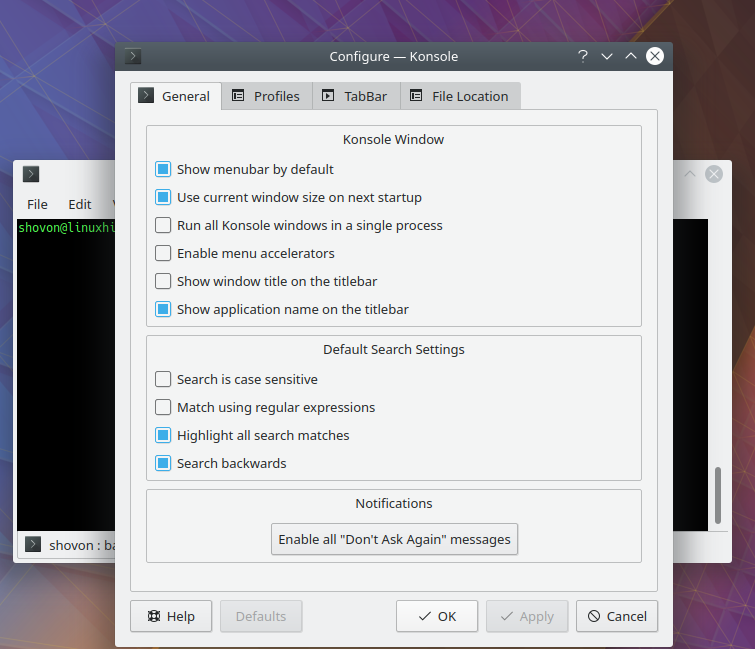
To configure Konsole global settings, go to Settings > Configure Konsole…
From the General tab, you can configure default Konsole Window settings.
You can also configure the Default Search Settings from here.
From the TabBar tab, you can set when the tab bar will be visible and the position of the tab bar.
You can also set where new tabs will be placed from the TabBar tab.
Configuring Konsole Profiles:
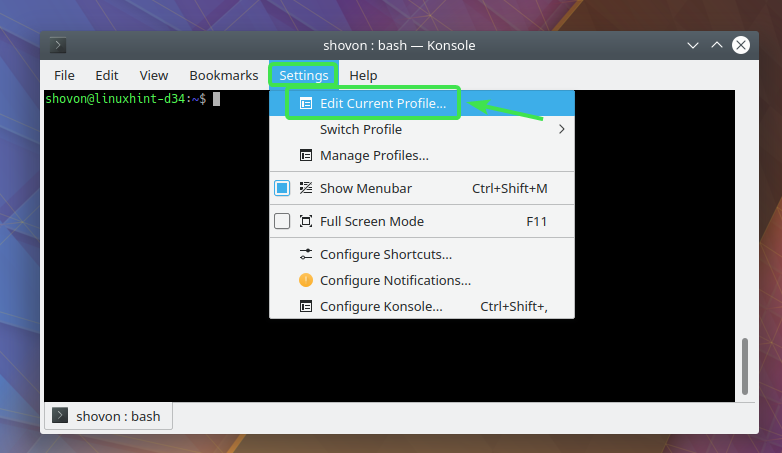
To edit the current Konsole profile, go to Settings > Edit Current Profile…
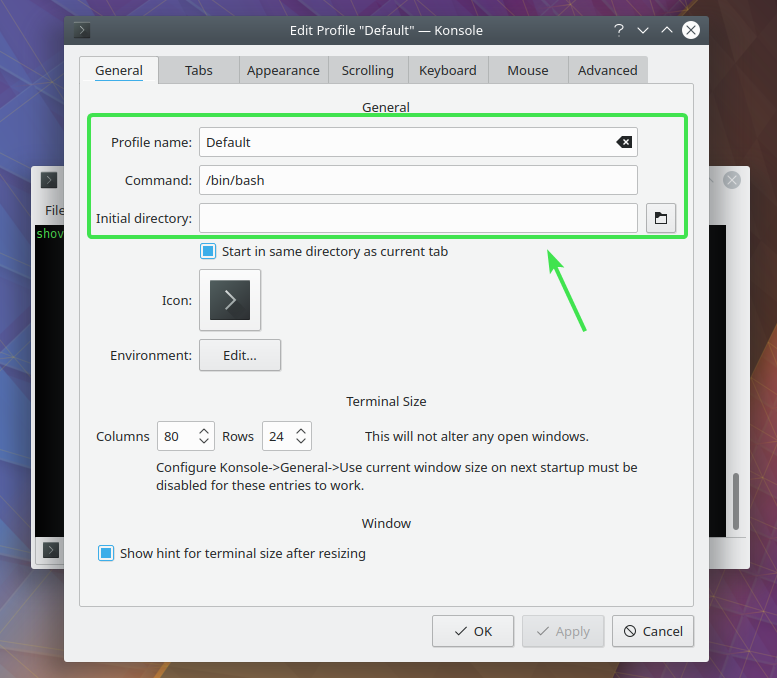
From the General tab, you can set a Profile name, set the default shell (Command), Initial directory when Konsole starts.
You can also set custom environment variables if you want. Just click on Edit…
Now, type in your environment variable and click on OK.
From the Tabs tab, you can set tab title format.
You can click on the Insert button to insert supported variables in the format string.
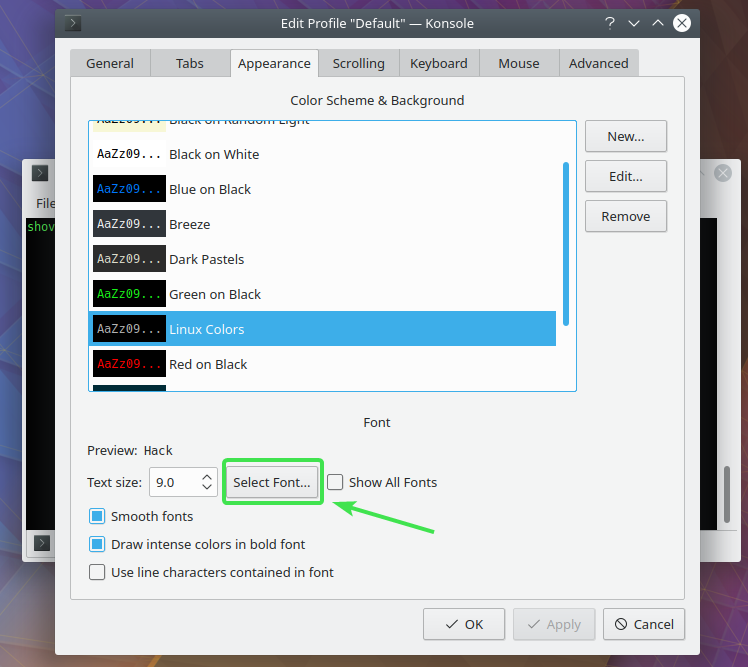
From the Appearance tab, you can set a predefined Color Scheme or create a new one or customize an existing one.
You can also change font and font size. To change font, click on Select Font…
Then, select your desired font, font style, size etc. from here and click on OK.
From the Scrolling tab, you can set how many lines of output Konsole will cache.
If you want Unlimited number of lines to be cached, select Unlimited scrollback.
If you enable Unlimited scrollback, you can set where the cache file will be saved from Settings > Configure Konsole…. > File Location.
You can also set the scroll bar location or hide it altogether.
You can set how much of the Konsole screen will be scrolled when you press <Page Up> or <Page Down>.
From the Mouse tab, you can set how words are selected when you double click, and what to do when you triple click.
You can set the behavior of copy & paste on Konosle.
You can set from where text will be pasted on Konsole when mouse middle button is pressed.
There are some other mouse related configurations as well.
From the Advanced tab, you can set the cursor shape, enable cursor blinking and set custom cursor color.
You can also set the default Konsole character encoding.
Managing Konsole Profiles:
You can manage Konsole profiles from Settings > Manage Profiles…
All your Konsole profiles should be listed here. You can click on New Profile… to create a new profile.
Type in a Profile name and configure your Konsole profile the way you like.
Once you’re done, click on OK.
A new Konsole profile should be created.
From here, you can edit or delete your existing profile.
You can also set a Konsole profile as the default profile. To do that, select a Konsole profile and click on Set as Default.
If you have multiple Konsole profiles, you can switch them from Settings > Switch Profile.
If you have multiple Konsole profiles, you can select what Konsole profile to apply while creating a new tab.
The newly created tab should have your selected profile applied.
So, that’s how you use Konsole terminal app. Thanks for reading this article.
from Linux Hint https://ift.tt/2OHNGUv


















0 Comments