Downloading CentOS 8 ISO Installation Image:
First, you have to download CentOS 8 ISO installation image from the official website of CentOS.
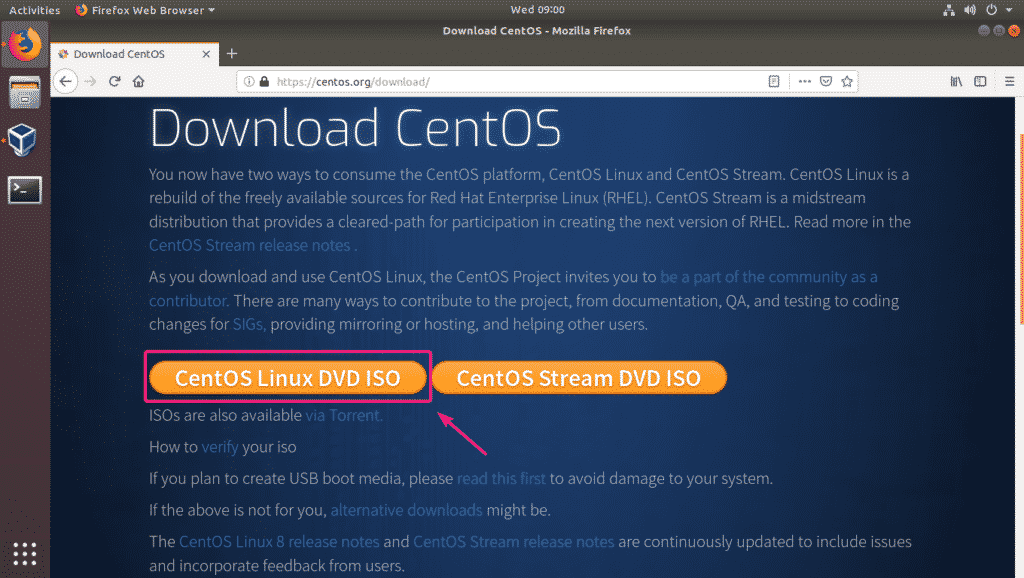
Visit the official website of CentOS and click on CentOS Linux DVD ISO button as marked in the screenshot below.
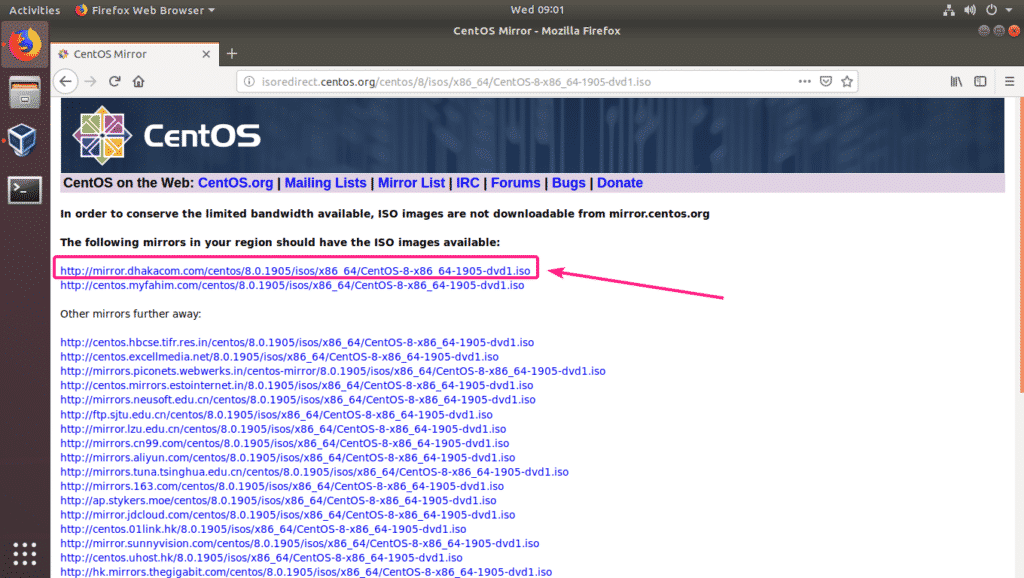
Now, click on the mirror link that is geographically closer to you.
Now, select Save File and click on OK.
Your browser should start downloading the CentOS 8 ISO installation image. It may take a while for the download to complete.
Creating a VirtualBox Virtual Machine for CentOS 8:
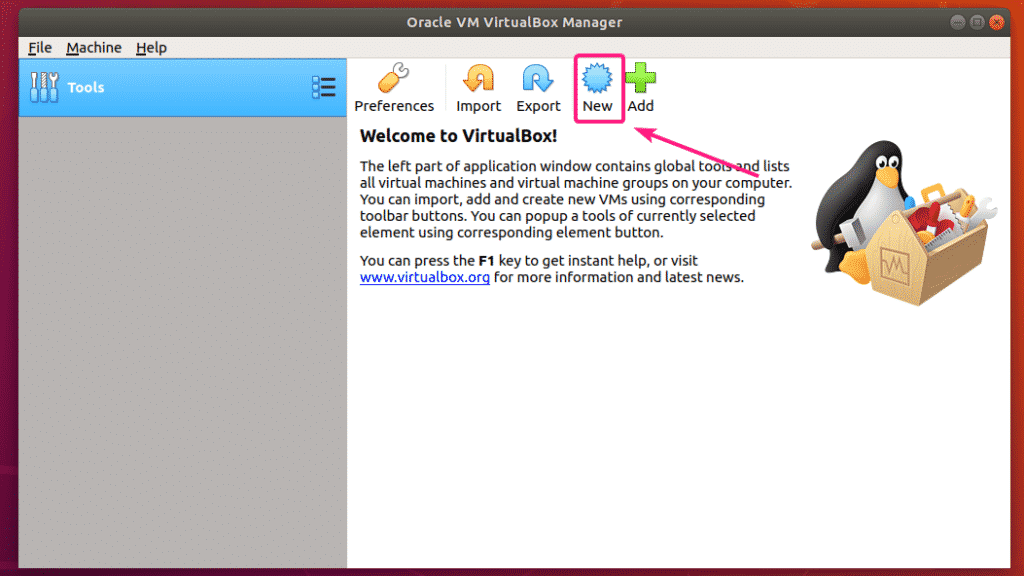
Open VirtualBox and click on New.
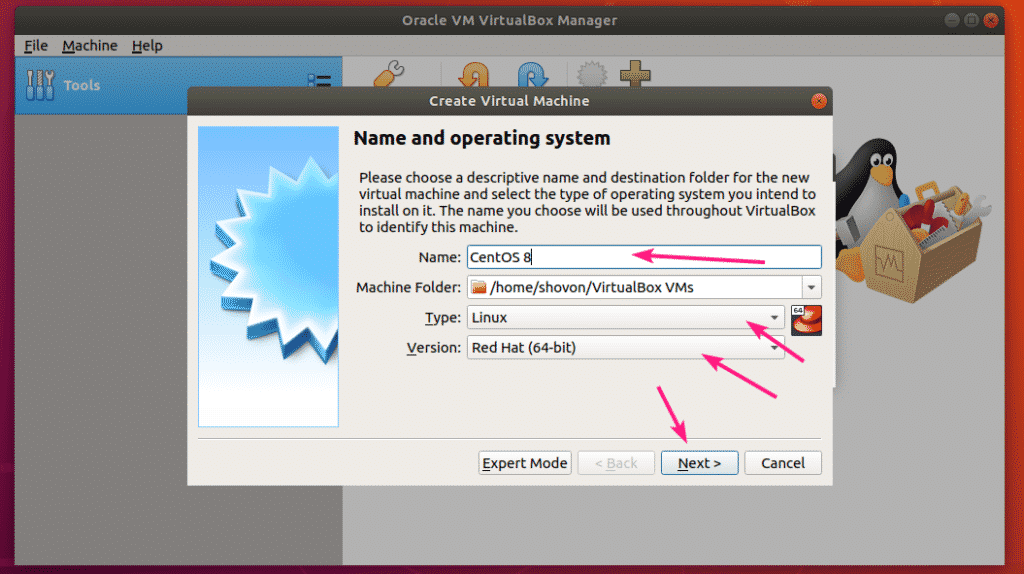
Now, type in a name for the Virtual Machine (VM), select the Type to Linux and Version to Red Hat (64-bit). Then, click on Next >.
Now, you have to set how much Memory (RAM) you want to allocate to the VM. For headless servers, 1 GB or 1024 MB is enough. For server with graphical user interface, it should be at least 2GB or 2048 MB. Then, click on Next >.
Now, you have to create a virtual hard disk. Select, Create a virtual hard disk now and click on Create.
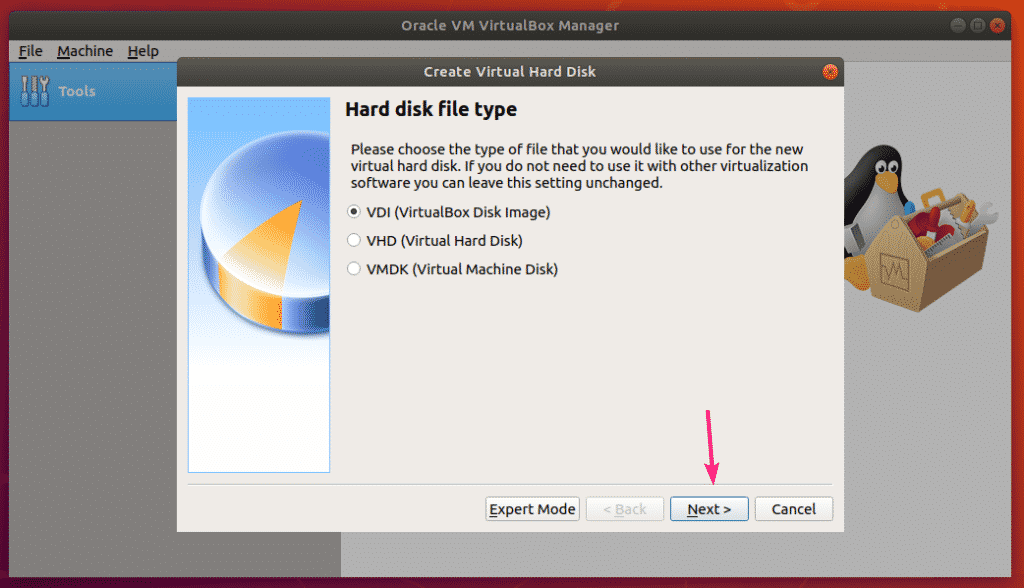
Now, click on Next >.
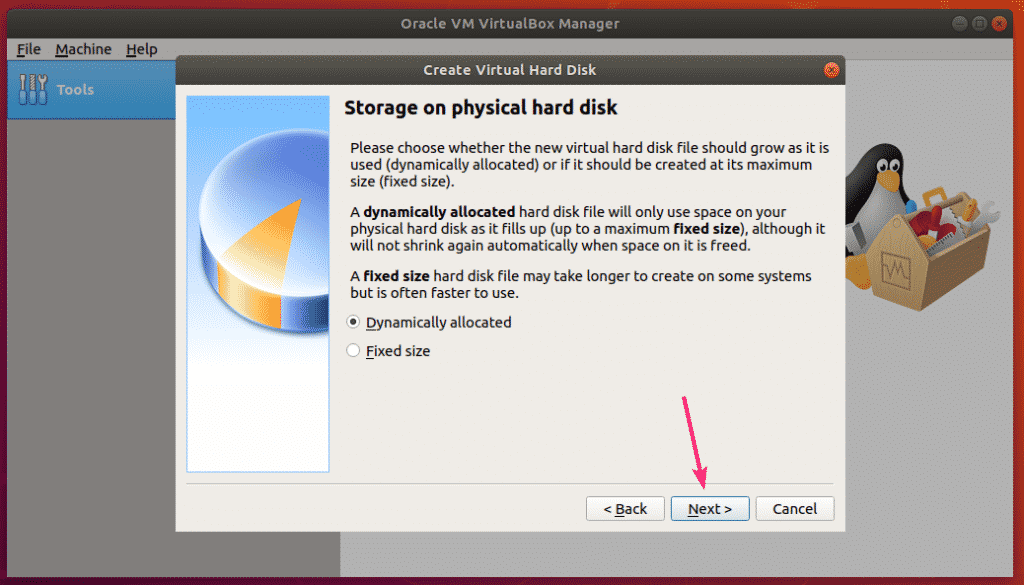
Click on Next >.
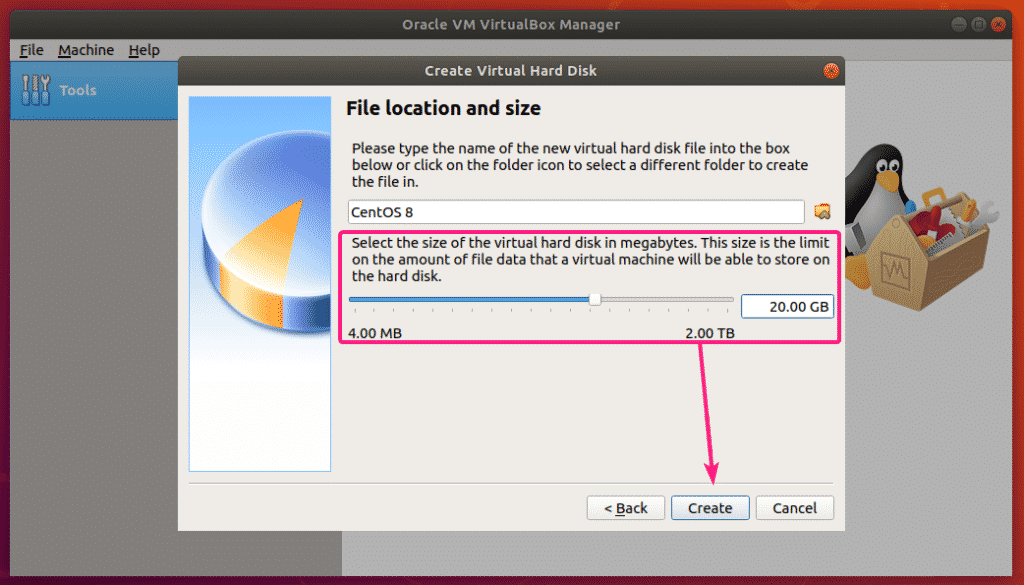
Now, you have to set the virtual hard disk size. 20 GB is enough for more task.
Then, click on Create.
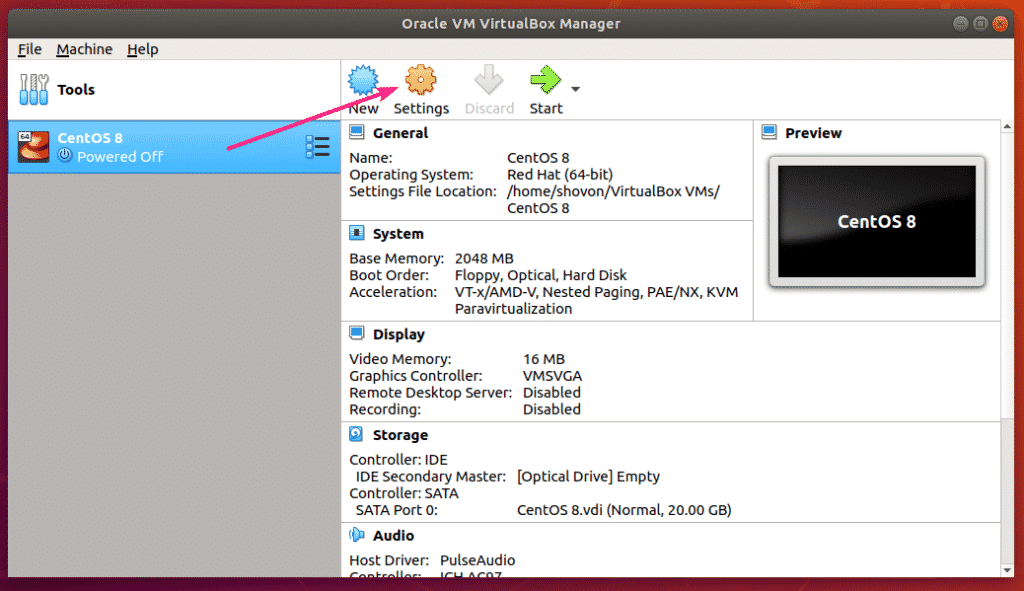
A new VM should be created. Now, select the VM and click on Settings.
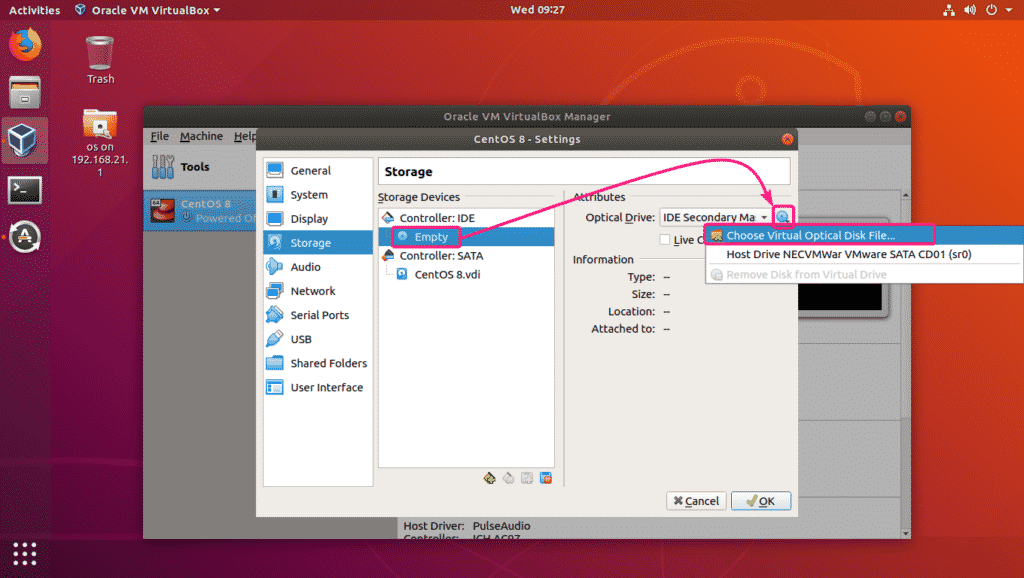
Now, go to the Storage section. Then, click on Empty in Controller: IDE, then click on the CD icon and click on Choose Virtual Optical Disk File…
Now, select the CentOS 8 ISO installation image and click on Open.
Now, click on OK.
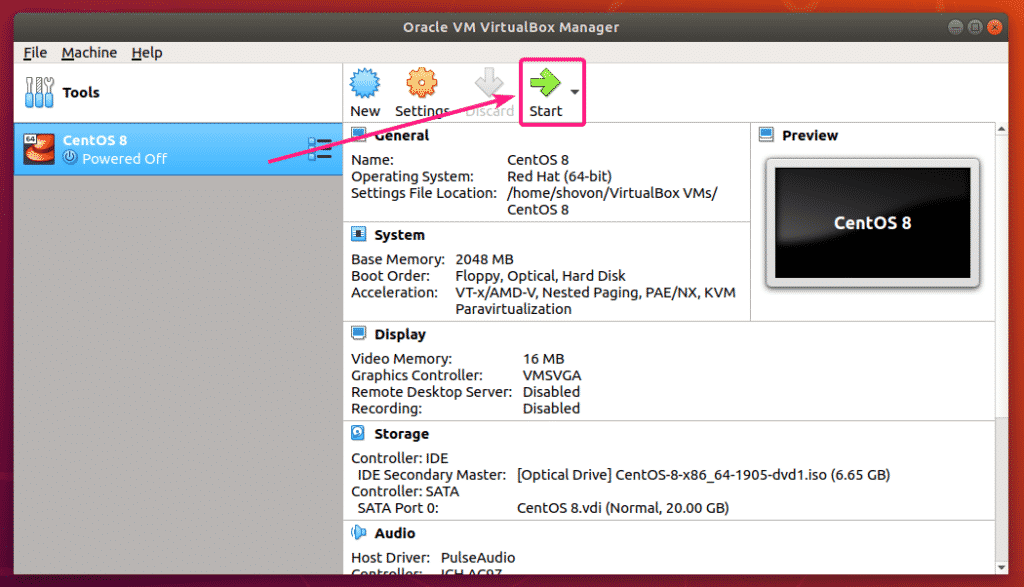
Now, select the VM and click on Start.
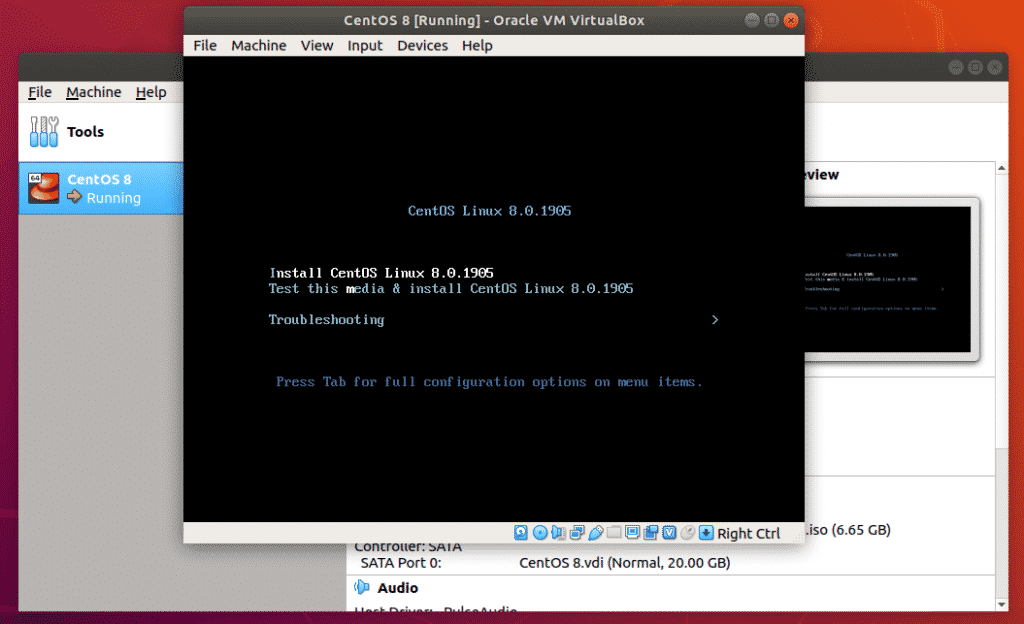
The VM should start and you should see the GRUB boot menu as you can see in the screenshot below.
Installing CentOS 8 on VirtualBox VM:
Now, select Install CentOS Linux 8.0.1905 from the GRUB menu and press <Enter>.
The CentOS 8 installer should work. Now, you can install CentOS 8 as usual on the virtual machine.
Select your language and click on Continue.
Now, click on Installation Destination.
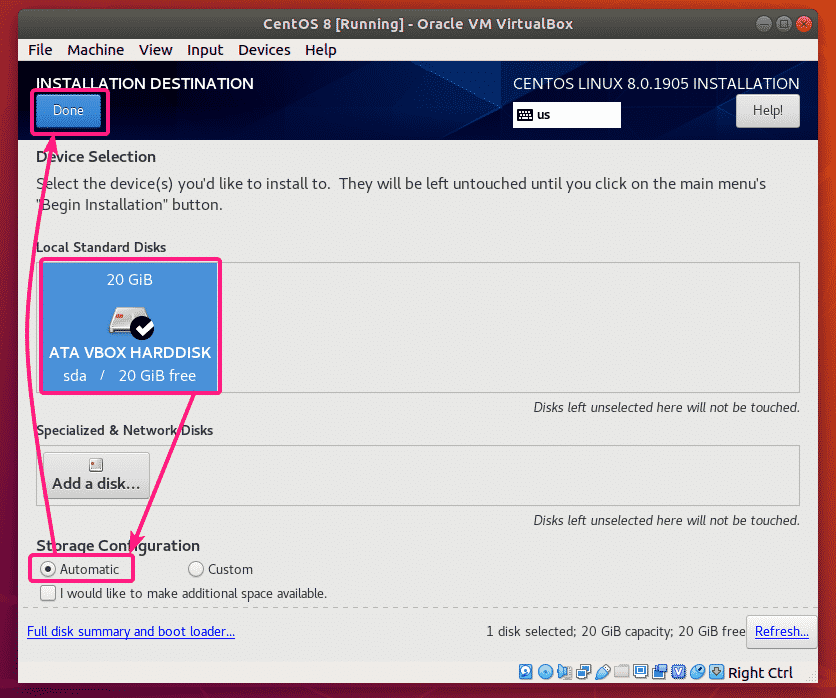
Now, select the virtual hard drive, select Automatic from Storage Configuration section and click on Done.
Now, click on Network & Host Name.
Type in a host name and click on Apply. Then, click on Done.
If you want to install CentOS 8 server with graphical user interface, then you don’t have to do anything else.
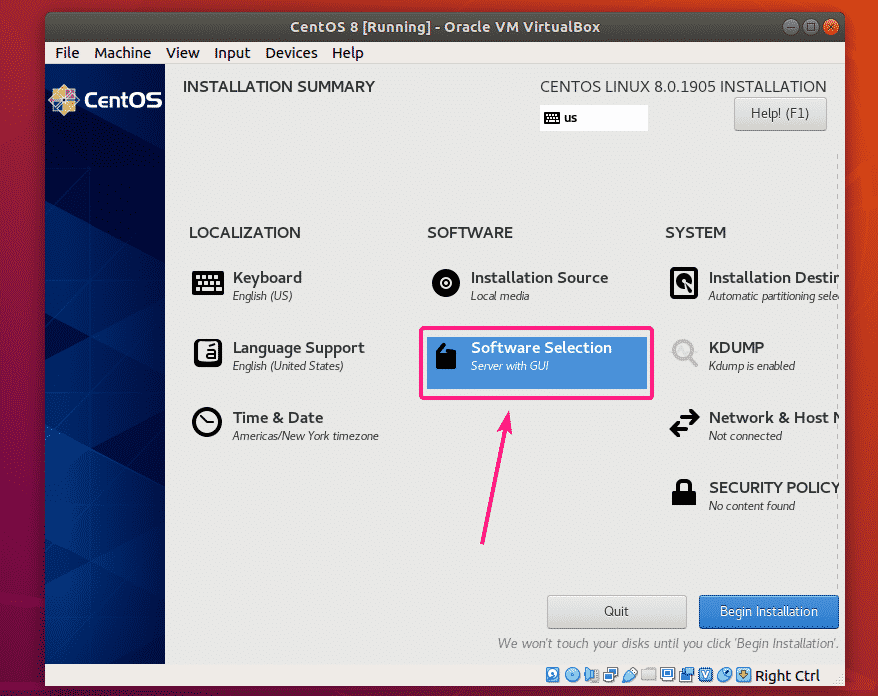
But, if you want to install CentOS 8 headless server, then click on Software Selection.
Now, select Server and click on Done.
If you want to set up your time zone, click on Time & Date.
Now, select your Region and City and click on Done.
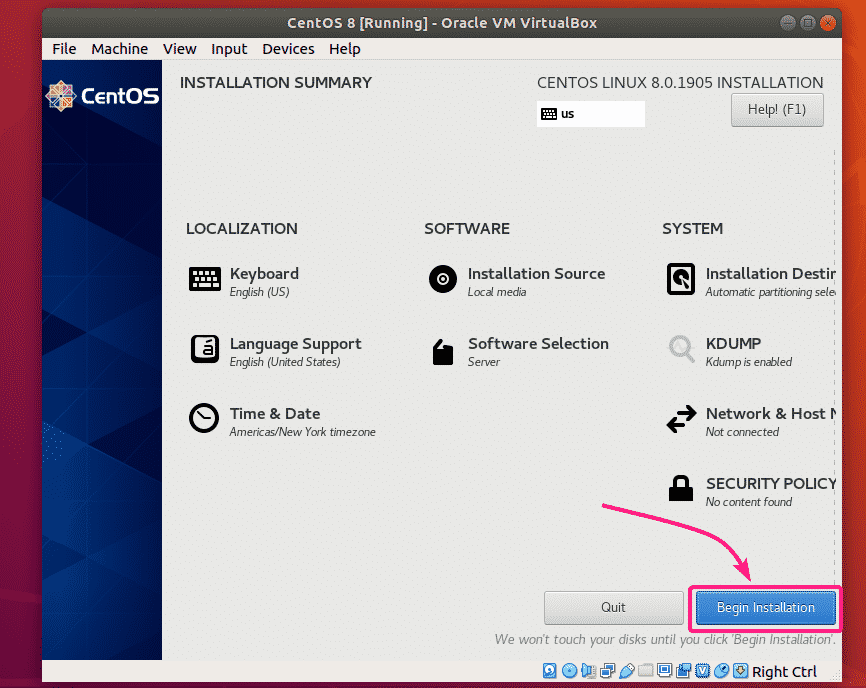
Once you’re happy, click on Begin Installation.
The installation should start.
Now, you have to create a new login user. To do that, click on User Creation.
Type in your personal information, check Make this user administrator and click on Done.
The installation should continue.
Once the installation is complete, click on Reboot.
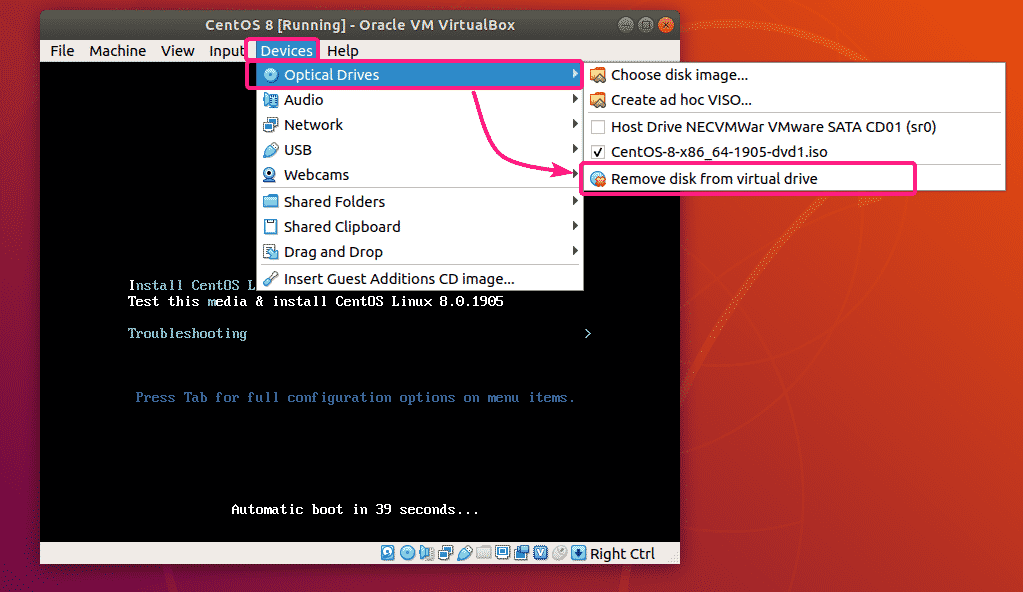
VirtualBox VM may boot from the CentOS 8 Installation DVD again. To avoid that, click on Devices > Optical Drives > Remove disk from virtual drive.
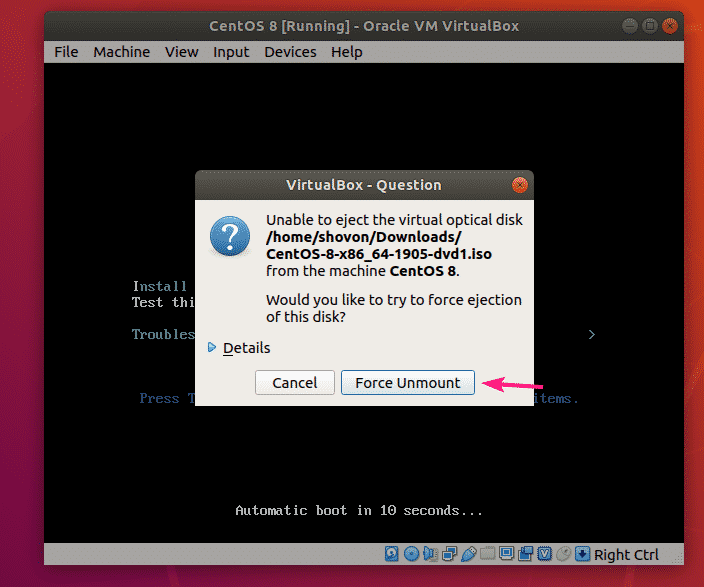
Click on Force Unmount.
Now, click on Machine > Reset to reset the VM.
Click on Reset to confirm the action.
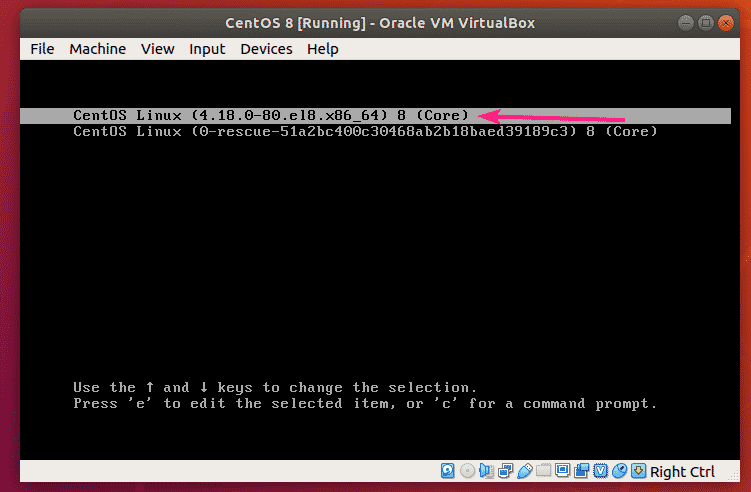
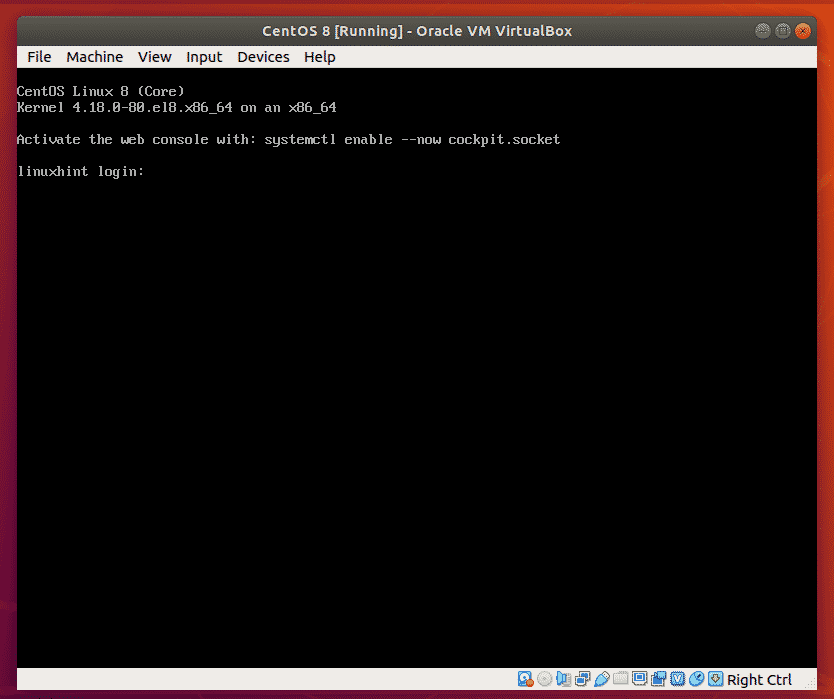
Now, the VM should boot from the virtual hard drive.
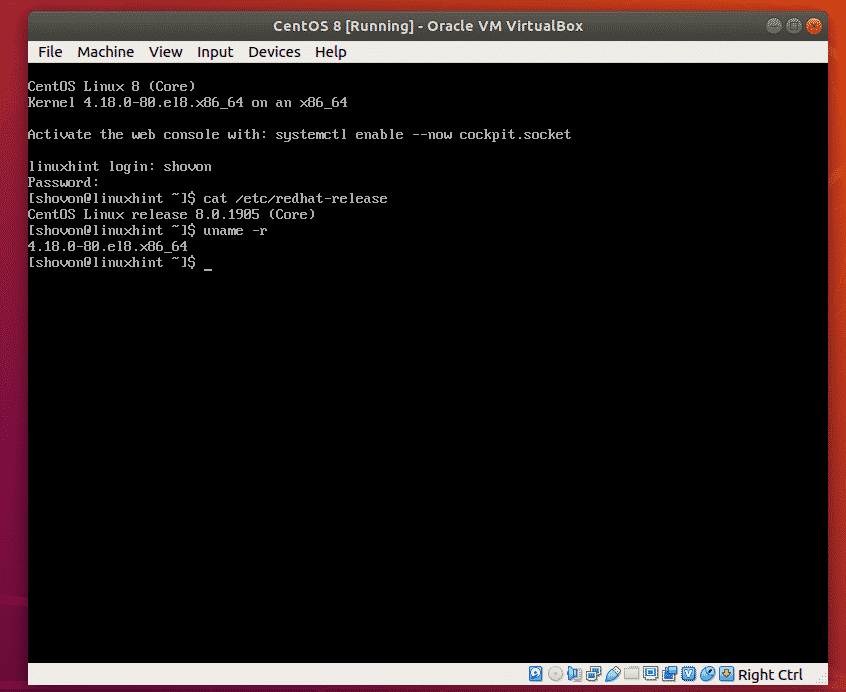
Once CentOS 8 boots, you can login using the username and password that you’ve set during the installation.
As you can see, I am using CentOS 8 and the Linux kernel version is 4.18.0.
Connecting to the Internet:
If your network connection is not active by default, you can use nmtui to configure the network interface to automatically activate on boot.
First, start nmtui with the following command:
Now, select Edit a connection and click on <Enter>.
Now, select the network interface, select <Edit…> and press <Enter>.
Now, check Automatically connect by selecting it and pressing <Spacebar>. Then, select <OK> and press <Enter>.
Now, press <Esc> twice.
Now, check whether the network interface got an IP address with the following command:
An IP address is assigned via DHCP as you can see in the screenshot below.
Now, try to ping google.com as follows:
As you can see, internet connectivity works.
So, that’s how you install CentOS 8 in a VirtualBox virtual machine (VM). Thanks for reading this article.
from Linux Hint https://ift.tt/33edfCa




















0 Comments